
:max_bytes(150000):strip_icc():format(webp)/tropical-beach-wallpaper-beach-backgrounds-587fbb765f9b584db3241860.jpg)
2024 Approved No Cost, No Problem Top 10 Free Game Download Sites for PC and Android Users
No Cost, No Problem: Top 10 Free Game Download Sites for PC and Android Users
Top 10 Best Free Game Download Sites [PC & Android][2024]

Ollie Mattison
Mar 27, 2024• Proven solutions


We all know and firmly believe that games are an integral part of our life. But the world has progressed, and we yearn to achieve real-life experiences through virtual reality instead of experiencing the actual thing. Online games are not only mentally stimulating, but they are also very addictive. Not everyone wants to pay to play games for a couple of hours, so here is a list of top free game downloading sites. You can download full versions of your favorite games for free.
Recommended Video Recorder & Editor for Gameplay: Filmora
If you want to edit a video recorded from games with more effects and templates, we recommend using Filmora . It is an easy-to-use video editor. It offers various title templates. You can also use it to record game videos. Just download it to have a try. Don’t know how to make a video? Visit the Wondershare Video Community and get some inspiration in video creation.
Part 1: Best Free PC Game Download Sites
1 Acid Play
Platforms: OS X and Windows

Key Features:
- Huge gaming library
The acid play has a gigantic collection of games of various types. The games at acid play have been categorized into action, arcade, board games, RPG, card games, puzzles, driving games, simulation, etc.
- Custom Search
The customized search helps you find the exact game you are looking for. It saves time since you cannot browse through thousands of games.
- Ratings
If you are new to this site or looking for a new game to play, you can choose only without trying every game to decide the best one. Just check the ratings provided by other players, and it will solve your problem. You can also rate a game according to your liking.
Pros:
- The games are easily downloadable and free.
- There is a large variety of games available to play.
Cons:
- The site is not updated, and no new games are introduced.
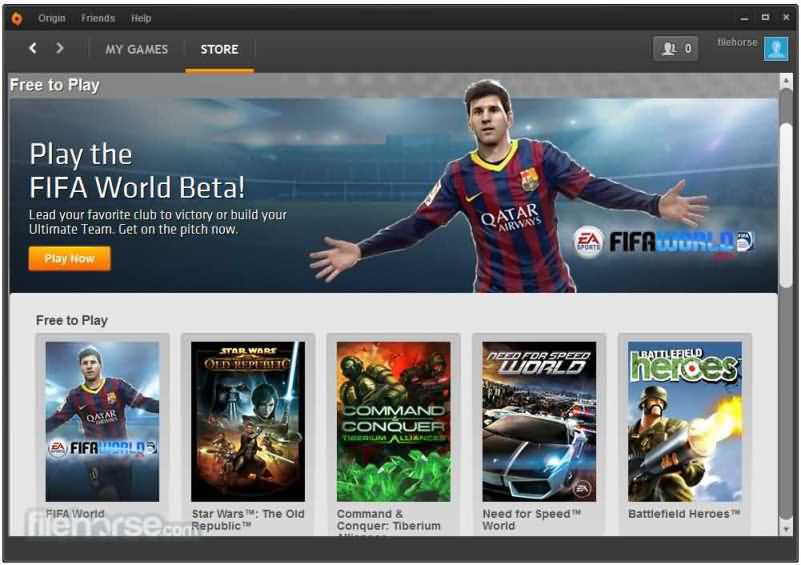
2 Origin Games
Platforms: OS X and Windows
Origin games are another best-known digital distribution platform for a free online gaming experience. It contains a fairly large library of premium games, but origin games provide links for free downloads for a limited time.
Key Features:
- Social Features
Origin provides its users with many social features like profile management, networking with friends through chatting, and video streaming via TwitchTV. You can also share your game library and community integration through social media and networking sites like Facebook, Xbox Live, PlayStation Network, and Nintendo Network.
- Variety in games
It provides various games, from PC games to Fifa and even classic games like Plant Vs. Zombies are also available.
- On-the-house games
The on-the-house features allow the customers to download a free trial of a premium game.
Pros:
- It provides great game streaming features.
- is developed by a renowned and successful company so that it can be trusted.
- The ‘on-the-house specials’ are appreciated by many gamers, allowing them to play a paid game for free now and then.
Cons:
- It has a lot of updates and takes an unreasonable amount of time to install and update the software.
- Customers have complained that they provide expired discount codes.
- Customer service needs to be improved as it is not very responsive.
3 AllGamesAtoZ
Platforms: OS X and Windows
If you want the best full version of a game for free, then AllGamesAtoZ is where you should go.
Key Features:
- The website is full of addictive games from different genres like action, arcade, shooting, role-playing, adventure, racing, simulation, etc.
- Multiple links for downloading a single game are available.
- A customized search bar is available so that you can locate the exact game you are looking for without having to browse through thousands of games.
- The games on AllGamesAtoZ are available on Windows, Linux, and Mac.
- A forum for game reviews is provided, so it is easier to decide which game you want to download without trying them all.
Pros:
- The gaming library is enormous.
- The game reviews make it easier to make a decision and save time.
- The website does not transfer viruses and is entirely safe from scams.
Cons:
- The downloading process is quite long.
- The website is not updated with new games.
4 Mega Games
Platforms: OS X and Windows
It is another highly recommended online gaming site. It not only provides PC games for free but also offers 3D PlayStation games to be downloaded on your PC without any charge.

Key Features:
- Search and download
Mega games allow a search and download option for every game published on their site.
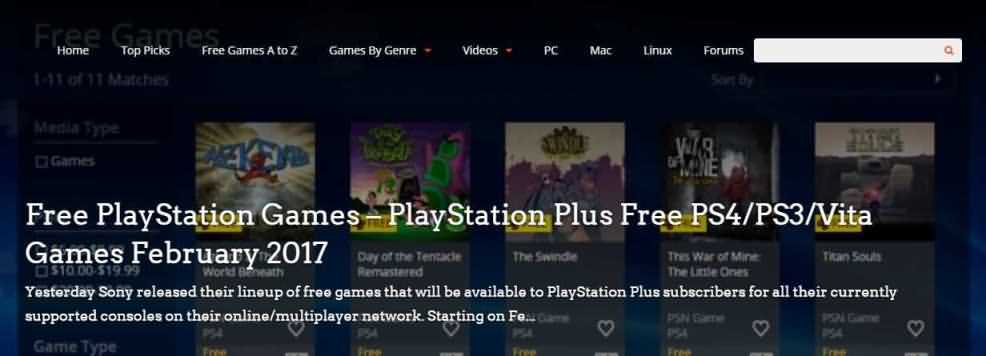
- PlayStation games
It has provided its customers with not only PC games but also 3D PlayStation games that can be downloaded for free.
- Cheat codes
Apart from all the standard gaming features, mega games also provide free cheat codes for the games.
Pros:
- The games are easily downloaded.
- The games have variety.
Cons:
- The website stops working after a while, and the download gets interrupted
5 Caiman.us
Platforms: OS X and Windows
It is another digital distribution platform for free online gaming. After the death of the site’s developer, the site has gone offline.

Key Features:
- It has a vast collection of games and over twenty free games categories.
- 2D and 3D gaming experiences are also provided.
- A customized search is available to make it easier for players to find the game they are looking for.
Pros:
- There is a vast collection of free games to download and play.
Cons:
- The site is not well organized and confusing.
- The search bar is at the very bottom of the page, so a person might find it hard to locate.
- Since the site has gone offline, the games are not updated, so there are no new games.
Part 2: Best Android Game Download Sites to Download Free Android Games
Android is growing very fast; now, almost everyone uses it and prefers it over any other software. Here are the best websites from where you can download free android apps:
1 Google Play
Google Play is the most common website to download free android apps. It is free, it is fast, and it is efficient. You can not only use this from your android mobile but also operate it and download apps using your laptop.

Key Features:
- The apps are easily downloaded, depending upon your internet connection.
- The purchase methods are through credit cards, and the procedure is straightforward.
- The platform allows everyone and anyone to sell their games.
- Sign up through your Google account is necessary to access these features.
Pros:
- It is easily accessible.
- It is pre-installed on all android supported devices.
- It contains a massive collection of unique apps, from books to music, workout, and games of various types.
Cons:
- Since everyone and anyone can access it without paying any registration fee, it is exposed to scams and harassment.
- A few games do not function and keep crashing.
2 Android Games Room

It contains thousands of free gaming apps in different categories like action, arcade, adventure, simulation, song games, and puzzle games. The download links are readily available; you can even access this site from your mobile by scanning a QR code. This site is a pretty good platform to download free games but has certain flaws. It does not allow a multiplayer gaming experience, and no customer services are provided.
3 Android Apps
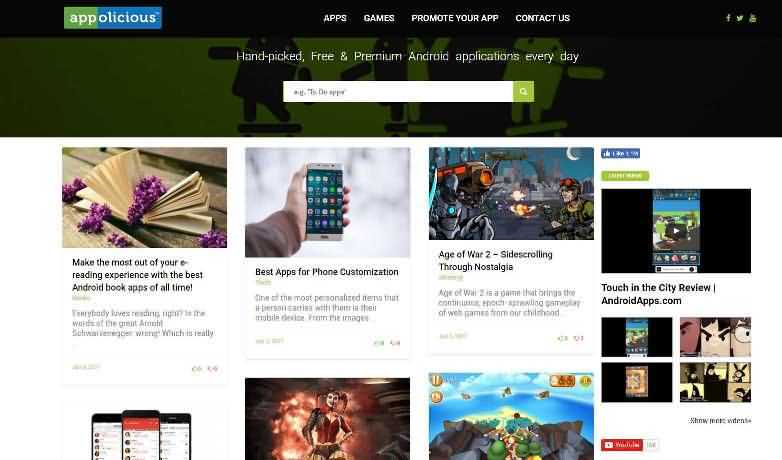
It is another platform to download android apps for free. This site is pretty good since it updates games that developers handpick almost daily. You can also promote your app using the ‘promote your app’ feature. The site has a lot of updates and takes an unreasonable amount of time to install and update the software. Furthermore, you can say that they do not have a customer service function because nobody ever responds to the customer’s queries.
4 1 Mobile
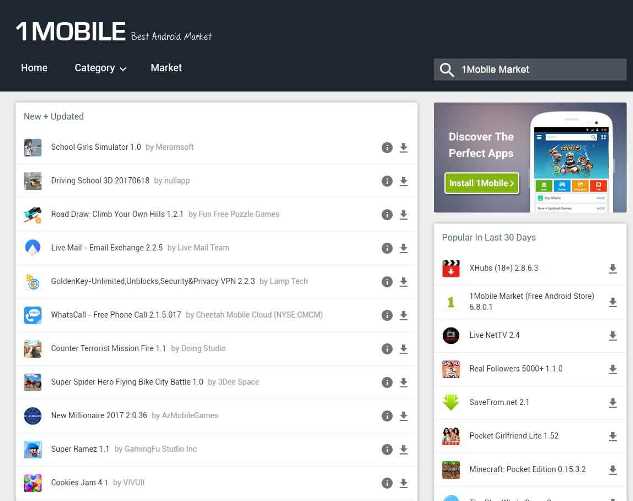
One mobile is a free android store. It provides its users the easiest way to locate, download and manage free apps. 1 Mobile has over eighty (80) million apps. One mobile has just been recently updated, has a brand new interface design, and operates much smoother. The content is more prosperous, smoother, and a thousand times better than before the latest update. All the apps and games are 100% free forever without hidden charges. It supports various languages like English, Korean, Chinese, French, Spanish, Japanese, and Portugal.
5 Approx
It provides the best free apps not only for android but OS as well. You can download it on your phone by scanning a QR code. This software has been functioning for the past six years and is free from viruses or malware.
To furnish your gameplay videos, Filmora also provides some cool effects, transitions, and elements, such as camera shake chaos effects, distortion effects, 3D change, speed blur transitions, and more. Moreover, you can always find some specially designed gaming effects in the Filmstock effects store.
Ollie Mattison
Ollie Mattison is a writer and a lover of all things video.
Follow @Ollie Mattison
Ollie Mattison
Mar 27, 2024• Proven solutions
We all know and firmly believe that games are an integral part of our life. But the world has progressed, and we yearn to achieve real-life experiences through virtual reality instead of experiencing the actual thing. Online games are not only mentally stimulating, but they are also very addictive. Not everyone wants to pay to play games for a couple of hours, so here is a list of top free game downloading sites. You can download full versions of your favorite games for free.
Recommended Video Recorder & Editor for Gameplay: Filmora
If you want to edit a video recorded from games with more effects and templates, we recommend using Filmora . It is an easy-to-use video editor. It offers various title templates. You can also use it to record game videos. Just download it to have a try. Don’t know how to make a video? Visit the Wondershare Video Community and get some inspiration in video creation.
Part 1: Best Free PC Game Download Sites
1 Acid Play
Platforms: OS X and Windows
Key Features:
- Huge gaming library
The acid play has a gigantic collection of games of various types. The games at acid play have been categorized into action, arcade, board games, RPG, card games, puzzles, driving games, simulation, etc.
- Custom Search
The customized search helps you find the exact game you are looking for. It saves time since you cannot browse through thousands of games.
- Ratings
If you are new to this site or looking for a new game to play, you can choose only without trying every game to decide the best one. Just check the ratings provided by other players, and it will solve your problem. You can also rate a game according to your liking.
Pros:
- The games are easily downloadable and free.
- There is a large variety of games available to play.
Cons:
- The site is not updated, and no new games are introduced.
2 Origin Games
Platforms: OS X and Windows
Origin games are another best-known digital distribution platform for a free online gaming experience. It contains a fairly large library of premium games, but origin games provide links for free downloads for a limited time.
Key Features:
- Social Features
Origin provides its users with many social features like profile management, networking with friends through chatting, and video streaming via TwitchTV. You can also share your game library and community integration through social media and networking sites like Facebook, Xbox Live, PlayStation Network, and Nintendo Network.
- Variety in games
It provides various games, from PC games to Fifa and even classic games like Plant Vs. Zombies are also available.
- On-the-house games
The on-the-house features allow the customers to download a free trial of a premium game.
Pros:
- It provides great game streaming features.
- is developed by a renowned and successful company so that it can be trusted.
- The ‘on-the-house specials’ are appreciated by many gamers, allowing them to play a paid game for free now and then.
Cons:
- It has a lot of updates and takes an unreasonable amount of time to install and update the software.
- Customers have complained that they provide expired discount codes.
- Customer service needs to be improved as it is not very responsive.
3 AllGamesAtoZ
Platforms: OS X and Windows
If you want the best full version of a game for free, then AllGamesAtoZ is where you should go.
Key Features:
- The website is full of addictive games from different genres like action, arcade, shooting, role-playing, adventure, racing, simulation, etc.
- Multiple links for downloading a single game are available.
- A customized search bar is available so that you can locate the exact game you are looking for without having to browse through thousands of games.
- The games on AllGamesAtoZ are available on Windows, Linux, and Mac.
- A forum for game reviews is provided, so it is easier to decide which game you want to download without trying them all.
Pros:
- The gaming library is enormous.
- The game reviews make it easier to make a decision and save time.
- The website does not transfer viruses and is entirely safe from scams.
Cons:
- The downloading process is quite long.
- The website is not updated with new games.
4 Mega Games
Platforms: OS X and Windows
It is another highly recommended online gaming site. It not only provides PC games for free but also offers 3D PlayStation games to be downloaded on your PC without any charge.
Key Features:
- Search and download
Mega games allow a search and download option for every game published on their site.
- PlayStation games
It has provided its customers with not only PC games but also 3D PlayStation games that can be downloaded for free.
- Cheat codes
Apart from all the standard gaming features, mega games also provide free cheat codes for the games.
Pros:
- The games are easily downloaded.
- The games have variety.
Cons:
- The website stops working after a while, and the download gets interrupted
5 Caiman.us
Platforms: OS X and Windows
It is another digital distribution platform for free online gaming. After the death of the site’s developer, the site has gone offline.
Key Features:
- It has a vast collection of games and over twenty free games categories.
- 2D and 3D gaming experiences are also provided.
- A customized search is available to make it easier for players to find the game they are looking for.
Pros:
- There is a vast collection of free games to download and play.
Cons:
- The site is not well organized and confusing.
- The search bar is at the very bottom of the page, so a person might find it hard to locate.
- Since the site has gone offline, the games are not updated, so there are no new games.
Part 2: Best Android Game Download Sites to Download Free Android Games
Android is growing very fast; now, almost everyone uses it and prefers it over any other software. Here are the best websites from where you can download free android apps:
1 Google Play
Google Play is the most common website to download free android apps. It is free, it is fast, and it is efficient. You can not only use this from your android mobile but also operate it and download apps using your laptop.
Key Features:
- The apps are easily downloaded, depending upon your internet connection.
- The purchase methods are through credit cards, and the procedure is straightforward.
- The platform allows everyone and anyone to sell their games.
- Sign up through your Google account is necessary to access these features.
Pros:
- It is easily accessible.
- It is pre-installed on all android supported devices.
- It contains a massive collection of unique apps, from books to music, workout, and games of various types.
Cons:
- Since everyone and anyone can access it without paying any registration fee, it is exposed to scams and harassment.
- A few games do not function and keep crashing.
2 Android Games Room
It contains thousands of free gaming apps in different categories like action, arcade, adventure, simulation, song games, and puzzle games. The download links are readily available; you can even access this site from your mobile by scanning a QR code. This site is a pretty good platform to download free games but has certain flaws. It does not allow a multiplayer gaming experience, and no customer services are provided.
3 Android Apps
It is another platform to download android apps for free. This site is pretty good since it updates games that developers handpick almost daily. You can also promote your app using the ‘promote your app’ feature. The site has a lot of updates and takes an unreasonable amount of time to install and update the software. Furthermore, you can say that they do not have a customer service function because nobody ever responds to the customer’s queries.
4 1 Mobile
One mobile is a free android store. It provides its users the easiest way to locate, download and manage free apps. 1 Mobile has over eighty (80) million apps. One mobile has just been recently updated, has a brand new interface design, and operates much smoother. The content is more prosperous, smoother, and a thousand times better than before the latest update. All the apps and games are 100% free forever without hidden charges. It supports various languages like English, Korean, Chinese, French, Spanish, Japanese, and Portugal.
5 Approx
It provides the best free apps not only for android but OS as well. You can download it on your phone by scanning a QR code. This software has been functioning for the past six years and is free from viruses or malware.
To furnish your gameplay videos, Filmora also provides some cool effects, transitions, and elements, such as camera shake chaos effects, distortion effects, 3D change, speed blur transitions, and more. Moreover, you can always find some specially designed gaming effects in the Filmstock effects store.
Ollie Mattison
Ollie Mattison is a writer and a lover of all things video.
Follow @Ollie Mattison
7 Video Mergers Without Watermark
Sometimes, when delving into the vast space of internet and trying to find the perfect online platforms or software in order to edit some videos, it might get frustrating to find only the ones with watermark. But of course, the resources are endless and in case we have some information, we can easily access the free video editing platforms which give us the opportunity to edit our videos without undesired logos on them. In this case, we will be discussing 6 video mergers without watermark, and the way we can use them – the tools and features they offer, and how we can get the best out of them.
- Photos by Microsoft
If you are too lazy to get high-quality results using popular video editors, like Filmora, try Photos App. It is a built-in program that usually opens your images on Windows 10, but you can also use it for merging your videos. And guess what? Since it comes within the system, all the features, although limited, are absolutely free.
How to Merge Videos on Windows using Photos App?

These are the steps to combine multiple clips in Windows 10 with Photos App.
Step 1: Open Photos App
Go to the ‘Start’ menu, find Photos App, and click to open it.
Step 2: Make a New Project
Click the ‘New video project’ (big blue box) under the ‘Video Projects’ tab. Alternatively, you can click the ‘New video’ button and select the ‘New video project’ option from the dropdown menu.
Step 3: Add Clips
Look for the text ‘Project library.’ Then click the ‘+ Add’ button. This will open a new window so you can select the clips you want to combine. Also, import videos one by one in a proper sequence because you cannot arrange them later.
Step 4: Make a Storyboard
After importing all the shots, you want to merge, click the ‘Place in storyboard’ button. This option will add all the chosen clips to your project’s storyboard.
- Fastreel by Movavi
Fastreel is a free online video editor. It is extremely easy to use right away, without installing anything. So, on Fastreel, one can edit videos or use online templates in the browser itself. Actually, the first tool we see in the list of Fastreel tools is to merge a video; then, it can be used in order to compress, make, cut, and create a video. On fastreel, you can add a watermark to a video, if wanted - so, it is very voluntary. As for the merging of a video, when this tool is chosen, it’s pretty simple to understand the steps – you can just drop/add multiple files right away.

The format must be either of the listed: MP4, MOV, MKV, AVI, and WMV, and the total size mustn’t exceed 500 MB. Then, in order to add some transitions, a style can be chosen from the drop-down menu, and after that, you should hit on Continue button to stitch the videos together. For the last step, you can export the result by selecting Download option.

- Free Video Cutter Joiner
Free Video Cutter Joiner – the name already explains it all by itself! This is a free video merger which will not add watermark on your video. The software needs to be downloaded, and contributes to quickly cutting and joining videos. Free Video Cutter Joiner has no size limits – it can cut and merge videos with large file sizes without any trouble, and speed of it to do so is quite fast. It supports several file formats, such as AVI, MPEG, WMV, 3GP FLV, MP4, WMV, MOV, VOB, etc.
So, once downloaded, you will see how user-friendly and straightforward the software is: it shows two of its features right away – video cutter and video joiner. You choose which one you are about to use – so, in our case, video joiner.

Then, you should click the the “+” icon, which lets you add files from your PC.

Then, hit on the Join button, and choose Indirect Join. Hitting on Start Join will start merging all the uploaded videos, and, wait a little until the process has been completed.

- Clideo
Clideo is the online platform that declares that it makes it super easy to edit all your video files, images and GIFs, and is totally free. It gives us the opportunities to: merge, compress, resize, cut, make, crop, speed, rotate, add music to, loop, flip, reverse, mute, filter, and adjust the videos. Add subtitles, make memes, create slideshows, etc. Therefore, it’s pretty rich in its tools and features.
As for merging videos, much like Fastreel, Clideo is pretty straightforward. You just click on the mentioned tool, and then easily choose files you would like to combine – you can merge any amount of video clips there. Several files can be chosen at the same time, or they can be added one by one.

Then it will take you to the editor, where you can join the videos. It’s possible to rearrange the files, by using drag-and-drop until they’re in the desired order. You can also add images and set duration from them, add audio, change its length and volume. The last step is choosing the aspect ratio and clicking the Export button. You can watch the preview of your result and then click on Download if you are satisfied with the merged file.

- Typito
Typito is a platform to merge videos online, as well as Fastreel and Clideo. It is free, and mostly aims to create combinations one can use to post on social network such as Instagram, Facebook, and Youtube. Typito supports a great many formats, some of them being MP4, AVI, FLV and WMV. You can edit your videos before merging them by trimming, cropping and resizing, and also add transition effects and music. It quickly combines footage, doesn’t watermark the videos, has brand kit of colors, fonts and style. It can also create collection of images, which is used for making Youtube compilation at most times.
To merge videos, you should choose the tool, then Get Started, and register and sign in first.

Then click on New Project, choose a video format (the platform offers you the list of the most popular ones), and it will take you to the editor, where you start off by adding media.

Drag and drop images or videos that you want to combine into a single video. You can also click to upload media files from your system or browse our Stock Media library for high-quality stock photos and video. Then, you can put your video clips in order, and work on it, if you want to use different tools, such as: edit, crop, trim, or resize them, as well as add text captions, images, and transitions. After you have previewed your video, you can click on the export button in the top right corner, and then, your merged video will be ready to be shared.
- Online UniConverter
Online UniConverter is the next online platform giving us the chance to merge our videos without watermark. It is an online analogue of Wondershare UniConverter, and is a very powerful platform, where you can trim, split, rotate, adjust, and download videos in HD quality. UniConverter supports numerous video formats, including MP4, AVI, MOV, MP3, WEBM. Online UniConverter offers various transitions and aspect ratios to fit the screen.

The web-site has lots of tools and features to offer: in the description of it, it reads: video converter, video compressor, video editor, audio converter, audio compressor, audio cutter, GIF maker, YouTube thumbnail, and image resizer. Importing media to the online UniConverter is extremely easy, and combining videos turns out to be a quick process, too.

Anyway, if you want to combine a lot of files and the size of them all exceeds 100 MB, you will not be able to use Online Uniconverter for that. It supports the video no more than 100 MB and suggests using Wondershare UniConverter (originally Wondershare Video Converter Ultimate) for Desktop.
- Wondershare Filmora
Last but not least – Filmora Video Editor ! Even it differs from other abovementioned video mergers, as in it is not totally free and adds a Filmora logo on exported project, it’s a great suggestion for people who want to make their videos look great with the help of various tools. When a user is ready to pay, Filmora offers a subscription model, and for a bit more, one can get a permanent license. The software costs $51.99 per year or $79.99 for an outright purchase (prices are regularly discounted).
Wondershare Filmora has a clear and pleasing interface, offers trimming, transitions, overlays, several effects, as well as some more advanced and modern features, such as motion tracking. For this one particular software, we will be offering a step by step guide about how to merge videos there.
For Win 7 or later (64-bit)
For macOS 10.14 or later
- Open the program.
- Choose Import Media Files Here.

- Choose your

- We can click and drag, essentially, “insert” a video in a sequence below. The Linear Timeline allows us to understand exactly when a video clip ends and when a new one starts.

- Accordingly, we can make one video “sit” next to another. If we want or need it, we will add the third video clip, fourth, and so on.

- We can view the entire video and save the video afterwards.
- Start to save video - we make sure the result is exactly what we wanted, find the Export button above the timeline and click on it.

- In the opened window, on the left side, to be precise, if we observe well, we can already choose in which format we want to save our clip. On the right we can indicate what name we want to give to our video; The location where we want to store it; Also, we see the resolution (which we can modify freely after clicking on Settings); Size; Duration.

- In Settings, we can decide how much quality the video should have, how many kbps will be the Bit Rate, how many fps the Frame Rate should be, etc., but most likely, beginners will not need to change all this.

- After selecting everything, right-click on the Export button in the lower right corner of the window and the program will start saving the material.


So, in this article, we introduced some online platforms and software for you to use if you would like to merge videos and combine them into one. These are: Fastreel, Free Video Cutter Joiner, Clideo, Typito, Online UniConverter, Wondershare Filmora. It’s up to you which one you would like to choose to merge your videos or edit them in any other way, but you can try either of them and choose to your own liking – even so, of course, there are some other video mergers worth considering, that we might mention in the coming articles. Before then, enjoy with free video editors, without watermark!
If you are too lazy to get high-quality results using popular video editors, like Filmora, try Photos App. It is a built-in program that usually opens your images on Windows 10, but you can also use it for merging your videos. And guess what? Since it comes within the system, all the features, although limited, are absolutely free.
How to Merge Videos on Windows using Photos App?
These are the steps to combine multiple clips in Windows 10 with Photos App.
Step 1: Open Photos App
Go to the ‘Start’ menu, find Photos App, and click to open it.
Step 2: Make a New Project
Click the ‘New video project’ (big blue box) under the ‘Video Projects’ tab. Alternatively, you can click the ‘New video’ button and select the ‘New video project’ option from the dropdown menu.
Step 3: Add Clips
Look for the text ‘Project library.’ Then click the ‘+ Add’ button. This will open a new window so you can select the clips you want to combine. Also, import videos one by one in a proper sequence because you cannot arrange them later.
Step 4: Make a Storyboard
After importing all the shots, you want to merge, click the ‘Place in storyboard’ button. This option will add all the chosen clips to your project’s storyboard.
- Fastreel by Movavi
Fastreel is a free online video editor. It is extremely easy to use right away, without installing anything. So, on Fastreel, one can edit videos or use online templates in the browser itself. Actually, the first tool we see in the list of Fastreel tools is to merge a video; then, it can be used in order to compress, make, cut, and create a video. On fastreel, you can add a watermark to a video, if wanted - so, it is very voluntary. As for the merging of a video, when this tool is chosen, it’s pretty simple to understand the steps – you can just drop/add multiple files right away.
The format must be either of the listed: MP4, MOV, MKV, AVI, and WMV, and the total size mustn’t exceed 500 MB. Then, in order to add some transitions, a style can be chosen from the drop-down menu, and after that, you should hit on Continue button to stitch the videos together. For the last step, you can export the result by selecting Download option.
- Free Video Cutter Joiner
Free Video Cutter Joiner – the name already explains it all by itself! This is a free video merger which will not add watermark on your video. The software needs to be downloaded, and contributes to quickly cutting and joining videos. Free Video Cutter Joiner has no size limits – it can cut and merge videos with large file sizes without any trouble, and speed of it to do so is quite fast. It supports several file formats, such as AVI, MPEG, WMV, 3GP FLV, MP4, WMV, MOV, VOB, etc.
So, once downloaded, you will see how user-friendly and straightforward the software is: it shows two of its features right away – video cutter and video joiner. You choose which one you are about to use – so, in our case, video joiner.
Then, you should click the the “+” icon, which lets you add files from your PC.
Then, hit on the Join button, and choose Indirect Join. Hitting on Start Join will start merging all the uploaded videos, and, wait a little until the process has been completed.
- Clideo
Clideo is the online platform that declares that it makes it super easy to edit all your video files, images and GIFs, and is totally free. It gives us the opportunities to: merge, compress, resize, cut, make, crop, speed, rotate, add music to, loop, flip, reverse, mute, filter, and adjust the videos. Add subtitles, make memes, create slideshows, etc. Therefore, it’s pretty rich in its tools and features.
As for merging videos, much like Fastreel, Clideo is pretty straightforward. You just click on the mentioned tool, and then easily choose files you would like to combine – you can merge any amount of video clips there. Several files can be chosen at the same time, or they can be added one by one.
Then it will take you to the editor, where you can join the videos. It’s possible to rearrange the files, by using drag-and-drop until they’re in the desired order. You can also add images and set duration from them, add audio, change its length and volume. The last step is choosing the aspect ratio and clicking the Export button. You can watch the preview of your result and then click on Download if you are satisfied with the merged file.
- Typito
Typito is a platform to merge videos online, as well as Fastreel and Clideo. It is free, and mostly aims to create combinations one can use to post on social network such as Instagram, Facebook, and Youtube. Typito supports a great many formats, some of them being MP4, AVI, FLV and WMV. You can edit your videos before merging them by trimming, cropping and resizing, and also add transition effects and music. It quickly combines footage, doesn’t watermark the videos, has brand kit of colors, fonts and style. It can also create collection of images, which is used for making Youtube compilation at most times.
To merge videos, you should choose the tool, then Get Started, and register and sign in first.
Then click on New Project, choose a video format (the platform offers you the list of the most popular ones), and it will take you to the editor, where you start off by adding media.
Drag and drop images or videos that you want to combine into a single video. You can also click to upload media files from your system or browse our Stock Media library for high-quality stock photos and video. Then, you can put your video clips in order, and work on it, if you want to use different tools, such as: edit, crop, trim, or resize them, as well as add text captions, images, and transitions. After you have previewed your video, you can click on the export button in the top right corner, and then, your merged video will be ready to be shared.
- Online UniConverter
Online UniConverter is the next online platform giving us the chance to merge our videos without watermark. It is an online analogue of Wondershare UniConverter, and is a very powerful platform, where you can trim, split, rotate, adjust, and download videos in HD quality. UniConverter supports numerous video formats, including MP4, AVI, MOV, MP3, WEBM. Online UniConverter offers various transitions and aspect ratios to fit the screen.
The web-site has lots of tools and features to offer: in the description of it, it reads: video converter, video compressor, video editor, audio converter, audio compressor, audio cutter, GIF maker, YouTube thumbnail, and image resizer. Importing media to the online UniConverter is extremely easy, and combining videos turns out to be a quick process, too.
Anyway, if you want to combine a lot of files and the size of them all exceeds 100 MB, you will not be able to use Online Uniconverter for that. It supports the video no more than 100 MB and suggests using Wondershare UniConverter (originally Wondershare Video Converter Ultimate) for Desktop.
- Wondershare Filmora
Last but not least – Filmora Video Editor ! Even it differs from other abovementioned video mergers, as in it is not totally free and adds a Filmora logo on exported project, it’s a great suggestion for people who want to make their videos look great with the help of various tools. When a user is ready to pay, Filmora offers a subscription model, and for a bit more, one can get a permanent license. The software costs $51.99 per year or $79.99 for an outright purchase (prices are regularly discounted).
Wondershare Filmora has a clear and pleasing interface, offers trimming, transitions, overlays, several effects, as well as some more advanced and modern features, such as motion tracking. For this one particular software, we will be offering a step by step guide about how to merge videos there.
For Win 7 or later (64-bit)
For macOS 10.14 or later
- Open the program.
- Choose Import Media Files Here.
- Choose your
- We can click and drag, essentially, “insert” a video in a sequence below. The Linear Timeline allows us to understand exactly when a video clip ends and when a new one starts.
- Accordingly, we can make one video “sit” next to another. If we want or need it, we will add the third video clip, fourth, and so on.
- We can view the entire video and save the video afterwards.
- Start to save video - we make sure the result is exactly what we wanted, find the Export button above the timeline and click on it.
- In the opened window, on the left side, to be precise, if we observe well, we can already choose in which format we want to save our clip. On the right we can indicate what name we want to give to our video; The location where we want to store it; Also, we see the resolution (which we can modify freely after clicking on Settings); Size; Duration.
- In Settings, we can decide how much quality the video should have, how many kbps will be the Bit Rate, how many fps the Frame Rate should be, etc., but most likely, beginners will not need to change all this.
- After selecting everything, right-click on the Export button in the lower right corner of the window and the program will start saving the material.
So, in this article, we introduced some online platforms and software for you to use if you would like to merge videos and combine them into one. These are: Fastreel, Free Video Cutter Joiner, Clideo, Typito, Online UniConverter, Wondershare Filmora. It’s up to you which one you would like to choose to merge your videos or edit them in any other way, but you can try either of them and choose to your own liking – even so, of course, there are some other video mergers worth considering, that we might mention in the coming articles. Before then, enjoy with free video editors, without watermark!
Bokeh Magic: Top-Rated Apps for iOS and Android Phones
Best Bokeh Effects Apps in 2024

Liza Brown
Mar 27, 2024• Proven solutions
It’s no secret that DSLR cameras can help you achieve this blurred effect, but now there are dozens of apps that allow you to get the same outcome without spending hundreds on a new camera. This article will provide you with the 10 best Bokeh apps for iPhones and Androids, based on our own testing, so that you can start editing right away.
- Part 1: What is the Bokeh Effect?
- Part 2: Best Apps to Achieve the Bokeh Effect
- Part 3: What is the Bokeh Effect?
Part 1: What is the Bokeh Effect and Why Should I Be Using it?
The word “Bokeh”or “boke” refers to the Japanese concept of “blur.” It is, in its simplest form, a style of photography where one object is the primary focus, and everything else is strategically blurred.
Using the Bokeh effect is an excellent way to separate the focal point of your photo from non-focal points. It not only serves the purpose of highlighting the focus of the image, but can also help when you’re looking to get rid of an unpleasant or unwanted background. The blurred background is meant to keep your focal point at the absolute center of your audience’s attention.
Part 2: Top 10 Best Apps to Achieve the Bokeh Effect for iOS and Android
As mentioned, there are other ways to achieve the Bokeh effect without an expensive and often fidget DSLR camera. The following apps have been deemed the best based on a variety of characteristics which will be mentioned below.
1. Focos -iOS - FREE
The Focos app for iPhones is a free resource that uses computational photography and light-field camera settings to help you achieve the perfect blur. It offers users the option to apply the Bokeh effect to both the background and foreground of your image, with a variety of options for adjusting size and transparency.
To create the Bokeh effect in Focos:
- Download App via App Store and allow it access to your camera and camera roll;
- Import the image you wish you use, or take a photo using the app’s camera;
- Adjust your focal point and transparency of the blur using their sliding bar feature;

- To add more Bokeh effects, select the star Effect feature in the bottom right of the screen.

- Once you’re happy with the effect, this app allows you to save to your camera roll or share to other apps, including Instagram.
2. Photo Editor Pro - Android - FREE

Photo Editor Pro is a free application that allows users to achieve the Bokeh effect with 4 different camera modes. Users can also adjust the transparency of the bokeh effect chosen.
To create the Bokeh effect in Photo Editor Pro:
- Download the app and allow access to camera and camera roll;
- Select your desired image either via camera or camera roll;
- Choose between a variety of backgrounds and blending tools and adjust using the apps adjustable features, and download to camera roll or upload to a third-party app.
3. Auto Blur Background - Android - FREE

The Auto Blur Background app for iOS and Android is another free resource for creating an image with the Bokeh effect. The app allows users to select the size and desired amount of blur for your background, giving the user a lot of control over the outcome of their photo. It enables users to add overlays in addition to the bokeh effect to enhance the overall outcome.
To create the Bokeh effect in Auto Blur Background app:
- Import or take your photo on the Auto Blur Background application;
- Edit as desired using a variety of tools offered at the bottom of your screen, and add bokeh effect to the video;
- To export, select the Share icon in the bottom right hand corner;
- From this step you can either import directly to Instagram, or export to camera roll. If exported to camera roll, open Instagram app and add a new story, select photo from camera roll and hit add to story!
4. SnapSeed- iOS & Android - FREE
SnapSeed is one of the ultimate editing apps to help you achieve the Bokeh effect on iOS and Android devices. This app, owned by Google, provides an array of advanced editing tools to help improve your photography and editing capabilities.
To create the Bokeh effect in SnapSeed:
- Download the app in the app store and allow access to camera and camera roll;
- Import or take desired image and choose between a variety of filters;

- After selecting your filter, choose Tools and select the Lens Blur Option , and adjust your blur strength accordingly**;**

- Export and save to camera roll or upload to a third-party site.
5. AfterFocus -iOS & Android - $0.99
AfterFocus helps users achieve the Bokeh effect by letting you define the focal area and adjusting the blur of the surrounding regions.

To create the Bokeh effect in AfterFocus:
- Download the app and allow the app access to your camera and camera roll, and select the image given your options (camera, camera roll);
- Once you’ve selected your image, the app will prompt you to select whether you want to manually select the focus area or if you want their software to detect it for you;
- Several blurring tools will appear, use the focus selector tool to select the regions in which you’d like your image to be focused;
- Then use the background selector tool to select the background of your photo, and choose between lens, motion and zoom blur
6. Real Bokeh -iOS & Android - $2.99
Real Bokeh allows users on both the iPhone and Android to add Bokeh light features to their photos. It includes 36 Bokeh shapes, 33 light leak effects, 23 image filters and much more.

To create the Bokeh effect in Real Bokeh:
- Download the app and allow the app access to your camera and camera roll and select the image given your options (camera, camera roll);
- Choose between different filters, shapes and effects to add to your image;
- Adjust the transparency of your bokeh effect on the sliding bar provided by the app, and export to camera roll or to a third party site.
7. Bokeh Lens -iOS - $0.99
This app, designed for the iPhone, is a magnifying glass for photos, allowing users to create their own Bokeh effect without the use of a DSLR camera. The Bokeh level on this app is also customizable, making it great if you’re looking to get detailed.

To create the Bokeh effect in Bokeh Lens:
- Download the app and allow the app access to your camera and camera roll, and select the image given your options (camera, camera roll);
- Using the image below, follow the focus area tools, adjustable bokeh level and more to achieve your perfect photo, and then export to camera roll or third party app
8. Blur Photo - iOS & Android - FREE
Blur photo uses a one click method to achieve auto blurred backgrounds to help you achieve the Bokeh effect. It also allows you to manually adjust the settings to your own liking. Users can increase or decrease the blur effect, add filters to photos, and add emojis and text.

To create the Bokeh effect in Blur Photo:
- Download the app and allow the app access to your camera and camera roll, and select the image given your options (camera, camera roll);
- You are given a variety of image sizing options, once completed, select Blur, from here you are able to adjust the size and amount of blur and your image is blurred by using your finger to glide over desired areas;
- Upon completion, export and save to camera roll or third-party app.
9. PhotoDirector -iOS & Android - FREE
PhotoDirector is an app available on the iPhone and Android that offers extensive editing options, including the Bokeh effect. You can add animated overlays, animated decorations, sky placement, photo retouching, and much, much more.
To create the Bokeh effect in PhotoDirector:
- Download the app and allow the app access to your camera and camera roll and then select the image given your options (camera, camera roll) ;
- To find and utilize the Bokeh effect, click the Live button, from there, choose where you want the image to focus, which Bokeh effects you want and how animated you want them to be;
- Upon completion, export and save to camera roll or third-party app.
10. Tadaa SLR - iOS - $3.99
Although this app is the most expensive on the list, it also offers some of the best depth-of-field and bokeh effects. It is ultra-precise and easy to navigate.

To create the Bokeh effect in Tadaa SLR:
- Download the app and allow the app access to your camera and camera roll, and then select the image given your options (camera, camera roll);
- Once image is imported, select the Mask tool, which you can use to select the portion of the image you’d like to keep in focus;
- You may then adjust the aperture, range, gloss and highlights via the modification tools provided at the bottom of the screen.
- Adjust to your liking and export!
Part 3: Creating the Bokeh Effect Using the Portrait Mode Function on Your iPhone
If using a third-party app seems like too much effort, or you don’t find the app that achieves the exact blur to focus ratio you’re looking for, consider using the Portrait Mode feature available on newer iPhone models.
Portrait mode is a camera function that allows users to create the depth of field effect we know as Bokeh. When used, the focal image will be crisp and sharp, while the background will be blurred nicely so as to not cause a distraction to the focal point.
To achieve the Bokeh effect through Portrait Mode, you must:
- Open up your camera app and along the bottom of your screen find and select Portrait, and select from a variety of portrait mode options, including Natural light, studio light, contour light, stage light, stage light mono, high key light mono;

- Portrait mode will then allow you to choose your focal point, and do the rest of the work when it comes to blurring the background to create the Bokeh effect;
- The different modes offered will allow users to achieve different types of blur.
Note: If you want to add the bokeh effect to video on the desktop computer, you should try Wondershare Filmora , which provides tilt-shift circle and tilt-shift linear effects for creating the bokeh effect, as well as some bokeh effect overlay. For more details, you can check how to add bokeh effects to the video with Filmora.
Takeaway
Using the Bokeh effect can add a layer to your photography that takes it to the next level. While there are a variety of tools you can use to achieve this, I have covered the 10 best apps for iOS and Android users to accomplish Bokeh. And if third-party apps aren’t for you, don’t forget that iPhone user can also use Portrait Mode to achieve a great Bokeh outcome.
Liza Brown
Liza Brown is a writer and a lover of all things video.
Follow @Liza Brown
Liza Brown
Mar 27, 2024• Proven solutions
It’s no secret that DSLR cameras can help you achieve this blurred effect, but now there are dozens of apps that allow you to get the same outcome without spending hundreds on a new camera. This article will provide you with the 10 best Bokeh apps for iPhones and Androids, based on our own testing, so that you can start editing right away.
- Part 1: What is the Bokeh Effect?
- Part 2: Best Apps to Achieve the Bokeh Effect
- Part 3: What is the Bokeh Effect?
Part 1: What is the Bokeh Effect and Why Should I Be Using it?
The word “Bokeh”or “boke” refers to the Japanese concept of “blur.” It is, in its simplest form, a style of photography where one object is the primary focus, and everything else is strategically blurred.
Using the Bokeh effect is an excellent way to separate the focal point of your photo from non-focal points. It not only serves the purpose of highlighting the focus of the image, but can also help when you’re looking to get rid of an unpleasant or unwanted background. The blurred background is meant to keep your focal point at the absolute center of your audience’s attention.
Part 2: Top 10 Best Apps to Achieve the Bokeh Effect for iOS and Android
As mentioned, there are other ways to achieve the Bokeh effect without an expensive and often fidget DSLR camera. The following apps have been deemed the best based on a variety of characteristics which will be mentioned below.
1. Focos -iOS - FREE
The Focos app for iPhones is a free resource that uses computational photography and light-field camera settings to help you achieve the perfect blur. It offers users the option to apply the Bokeh effect to both the background and foreground of your image, with a variety of options for adjusting size and transparency.
To create the Bokeh effect in Focos:
- Download App via App Store and allow it access to your camera and camera roll;
- Import the image you wish you use, or take a photo using the app’s camera;
- Adjust your focal point and transparency of the blur using their sliding bar feature;
- To add more Bokeh effects, select the star Effect feature in the bottom right of the screen.
- Once you’re happy with the effect, this app allows you to save to your camera roll or share to other apps, including Instagram.
2. Photo Editor Pro - Android - FREE
Photo Editor Pro is a free application that allows users to achieve the Bokeh effect with 4 different camera modes. Users can also adjust the transparency of the bokeh effect chosen.
To create the Bokeh effect in Photo Editor Pro:
- Download the app and allow access to camera and camera roll;
- Select your desired image either via camera or camera roll;
- Choose between a variety of backgrounds and blending tools and adjust using the apps adjustable features, and download to camera roll or upload to a third-party app.
3. Auto Blur Background - Android - FREE
The Auto Blur Background app for iOS and Android is another free resource for creating an image with the Bokeh effect. The app allows users to select the size and desired amount of blur for your background, giving the user a lot of control over the outcome of their photo. It enables users to add overlays in addition to the bokeh effect to enhance the overall outcome.
To create the Bokeh effect in Auto Blur Background app:
- Import or take your photo on the Auto Blur Background application;
- Edit as desired using a variety of tools offered at the bottom of your screen, and add bokeh effect to the video;
- To export, select the Share icon in the bottom right hand corner;
- From this step you can either import directly to Instagram, or export to camera roll. If exported to camera roll, open Instagram app and add a new story, select photo from camera roll and hit add to story!
4. SnapSeed- iOS & Android - FREE
SnapSeed is one of the ultimate editing apps to help you achieve the Bokeh effect on iOS and Android devices. This app, owned by Google, provides an array of advanced editing tools to help improve your photography and editing capabilities.
To create the Bokeh effect in SnapSeed:
- Download the app in the app store and allow access to camera and camera roll;
- Import or take desired image and choose between a variety of filters;
- After selecting your filter, choose Tools and select the Lens Blur Option , and adjust your blur strength accordingly**;**
- Export and save to camera roll or upload to a third-party site.
5. AfterFocus -iOS & Android - $0.99
AfterFocus helps users achieve the Bokeh effect by letting you define the focal area and adjusting the blur of the surrounding regions.
To create the Bokeh effect in AfterFocus:
- Download the app and allow the app access to your camera and camera roll, and select the image given your options (camera, camera roll);
- Once you’ve selected your image, the app will prompt you to select whether you want to manually select the focus area or if you want their software to detect it for you;
- Several blurring tools will appear, use the focus selector tool to select the regions in which you’d like your image to be focused;
- Then use the background selector tool to select the background of your photo, and choose between lens, motion and zoom blur
6. Real Bokeh -iOS & Android - $2.99
Real Bokeh allows users on both the iPhone and Android to add Bokeh light features to their photos. It includes 36 Bokeh shapes, 33 light leak effects, 23 image filters and much more.
To create the Bokeh effect in Real Bokeh:
- Download the app and allow the app access to your camera and camera roll and select the image given your options (camera, camera roll);
- Choose between different filters, shapes and effects to add to your image;
- Adjust the transparency of your bokeh effect on the sliding bar provided by the app, and export to camera roll or to a third party site.
7. Bokeh Lens -iOS - $0.99
This app, designed for the iPhone, is a magnifying glass for photos, allowing users to create their own Bokeh effect without the use of a DSLR camera. The Bokeh level on this app is also customizable, making it great if you’re looking to get detailed.
To create the Bokeh effect in Bokeh Lens:
- Download the app and allow the app access to your camera and camera roll, and select the image given your options (camera, camera roll);
- Using the image below, follow the focus area tools, adjustable bokeh level and more to achieve your perfect photo, and then export to camera roll or third party app
8. Blur Photo - iOS & Android - FREE
Blur photo uses a one click method to achieve auto blurred backgrounds to help you achieve the Bokeh effect. It also allows you to manually adjust the settings to your own liking. Users can increase or decrease the blur effect, add filters to photos, and add emojis and text.
To create the Bokeh effect in Blur Photo:
- Download the app and allow the app access to your camera and camera roll, and select the image given your options (camera, camera roll);
- You are given a variety of image sizing options, once completed, select Blur, from here you are able to adjust the size and amount of blur and your image is blurred by using your finger to glide over desired areas;
- Upon completion, export and save to camera roll or third-party app.
9. PhotoDirector -iOS & Android - FREE
PhotoDirector is an app available on the iPhone and Android that offers extensive editing options, including the Bokeh effect. You can add animated overlays, animated decorations, sky placement, photo retouching, and much, much more.
To create the Bokeh effect in PhotoDirector:
- Download the app and allow the app access to your camera and camera roll and then select the image given your options (camera, camera roll) ;
- To find and utilize the Bokeh effect, click the Live button, from there, choose where you want the image to focus, which Bokeh effects you want and how animated you want them to be;
- Upon completion, export and save to camera roll or third-party app.
10. Tadaa SLR - iOS - $3.99
Although this app is the most expensive on the list, it also offers some of the best depth-of-field and bokeh effects. It is ultra-precise and easy to navigate.
To create the Bokeh effect in Tadaa SLR:
- Download the app and allow the app access to your camera and camera roll, and then select the image given your options (camera, camera roll);
- Once image is imported, select the Mask tool, which you can use to select the portion of the image you’d like to keep in focus;
- You may then adjust the aperture, range, gloss and highlights via the modification tools provided at the bottom of the screen.
- Adjust to your liking and export!
Part 3: Creating the Bokeh Effect Using the Portrait Mode Function on Your iPhone
If using a third-party app seems like too much effort, or you don’t find the app that achieves the exact blur to focus ratio you’re looking for, consider using the Portrait Mode feature available on newer iPhone models.
Portrait mode is a camera function that allows users to create the depth of field effect we know as Bokeh. When used, the focal image will be crisp and sharp, while the background will be blurred nicely so as to not cause a distraction to the focal point.
To achieve the Bokeh effect through Portrait Mode, you must:
- Open up your camera app and along the bottom of your screen find and select Portrait, and select from a variety of portrait mode options, including Natural light, studio light, contour light, stage light, stage light mono, high key light mono;
- Portrait mode will then allow you to choose your focal point, and do the rest of the work when it comes to blurring the background to create the Bokeh effect;
- The different modes offered will allow users to achieve different types of blur.
Note: If you want to add the bokeh effect to video on the desktop computer, you should try Wondershare Filmora , which provides tilt-shift circle and tilt-shift linear effects for creating the bokeh effect, as well as some bokeh effect overlay. For more details, you can check how to add bokeh effects to the video with Filmora.
Takeaway
Using the Bokeh effect can add a layer to your photography that takes it to the next level. While there are a variety of tools you can use to achieve this, I have covered the 10 best apps for iOS and Android users to accomplish Bokeh. And if third-party apps aren’t for you, don’t forget that iPhone user can also use Portrait Mode to achieve a great Bokeh outcome.
Liza Brown
Liza Brown is a writer and a lover of all things video.
Follow @Liza Brown
FCPX Beauty Essentials: How to Achieve Smooth Skin Without Plugins
Full Guide: How to Add a Skin Smoother Effect with Final Cut Pro
Liza Brown
Mar 27, 2024• Proven solutions
It’s quite common for vloggers to try to show the best of their states. However, makeup, weather, and the shooting equipment may disagree. So, how to tackle this problem?

Fortunately, we have the best solutions to fix the skin tone issue by using FCPX’s built-in tools or smooth skin plugins. You will learn how to strategically adjust your footage’s look for stylistic purposes and impress your audience with your video-editing skills. Now, let’s understand what a skin smoother effect is before learning how to add it in FCPX.
Part 1: How to Add a Skin Smoother Effect without Plugins in Final Cut Pro?
Smoothening the skin in Final Cut Pro is very simple. Simply select the video, choose Video effects to be applied, and adjust the percentages from the Inspector pane. You will get wrinkle-free skin with an astonishing look. While multiple plugins are also available to apply a skin smoother effect, you can use the built-in features of Final Cut Pro to smoothen the skin and decrease the amount of contrast.
Here’s how you can do this:
step1Choose the starting image and edit the clip into the timeline. Press Option and make a connected copy of the clip by dragging it up. The start and end points should match for syncing. In the Effects Browser, drag Blur > Gaussian Blur to apply the blur effect on the upper clip.

step2Open the Inspector pan and select Compositing from its bottom. Switch the Blend Mode to Lighten and adjust the Opacity slider as per your desired glow. Usually, 40 to 45% is ideal.

step3Now, go to the top of the Inspector and turn on the blue checkbox next to Gaussian. Adjust the blurring effect until you achieve your desired level of skin softening. It is highly recommended to blur using the horizontal setting to soften the skin while keeping the eyes sharp. Here, the glow is controlled by Opacity while skin softening is controlled by the Blue Amount.

For better results, add a Vignette by selecting and combining the two clips into a Compound Clip. From the Effects Browser, select Stylize > Vignette and adjust drag the vignette. Now, customize the compound clip settings in the Inspector pane until you achieve your desired look. Compare the results between two images before and after editing
Part 2: Where to Find Good Skin Smoother Plugins?
Plugins make it easy for beginners and users with limited expertise to add a skin smoother effect in Final Cut Pro X. You can find both free and paid skin smoother plugins for FCPX online. Given below are some popular skin smoothening plugins for Final Cut Pro X.
- Skin Smoother 2
Skin Smoother 2 is a powerful and easy-to-use plugin that allows you to smooth out unwanted skin details and enhance your facial appearance.
Price: $19.99 (One-time Charges)
Software Requirements: FCP 10.2 or later
Features:
- Enhanced control over facial adjustments with fine-tuning giving more natural results;
- Precise color sampling without a need to match up with present skin tones; and
- 3 to 5 times faster rendering.
- Color Finale
Color Finale is a user-friendly, fine-tuned, and fully-featured professional skin smoother plugin purpose bit for FCP.

Price: $152
Software Requirements: FCP 10.4.8 - 10.5.1
Features:
- Color wheels, curves, and LUT utilities;
- A complete professional color toolset for videographers, colorists, and editors; and
- Allows personal preference on the interface.
- Universe
A comprehensive FCP tool with 89 individual plugins to apply the next-generation skin smoothening and facial improvement effects.
Price: $199/year
Software Requirements: FCPX 10.5 or later
Features:
- Advanced transitions and effects and motion graphics tools;
- A variety of cool presents and text generators; and
- Number counters, chromatic aberration, VHS looks, camera shake, glitch effects.
Part 3: How to adopt Skin Smoothing Plugins into FCPX?
Follow these steps to use the Skin Smooth 2 Plugin for Final Cut Pro X:
- Purchase and download the Skin Smoother 2 plugin. Go to downloads, unzip the folder containing the plugin and install it on your computer.
- Open the FCPX, go to Effects, and click on Skin Smoother 2. A list of options will appear. Import the image or video you want to edit.

- To apply the skin-smoothing effect, click on Add Color Mask, and select the areas of the face where the color mask has to be added.
- Adjust the Skin Smoothing, Smoothing Mix, and the Softness of the color mask as per your requirements.
- Finally, click on Add Shape Mask, two circles will appear on the image. Adjust the covering area of both circles for Shape Mask 1 to add a smiling face.


Part 4: How to Smooth Skin in Filmora?
Wondershare Filmora features advanced tuning tools and a variety of video filters and overlays. Learn how to smooth skin or beautify your face in the video with this advanced video-editing software.
- Open Filmora, open New Project and click Import to load your videos to the timeline.
- Double click on the video to open the editing window. Open the Color panel and adjust parameters according to your preference such as white balance, tone, and 3D LUT, etc.
- Open the toolbar, click the Advanced Color Tuning icon, go to the advanced color tuning window, and adjust the white balance, color tint and temperature, HSL, 3D LUT, Vignette, and Light. If you are a beginner, try applying the present templates.
- To set a specific tone or beautify your video, open the Tools tab and click the Color Correction option to change the color tones.
- Open Effects and Transitions and select the skin smooth filter. Hover the cursor over the filter and click the plus icon in the middle to add that effect. You can also apply the effect to the whole clip by dragging and dropping it directly onto the video clip.
Part 5: How to smooth skin in Adobe Pro?
Given below are simple steps to create a face matter, control the skin smoothing, adjust color correction, and correct the skin glow in Adobe Pro by using the Beauty Studio Effect:
- Applying the Beauty Studio effect smoothens all parts of the image including the background. However, it will make your footage look artificial, which is not desired. Hence, turn on the Pixel Chooser, pick two colors with the eye dropper tool. Color A for the darker area and Color B for the lighter area.
- Underneath the Mocha Matte, use the eyedropper tool to select colors on the skin of the subject in your footage.
- Now, click on View Matte/Mask to visualize the image areas where you are applying the skin smoothing effect. The Beauty Studio will affect the smoothing effect in the white area while the black area will remain unsmoothed.
- Adjust the Saturation, Hue, and Luma softness to enhance the appearance of the skin, eyes, and mouth.
- To prevent the rest of the image from getting affected, create a Mocha mask around the face by clicking on the Mocha logo and drawing a mask with the X-Spline tool. Make sure the mask moves as the subject is moved after your track forward and back.
- Beauty Studio offers four levels of skin smoothing. You can adjust these levels as per your situation by lowering the smoothing amount for each level. For better results, adjust the levels at 70 or below.
- For the final touch, adjust the sharpening between 10-20 points, add saturation between 3 to 8 points for color correction, and add 5 to 10 points of glow. Your image is ready, compare the results before and after applying the effect.
Conclusion
Smooth skin with clear facial expressions attracts everyone. You can apply a skin smooth effect in your video by using advanced video editing tools like Final Cut Pro, Adobe Premium, and Wondershare Filmora.
There are two methods to add a skin smooth effect with FCPX: By using in-built software settings, or by using plugins like Skin Smoother 2, Color Finale, and Universe. Use Beauty Studio Effect in Adobe Pro to smooth skin and improve facial appearance. Finally, you can beautify the face in your video by adding transitions, making color adjustments, and applying different effects with Wondershare Filmora.
Liza Brown
Liza Brown is a writer and a lover of all things video.
Follow @Liza Brown
Liza Brown
Mar 27, 2024• Proven solutions
It’s quite common for vloggers to try to show the best of their states. However, makeup, weather, and the shooting equipment may disagree. So, how to tackle this problem?
Fortunately, we have the best solutions to fix the skin tone issue by using FCPX’s built-in tools or smooth skin plugins. You will learn how to strategically adjust your footage’s look for stylistic purposes and impress your audience with your video-editing skills. Now, let’s understand what a skin smoother effect is before learning how to add it in FCPX.
Part 1: How to Add a Skin Smoother Effect without Plugins in Final Cut Pro?
Smoothening the skin in Final Cut Pro is very simple. Simply select the video, choose Video effects to be applied, and adjust the percentages from the Inspector pane. You will get wrinkle-free skin with an astonishing look. While multiple plugins are also available to apply a skin smoother effect, you can use the built-in features of Final Cut Pro to smoothen the skin and decrease the amount of contrast.
Here’s how you can do this:
step1Choose the starting image and edit the clip into the timeline. Press Option and make a connected copy of the clip by dragging it up. The start and end points should match for syncing. In the Effects Browser, drag Blur > Gaussian Blur to apply the blur effect on the upper clip.
step2Open the Inspector pan and select Compositing from its bottom. Switch the Blend Mode to Lighten and adjust the Opacity slider as per your desired glow. Usually, 40 to 45% is ideal.
step3Now, go to the top of the Inspector and turn on the blue checkbox next to Gaussian. Adjust the blurring effect until you achieve your desired level of skin softening. It is highly recommended to blur using the horizontal setting to soften the skin while keeping the eyes sharp. Here, the glow is controlled by Opacity while skin softening is controlled by the Blue Amount.
For better results, add a Vignette by selecting and combining the two clips into a Compound Clip. From the Effects Browser, select Stylize > Vignette and adjust drag the vignette. Now, customize the compound clip settings in the Inspector pane until you achieve your desired look. Compare the results between two images before and after editing
Part 2: Where to Find Good Skin Smoother Plugins?
Plugins make it easy for beginners and users with limited expertise to add a skin smoother effect in Final Cut Pro X. You can find both free and paid skin smoother plugins for FCPX online. Given below are some popular skin smoothening plugins for Final Cut Pro X.
- Skin Smoother 2
Skin Smoother 2 is a powerful and easy-to-use plugin that allows you to smooth out unwanted skin details and enhance your facial appearance.
Price: $19.99 (One-time Charges)
Software Requirements: FCP 10.2 or later
Features:
- Enhanced control over facial adjustments with fine-tuning giving more natural results;
- Precise color sampling without a need to match up with present skin tones; and
- 3 to 5 times faster rendering.
- Color Finale
Color Finale is a user-friendly, fine-tuned, and fully-featured professional skin smoother plugin purpose bit for FCP.
Price: $152
Software Requirements: FCP 10.4.8 - 10.5.1
Features:
- Color wheels, curves, and LUT utilities;
- A complete professional color toolset for videographers, colorists, and editors; and
- Allows personal preference on the interface.
- Universe
A comprehensive FCP tool with 89 individual plugins to apply the next-generation skin smoothening and facial improvement effects.
Price: $199/year
Software Requirements: FCPX 10.5 or later
Features:
- Advanced transitions and effects and motion graphics tools;
- A variety of cool presents and text generators; and
- Number counters, chromatic aberration, VHS looks, camera shake, glitch effects.
Part 3: How to adopt Skin Smoothing Plugins into FCPX?
Follow these steps to use the Skin Smooth 2 Plugin for Final Cut Pro X:
- Purchase and download the Skin Smoother 2 plugin. Go to downloads, unzip the folder containing the plugin and install it on your computer.
- Open the FCPX, go to Effects, and click on Skin Smoother 2. A list of options will appear. Import the image or video you want to edit.
- To apply the skin-smoothing effect, click on Add Color Mask, and select the areas of the face where the color mask has to be added.
- Adjust the Skin Smoothing, Smoothing Mix, and the Softness of the color mask as per your requirements.
- Finally, click on Add Shape Mask, two circles will appear on the image. Adjust the covering area of both circles for Shape Mask 1 to add a smiling face.
Part 4: How to Smooth Skin in Filmora?
Wondershare Filmora features advanced tuning tools and a variety of video filters and overlays. Learn how to smooth skin or beautify your face in the video with this advanced video-editing software.
- Open Filmora, open New Project and click Import to load your videos to the timeline.
- Double click on the video to open the editing window. Open the Color panel and adjust parameters according to your preference such as white balance, tone, and 3D LUT, etc.
- Open the toolbar, click the Advanced Color Tuning icon, go to the advanced color tuning window, and adjust the white balance, color tint and temperature, HSL, 3D LUT, Vignette, and Light. If you are a beginner, try applying the present templates.
- To set a specific tone or beautify your video, open the Tools tab and click the Color Correction option to change the color tones.
- Open Effects and Transitions and select the skin smooth filter. Hover the cursor over the filter and click the plus icon in the middle to add that effect. You can also apply the effect to the whole clip by dragging and dropping it directly onto the video clip.
Part 5: How to smooth skin in Adobe Pro?
Given below are simple steps to create a face matter, control the skin smoothing, adjust color correction, and correct the skin glow in Adobe Pro by using the Beauty Studio Effect:
- Applying the Beauty Studio effect smoothens all parts of the image including the background. However, it will make your footage look artificial, which is not desired. Hence, turn on the Pixel Chooser, pick two colors with the eye dropper tool. Color A for the darker area and Color B for the lighter area.
- Underneath the Mocha Matte, use the eyedropper tool to select colors on the skin of the subject in your footage.
- Now, click on View Matte/Mask to visualize the image areas where you are applying the skin smoothing effect. The Beauty Studio will affect the smoothing effect in the white area while the black area will remain unsmoothed.
- Adjust the Saturation, Hue, and Luma softness to enhance the appearance of the skin, eyes, and mouth.
- To prevent the rest of the image from getting affected, create a Mocha mask around the face by clicking on the Mocha logo and drawing a mask with the X-Spline tool. Make sure the mask moves as the subject is moved after your track forward and back.
- Beauty Studio offers four levels of skin smoothing. You can adjust these levels as per your situation by lowering the smoothing amount for each level. For better results, adjust the levels at 70 or below.
- For the final touch, adjust the sharpening between 10-20 points, add saturation between 3 to 8 points for color correction, and add 5 to 10 points of glow. Your image is ready, compare the results before and after applying the effect.
Conclusion
Smooth skin with clear facial expressions attracts everyone. You can apply a skin smooth effect in your video by using advanced video editing tools like Final Cut Pro, Adobe Premium, and Wondershare Filmora.
There are two methods to add a skin smooth effect with FCPX: By using in-built software settings, or by using plugins like Skin Smoother 2, Color Finale, and Universe. Use Beauty Studio Effect in Adobe Pro to smooth skin and improve facial appearance. Finally, you can beautify the face in your video by adding transitions, making color adjustments, and applying different effects with Wondershare Filmora.
Liza Brown
Liza Brown is a writer and a lover of all things video.
Follow @Liza Brown
Also read:
- Updated In 2024, Minitool Movie Maker A Detailed Review, User Manual, and Alternative Solutions
- Updated S Top-Rated Free Music Recording Programs A Comprehensive List
- New Top WhatsApp Status Art Maker Apps for Mobile for 2024
- 2024 Approved Make Your Message Stick with the Best Explainer Video Creators
- Updated The Best of the Best Free VOB Video Editors , Reviewed for 2024
- Updated In 2024, Online Video Creation Made Easy WeVideo
- New Unlock the Power of Screen Recording A Filmora Scrn Tutorial
- In 2024, From Hero to Pro Easy GoPro HD Video Editing Techniques
- Updated Windows 10 Video Editors The Best Free and Paid iMovie Alternatives
- New 2024 Approved Home Movie Mastery The Top DVD Creation Software for Beginners and Pros Alike
- In 2024, The Complete Facebook Video Aspect Ratio Cheat Sheet
- New Best Video Blur Apps on iPhone and Android Face/Background for 2024
- Updated Step Into a New Dimension Best Practices for Converting Videos to VR
- Updated 2024 Approved The Best Video Editing Software? Videopad Review and Comparison
- New In 2024, The Best of the Best Top Video Editors for Windows, Mac, iOS, Android, and Linux Users
- 2024 Approved 11 Exceptional Free Music Recording Programs for Beginners and Pros
- Young Filmmakers Learn to Make Your Own Movies
- Updated In 2024, Create Jaw-Dropping Glitch Art with These Free Online Generators
- New 2024 Approved S Most Popular Public Domain Image Websites
- Trim Videos Like a Pro A Step-by-Step Guide to Kapwing Editor
- New 2024 Approved Free Video Editors for Chrome OS A Review of the Top Options
- Updated Top Online Image Resizers for Perfect Proportions
- New 2024 Approved Free Video Editing Essentials Stabilize Your Videos Like a Pro
- Updated A Full Review of Splice Video Editor
- Cut, Merge, Repeat The 5 Best Free Online Video Merging Tools You Should Know
- In 2024, The Ultimate Guide to Apples Best Video Editing Tools
- Updated Videopad Review Is This Video Editor Right for You for 2024
- Updated Change Your Videos Aspect Ratio in Just a Few Clicks
- Updated 2024 Approved When Struggling to Find a Suitable Game Recorder for Your PC, You Might Come Across Many Options. Explore the Best Game Recorders for Sharing Game Highlights
- In 2024, How to Change Lock Screen Wallpaper on ZTE Nubia Z60 Ultra
- Tecno ADB Format Tool for PC vs. Other Unlocking Tools Which One is the Best?
- Complete Guide to Hard Reset Your Oppo Find X6 Pro | Dr.fone
- 5 Tips for Faster Editing in Filmora
- In 2024, Troubleshooting Error Connecting to the Apple ID Server On Apple iPhone 15
- A Guide Sony Xperia 5 V Wireless and Wired Screen Mirroring | Dr.fone
- Conversion Made Easy How to Pick the Best Video to Audio Converter for Your Needs for 2024
- How to Transfer Data from Vivo V27 to BlackBerry | Dr.fone
- In 2024, Hassle-Free Ways to Remove FRP Lock from Oppo Reno 10 Pro+ 5G Phones with/without a PC
- In 2024, Planning to Use a Pokemon Go Joystick on Honor X50? | Dr.fone
- In 2024, The 10 Best Tools to Bypass iCloud Activation Lock On iPhone SE You Should Try Out
- Title: 2024 Approved No Cost, No Problem Top 10 Free Game Download Sites for PC and Android Users
- Author: Emma
- Created at : 2024-04-29 02:34:46
- Updated at : 2024-04-30 02:34:46
- Link: https://video-ai-editor.techidaily.com/2024-approved-no-cost-no-problem-top-10-free-game-download-sites-for-pc-and-android-users/
- License: This work is licensed under CC BY-NC-SA 4.0.
