
:max_bytes(150000):strip_icc():format(webp)/Childlearningonline_WillieBThomas_Getty-3e51600a64d742a0b5db4fadacead069.jpg)
2024 Approved Transform Your 3GP Videos Top Free Rotation Software Compared
Transform Your 3GP Videos: Top Free Rotation Software Compared
Top 5 Best Free 3GP Video Rotators

Ollie Mattison
Mar 27, 2024• Proven solutions
3GP is a format generally used to store videos in 3G mobile phones. At times, when you make videos with your smart phone, they may look up side down because your smart phone has flipped the videos automatically. In this case, you would prefer to rotate 3GP videos 90 degrees for a better viewing. Here is a list of top 5 free 3GP video rotators.
- Movie Rotator 2.0
- Video Rotator
- Free Video Flip and Rotate
- Freemake Video Converter
- Any Video Converter
- Recommended: Wondershare Filmora (originally Wondershare Video Editor)
Movie Rotator 2.0
Movie Rotator 2.0 is the updated version of Movie Rotator. It’s fully compatible with Windows 7 and 8 and enables you to rotate videos in just one few clicks. In addition to 3GP, the software also supports other formats such as AVI, MPG, FLV, MP4, WMV, MOV and so much more.

Pros:
- Easy-to-use.
Cons:
- Only available for Windows 7 and 8.
Video Rotator
Video Rotator is an application for flipping video clips 90 degree clockwise, horizontal mirror, anticlockwise, or upside-down. The program supports over 15 popular video input formats which includes 3GP, MPG, AVI, FLV, WMV, MOV and MP4, etc. Video Rotator allows users to also save the rotated videos into 5 popular video formats: MPG, FLV, MP4, AVI, and MOV. This program supports batch mode which enables users are able to flip & rotate videos in bulk.

Pros:
- Supports various video formats;
- Straightforward and easy-to-use;
- Can rotate Videos in Bulk.
Cons:
- Crashed occasionally;
- No previewer.
Free Video Flip and Rotate
With Free Video Flip, you can flip or rotate video with a mouse click. It features different predefined presets and you can rotate the video by 90 degrees, 180 degrees in clockwise and anti-clockwise direction. Or flip the video vertically as well as horizontally to make more correction to the original video or rotated video.

Pros:
- Appealing user-interface.
Cons:
- It offers to install a lot of unwanted applications.
Freemake Video Converter
Freemake Video Converter is more than just a video converter. It also provides a very easy way for you to change the rotation of your movies. It supports various video formats like MOV, AVI, MP4, WMV, MKV, 3GP and more. Once you get going it’s easy to use, straightforward and uncomplicated.

Pros:
- Supports various video formats;
- Different video editing options;
- User-friendly interface and easy-to-use.
Cons:
- There is a charge to upgrade it to the Gold Version.
Any Video Converter
Any video Converter features a very easy-to-use interface. It even enables you to rotate in batches and do some smart editing like trimming, cropping, clipping as well. It’s a bit of all-singing, all-dancing rotating software as it also supports a huge amount of file formats, including 3GP of course.

Pros:
- Supports almost any video formats;
- Different video editing functions.
Cons:
- Can’t convert audio files.
Recommended: Wondershare Filmora (originally Wondershare Video Editor)
Wondershare Video Editor is a great program for 3GP rotation. With just some clicks, you can rotate the videos to normal viewing position. You are not only able to rotate your videos 90 degrees and more clockwise or anticlockwise, but also spin them vertically and horizontally. It has a fast rotation speed and will carry out the changes without tarnishing the original quality. In addition to 3GP, the software supports also other formats such as MOV, ASF, FLV, VOB, WMA, MP4, WMV, AVI, MKV, MPG and many more.
 Download Mac Version ](https://tools.techidaily.com/wondershare/filmora/download/ )
Ollie Mattison
Ollie Mattison is a writer and a lover of all things video.
Follow @Ollie Mattison
Ollie Mattison
Mar 27, 2024• Proven solutions
3GP is a format generally used to store videos in 3G mobile phones. At times, when you make videos with your smart phone, they may look up side down because your smart phone has flipped the videos automatically. In this case, you would prefer to rotate 3GP videos 90 degrees for a better viewing. Here is a list of top 5 free 3GP video rotators.
- Movie Rotator 2.0
- Video Rotator
- Free Video Flip and Rotate
- Freemake Video Converter
- Any Video Converter
- Recommended: Wondershare Filmora (originally Wondershare Video Editor)
Movie Rotator 2.0
Movie Rotator 2.0 is the updated version of Movie Rotator. It’s fully compatible with Windows 7 and 8 and enables you to rotate videos in just one few clicks. In addition to 3GP, the software also supports other formats such as AVI, MPG, FLV, MP4, WMV, MOV and so much more.
Pros:
- Easy-to-use.
Cons:
- Only available for Windows 7 and 8.
Video Rotator
Video Rotator is an application for flipping video clips 90 degree clockwise, horizontal mirror, anticlockwise, or upside-down. The program supports over 15 popular video input formats which includes 3GP, MPG, AVI, FLV, WMV, MOV and MP4, etc. Video Rotator allows users to also save the rotated videos into 5 popular video formats: MPG, FLV, MP4, AVI, and MOV. This program supports batch mode which enables users are able to flip & rotate videos in bulk.
Pros:
- Supports various video formats;
- Straightforward and easy-to-use;
- Can rotate Videos in Bulk.
Cons:
- Crashed occasionally;
- No previewer.
Free Video Flip and Rotate
With Free Video Flip, you can flip or rotate video with a mouse click. It features different predefined presets and you can rotate the video by 90 degrees, 180 degrees in clockwise and anti-clockwise direction. Or flip the video vertically as well as horizontally to make more correction to the original video or rotated video.
Pros:
- Appealing user-interface.
Cons:
- It offers to install a lot of unwanted applications.
Freemake Video Converter
Freemake Video Converter is more than just a video converter. It also provides a very easy way for you to change the rotation of your movies. It supports various video formats like MOV, AVI, MP4, WMV, MKV, 3GP and more. Once you get going it’s easy to use, straightforward and uncomplicated.
Pros:
- Supports various video formats;
- Different video editing options;
- User-friendly interface and easy-to-use.
Cons:
- There is a charge to upgrade it to the Gold Version.
Any Video Converter
Any video Converter features a very easy-to-use interface. It even enables you to rotate in batches and do some smart editing like trimming, cropping, clipping as well. It’s a bit of all-singing, all-dancing rotating software as it also supports a huge amount of file formats, including 3GP of course.
Pros:
- Supports almost any video formats;
- Different video editing functions.
Cons:
- Can’t convert audio files.
Recommended: Wondershare Filmora (originally Wondershare Video Editor)
Wondershare Video Editor is a great program for 3GP rotation. With just some clicks, you can rotate the videos to normal viewing position. You are not only able to rotate your videos 90 degrees and more clockwise or anticlockwise, but also spin them vertically and horizontally. It has a fast rotation speed and will carry out the changes without tarnishing the original quality. In addition to 3GP, the software supports also other formats such as MOV, ASF, FLV, VOB, WMA, MP4, WMV, AVI, MKV, MPG and many more.
Download Mac Version ](https://tools.techidaily.com/wondershare/filmora/download/ )
Ollie Mattison
Ollie Mattison is a writer and a lover of all things video.
Follow @Ollie Mattison
Add Emotional Depth: Learn to Create a Ken Burns Effect in Minutes
How to Make Ken Burns Effect in Final Cut Pro?

Liza Brown
Mar 27, 2024• Proven solutions
Ken Burns Effect is an advanced feature of Final Cut Pro that allows users to add creative animations to their videos and images within minutes. You just need to select your picture, add movements to the clip, and choose the start and the end position to produce high-resolution stills. Besides, you can do a tilt, zoom in, a pan, or a combination of these three moves on a single image. This way, you can use the Ken Burns Effect to highlight the stimulating features in your photograph and save your memories in the form of innovative and high-definition animated clips.
This article introduces the readers to Final Cut Pro and explains how to add the Ken Burns Effect in 8 simple steps.
- Part 1: How to Make a Ken Burns Effect in Final Cut Pro?[detaied steps]
- Part 2: How to add the Ken Burns Effect to Multiple Camera Movements?
- Extensive Reading: Why Ken Burns Effect is Named after Ken Burns?
Part 1: How to Make a Ken Burns Effect in Final Cut Pro?
Final Cut Pro is user-friendly software and makes it easy for you to create a Ken Burns Effect without having advanced skills and expertise. So, are you interested in knowing the best part? Given below are a few simple steps to create Ken Burns Effect and make your pictures and videos look adorable.
Step 1: Add Images to the Timeline
First of all, you should specify a name for your project and add photos to the timeline in Final Cut Pro. For this purpose, select multiple photos and press E. A clip will be added to the timeline as shown in figure 1.

Step 2: Check Your Settings
As you can see, our timeline has no other video clip. Hence, Final Cut Pro will not recognize the clip until you adjust the video properties such as format, resolution, and rate, etc. For this purpose, click OK to use your preferred settings and press Shift + Z to fit the picture to your timeline window. Once you’re done it’s time to apply the Ken Burns Effect.

Step 3: Add the Ken Burns Effect
The Ken Burns Effect is used to focus on specific parts of an image and bring motionless content in to provoke emotional reactions. Follow these steps to add the Ken Burns Effect:
- Select the clip or picture;
- See the lower left of the viewer;
- Go to the Viewer window using the drop-down menu;
- Tap on the pop-up menu located in the bottom left-hand corner;
- Choose the Crop option from the menu or press Shift + C;
- Press the Ken Burns button in the Crop onscreen controls to add the effect; and
- Finally, notice the start frame and the end frame controls.

Step 4: Customize Your Effect
In the Ken Burns display, you can see the controls for adjusting the panning and zooms effects by changing the size and position of two-colored rectangles overlaying on the clip. To customize the Ken Burns effect:
- Adjust the green rectangle’s size and position to set the start position;
- Adjust the red rectangle’s size and position to set the end position;
- The arrow depicts the direction of camera position between start and end position;
- In the top left-hand corner, click on the Swap button to exchange the two positions as per your requirements;
- You can see the preview of the animation on the screen.

Step 5: Add a Freeze Frame
You’re not done yet because you need to hold your picture at the end of the animation. For this purpose, you should create a freezing frame at the end of the clip to make Ken Burns do this. Here’s the deal:
- Press the Down arrow followed by the Left arrow to go to the last frame;
- Press Option-F to add a freeze-frame;
- Make sure that your added frame matches the ending frame of the Ken Burns Effect.

Step 6: Adjust the Duration of the Freeze Frame
The users can also adjust the speed of the animation and the duration of the freeze-frame by trimming your clip. For this purpose, trim the length as per your requirement and it will optimize the speed as shown in figure 6.

Step 7: Swap the Start and End Frame
Now, swap the start and ending frame as per your preference for the Ken Burns animation. Here’s how you can do this:
- Click on the Swap button;
- The start frame will match the still frame (previous one);
- Grab the end frame and move it to your desired position;
- Apply enough zoom in to make the black areas disappear;
- Preview to see how your animation looks.

Step 8: Play/Preview Looping
After you have optimized the speed of the Ken Burns Effect by trimming the clip’s length and have widened the shot to include everyone, it’s time to preview the changes you have made. Given below are simple steps:
- Press the Play Loop button;
- Tap on the Pause icon and return to editing;
- Click Done and enjoy your animation.
Seems a little complicated? Filmora allows users to do Ken Burns effect, or pan and zoom effect, in much easier steps, click to download and have a try!

Part 2: How to add the Ken Burns Effect to Multiple Camera Movements?
Although you can apply a single Ken Burns movement to your image, you can still give the impression of multiple movements being used. This means the Ken Burns Effect can be added to multiple camera movements by duplicating the photo and building numerous movements in sequence.
- Add the first camera movement to your image;
- Duplicate the clip by click and drag option or copy and paste option;
- Press the Swap button in the Ken Burns settings to reverse the start and end positions;
- Verify if multiple camera movements have been added.
Extensive Reading: Why Ken Burns Effect is Named after Ken Burns?
What is the Ken Burns Effect?
The Ken Burns Effect is a feature in Final Cut Pro to create a pan and zoom effect by using your predefined start and end positions. Basically, it is a crop effect with one crop at the start of the clip while the other at the end. Ken Burns Effect can be further customized by adjusting the smoothness of the animation. While creating a Ken Burns Effect, the motion applied to the video clips gets automatically smoothed to accelerate and decelerate the movement slowly at the start and the end of the animation.
Why the Effect is named after Ken Burns?
Now, as you have learned the purpose of the Ken Burns Effect, you must be curious about its name. It is named after American documentarian Ken Burns, who is known for his instantly recognizable and highly influential visual aesthetic. Surprisingly, Ken Burns did not invent this Ken Burns Effect; rather, it has existed for decades. You might be wondering why the technique was then named after Ken Burns. This was due to the persistent and adroit use of this technique that it is now known as the Ken Burns Effect.

What are the Applications of Ken Burns Effect?
Primarily, the Ken Burns Effect is used due to the unavailability of a film or video. The technique gives action to still photographs to glorify the subjects of interest like couples in wedding photography. It gets better and better as you apply simulated parallax with Ken Burns Effect to make your 2D images appear as 3D plus advanced zooming visuals. You can also use the Ken Burns effect to make a video of your graduation ceremony pictures or memorable moments of reunion. Ken Burns Effect is also used in documentaries by professional filmmakers and editors.
Conclusion
Adding animated effects to your pictures and videos makes them look gorgeous. This is crazy, isn’t it, when you impress your peers with your editing skills. So, what’s the bottom line of this whole discussion? Try adding the Ken Burns Effect with Final Cut Pro to create a pan and zoom effect on your pictures and clips get the output in your desired format.
Liza Brown
Liza Brown is a writer and a lover of all things video.
Follow @Liza Brown
Liza Brown
Mar 27, 2024• Proven solutions
Ken Burns Effect is an advanced feature of Final Cut Pro that allows users to add creative animations to their videos and images within minutes. You just need to select your picture, add movements to the clip, and choose the start and the end position to produce high-resolution stills. Besides, you can do a tilt, zoom in, a pan, or a combination of these three moves on a single image. This way, you can use the Ken Burns Effect to highlight the stimulating features in your photograph and save your memories in the form of innovative and high-definition animated clips.
This article introduces the readers to Final Cut Pro and explains how to add the Ken Burns Effect in 8 simple steps.
- Part 1: How to Make a Ken Burns Effect in Final Cut Pro?[detaied steps]
- Part 2: How to add the Ken Burns Effect to Multiple Camera Movements?
- Extensive Reading: Why Ken Burns Effect is Named after Ken Burns?
Part 1: How to Make a Ken Burns Effect in Final Cut Pro?
Final Cut Pro is user-friendly software and makes it easy for you to create a Ken Burns Effect without having advanced skills and expertise. So, are you interested in knowing the best part? Given below are a few simple steps to create Ken Burns Effect and make your pictures and videos look adorable.
Step 1: Add Images to the Timeline
First of all, you should specify a name for your project and add photos to the timeline in Final Cut Pro. For this purpose, select multiple photos and press E. A clip will be added to the timeline as shown in figure 1.
Step 2: Check Your Settings
As you can see, our timeline has no other video clip. Hence, Final Cut Pro will not recognize the clip until you adjust the video properties such as format, resolution, and rate, etc. For this purpose, click OK to use your preferred settings and press Shift + Z to fit the picture to your timeline window. Once you’re done it’s time to apply the Ken Burns Effect.
Step 3: Add the Ken Burns Effect
The Ken Burns Effect is used to focus on specific parts of an image and bring motionless content in to provoke emotional reactions. Follow these steps to add the Ken Burns Effect:
- Select the clip or picture;
- See the lower left of the viewer;
- Go to the Viewer window using the drop-down menu;
- Tap on the pop-up menu located in the bottom left-hand corner;
- Choose the Crop option from the menu or press Shift + C;
- Press the Ken Burns button in the Crop onscreen controls to add the effect; and
- Finally, notice the start frame and the end frame controls.
Step 4: Customize Your Effect
In the Ken Burns display, you can see the controls for adjusting the panning and zooms effects by changing the size and position of two-colored rectangles overlaying on the clip. To customize the Ken Burns effect:
- Adjust the green rectangle’s size and position to set the start position;
- Adjust the red rectangle’s size and position to set the end position;
- The arrow depicts the direction of camera position between start and end position;
- In the top left-hand corner, click on the Swap button to exchange the two positions as per your requirements;
- You can see the preview of the animation on the screen.
Step 5: Add a Freeze Frame
You’re not done yet because you need to hold your picture at the end of the animation. For this purpose, you should create a freezing frame at the end of the clip to make Ken Burns do this. Here’s the deal:
- Press the Down arrow followed by the Left arrow to go to the last frame;
- Press Option-F to add a freeze-frame;
- Make sure that your added frame matches the ending frame of the Ken Burns Effect.
Step 6: Adjust the Duration of the Freeze Frame
The users can also adjust the speed of the animation and the duration of the freeze-frame by trimming your clip. For this purpose, trim the length as per your requirement and it will optimize the speed as shown in figure 6.
Step 7: Swap the Start and End Frame
Now, swap the start and ending frame as per your preference for the Ken Burns animation. Here’s how you can do this:
- Click on the Swap button;
- The start frame will match the still frame (previous one);
- Grab the end frame and move it to your desired position;
- Apply enough zoom in to make the black areas disappear;
- Preview to see how your animation looks.
Step 8: Play/Preview Looping
After you have optimized the speed of the Ken Burns Effect by trimming the clip’s length and have widened the shot to include everyone, it’s time to preview the changes you have made. Given below are simple steps:
- Press the Play Loop button;
- Tap on the Pause icon and return to editing;
- Click Done and enjoy your animation.
Seems a little complicated? Filmora allows users to do Ken Burns effect, or pan and zoom effect, in much easier steps, click to download and have a try!
Part 2: How to add the Ken Burns Effect to Multiple Camera Movements?
Although you can apply a single Ken Burns movement to your image, you can still give the impression of multiple movements being used. This means the Ken Burns Effect can be added to multiple camera movements by duplicating the photo and building numerous movements in sequence.
- Add the first camera movement to your image;
- Duplicate the clip by click and drag option or copy and paste option;
- Press the Swap button in the Ken Burns settings to reverse the start and end positions;
- Verify if multiple camera movements have been added.
Extensive Reading: Why Ken Burns Effect is Named after Ken Burns?
What is the Ken Burns Effect?
The Ken Burns Effect is a feature in Final Cut Pro to create a pan and zoom effect by using your predefined start and end positions. Basically, it is a crop effect with one crop at the start of the clip while the other at the end. Ken Burns Effect can be further customized by adjusting the smoothness of the animation. While creating a Ken Burns Effect, the motion applied to the video clips gets automatically smoothed to accelerate and decelerate the movement slowly at the start and the end of the animation.
Why the Effect is named after Ken Burns?
Now, as you have learned the purpose of the Ken Burns Effect, you must be curious about its name. It is named after American documentarian Ken Burns, who is known for his instantly recognizable and highly influential visual aesthetic. Surprisingly, Ken Burns did not invent this Ken Burns Effect; rather, it has existed for decades. You might be wondering why the technique was then named after Ken Burns. This was due to the persistent and adroit use of this technique that it is now known as the Ken Burns Effect.
What are the Applications of Ken Burns Effect?
Primarily, the Ken Burns Effect is used due to the unavailability of a film or video. The technique gives action to still photographs to glorify the subjects of interest like couples in wedding photography. It gets better and better as you apply simulated parallax with Ken Burns Effect to make your 2D images appear as 3D plus advanced zooming visuals. You can also use the Ken Burns effect to make a video of your graduation ceremony pictures or memorable moments of reunion. Ken Burns Effect is also used in documentaries by professional filmmakers and editors.
Conclusion
Adding animated effects to your pictures and videos makes them look gorgeous. This is crazy, isn’t it, when you impress your peers with your editing skills. So, what’s the bottom line of this whole discussion? Try adding the Ken Burns Effect with Final Cut Pro to create a pan and zoom effect on your pictures and clips get the output in your desired format.
Liza Brown
Liza Brown is a writer and a lover of all things video.
Follow @Liza Brown
Free Video Enhancement Software: Top 9 Picks
Top 9 Best Online Video Quality Enhancer for FREE
Ollie Mattison
Apr 24, 2024• Proven solutions
In 2024, the average person will watch 17 hours of video content every week. Improving the quality of your videos can make your content more noticeable.
Fortunately, there are many excellent video quality enhancer tools to choose from. These tools can enhance both the visual and audio clarity of your content. Ultimately, this will enhance your professionalism and reputation as a trustworthy creator.
Are you wondering where to start when selecting an effective, user-friendly video enhancer? Here are some of our top recommendations to help you begin.
- Part 2: 5 Free AI Video Enhancers [Software Options]
- Part 3: Top 2 4K Video Enhancer Online Free Options
- Part 4: How to Choose the Best Video Enhancer
- In this article
Why Do You Need an AI Video Enhancer?
AI video enhancers utilize generative AI to remove noise, stabilize shaky videos, upscale, or enhance their overall appearance. These tools employ machine learning and neural network techniques to analyze videos and apply different effects for enhancement. Trained on extensive datasets, most AI video enhancers can understand video content like faces, scenes, and objects, automatically adjusting imperfections.
Using an AI video enhancer is an excellent way to boost video quality quickly. Unlike traditional methods, AI speeds up the enhancement process significantly. There are additional benefits, such as:
- **Enhanced Media Quality:**AI video enhancers enhance videos automatically with advanced algorithms, maintaining quality, clarity, and detail.
- Noise Reduction: Many AI video enhancer tools effectively reduce visual noise in videos, resulting in cleaner and clearer footage.
- **Reviving Old Clip:**AI video enhancers are adept at restoring old video footage to make it appear more vibrant.
5 Free AI Video Enhancers [Software Options]
Are blurry videos on your large screen getting on your nerves? Thanks to advancements in artificial intelligence (AI), you can now enhance your low-resolution videos for a crystal-clear viewing experience.
Whether you’re a video editor, content creator, or streamer, incorporating an AI video upscaler into your toolkit is a wise choice. Here are the top 5 picks for the best free AI video enhancer software to improve your video editing.
1.Wondershare Filmora - AI Video Enhancer

Pricing:Filmora offers a free trial without exporting.
Wondershare Filmora stands out in video editing by combining comprehensive editing features with AI-powered enhancement tools. With 4K editing, Filmora ensures videos are improved and future-proofed.
In addition to enhancement, Filmora offers over 300 unique transitions and effects catering to creative minds. Audio enthusiasts will enjoy advanced audio tools like audio ducking and equalizers.
Filmora’s standout feature is its motion tracking capability, enabling dynamic video compositions. While beginners may find the abundance of features overwhelming, regular updates and an active online community provide ample support.
Features
- Filmora’s advanced AI video-enhancing algorithms let you convert black-and-white footage to colored ones.
- It boosts frame rates up to 240 FPS using AI-enhanced frame interpolation technology and 4x super-resolution algorithms.
- Filmora enhances videos’ clarity and quality through audio ducking, equalizers, and more.
- This AI Video Enhancer tracks and attaches objects in videos.
- The tool preserves details and enhances quality in slow-motion scenes.
- Offers over 300 unique transitions and effects.
Pros
- Versatile editing and enhancement options.
- This AI video enhancer is designed to assist both beginners and professionals.
- It supports batch processing, enhancing 10+ videos simultaneously.
Cons
- The free version adds a watermark.
2.AVCLabs Video Enhancer AI
Pricing:AVCLabs offers new users a 7-day free trial.
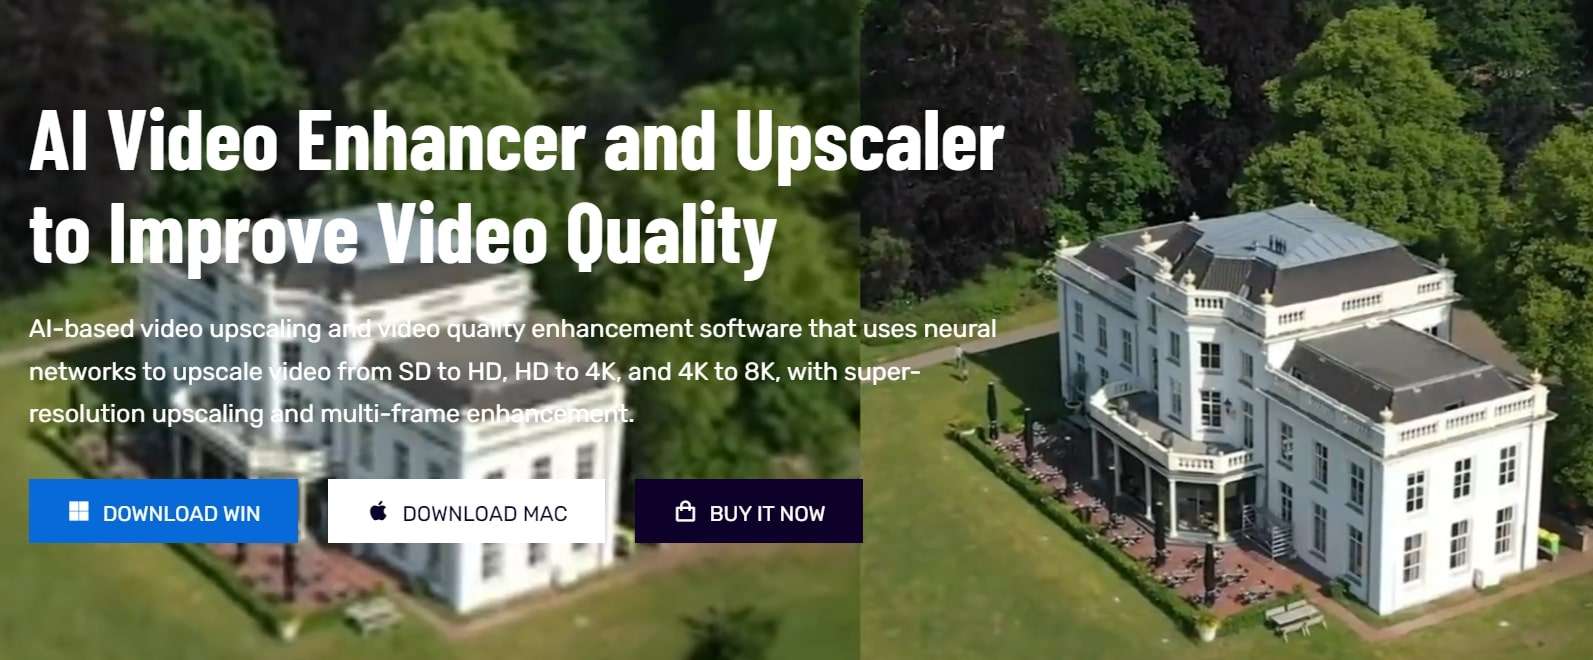
AVCLabs Video Enhancer AI utilizes a neural network to improve video clip quality. With super-resolution AI video upscaling and multi-frame enhancement, it can easily upscale video from SD to HD (720p or 1080p) to 4K and up to 8K in just one click.
With support for various video and audio formats, users can work seamlessly without compatibility issues. A notable feature is its batch processing capability, enabling users to upscale and enhance multiple videos simultaneously, saving time. The real-time preview feature is invaluable for those who wish to see the software’s results before finalizing their project.
Features
- AVCLabs seamlessly enhances any video footage without quality loss. Whether single or multi-frame, you’ll experience smooth transitions and improved frames.
- With AVCLabs’ color correction feature, you can easily adjust each video frame’s brightness, saturation, and contrast. This tool employs AI video upscaling to create larger, more detailed images without sacrificing quality.
- This video enhancement tool offers automatic face refinement to enhance facial details, which is ideal for improving low-quality videos with excessive noise and blurriness.
- The Super Resolution feature recovers high-resolution videos from low-resolution materials by generating additional pixel data to fill gaps, resulting in enhanced output.
- AVCLabs Video Enhancer AI uses a multi-frame convolutional neural network to stabilize video shakes and remove motion artifacts, overlay noise, and grain, producing natural and enhanced results.
Pros
- AVCLabs features a color calibration algorithm that accurately portrays natural colors.
- It allows you to add color to old black-and-white videos.
- The video processing is fully automatic, requiring no manual fine-tuning.
Cons
- The app demands a significant amount of free space, up to 15 GB.
- It is only compatible with Windows and Mac operating systems.
- The free trial adds a watermark from AVC Labs to the videos.
3.UniFab Video Enhancer
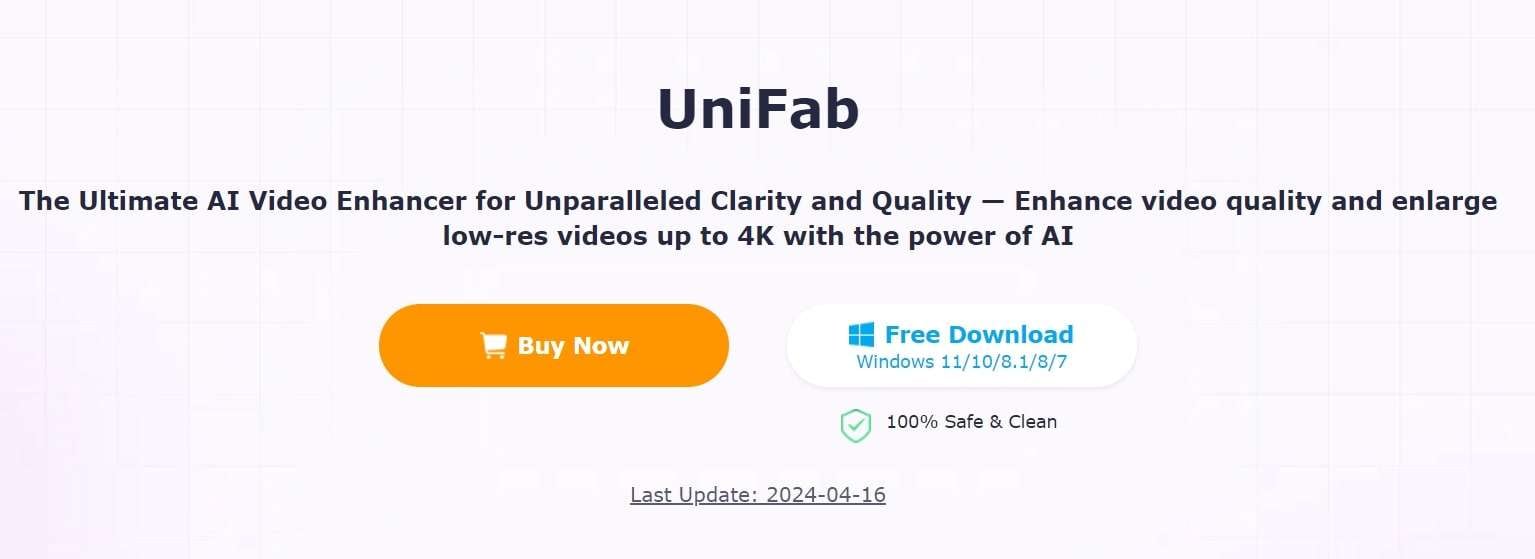
Pricing: UniFab provides a 30-day free trial for new AI users and a 30-day money-back guarantee for paid.
UniFab is a comprehensive AI-powered video enhancer to enhance video quality for all types of videos. Standout features like upscaling video to HDR10/Dolby Vision, denoising, and deinterlacing set this tool apart.
The models are regularly updated with the latest advancements in Deep Learning. Whether you’re a novice or an expert, UniFab offers both automatic and manual modes for video enhancement, making it easy to use without requiring complex settings.
Features
- Upgrade any video to 720p, 1080p, or even 4k resolution with remarkable clarity.
- Convert SDR videos to stunning HDR formats like HDR10+ and Dolby Vision. This feature revitalizes your videos, making them significantly more vibrant and immersive.
- Utilize AI technology to deinterlace your videos, ensuring smooth playback and a pristine viewing experience on modern displays.
- Specifically designed for videos captured in low-light conditions or with high ISO settings, this tool intuitively reduces grain and noise, restoring your footage’s true essence without sacrificing detail.
- Experience unprecedented fluidity as the software boosts your videos to an impressive 120FPS using AI. This transforms your content into a smooth motion stream, ideal for high-definition screens and attentive audiences.
Pros
- It allows audio up-mixing to EAC3 5.1/DTS 7.1 through AI.
- Utilizes GPU-accelerated technology.
- Supports video conversion, compression, and editing.
Cons
- The free trial is limited to 3 videos.
- Does not support Mac systems.
4.Topaz Video Enhance AI
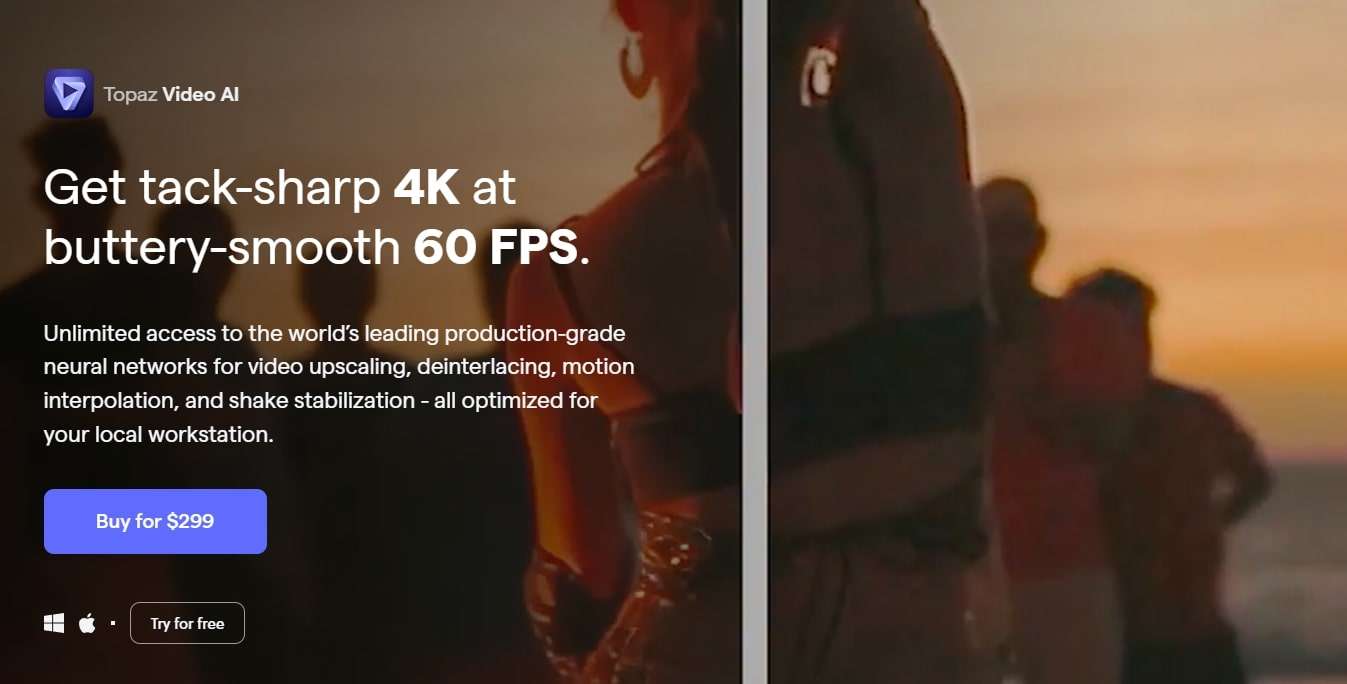
Pricing:Topaz video enhancement tool offers a 30-day no-questions-asked refund policy.
Topaz Video Enhance AI enhances video quality by increasing its resolution. It supports batch upscaling of videos and is compatible with DVD, DSLR, Game, and HD stock footage.
Many notable film studios consider Topaz Video Enhance AI one of the best video editing software tools. It is suitable for various uses, such as commercials, movie content, and YouTube videos.
Features
- This free video upscaling software swiftly analyzes video footage quality using AI tools and recreates it into high-resolution videos.
- Topaz offers Gaia CGI and Theia for enhancing CG and animated videos, along with Proteus and Artemis for noise removal and sharpening.
- Easily recover details from any video footage by injecting original details using adjacent frames’ additional information. It detects and corrects visual artifacts formed during compression.
- Topaz provides an automatic mode for quick video quality enhancement and manual fine-tuning options using available controls.
- With this free video enhancer software, preserve video audio tracks and select from different conversion options for optimal output in the final project.
Pros
- Reduces motion artifacts.
- Adds extra frames for smooth, slow-motion videos.
- Enhances video quality up to 8K.
Cons
- AI processing can be time-consuming, sometimes taking hours.
- Requires a high-quality graphics card.
5.HitPaw Video Enhancer

Pricing:HitPaw AI video enhancer offers a 30-day refund guarantee on paid plans.
HitPaw is a user-friendly video enhancer suitable for both beginners and professionals. It features an easy-to-navigate interface, ensuring even those with minimal experience can improve their videos. Despite its simplicity, HitPaw offers robust enhancement tools, including color correction and stabilization. Its extensive support for various video formats eliminates compatibility concerns.
The software prioritizes efficient video enhancement without compromising quality or speed. Comprehensive tutorials help users explore different editing tasks and unlock their content’s full potential.
Features
- Utilize advanced AI algorithms to upscale low-resolution videos for a more appealing look. The AI feature optimizes content for sharper and more vibrant visuals.
- The HitPaw video quality enhancer app uses AI tools to improve detailing on human faces. Apply filters and adjust settings to enhance facial output in videos.
- The app includes a video stabilization feature that eliminates shaky camera movements, producing smoother and clearer videos with a professional touch.
- HitPaw offers an AI video repair option to restore damaged, corrupted, and old videos. It can also use deep learning AI to colorize black-and-white videos.
- Remove noise from videos with the General Denoise feature, making them look sharper, clearer, and newer.
Pros
- Supports various video formats.
- Has a user-friendly and intuitive interface.
- Can repair and enhance animation videos.
Cons
- The free plan has limited editing features.
Top 2 4K Video Enhancer Online Free Options
The AI-enhanced video tools mentioned above excel in their field. However, there are times when you might run out of storage or need a quick fix through your browser. So, here are some online AI tools that can enhance your videos. Unlike offline video enhancer AIs, online tools are easily accessible. While they may offer fewer features than desktop solutions, they are still useful for some editors.
1.Cutout.Pro
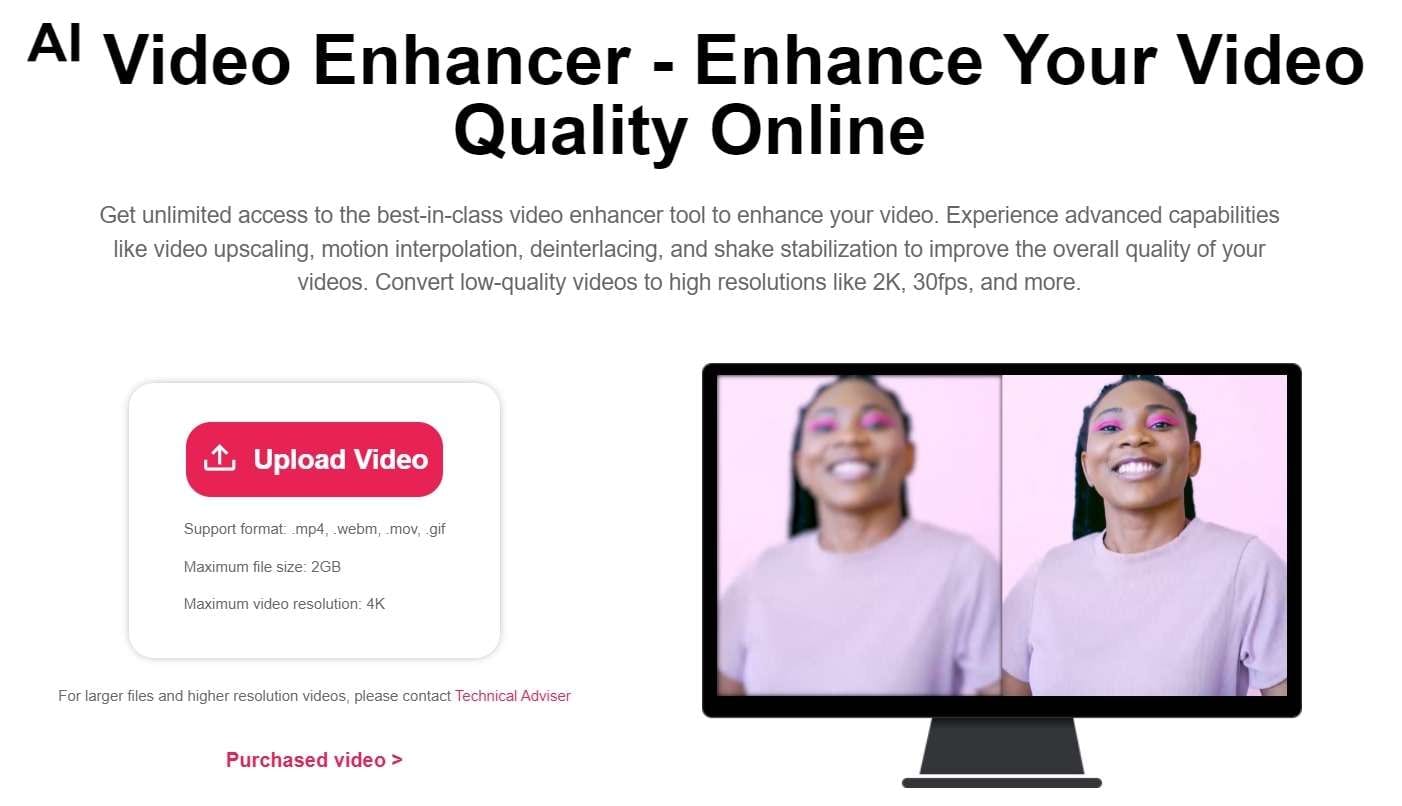
Many editing professionals rely on this free AI video enhancer for unlimited video improvements. Cutout.Pro utilizes advanced features such as video upscaling, motion interpolation, deinterlacing, and shake stabilization to enhance overall quality. This tool converts low-quality videos to higher resolutions like 2K, 30fps, and beyond. Moreover, this online tool swiftly reduces visual noise and other motion artifacts from clips using AI.
Features
- Reduce noise, motion artifacts, and improve video resolution significantly with this powerful online video quality enhancer and upscaler. Perfect for enhancing low-resolution videos like 240p, 360p, 480p, and more.
- Pro increases video frame rates without sacrificing quality. Smooth out shaky footage for better slow-motion effects.
- This tool enhances video resolution up to 2K at a maximum of 30fps effortlessly. It sharpens and defines your videos, bringing your story to life like a professional.
- This is perfect for filmmakers seeking to enhance footage quality and create professional-looking films. Improve video resolution and quality to unblur, upscale, and smooth videos for cinematic results.
- Enhance the quality of personal videos as this tool features shake stabilization for professional results.
- This video enhancer is ideal for professionals creating cinematic frames and restoring old footage. It’s also great for individuals looking to improve the quality of compressed videos downloaded from social media platforms like YouTube, Netflix, and TikTok.
Pros
- It boosts video frame rates and enables HD clip exports.
- Users can upload videos in MP4, MOV, WebM, and GIF formats for processing.
Cons
- It only offers a 5-second preview of the results after enhancement.
2.Clideo Video Enhancer
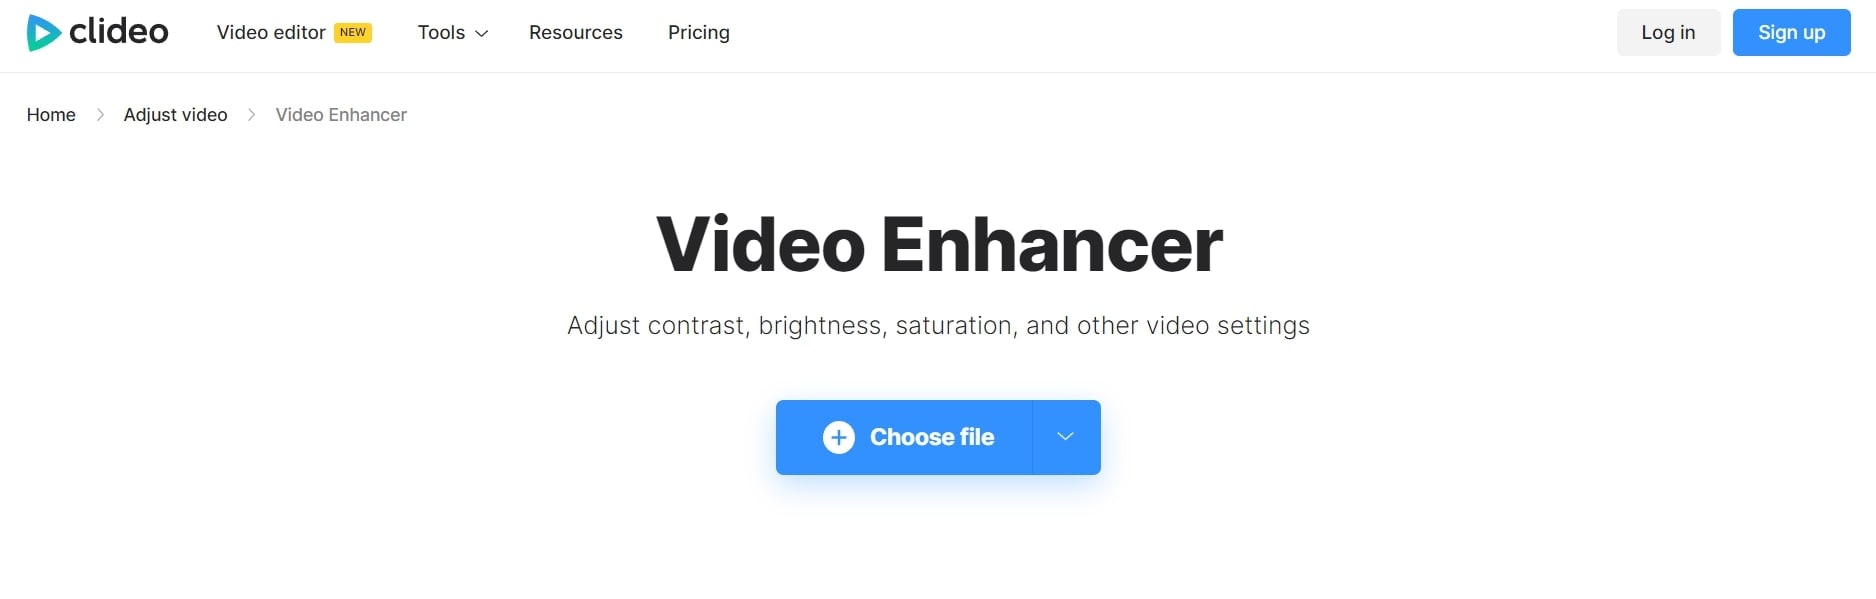
Clideo is an online video-enhancing tool that can completely transform any random video. It lets you add special AI effects and filters to adjust the video’s brightness, saturation, and contrast, making it stunning, vibrant, and attractive. You can enhance any video professionally for social media attention or business branding.
When it comes to video-enhancing tools, users seek maximum customization options. Clideo offers various features, functions, and facilities to transform average-looking videos into 4k video resolutions.
Features
- The interface is intuitive, so you don’t need any video editing experience to use it.
- You can enhance your video regardless of format because Clideo works with MP4, WMV, MOV, VOB, AVI, and other popular formats.
- You don’t need to download and install the video enhancer to your device. It’s not only faster but also more secure.
- Enhance multiple videos or images simultaneously.
- Add subtitles with customizable text fonts.
- Text Overlay feature with support for HD resolution.
- Access a media library with social sharing options.
Pros
- User-friendly tool is ideal for beginners.
- Supports multiple formats.
- As an online tool, it saves device storage space.
- Reasonable pricing.
- Provides uninterrupted video editing with customizable features.
Cons
- A premium subscription is required to remove watermarking.
- No offline app available; internet connection always necessary.
- No dedicated mobile app.
How to Choose the Best Video Enhancer
Consider the following to ensure you select the right video enhancer for your needs and creative vision.
1.Type of Content
Think about the type of content you’re working with. Are you creating short-form clips for social media or longer, more complex videos? Different enhancers may better suit different content types, so consider your file type and potential quality issues.
2.Consider The Features You Need
Consider the tools and features you need from your video quality enhancer software. Each system offers different capabilities, so planning can help you find the option that best fits your requirements.
3.Sharing Formats and Requirements
Determine the purpose of your video project and any specific sharing requirements. Understanding your goals will help you plan accordingly, whether for online sharing or commercial use.
4.Your Budget
Keep your budget in mind. Some enhancers offer free features, while others may require a purchase or subscription fee for full access. Budgeting effectively ensures you get the best value for your money while achieving great video results.
Conclusion
The video enhancement landscape has been transformed by artificial intelligence, providing numerous options to enhance your videos’ quality. Whether a professional filmmaker or a casual content creator, free AI video enhancers offer a chance to take your productions to the next level.
Each software has unique strengths, from Wondershare Filmora’s comprehensive editing features to AVCLabs’ neural network-powered upscaling and UniFab’s HDR conversion capabilities. User-friendly options like HitPaw cater to beginners while providing robust enhancement tools.
Moreover, for quick fixes or limited storage, online options like Cutout.Pro and Clideo offer accessible solutions with impressive results. With these advancements, achieving professional-quality videos is now achievable for everyone.
Ollie Mattison
Ollie Mattison is a writer and a lover of all things video.
Follow @Ollie Mattison
Ollie Mattison
Apr 24, 2024• Proven solutions
In 2024, the average person will watch 17 hours of video content every week. Improving the quality of your videos can make your content more noticeable.
Fortunately, there are many excellent video quality enhancer tools to choose from. These tools can enhance both the visual and audio clarity of your content. Ultimately, this will enhance your professionalism and reputation as a trustworthy creator.
Are you wondering where to start when selecting an effective, user-friendly video enhancer? Here are some of our top recommendations to help you begin.
- Part 2: 5 Free AI Video Enhancers [Software Options]
- Part 3: Top 2 4K Video Enhancer Online Free Options
- Part 4: How to Choose the Best Video Enhancer
- In this article
Why Do You Need an AI Video Enhancer?
AI video enhancers utilize generative AI to remove noise, stabilize shaky videos, upscale, or enhance their overall appearance. These tools employ machine learning and neural network techniques to analyze videos and apply different effects for enhancement. Trained on extensive datasets, most AI video enhancers can understand video content like faces, scenes, and objects, automatically adjusting imperfections.
Using an AI video enhancer is an excellent way to boost video quality quickly. Unlike traditional methods, AI speeds up the enhancement process significantly. There are additional benefits, such as:
- **Enhanced Media Quality:**AI video enhancers enhance videos automatically with advanced algorithms, maintaining quality, clarity, and detail.
- Noise Reduction: Many AI video enhancer tools effectively reduce visual noise in videos, resulting in cleaner and clearer footage.
- **Reviving Old Clip:**AI video enhancers are adept at restoring old video footage to make it appear more vibrant.
5 Free AI Video Enhancers [Software Options]
Are blurry videos on your large screen getting on your nerves? Thanks to advancements in artificial intelligence (AI), you can now enhance your low-resolution videos for a crystal-clear viewing experience.
Whether you’re a video editor, content creator, or streamer, incorporating an AI video upscaler into your toolkit is a wise choice. Here are the top 5 picks for the best free AI video enhancer software to improve your video editing.
1.Wondershare Filmora - AI Video Enhancer
Pricing:Filmora offers a free trial without exporting.
Wondershare Filmora stands out in video editing by combining comprehensive editing features with AI-powered enhancement tools. With 4K editing, Filmora ensures videos are improved and future-proofed.
In addition to enhancement, Filmora offers over 300 unique transitions and effects catering to creative minds. Audio enthusiasts will enjoy advanced audio tools like audio ducking and equalizers.
Filmora’s standout feature is its motion tracking capability, enabling dynamic video compositions. While beginners may find the abundance of features overwhelming, regular updates and an active online community provide ample support.
Features
- Filmora’s advanced AI video-enhancing algorithms let you convert black-and-white footage to colored ones.
- It boosts frame rates up to 240 FPS using AI-enhanced frame interpolation technology and 4x super-resolution algorithms.
- Filmora enhances videos’ clarity and quality through audio ducking, equalizers, and more.
- This AI Video Enhancer tracks and attaches objects in videos.
- The tool preserves details and enhances quality in slow-motion scenes.
- Offers over 300 unique transitions and effects.
Pros
- Versatile editing and enhancement options.
- This AI video enhancer is designed to assist both beginners and professionals.
- It supports batch processing, enhancing 10+ videos simultaneously.
Cons
- The free version adds a watermark.
2.AVCLabs Video Enhancer AI
Pricing:AVCLabs offers new users a 7-day free trial.
AVCLabs Video Enhancer AI utilizes a neural network to improve video clip quality. With super-resolution AI video upscaling and multi-frame enhancement, it can easily upscale video from SD to HD (720p or 1080p) to 4K and up to 8K in just one click.
With support for various video and audio formats, users can work seamlessly without compatibility issues. A notable feature is its batch processing capability, enabling users to upscale and enhance multiple videos simultaneously, saving time. The real-time preview feature is invaluable for those who wish to see the software’s results before finalizing their project.
Features
- AVCLabs seamlessly enhances any video footage without quality loss. Whether single or multi-frame, you’ll experience smooth transitions and improved frames.
- With AVCLabs’ color correction feature, you can easily adjust each video frame’s brightness, saturation, and contrast. This tool employs AI video upscaling to create larger, more detailed images without sacrificing quality.
- This video enhancement tool offers automatic face refinement to enhance facial details, which is ideal for improving low-quality videos with excessive noise and blurriness.
- The Super Resolution feature recovers high-resolution videos from low-resolution materials by generating additional pixel data to fill gaps, resulting in enhanced output.
- AVCLabs Video Enhancer AI uses a multi-frame convolutional neural network to stabilize video shakes and remove motion artifacts, overlay noise, and grain, producing natural and enhanced results.
Pros
- AVCLabs features a color calibration algorithm that accurately portrays natural colors.
- It allows you to add color to old black-and-white videos.
- The video processing is fully automatic, requiring no manual fine-tuning.
Cons
- The app demands a significant amount of free space, up to 15 GB.
- It is only compatible with Windows and Mac operating systems.
- The free trial adds a watermark from AVC Labs to the videos.
3.UniFab Video Enhancer
Pricing: UniFab provides a 30-day free trial for new AI users and a 30-day money-back guarantee for paid.
UniFab is a comprehensive AI-powered video enhancer to enhance video quality for all types of videos. Standout features like upscaling video to HDR10/Dolby Vision, denoising, and deinterlacing set this tool apart.
The models are regularly updated with the latest advancements in Deep Learning. Whether you’re a novice or an expert, UniFab offers both automatic and manual modes for video enhancement, making it easy to use without requiring complex settings.
Features
- Upgrade any video to 720p, 1080p, or even 4k resolution with remarkable clarity.
- Convert SDR videos to stunning HDR formats like HDR10+ and Dolby Vision. This feature revitalizes your videos, making them significantly more vibrant and immersive.
- Utilize AI technology to deinterlace your videos, ensuring smooth playback and a pristine viewing experience on modern displays.
- Specifically designed for videos captured in low-light conditions or with high ISO settings, this tool intuitively reduces grain and noise, restoring your footage’s true essence without sacrificing detail.
- Experience unprecedented fluidity as the software boosts your videos to an impressive 120FPS using AI. This transforms your content into a smooth motion stream, ideal for high-definition screens and attentive audiences.
Pros
- It allows audio up-mixing to EAC3 5.1/DTS 7.1 through AI.
- Utilizes GPU-accelerated technology.
- Supports video conversion, compression, and editing.
Cons
- The free trial is limited to 3 videos.
- Does not support Mac systems.
4.Topaz Video Enhance AI
Pricing:Topaz video enhancement tool offers a 30-day no-questions-asked refund policy.
Topaz Video Enhance AI enhances video quality by increasing its resolution. It supports batch upscaling of videos and is compatible with DVD, DSLR, Game, and HD stock footage.
Many notable film studios consider Topaz Video Enhance AI one of the best video editing software tools. It is suitable for various uses, such as commercials, movie content, and YouTube videos.
Features
- This free video upscaling software swiftly analyzes video footage quality using AI tools and recreates it into high-resolution videos.
- Topaz offers Gaia CGI and Theia for enhancing CG and animated videos, along with Proteus and Artemis for noise removal and sharpening.
- Easily recover details from any video footage by injecting original details using adjacent frames’ additional information. It detects and corrects visual artifacts formed during compression.
- Topaz provides an automatic mode for quick video quality enhancement and manual fine-tuning options using available controls.
- With this free video enhancer software, preserve video audio tracks and select from different conversion options for optimal output in the final project.
Pros
- Reduces motion artifacts.
- Adds extra frames for smooth, slow-motion videos.
- Enhances video quality up to 8K.
Cons
- AI processing can be time-consuming, sometimes taking hours.
- Requires a high-quality graphics card.
5.HitPaw Video Enhancer
Pricing:HitPaw AI video enhancer offers a 30-day refund guarantee on paid plans.
HitPaw is a user-friendly video enhancer suitable for both beginners and professionals. It features an easy-to-navigate interface, ensuring even those with minimal experience can improve their videos. Despite its simplicity, HitPaw offers robust enhancement tools, including color correction and stabilization. Its extensive support for various video formats eliminates compatibility concerns.
The software prioritizes efficient video enhancement without compromising quality or speed. Comprehensive tutorials help users explore different editing tasks and unlock their content’s full potential.
Features
- Utilize advanced AI algorithms to upscale low-resolution videos for a more appealing look. The AI feature optimizes content for sharper and more vibrant visuals.
- The HitPaw video quality enhancer app uses AI tools to improve detailing on human faces. Apply filters and adjust settings to enhance facial output in videos.
- The app includes a video stabilization feature that eliminates shaky camera movements, producing smoother and clearer videos with a professional touch.
- HitPaw offers an AI video repair option to restore damaged, corrupted, and old videos. It can also use deep learning AI to colorize black-and-white videos.
- Remove noise from videos with the General Denoise feature, making them look sharper, clearer, and newer.
Pros
- Supports various video formats.
- Has a user-friendly and intuitive interface.
- Can repair and enhance animation videos.
Cons
- The free plan has limited editing features.
Top 2 4K Video Enhancer Online Free Options
The AI-enhanced video tools mentioned above excel in their field. However, there are times when you might run out of storage or need a quick fix through your browser. So, here are some online AI tools that can enhance your videos. Unlike offline video enhancer AIs, online tools are easily accessible. While they may offer fewer features than desktop solutions, they are still useful for some editors.
1.Cutout.Pro
Many editing professionals rely on this free AI video enhancer for unlimited video improvements. Cutout.Pro utilizes advanced features such as video upscaling, motion interpolation, deinterlacing, and shake stabilization to enhance overall quality. This tool converts low-quality videos to higher resolutions like 2K, 30fps, and beyond. Moreover, this online tool swiftly reduces visual noise and other motion artifacts from clips using AI.
Features
- Reduce noise, motion artifacts, and improve video resolution significantly with this powerful online video quality enhancer and upscaler. Perfect for enhancing low-resolution videos like 240p, 360p, 480p, and more.
- Pro increases video frame rates without sacrificing quality. Smooth out shaky footage for better slow-motion effects.
- This tool enhances video resolution up to 2K at a maximum of 30fps effortlessly. It sharpens and defines your videos, bringing your story to life like a professional.
- This is perfect for filmmakers seeking to enhance footage quality and create professional-looking films. Improve video resolution and quality to unblur, upscale, and smooth videos for cinematic results.
- Enhance the quality of personal videos as this tool features shake stabilization for professional results.
- This video enhancer is ideal for professionals creating cinematic frames and restoring old footage. It’s also great for individuals looking to improve the quality of compressed videos downloaded from social media platforms like YouTube, Netflix, and TikTok.
Pros
- It boosts video frame rates and enables HD clip exports.
- Users can upload videos in MP4, MOV, WebM, and GIF formats for processing.
Cons
- It only offers a 5-second preview of the results after enhancement.
2.Clideo Video Enhancer
Clideo is an online video-enhancing tool that can completely transform any random video. It lets you add special AI effects and filters to adjust the video’s brightness, saturation, and contrast, making it stunning, vibrant, and attractive. You can enhance any video professionally for social media attention or business branding.
When it comes to video-enhancing tools, users seek maximum customization options. Clideo offers various features, functions, and facilities to transform average-looking videos into 4k video resolutions.
Features
- The interface is intuitive, so you don’t need any video editing experience to use it.
- You can enhance your video regardless of format because Clideo works with MP4, WMV, MOV, VOB, AVI, and other popular formats.
- You don’t need to download and install the video enhancer to your device. It’s not only faster but also more secure.
- Enhance multiple videos or images simultaneously.
- Add subtitles with customizable text fonts.
- Text Overlay feature with support for HD resolution.
- Access a media library with social sharing options.
Pros
- User-friendly tool is ideal for beginners.
- Supports multiple formats.
- As an online tool, it saves device storage space.
- Reasonable pricing.
- Provides uninterrupted video editing with customizable features.
Cons
- A premium subscription is required to remove watermarking.
- No offline app available; internet connection always necessary.
- No dedicated mobile app.
How to Choose the Best Video Enhancer
Consider the following to ensure you select the right video enhancer for your needs and creative vision.
1.Type of Content
Think about the type of content you’re working with. Are you creating short-form clips for social media or longer, more complex videos? Different enhancers may better suit different content types, so consider your file type and potential quality issues.
2.Consider The Features You Need
Consider the tools and features you need from your video quality enhancer software. Each system offers different capabilities, so planning can help you find the option that best fits your requirements.
3.Sharing Formats and Requirements
Determine the purpose of your video project and any specific sharing requirements. Understanding your goals will help you plan accordingly, whether for online sharing or commercial use.
4.Your Budget
Keep your budget in mind. Some enhancers offer free features, while others may require a purchase or subscription fee for full access. Budgeting effectively ensures you get the best value for your money while achieving great video results.
Conclusion
The video enhancement landscape has been transformed by artificial intelligence, providing numerous options to enhance your videos’ quality. Whether a professional filmmaker or a casual content creator, free AI video enhancers offer a chance to take your productions to the next level.
Each software has unique strengths, from Wondershare Filmora’s comprehensive editing features to AVCLabs’ neural network-powered upscaling and UniFab’s HDR conversion capabilities. User-friendly options like HitPaw cater to beginners while providing robust enhancement tools.
Moreover, for quick fixes or limited storage, online options like Cutout.Pro and Clideo offer accessible solutions with impressive results. With these advancements, achieving professional-quality videos is now achievable for everyone.
Ollie Mattison
Ollie Mattison is a writer and a lover of all things video.
Follow @Ollie Mattison
Shrink Your Timeline: A Simple Guide to Creating Time Lapse Videos
Time Lapse Software: Create Time Lapse Video
Ollie Mattison
Mar 27, 2024• Proven solutions
You may have seen some time lapse videos already. A sunset motion, flower blooming, traffic and city lights and more time lapse videos. Time lapse is an amazing technique often used to make everything in the video seems moving much faster than in real life, like speed up a video clip and give the illusion of compressed time.
If you have a GoPro Hero 5 Black action camera, check our article abouthow to shoot a time-lapse video with GoPro.
Some phones also allow you to shoot time-lapse video , but we recommend you to use a good camera and video editing software to make better time lapse videos. If you are looking for a time lapse software to make a time lapse video, we recommend Filmora video editor , which is easy to use on both Windows PC and Mac. How to create a time-lapse video with Filmora? Download the software and follow the step-by-step tutorial below.
In this article, we will introduce two methods of creating time lapse video in Filmora:
With built-in slow/fast motion effects, you can use Filmora to make time lapse effects in drag-and-drop. If you want to add filters to your video, Filmora offers more than 150 free filters to use. Check the new features of Filmora to empower your imagination. Download it to have a try!
Download Mac Version ](https://tools.techidaily.com/wondershare/filmora/download/ )
Before we get started, we have summarized some tips for shooting time-lapse videos, hope that will help to shoot a good video footage. If you have some other tips and tricks about shooting time lapse videos, please share it on the comment below.
Tip 1: Keep the Camera/phone stable with camera stabilizer or tripod.
Tip 2: Make sure there is enough space for shooting time-lapse video. Large capacity memory cards are always welcomed.
Tip 3: Charge the battery fully before shooting and prepare a standby battery if you have.
If you wanna make a time lapse video with photos, you need set up your camera to take photos at a proper interval, such as take photo at every five second or use the built-in time lapse shooting settings in your camera. It is recommended to record or take photos for at least 20 minutes because the time lapse video will speed up. OK, now let’s start making the time lapse video:
Tips for Recording Time Lapse Video on iPhone
Method 1: Creating time lapse video from photos
1 Import the original photos to Filmora
After installing and launch Filmora video editor, import the shot time lapse photos to it. Click New Project and then click the Import button to add your photos to the media library. You can also directly drag and drop your video to the program. Then all the imported files will appear as thumbnails in the left of the window.

You can also import the photos from the video shooting device. Just plug in the video camera, click Import from Phone or Camera option in Import menu, and then transfer the target media files to Filmora.
After that, you need to select and drag and drop all the photos to the first video track.
2 Preview the photos
After all your photos are placed in timeline, you can zoom in the timeline or preview it in the Preview window to check if it needs any order adjustment or deletion.
3 Adjust Photo Duration to Create Time lapse Video
Select one of the photos in the timeline and right click on it to select Speed and Duration to open the Custom Speed panel. Go to Duration section, and change the duration of the photo to 00:00:00:01 or other duration based on your needs, and then click OK.

You can also add a background music to make time lapse more professional. You can choose a music sound from the built-in music library or import your own audio file.
4 Export your new video
Place the timeline playhead at the beginner, and play it in Preview window to check the time lapse effects. If everything works fine, click the Export tab and choose the target format and click SETTINGS to output the time lapse video. Here you can change the video format and video and audio parameters such as Bit Rate, Encoder, Resolution and so on.
If you want to save and play your video on iPhone, iPod, iPad and other devices, just switch to the Device tab and choose from the device list. What’s more, you can upload the newly made video file to all popular video sites such as YouTube and Vimeo directly from the interface of Filmora. Or turn to DVD tab to burn your video to DVD for playing on TV.

Method 2: Speed Up to Make a Time lapse Video
In case that you want to make a time lapse video with video footage, below are the step-by-step tutorial:
1 Import Video Footage
Just like importing photos to Filmora, follow the steps to import the video clips to media library.
2 Cut out part of the video for time lapse editing (optional)
Next, drag your video onto the video column in the timeline. Select the loaded video and click the “Play” button. While playing the video, drag the slider bar at the start time and hit the “Split” icon to cut out the part you want to do time lapse editing.

3 Speed up to create time lapse video
Right click on the video clip in the timeline to select Speed and Duration. Then a window will pop up for you to adjust the settings of video. Find the Speed option and drag the slider bar to the right to increase the speed. If you set the playback speed to play at 200% the original speed, then the 30-second clip be only 15 seconds (twice the speed). After that click OK. Click the Play button to preview the result. Filmora now support up to 100x fast mo and 0.01x slow mo.
4 Export your new time lapse video
If you are satisfied with the newly made time lapse video, just click Export to output the video footage.
Conclusion
That’s how to make a cool time lapse video with the time lapse video software Filmora, no matter whether you want to make a time lapse video from photos, or speed up the video to make a time lapse video, you can achieve that with a few clicks.
Download Mac Version ](https://tools.techidaily.com/wondershare/filmora/download/ )
Ollie Mattison
Ollie Mattison is a writer and a lover of all things video.
Follow @Ollie Mattison
Ollie Mattison
Mar 27, 2024• Proven solutions
You may have seen some time lapse videos already. A sunset motion, flower blooming, traffic and city lights and more time lapse videos. Time lapse is an amazing technique often used to make everything in the video seems moving much faster than in real life, like speed up a video clip and give the illusion of compressed time.
If you have a GoPro Hero 5 Black action camera, check our article abouthow to shoot a time-lapse video with GoPro.
Some phones also allow you to shoot time-lapse video , but we recommend you to use a good camera and video editing software to make better time lapse videos. If you are looking for a time lapse software to make a time lapse video, we recommend Filmora video editor , which is easy to use on both Windows PC and Mac. How to create a time-lapse video with Filmora? Download the software and follow the step-by-step tutorial below.
In this article, we will introduce two methods of creating time lapse video in Filmora:
With built-in slow/fast motion effects, you can use Filmora to make time lapse effects in drag-and-drop. If you want to add filters to your video, Filmora offers more than 150 free filters to use. Check the new features of Filmora to empower your imagination. Download it to have a try!
Download Mac Version ](https://tools.techidaily.com/wondershare/filmora/download/ )
Before we get started, we have summarized some tips for shooting time-lapse videos, hope that will help to shoot a good video footage. If you have some other tips and tricks about shooting time lapse videos, please share it on the comment below.
Tip 1: Keep the Camera/phone stable with camera stabilizer or tripod.
Tip 2: Make sure there is enough space for shooting time-lapse video. Large capacity memory cards are always welcomed.
Tip 3: Charge the battery fully before shooting and prepare a standby battery if you have.
If you wanna make a time lapse video with photos, you need set up your camera to take photos at a proper interval, such as take photo at every five second or use the built-in time lapse shooting settings in your camera. It is recommended to record or take photos for at least 20 minutes because the time lapse video will speed up. OK, now let’s start making the time lapse video:
Tips for Recording Time Lapse Video on iPhone
Method 1: Creating time lapse video from photos
1 Import the original photos to Filmora
After installing and launch Filmora video editor, import the shot time lapse photos to it. Click New Project and then click the Import button to add your photos to the media library. You can also directly drag and drop your video to the program. Then all the imported files will appear as thumbnails in the left of the window.
You can also import the photos from the video shooting device. Just plug in the video camera, click Import from Phone or Camera option in Import menu, and then transfer the target media files to Filmora.
After that, you need to select and drag and drop all the photos to the first video track.
2 Preview the photos
After all your photos are placed in timeline, you can zoom in the timeline or preview it in the Preview window to check if it needs any order adjustment or deletion.
3 Adjust Photo Duration to Create Time lapse Video
Select one of the photos in the timeline and right click on it to select Speed and Duration to open the Custom Speed panel. Go to Duration section, and change the duration of the photo to 00:00:00:01 or other duration based on your needs, and then click OK.
You can also add a background music to make time lapse more professional. You can choose a music sound from the built-in music library or import your own audio file.
4 Export your new video
Place the timeline playhead at the beginner, and play it in Preview window to check the time lapse effects. If everything works fine, click the Export tab and choose the target format and click SETTINGS to output the time lapse video. Here you can change the video format and video and audio parameters such as Bit Rate, Encoder, Resolution and so on.
If you want to save and play your video on iPhone, iPod, iPad and other devices, just switch to the Device tab and choose from the device list. What’s more, you can upload the newly made video file to all popular video sites such as YouTube and Vimeo directly from the interface of Filmora. Or turn to DVD tab to burn your video to DVD for playing on TV.
Method 2: Speed Up to Make a Time lapse Video
In case that you want to make a time lapse video with video footage, below are the step-by-step tutorial:
1 Import Video Footage
Just like importing photos to Filmora, follow the steps to import the video clips to media library.
2 Cut out part of the video for time lapse editing (optional)
Next, drag your video onto the video column in the timeline. Select the loaded video and click the “Play” button. While playing the video, drag the slider bar at the start time and hit the “Split” icon to cut out the part you want to do time lapse editing.
3 Speed up to create time lapse video
Right click on the video clip in the timeline to select Speed and Duration. Then a window will pop up for you to adjust the settings of video. Find the Speed option and drag the slider bar to the right to increase the speed. If you set the playback speed to play at 200% the original speed, then the 30-second clip be only 15 seconds (twice the speed). After that click OK. Click the Play button to preview the result. Filmora now support up to 100x fast mo and 0.01x slow mo.
4 Export your new time lapse video
If you are satisfied with the newly made time lapse video, just click Export to output the video footage.
Conclusion
That’s how to make a cool time lapse video with the time lapse video software Filmora, no matter whether you want to make a time lapse video from photos, or speed up the video to make a time lapse video, you can achieve that with a few clicks.
Download Mac Version ](https://tools.techidaily.com/wondershare/filmora/download/ )
Ollie Mattison
Ollie Mattison is a writer and a lover of all things video.
Follow @Ollie Mattison
Also read:
- Updated In 2024, WhatsApp Status Editor Apps Our Top Picks
- New In 2024, Free Online Video Editing Top 10 Trimming Tools 2023 Rankings
- Updated Add Motion to Your Messages Top Text Animation Apps for Phones for 2024
- Updated 2024 Approved Best Photo Video Makers for Stunning Visual Stories
- Updated In 2024, Top 10 Video Editing Apps for Android Devices
- New 2024 Approved Top Mac Video Editors for Creators
- Free and Fabulous Video Editing Software for 32-Bit Windows
- Updated 2024 Approved Pro-Level Jump Cuts Made Easy A Final Cut Pro X Tutorial
- 2024 Approved Commercial-Use Images Without the Cost Best Free Options
- Updated Top 10 Video Editing Software Options Beyond Final Cut Pro X for 2024
- Updated Aspect Ratio Mastery Elevating Your Mobile Design Game
- In 2024, Perfecting Your Facebook Video Cover Tips and Tricks
- Updated Instagram Video Dimensions Explained A Beginners Guide to Aspect Ratios for 2024
- 2024 Approved Free and Clear The Best Android Video Editing Apps Without Watermarks
- How to Extract Audio From YouTube Videos for 2024
- New Free GIF Looping Software for Animated Fun 2023 Review for 2024
- Updated Best Movie Making Apps for Android Top Picks for 2024
- Updated 2024 Approved Unleash Your Creativity Best Free 3D Animation Apps for Mobile
- 3 Best Tools to Hard Reset Samsung Galaxy A15 4G | Dr.fone
- 3 Ways to Track Xiaomi Redmi Note 12R without Them Knowing | Dr.fone
- How to Reset a Realme 11 5G Phone That Is Locked | Dr.fone
- 5 Best Apps for Voice Translation From English to Bangla for 2024
- How to Stabilize Videos with Google Photos App for Free for 2024
- How to Liven Up Your Animate Website on Scroll for 2024
- In 2024, How to Fix Locked Apple ID from iPhone 14 Pro
- Complete Tutorial to Use VPNa to Fake GPS Location On Realme GT Neo 5 | Dr.fone
- 10 Fake GPS Location Apps on Android Of your Motorola Moto G04 | Dr.fone
- In 2024, How to Mirror Apple iPhone 14 to iPad? | Dr.fone
- Title: 2024 Approved Transform Your 3GP Videos Top Free Rotation Software Compared
- Author: Emma
- Created at : 2024-04-29 02:35:06
- Updated at : 2024-04-30 02:35:06
- Link: https://video-ai-editor.techidaily.com/2024-approved-transform-your-3gp-videos-top-free-rotation-software-compared/
- License: This work is licensed under CC BY-NC-SA 4.0.
