
:max_bytes(150000):strip_icc():format(webp)/GettyImages-971165690-1e0af1d9299f4fdba1225c2d20c739f2.jpg)
Best 20 Free Adobe Premiere Title Templates to Download
Best 20 Free Adobe Premiere Title Templates to Download
Top 20 Adobe Premiere Title/Intro Templates [Free Download]

Benjamin Arango
Mar 29, 2024• Proven solutions
One of the things that can make your output stand out from the crowd is the titles. Many people think creating eye-catching title effects is beyond them, but with Premiere Pro, you really couldn’t be more wrong.
As Premiere Pro doesn’t have built-in templates, the ability to import free Premiere Pro templates is a must. Anyone need to find a custom title style that suits the project and looks professional and carries impact.
The great thing is that there are many of these resources that are offered entirely free! If you don’t know how to add text/title to Adobe Premiere, here are steps to add text resources .
In this article, we will share with you 20 Free to download Title Templates for Premiere Pro.
- Part1: Top 15 Free Adobe Premiere Pro Title Templates
- Part2: Best 5 Premiere Pro Intro Templates Free Download
- Part3: How to Import and Customize Title Templates in Premiere
You may also like: 10 Free Star Wars Fonts to Make Your Video Amazing
Part 1: Top 15 Free Adobe Premiere Title Templates
Adding the finishing touches to a project, like creating the opening titles or end credits, is often not at the top of anyone’s priority list during the video editing process.
Nonetheless, making a unique opening sequence along with impressive animations in Adobe Premiere Pro can be a time-consuming endeavor, so instead of spending countless hours on producing a perfect combination of text and images, you can just download a title template from the Internet.
1 Premier Pro
Jarle Leirpoll runs this site, and it is a treasure trove of information, help, and advice on Premiere from a man who wrote the book (literally, it’s for sale on the site!) on Premiere.
His first title collection is consisting of 8 templates, including Lower Thirds templates, end credit template, and some special characters. However, it well worth a look around the site as there is plenty more free stuff including presets, and a whole range of tips and tricks to help with your editing.
Features:
- Free Premiere Pro templates to download
- Easy to import the title template to Premiere
- 100% ready to use
In case that you’re just a beginner of video editing software, you can start with Wondershare Filmora (Latest Filmora version 11) to add text to videos, which is powerful but easy-to-use for green hands. Download the Wondershare Filmora below.
There are hundreds of Text and Titles presets available in Filmora, which allows you to add titles, subtitles, scrolling end credits, lower 3d, and openers with ease. You can also apply some animation effects to the selected title presets.
Check the video below to find out how to add text to video with Wondershare Filmora.
Besides the built-in title presets, Wondershare Filmora (Latest Filmora version X) also provides more title templates in Filmstock , which offers lots of special effects templates.
Currently, there are Title Expansion Set, business title set, wedding title set, and lower third expansion set to download. Check the video below to watch the Title Expansion set templates.
 Download Mac Version ](https://tools.techidaily.com/wondershare/filmora/download/ )
Learn more details about How to Add Text to Video with Filmora.
2 Richard Harrington
This is another site that offers templates for download but is also a great place to visit for ideas and information. Richard approaches Premiere from a photographer’s viewpoint, and so has a slightly different view on many topics that are well worth reading.
He has links to a sizable number of templates on Richard Harrington covering a range of styles and subjects, including DVD menus, animated text, and high-quality models. Still, his blog is updated regularly and often includes free downloads.
Features:
- Supports Adobe Premiere intro templates to use
- It includes various templates and presets on Windows and Mac
- More than title templates also has DVD menus and animated text
3 ProVideoCoalition
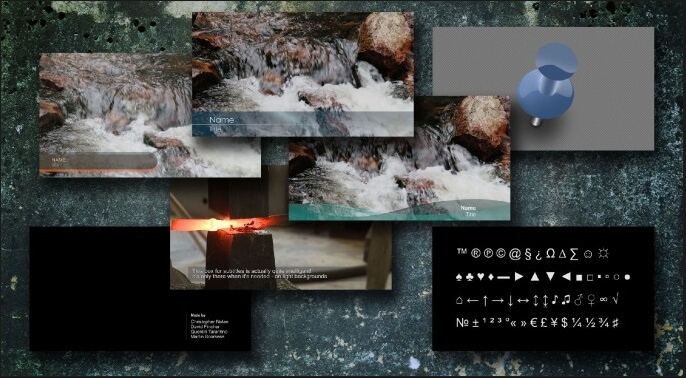
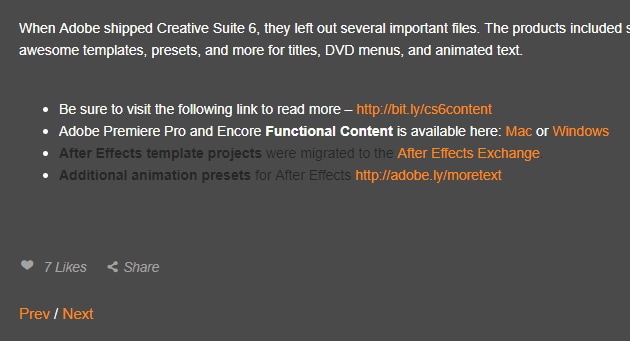
Another all-encompassing site has a huge amount of information and knowledge to be gained. The templates are just part of the story. They are available on Pro Video Coalition and include numerous files and even some free video content showing their implementation.
Also on this page are links to some other sites offering free content or advice on various aspects of Premiere, making it well worth a visit and definitely worth its place in this top 10.
Of particular interest on this site is the regularly updated news which focuses on the latest hardware and software announcements.
Features:
- Supports lower thirds for Adobe Premiere
- You can customize the Premiere Pro intro template free download
- You can create graphic elements
4 Coremelt
This is a commercial site that offers a wide variety of high-quality plugins and templates for several video editing platforms. However, we are on the lookout for that fabulous price of free here, so a little digging finds this page , here you will find ten templates from one of their best selling products offered entirely free.
All templates are quality professionally produced products and worth the visit alone. For anyone who is looking to take their editing output to the professional level, the commercial products on offer here are well worth a look, high quality, and a reasonable cost.
Features:
- It includes 3D text and motion graphics templates
- Free and safe download the Premiere template

5 Bestproaction
Another commercial site. This one has a range of free templates and presets to download for Premiere. Fourteen open items altogether can be downloaded. This site at least deserves a browse through their catalog after a download. The emphasis here is on low cost but high quality, useful templates, and plugins to suit any project.
Even for those of us with a limited budget, there may be something that catches the eye. It is an excellent site for browsing when looking for inspiration.
Features:
- Offers multimedia products like free Premiere Pro text, title templates
- Includes professional Premiere Pro template for videographers
- You can create graphic elements
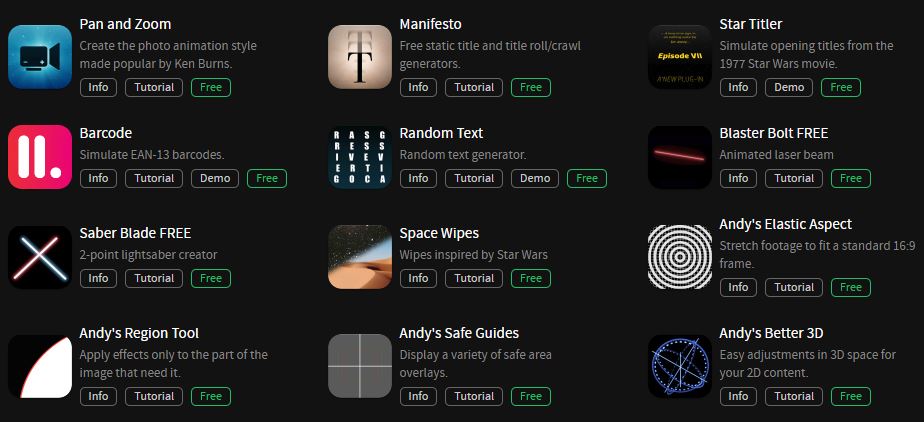
6 FXFactory
This is another commercial site that has a smattering of very high-quality free downloads on offer, including a beautiful template for the original Star Wars movie style scrolling titles.
Again, it is worth browsing the catalog when you are on the site, but all the free products can be found here .
FX Factory has also created some great video tutorials on a variety of aspects of video production that are well worth a view when you are at the site.
Features:
- Free Premiere Pro effects templates to download
- Includes a step by step Premiere Pro tutorial
7 Creative Impatience
A fantastic site full of information, tips, and opinion on all aspects of video production, it’s a great place to spend some time, with the bonus of a bunch of free downloads for Premiere.
Of particular note are the tutorials, an excellent source of information and tricks that you may not have seen before, with their YouTube channel being a great source of free guidance for editors of any sort of experience.
Features:
- Apart from free Premiere Pro templates, you can also find blogs
- Easy steps to make Premiere Pro templates
- Safe and clean to use. All real
8Filmimpact
A commercial site is offering some great products at competitive prices. At first glance, this may not seem to be a useful place for our search for the free stuff.
However, all the products do have a free trial download, and as a bonus, the trial for pack one includes four free to use templates. They are quality products too, and well worth a look.

9 Style4Type
Style4Type is an exciting site regularly updated with new free templates as well as offering technical advice and having further templates available as commercial products.
And to the side is even a free download for a PDF file that walks you through installing and using the templates within Premiere once you have them.
There are already a lot of free templates on offer covering a wide variety of styles, but they are added to with regularity, so it is a site to bookmark for the future.
Features:
- Free title templates to use including texture templates
- Professional tools to better your video

10 Premiere Beat
Lots of information on this site as its been running for a decade, it is a website that imparts a wealth of knowledge along the way on not just video editing but music.
The pack includes 21 Premiere title templates to use. Another site that you will want to visit again and again.
Features:
- High-quality Premiere Pro templates to download
- A large number of Premiere templates to use
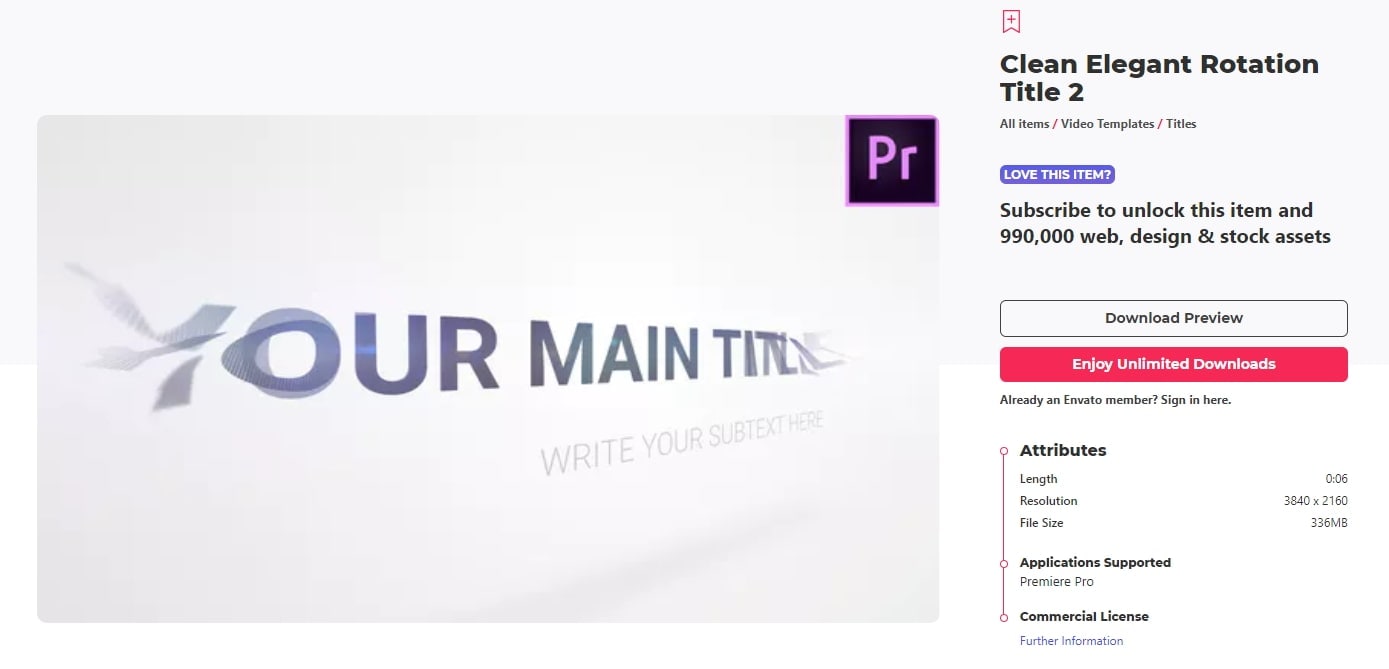
11 Clean Elegant Rotation Title
It is a clean title template without unnecessary parts. If you like simple titles, this one is best for you. You can customize in Premiere easily with a few clicks. For beginners, it also includes free tutorials to use.
Features:
- Simple and clean Premiere title templates
- Customizable in Premiere
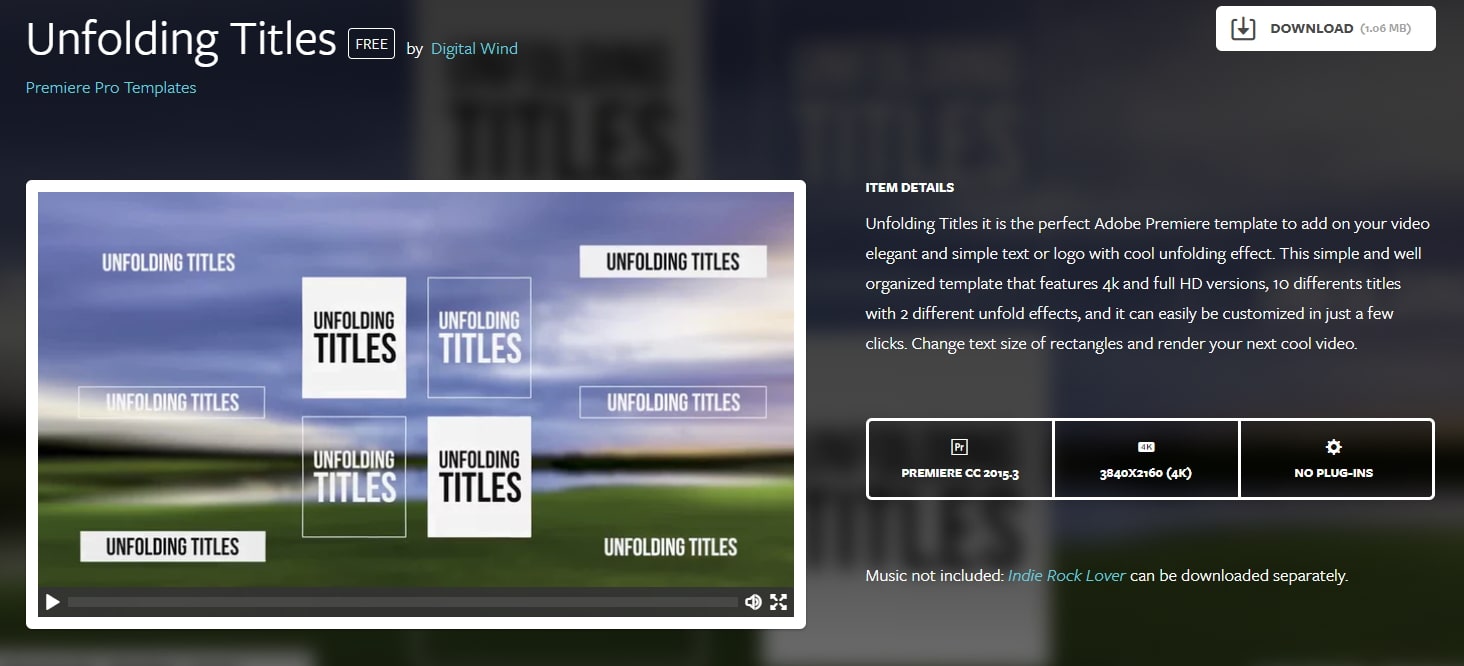
12 Unfolding Titles
It is a clean title template with an unfolding effect. Each text has two unfolding effects, which are convenient to use with customization. It supports 4K and HD versions. In this pack, it wons 10 title formats. After importing Premiere, you can also change text size.
Features:
- 20 unfolding title effects
- Supports rendering your video
13 Orange83
These are five modern title packs for Premiere. With it, you don’t need to use After Effects as you can import them to edit. The best part is you can include your logo and other stuff you like.
Features:
- Include 5 title packs
- Modern and clean titles
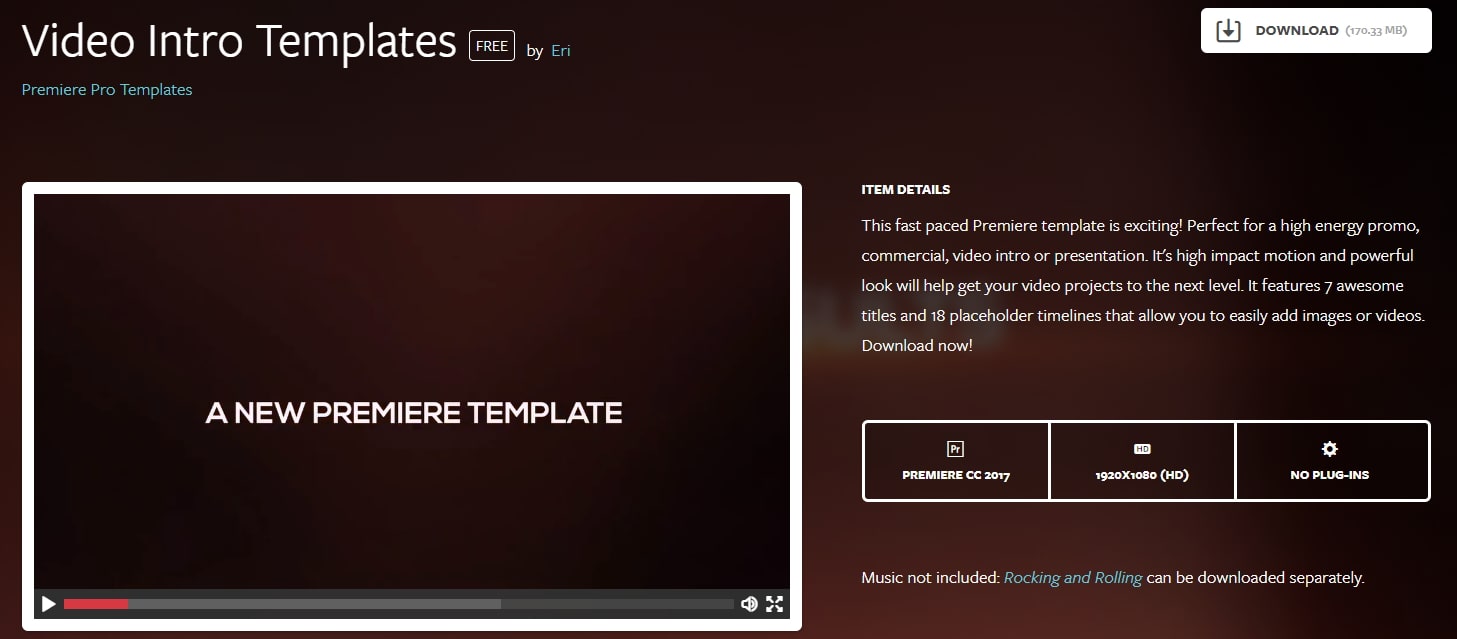
14 Video Intro Templates - Premiere Pro intro template free download
It is a free download Premiere Pro intro template that you can add to your video. It is highly recommended to use promotion and commercial video.
This intro template can be adjusted after you import it to Premiere Pro. This Premiere Pro intro template is HD, so you don’t need to worry about the whole video quality.
Features:
- 1920X1080 (HD) is supported
- This intro template doesn’t include built-in music
15 Elegant Promo - another Premiere Pro intro template free to use
It is intro template for Premiere Pro is modern and free to use. The whole style is young and energetic, which will give viewers a fresh new feeling. It includes 12 images and 26 text layers, and all of them are free to download.
You can use it for your presentation, promotional video, and product video. Besides, it doesn’t require a plug in to use this intro template in Premiere Pro.
Features:
- It includes animated intro elements.
- Use an HD intro template to make a popular video.

These are free templates, and they are enough to get anyone up and running with a new project. As said before, with the commercial enterprises that offer freebies, it’s always worth checking out their paid for output as well, you may not be in the market for it right now, but something may stick for a later time.
Part 2: Bonus: Best 5 Premiere Pro Intro Templates Free Download
Even though all websites we featured in this article offer some free intro templates for Adobe Premiere Pro. However, it is still a much better solution to buy a subscription plan on a platform if you are working on a large number of projects each month.
Let’s see which websites you can use to download the intro and title templates for Premiere Pro.
16. Motion Array
In addition to an impressive library of intro templates, Motion Array offers presets, sound effects, royalty-free music, and stock footage.
Furthermore, you can choose the software version to make sure that the templates you download can be used with the version of Adobe Premiere Pro you have installed on your computer.
The website provides you with powerful search tools, so you can select the resolution of the template, up to 8K, or choose which types of templates are going to be displayed.
Using the free subscription plan can limit your options since you’ll only be able to download free templates, and your upload storage will be limited to just 1GB.
The Pro subscription plan that can be purchased for $54 per month will grant you access to an almost endless selection of title templates as well as a huge selection of plugins for Adobe Premiere Pro.

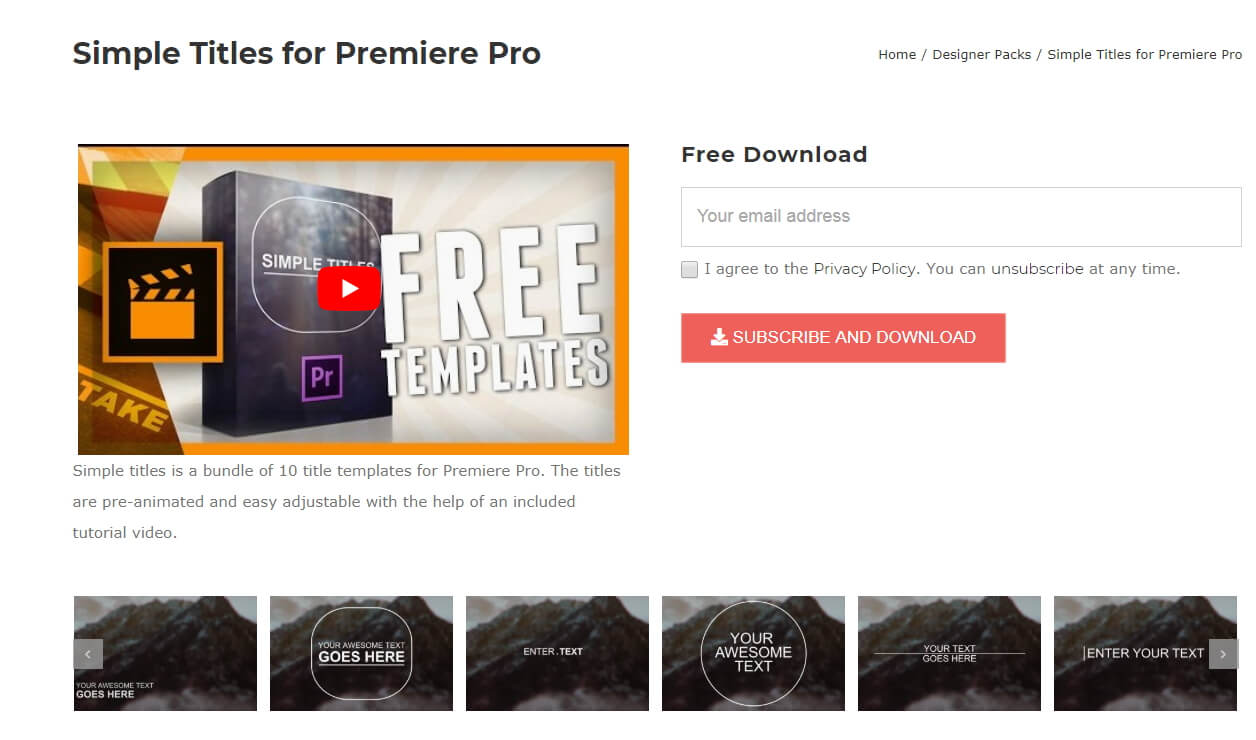
17. Cinecom – Simple Intro for Premiere Pro
It is a designer pack that features ten pre-animated lower-thirds intro templates. You can change the duration of the font and color of the text in each template, and you can choose if you want to download a 1080 or the 4K version of the designer pack.
The templates are compatible with CS6, CC2013, CC2014, and CC2016 versions of the Premiere Pro. The Simple Titles pack can be easily installed, as you just have to drag and drop it into the software.
However, before you can download these title templates, you have to subscribe to Cinecom’s mailing list.
Even though this can be a bit inconvenient, it is very well worth the trouble since you’ll be able to transform or build upon the intro templates and use them freely in all videos you edit in Adobe Premiere Pro.
18. EnvatoElements
You can find much more than intro templates on the EnvatoElements platform since you can choose from 740.000 items you can use for anything from creating a WordPress website to preparing your next business presentation.
The Video Templates category alone features over 4000 items, including Logo Stings or Infographics assets.
There are nearly one hundred available intro templates for Adobe Premiere Pro, but downloading any of them requires you to create an account and purchase a subscription plan.
Prices start from $16.50 per month, and packages include virtually unlimited access to stock photos and videos, video templates, and much more. The EnvatoElements platform also offers assets that can be used with Final Cut Pro, Adobe After Effects or Apple Motion.

19. Videohive
Videohive is a part of the Envato Market platform that also features Web Themes and Templates, Code, Audio, or Graphic sections. It is free to use, but only a limited amount of assets can be downloaded for free.
To download an item, you must purchase it, and prices can range from $16 to $50 for a single title template.
Videohive is also a great source of title templates for Adobe After Effects, as it offers more than 5000 titles and intros that are compatible with this software.
Furthermore, you can download presets for both Premiere Pro and After Effects that can be used to create stop-motion animations, perform color correction, or make the footage look like it was captured with a VHS camera.

20. RocketStock
This option is best suited for video editors who want to create their intros because RocketStok’s Cinematic Style Library extends the scope of options provided by Premiere Pro.
Downloading all fonts except Helvetica Neue is free, but you must check which fonts you can use in commercial projects. You will have no trouble installing the fonts since you can just double-click on the font and follow the on-screen instructions.
Once you’ve installed all the fonts from the library, you can use them to replace the software’s default library. You just have to click on the Replace Style Library option that can be accessed from Premiere Pro’s Title Style tab.
If you don’t feel comfortable creating your titles or if you simply don’t have the time to create your own titles, the Free Cinematic Style Library is not the best choice for you.
On the other hand, Premiere Pro’s users who don’t often use title templates can benefit from downloading RocketStock’s intro library.

Part 3: How to Import and Customize Title Templates in Premiere
If you download the template, all the title templates support customization. You can change its size, font, color, and add 3D effects.
It is easy to import and use it to touch up your video. Check out the steps below to know how to import title templates quickly.
- Install the title template. Choose one template you like and download it to your PC. Remember to unzip it before importing it. Now install them.
- Import the title template. You just need to go to click Effects at the top. Then at right, you will find Presets in the effects section.
- Right-click on presets, and choose Import Presets. If the title template format is .mogrt, you need to open it in Essential Graphics Panel. At the bottom right corner, click the plus icon to import the title template and install it.
- Customize the title template. Once the title template is imported, drag it to the timeline. Click the Editing tab. Here you can customize colors, text, opacities, and positions. There are more options for you to explore.
- You can also copy and paste the title template to another place in the timeline. If you change one place of the pasted template, the original one will remain the same.
Note: each version of Premiere’s interface will look different, but the workflow is similar.
Conclusion
Using title templates can help you achieve a certain visual style faster, so you don’t have to spend a lot of time looking for a perfect background or animating the text.
The Internet provides almost unlimited video editing resources, but not all of these resources can be acquired for free.
Which website you will choose as a source of fresh title templates depends on how often you work on new projects in Adobe Premiere Pro.
If you want to make professional video editing and tired of Premiere, try Filmora! It includes various titles templates to use.
You can sync audio automatically, use detailed color correction to make your title and video like a movie. Download it now (FREE)!
Benjamin Arango
Benjamin Arango is a writer and a lover of all things video.
Follow @Benjamin Arango
Benjamin Arango
Mar 29, 2024• Proven solutions
One of the things that can make your output stand out from the crowd is the titles. Many people think creating eye-catching title effects is beyond them, but with Premiere Pro, you really couldn’t be more wrong.
As Premiere Pro doesn’t have built-in templates, the ability to import free Premiere Pro templates is a must. Anyone need to find a custom title style that suits the project and looks professional and carries impact.
The great thing is that there are many of these resources that are offered entirely free! If you don’t know how to add text/title to Adobe Premiere, here are steps to add text resources .
In this article, we will share with you 20 Free to download Title Templates for Premiere Pro.
- Part1: Top 15 Free Adobe Premiere Pro Title Templates
- Part2: Best 5 Premiere Pro Intro Templates Free Download
- Part3: How to Import and Customize Title Templates in Premiere
You may also like: 10 Free Star Wars Fonts to Make Your Video Amazing
Part 1: Top 15 Free Adobe Premiere Title Templates
Adding the finishing touches to a project, like creating the opening titles or end credits, is often not at the top of anyone’s priority list during the video editing process.
Nonetheless, making a unique opening sequence along with impressive animations in Adobe Premiere Pro can be a time-consuming endeavor, so instead of spending countless hours on producing a perfect combination of text and images, you can just download a title template from the Internet.
1 Premier Pro
Jarle Leirpoll runs this site, and it is a treasure trove of information, help, and advice on Premiere from a man who wrote the book (literally, it’s for sale on the site!) on Premiere.
His first title collection is consisting of 8 templates, including Lower Thirds templates, end credit template, and some special characters. However, it well worth a look around the site as there is plenty more free stuff including presets, and a whole range of tips and tricks to help with your editing.
Features:
- Free Premiere Pro templates to download
- Easy to import the title template to Premiere
- 100% ready to use
In case that you’re just a beginner of video editing software, you can start with Wondershare Filmora (Latest Filmora version 11) to add text to videos, which is powerful but easy-to-use for green hands. Download the Wondershare Filmora below.
There are hundreds of Text and Titles presets available in Filmora, which allows you to add titles, subtitles, scrolling end credits, lower 3d, and openers with ease. You can also apply some animation effects to the selected title presets.
Check the video below to find out how to add text to video with Wondershare Filmora.
Besides the built-in title presets, Wondershare Filmora (Latest Filmora version X) also provides more title templates in Filmstock , which offers lots of special effects templates.
Currently, there are Title Expansion Set, business title set, wedding title set, and lower third expansion set to download. Check the video below to watch the Title Expansion set templates.
Download Mac Version ](https://tools.techidaily.com/wondershare/filmora/download/ )
Learn more details about How to Add Text to Video with Filmora.
2 Richard Harrington
This is another site that offers templates for download but is also a great place to visit for ideas and information. Richard approaches Premiere from a photographer’s viewpoint, and so has a slightly different view on many topics that are well worth reading.
He has links to a sizable number of templates on Richard Harrington covering a range of styles and subjects, including DVD menus, animated text, and high-quality models. Still, his blog is updated regularly and often includes free downloads.
Features:
- Supports Adobe Premiere intro templates to use
- It includes various templates and presets on Windows and Mac
- More than title templates also has DVD menus and animated text
3 ProVideoCoalition
Another all-encompassing site has a huge amount of information and knowledge to be gained. The templates are just part of the story. They are available on Pro Video Coalition and include numerous files and even some free video content showing their implementation.
Also on this page are links to some other sites offering free content or advice on various aspects of Premiere, making it well worth a visit and definitely worth its place in this top 10.
Of particular interest on this site is the regularly updated news which focuses on the latest hardware and software announcements.
Features:
- Supports lower thirds for Adobe Premiere
- You can customize the Premiere Pro intro template free download
- You can create graphic elements
4 Coremelt
This is a commercial site that offers a wide variety of high-quality plugins and templates for several video editing platforms. However, we are on the lookout for that fabulous price of free here, so a little digging finds this page , here you will find ten templates from one of their best selling products offered entirely free.
All templates are quality professionally produced products and worth the visit alone. For anyone who is looking to take their editing output to the professional level, the commercial products on offer here are well worth a look, high quality, and a reasonable cost.
Features:
- It includes 3D text and motion graphics templates
- Free and safe download the Premiere template
5 Bestproaction
Another commercial site. This one has a range of free templates and presets to download for Premiere. Fourteen open items altogether can be downloaded. This site at least deserves a browse through their catalog after a download. The emphasis here is on low cost but high quality, useful templates, and plugins to suit any project.
Even for those of us with a limited budget, there may be something that catches the eye. It is an excellent site for browsing when looking for inspiration.
Features:
- Offers multimedia products like free Premiere Pro text, title templates
- Includes professional Premiere Pro template for videographers
- You can create graphic elements
6 FXFactory
This is another commercial site that has a smattering of very high-quality free downloads on offer, including a beautiful template for the original Star Wars movie style scrolling titles.
Again, it is worth browsing the catalog when you are on the site, but all the free products can be found here .
FX Factory has also created some great video tutorials on a variety of aspects of video production that are well worth a view when you are at the site.
Features:
- Free Premiere Pro effects templates to download
- Includes a step by step Premiere Pro tutorial
7 Creative Impatience
A fantastic site full of information, tips, and opinion on all aspects of video production, it’s a great place to spend some time, with the bonus of a bunch of free downloads for Premiere.
Of particular note are the tutorials, an excellent source of information and tricks that you may not have seen before, with their YouTube channel being a great source of free guidance for editors of any sort of experience.
Features:
- Apart from free Premiere Pro templates, you can also find blogs
- Easy steps to make Premiere Pro templates
- Safe and clean to use. All real
8Filmimpact
A commercial site is offering some great products at competitive prices. At first glance, this may not seem to be a useful place for our search for the free stuff.
However, all the products do have a free trial download, and as a bonus, the trial for pack one includes four free to use templates. They are quality products too, and well worth a look.
9 Style4Type
Style4Type is an exciting site regularly updated with new free templates as well as offering technical advice and having further templates available as commercial products.
And to the side is even a free download for a PDF file that walks you through installing and using the templates within Premiere once you have them.
There are already a lot of free templates on offer covering a wide variety of styles, but they are added to with regularity, so it is a site to bookmark for the future.
Features:
- Free title templates to use including texture templates
- Professional tools to better your video
10 Premiere Beat
Lots of information on this site as its been running for a decade, it is a website that imparts a wealth of knowledge along the way on not just video editing but music.
The pack includes 21 Premiere title templates to use. Another site that you will want to visit again and again.
Features:
- High-quality Premiere Pro templates to download
- A large number of Premiere templates to use
11 Clean Elegant Rotation Title
It is a clean title template without unnecessary parts. If you like simple titles, this one is best for you. You can customize in Premiere easily with a few clicks. For beginners, it also includes free tutorials to use.
Features:
- Simple and clean Premiere title templates
- Customizable in Premiere
12 Unfolding Titles
It is a clean title template with an unfolding effect. Each text has two unfolding effects, which are convenient to use with customization. It supports 4K and HD versions. In this pack, it wons 10 title formats. After importing Premiere, you can also change text size.
Features:
- 20 unfolding title effects
- Supports rendering your video
13 Orange83
These are five modern title packs for Premiere. With it, you don’t need to use After Effects as you can import them to edit. The best part is you can include your logo and other stuff you like.
Features:
- Include 5 title packs
- Modern and clean titles
14 Video Intro Templates - Premiere Pro intro template free download
It is a free download Premiere Pro intro template that you can add to your video. It is highly recommended to use promotion and commercial video.
This intro template can be adjusted after you import it to Premiere Pro. This Premiere Pro intro template is HD, so you don’t need to worry about the whole video quality.
Features:
- 1920X1080 (HD) is supported
- This intro template doesn’t include built-in music
15 Elegant Promo - another Premiere Pro intro template free to use
It is intro template for Premiere Pro is modern and free to use. The whole style is young and energetic, which will give viewers a fresh new feeling. It includes 12 images and 26 text layers, and all of them are free to download.
You can use it for your presentation, promotional video, and product video. Besides, it doesn’t require a plug in to use this intro template in Premiere Pro.
Features:
- It includes animated intro elements.
- Use an HD intro template to make a popular video.
These are free templates, and they are enough to get anyone up and running with a new project. As said before, with the commercial enterprises that offer freebies, it’s always worth checking out their paid for output as well, you may not be in the market for it right now, but something may stick for a later time.
Part 2: Bonus: Best 5 Premiere Pro Intro Templates Free Download
Even though all websites we featured in this article offer some free intro templates for Adobe Premiere Pro. However, it is still a much better solution to buy a subscription plan on a platform if you are working on a large number of projects each month.
Let’s see which websites you can use to download the intro and title templates for Premiere Pro.
16. Motion Array
In addition to an impressive library of intro templates, Motion Array offers presets, sound effects, royalty-free music, and stock footage.
Furthermore, you can choose the software version to make sure that the templates you download can be used with the version of Adobe Premiere Pro you have installed on your computer.
The website provides you with powerful search tools, so you can select the resolution of the template, up to 8K, or choose which types of templates are going to be displayed.
Using the free subscription plan can limit your options since you’ll only be able to download free templates, and your upload storage will be limited to just 1GB.
The Pro subscription plan that can be purchased for $54 per month will grant you access to an almost endless selection of title templates as well as a huge selection of plugins for Adobe Premiere Pro.
17. Cinecom – Simple Intro for Premiere Pro
It is a designer pack that features ten pre-animated lower-thirds intro templates. You can change the duration of the font and color of the text in each template, and you can choose if you want to download a 1080 or the 4K version of the designer pack.
The templates are compatible with CS6, CC2013, CC2014, and CC2016 versions of the Premiere Pro. The Simple Titles pack can be easily installed, as you just have to drag and drop it into the software.
However, before you can download these title templates, you have to subscribe to Cinecom’s mailing list.
Even though this can be a bit inconvenient, it is very well worth the trouble since you’ll be able to transform or build upon the intro templates and use them freely in all videos you edit in Adobe Premiere Pro.
18. EnvatoElements
You can find much more than intro templates on the EnvatoElements platform since you can choose from 740.000 items you can use for anything from creating a WordPress website to preparing your next business presentation.
The Video Templates category alone features over 4000 items, including Logo Stings or Infographics assets.
There are nearly one hundred available intro templates for Adobe Premiere Pro, but downloading any of them requires you to create an account and purchase a subscription plan.
Prices start from $16.50 per month, and packages include virtually unlimited access to stock photos and videos, video templates, and much more. The EnvatoElements platform also offers assets that can be used with Final Cut Pro, Adobe After Effects or Apple Motion.
19. Videohive
Videohive is a part of the Envato Market platform that also features Web Themes and Templates, Code, Audio, or Graphic sections. It is free to use, but only a limited amount of assets can be downloaded for free.
To download an item, you must purchase it, and prices can range from $16 to $50 for a single title template.
Videohive is also a great source of title templates for Adobe After Effects, as it offers more than 5000 titles and intros that are compatible with this software.
Furthermore, you can download presets for both Premiere Pro and After Effects that can be used to create stop-motion animations, perform color correction, or make the footage look like it was captured with a VHS camera.
20. RocketStock
This option is best suited for video editors who want to create their intros because RocketStok’s Cinematic Style Library extends the scope of options provided by Premiere Pro.
Downloading all fonts except Helvetica Neue is free, but you must check which fonts you can use in commercial projects. You will have no trouble installing the fonts since you can just double-click on the font and follow the on-screen instructions.
Once you’ve installed all the fonts from the library, you can use them to replace the software’s default library. You just have to click on the Replace Style Library option that can be accessed from Premiere Pro’s Title Style tab.
If you don’t feel comfortable creating your titles or if you simply don’t have the time to create your own titles, the Free Cinematic Style Library is not the best choice for you.
On the other hand, Premiere Pro’s users who don’t often use title templates can benefit from downloading RocketStock’s intro library.
Part 3: How to Import and Customize Title Templates in Premiere
If you download the template, all the title templates support customization. You can change its size, font, color, and add 3D effects.
It is easy to import and use it to touch up your video. Check out the steps below to know how to import title templates quickly.
- Install the title template. Choose one template you like and download it to your PC. Remember to unzip it before importing it. Now install them.
- Import the title template. You just need to go to click Effects at the top. Then at right, you will find Presets in the effects section.
- Right-click on presets, and choose Import Presets. If the title template format is .mogrt, you need to open it in Essential Graphics Panel. At the bottom right corner, click the plus icon to import the title template and install it.
- Customize the title template. Once the title template is imported, drag it to the timeline. Click the Editing tab. Here you can customize colors, text, opacities, and positions. There are more options for you to explore.
- You can also copy and paste the title template to another place in the timeline. If you change one place of the pasted template, the original one will remain the same.
Note: each version of Premiere’s interface will look different, but the workflow is similar.
Conclusion
Using title templates can help you achieve a certain visual style faster, so you don’t have to spend a lot of time looking for a perfect background or animating the text.
The Internet provides almost unlimited video editing resources, but not all of these resources can be acquired for free.
Which website you will choose as a source of fresh title templates depends on how often you work on new projects in Adobe Premiere Pro.
If you want to make professional video editing and tired of Premiere, try Filmora! It includes various titles templates to use.
You can sync audio automatically, use detailed color correction to make your title and video like a movie. Download it now (FREE)!
Benjamin Arango
Benjamin Arango is a writer and a lover of all things video.
Follow @Benjamin Arango
10 Free Android Video Editing Apps That Won’t Brand Your Videos
A few years ago, editing videos on Android smartphones seemed like a dream that would never come true. But today, content creators prefer to edit their videos themselves without having to hire professionals. As a result, the popularity of editing videos on android is constantly on the rise worldwide.
However, one of the issues many content creators face is looking for the best video editor for Android without watermark. If you encounter this same issue, you are in the right place, as this article will show you the best video editing apps without watermarks for Android devices. Below are ten out of the best video editing app for Android without watermark.
| 1 - Wondershare Filmora | 2 - CapCut |
|---|---|
| 3 - VN Video Editor | 4 - VLLO |
| 5 - GoPro Quik | 6 - ActionDirector |
| 7 - Kruso | 8 - Picsart Photo & Video Editor |
| 9 - Super Studio | 10 - Beecut |
Best Free Video Editing Apps without Watermark for Android in 2024
1. Wondershare Filmora

App Installs Amount: 50,000,000+
Google Play Store Rating: 4.7
You can download Filmora Go from here! Or install through the download button directly.
Wondershare Filmora is a rising video editing tool that can perfectly work for Android users and of course, without a watermark attached while exporting the video. It possesses a huge library of video effects and filters and offers plenty of audio tracks for adding. You can learn more user-created content from User Gallery to empower video creation. It is easy to use and can share on different social media or video platforms directly.
For Win 7 or later (64-bit)
For macOS 10.14 or later


2. CapCut

System Requirement: A minimum of 2GB RAM and 4GB ROM. 8 GB RAM for HD media.
App Installs Amount: 100,000,000+
Google Play Store Rating: 4.4
If you are looking for a good video editor without watermarks for Android, then CapCut is your best bet. The makers of Tiktok created it, so you can easily export your edited videos to Tiktok if you are a Tiktoker. It is also completely free. It is so user-friendly that you can make and edit incredible videos with little or no knowledge of video editing. It also has a wide range of options to pick from, be it effects, transition animations, stock sounds, etc.
To remove the watermark from video in CapCut is easy, just delete the last end screen. For more details, check the video tutorial below:
You may also like: How to Apply 3D Effects in CapCut
3. VN Video Editor

System Requirement: Android version of 9.0 or more, 2GB RAM, and up to 8GB free memory
App Installs Amount: 50,000,000+
Google Play Store Rating: 4.6
This is one of the best video editing apps without watermarks. This app is made mainly for content creators because of its subtitle features. However, it also has over fifty movie-sensitive filters, and more than fifteen animation presets. One of its most notable features is the multi-layer timeframe, where you can edit your videos freely without mixing other elements up with the effects. It also supports exporting 60fps and 4k videos , which means videos edited with this app will be insanely clear. Its more advanced editing tools include curve shifting and multi-track editing.
4. VLLO

System Requirement: A minimum of 1GB RAM and 4GB free memory space.
App Installs Amount: 5,000,000+
Google Play Store Rating: 4.4
The simple interface of this software makes it one of the best video editing apps for android with no watermark. This app is perfect for you if you are a blogger or a Youtuber. Beginners will also have a swell time using this software because it is user-friendly. It can also be used to take and edit pictures. This software is entirely free. You only have to watch a video ad for about ten seconds before you can export your videos.
5. GoPro Quik

Price: Free
System Requirement: A minimum of 2GB RAM and 8GB ROM
App Installs Amount: 10,000,000+
Google Play Store Rating: 4.4
If you are looking for an app that can automatically edit videos for you without you having to do much, then GoPro Quik is that app. It has a hub area called Mural, a very clever AI that shows you your favorite photos and videos. Then, GoPro auto-edits the video into a highlighted one and even adds suitable music. The Mural also serves as storage where you can save your edited contents.
Suppose you don’t want to use the Mural. In that case, You can also manually edit your videos with its fantastic editing tools and features, including the Video-speed control, transition, filters, lovely themes, and incredible effects. It is also a good video editor for android without any watermark.
6. ActionDirector

System Requirement: A minimum of 2GB RAM and 4GB ROM
App Installs Amount: 10,000,000+
Google Play Store Rating: 4.4
ActionDirector is another excellent choice if you want a video editor without watermarks for android. Unfortunately, this software comes with a watermark. After editing a video, you can tap on the cross sign, which prompts you to update to the premium version. This software is excellent with its audio editing, effects customization, speed action effect, etc. You can even make blur videos sharper. Video quality is also not tampered with while using this software. This software is recommended for Instagram and YouTube content creators.
7. Kruso

System Requirement: Android 16 and above
App Installs Amount: 10,000,000+
Google Play Store Rating: Not available on Google play presently
If you are searching for video editing and story-making software, then Kruso should be your go-to. It has a user-friendly interface. Content creators with little to no editing knowledge will find this software very useful. Although Kruso is relatively new, it has proven to be one of the best video editing apps without watermarks for android. This software is also loaded with distinctive features, from its ability to trim, merge and crop videos to its ability to change the background. It also allows custom customization of color and effects.
8. Picsart Photo & Video Editor

System Requirement: A memory space of 500MB and 2GB RAM
App Installs Amount: 500,000,000+
Google Play Store Rating: 4.2
Picsart is undoubtedly one of the most popular and best video editing apps without watermark for androids we have in this era. It has an intuitive interface that is user-friendly for beginners. It’s not only used to edit videos but can be used to edit pictures too. This software is loaded with exciting features, including numerous animated transitions, adding music to videos, subtitles, video trimming and merger, timeline bar, blending modes, and many more.
The overall functionality of this app is simply superb. It is free to use, and it doesn’t add any watermark to its edited content. If you are a beginner with little to no knowledge of video editing, go for Picsart. This software doesn’t need a lot of space.
9. Super Studio

System Requirement: A minimum of 5.0 android version with 2GB RAM and 4GB memory space
App Installs Amount: 1,000,000+
Google Play Store Rating: 4.6
Super Studio is one of the most accessible video editor apps without watermarks for android. You can compress your videos using this app without losing your video quality. It is entirely free to use too. It also has dynamic video editing features like the video merger, adding subtitles, adding background music, video trimmer, adding stickers to make your video more colorful, applying multiple free filters and effects, etc. It also supports the export of 4k and HD videos.
10. Beecut

System Requirement: Android version of 7.0 and above and a 4GB ROM and 2GB RAM space. A minimum of 2GB RAM and 8GB ROM
App Installs Amount: 500,000+
Google Play Store Rating: 2.7
Beecut is an application by a software developer called APOWERSOFT. It is effortless to navigate because of its user-friendly interface. You can edit videos with excellent results within minutes. This software is one of the simple and free video editor apps without watermarks for androids. You can get rid of the watermark without having to watch any video ad.
Some of its most attractive features are the text formatting, mosaic effect if you want to blur parts of your video, transitions options, and beautiful templates. It also features a drag and drop option, multiple timeframes layers, unique overlays, filters, etc. You can also do a voice-over when using this software. It, however, doesn’t support the export of 4k videos, and it can be buggy.
Editing videos on desktop? Don’t miss these free video editing software without a watermark on your computer.
For Win 7 or later (64-bit)
For macOS 10.14 or later
Final Thoughts
Now, you can make and edit videos without watermarks with these applications that we have picked for you. However, your preference should be based on the features you want to use to edit your videos. Also, some applications need you to watch ads, and they have been highlighted in the article. So if you don’t want to watch ads before removing the watermark, do not use them.
Best Free Video Editing Apps without Watermark for Android in 2024
1. Wondershare Filmora
App Installs Amount: 50,000,000+
Google Play Store Rating: 4.7
You can download Filmora Go from here! Or install through the download button directly.
Wondershare Filmora is a rising video editing tool that can perfectly work for Android users and of course, without a watermark attached while exporting the video. It possesses a huge library of video effects and filters and offers plenty of audio tracks for adding. You can learn more user-created content from User Gallery to empower video creation. It is easy to use and can share on different social media or video platforms directly.
For Win 7 or later (64-bit)
For macOS 10.14 or later
2. CapCut
System Requirement: A minimum of 2GB RAM and 4GB ROM. 8 GB RAM for HD media.
App Installs Amount: 100,000,000+
Google Play Store Rating: 4.4
If you are looking for a good video editor without watermarks for Android, then CapCut is your best bet. The makers of Tiktok created it, so you can easily export your edited videos to Tiktok if you are a Tiktoker. It is also completely free. It is so user-friendly that you can make and edit incredible videos with little or no knowledge of video editing. It also has a wide range of options to pick from, be it effects, transition animations, stock sounds, etc.
To remove the watermark from video in CapCut is easy, just delete the last end screen. For more details, check the video tutorial below:
You may also like: How to Apply 3D Effects in CapCut
3. VN Video Editor
System Requirement: Android version of 9.0 or more, 2GB RAM, and up to 8GB free memory
App Installs Amount: 50,000,000+
Google Play Store Rating: 4.6
This is one of the best video editing apps without watermarks. This app is made mainly for content creators because of its subtitle features. However, it also has over fifty movie-sensitive filters, and more than fifteen animation presets. One of its most notable features is the multi-layer timeframe, where you can edit your videos freely without mixing other elements up with the effects. It also supports exporting 60fps and 4k videos , which means videos edited with this app will be insanely clear. Its more advanced editing tools include curve shifting and multi-track editing.
4. VLLO
System Requirement: A minimum of 1GB RAM and 4GB free memory space.
App Installs Amount: 5,000,000+
Google Play Store Rating: 4.4
The simple interface of this software makes it one of the best video editing apps for android with no watermark. This app is perfect for you if you are a blogger or a Youtuber. Beginners will also have a swell time using this software because it is user-friendly. It can also be used to take and edit pictures. This software is entirely free. You only have to watch a video ad for about ten seconds before you can export your videos.
5. GoPro Quik
Price: Free
System Requirement: A minimum of 2GB RAM and 8GB ROM
App Installs Amount: 10,000,000+
Google Play Store Rating: 4.4
If you are looking for an app that can automatically edit videos for you without you having to do much, then GoPro Quik is that app. It has a hub area called Mural, a very clever AI that shows you your favorite photos and videos. Then, GoPro auto-edits the video into a highlighted one and even adds suitable music. The Mural also serves as storage where you can save your edited contents.
Suppose you don’t want to use the Mural. In that case, You can also manually edit your videos with its fantastic editing tools and features, including the Video-speed control, transition, filters, lovely themes, and incredible effects. It is also a good video editor for android without any watermark.
6. ActionDirector
System Requirement: A minimum of 2GB RAM and 4GB ROM
App Installs Amount: 10,000,000+
Google Play Store Rating: 4.4
ActionDirector is another excellent choice if you want a video editor without watermarks for android. Unfortunately, this software comes with a watermark. After editing a video, you can tap on the cross sign, which prompts you to update to the premium version. This software is excellent with its audio editing, effects customization, speed action effect, etc. You can even make blur videos sharper. Video quality is also not tampered with while using this software. This software is recommended for Instagram and YouTube content creators.
7. Kruso
System Requirement: Android 16 and above
App Installs Amount: 10,000,000+
Google Play Store Rating: Not available on Google play presently
If you are searching for video editing and story-making software, then Kruso should be your go-to. It has a user-friendly interface. Content creators with little to no editing knowledge will find this software very useful. Although Kruso is relatively new, it has proven to be one of the best video editing apps without watermarks for android. This software is also loaded with distinctive features, from its ability to trim, merge and crop videos to its ability to change the background. It also allows custom customization of color and effects.
8. Picsart Photo & Video Editor
System Requirement: A memory space of 500MB and 2GB RAM
App Installs Amount: 500,000,000+
Google Play Store Rating: 4.2
Picsart is undoubtedly one of the most popular and best video editing apps without watermark for androids we have in this era. It has an intuitive interface that is user-friendly for beginners. It’s not only used to edit videos but can be used to edit pictures too. This software is loaded with exciting features, including numerous animated transitions, adding music to videos, subtitles, video trimming and merger, timeline bar, blending modes, and many more.
The overall functionality of this app is simply superb. It is free to use, and it doesn’t add any watermark to its edited content. If you are a beginner with little to no knowledge of video editing, go for Picsart. This software doesn’t need a lot of space.
9. Super Studio
System Requirement: A minimum of 5.0 android version with 2GB RAM and 4GB memory space
App Installs Amount: 1,000,000+
Google Play Store Rating: 4.6
Super Studio is one of the most accessible video editor apps without watermarks for android. You can compress your videos using this app without losing your video quality. It is entirely free to use too. It also has dynamic video editing features like the video merger, adding subtitles, adding background music, video trimmer, adding stickers to make your video more colorful, applying multiple free filters and effects, etc. It also supports the export of 4k and HD videos.
10. Beecut
System Requirement: Android version of 7.0 and above and a 4GB ROM and 2GB RAM space. A minimum of 2GB RAM and 8GB ROM
App Installs Amount: 500,000+
Google Play Store Rating: 2.7
Beecut is an application by a software developer called APOWERSOFT. It is effortless to navigate because of its user-friendly interface. You can edit videos with excellent results within minutes. This software is one of the simple and free video editor apps without watermarks for androids. You can get rid of the watermark without having to watch any video ad.
Some of its most attractive features are the text formatting, mosaic effect if you want to blur parts of your video, transitions options, and beautiful templates. It also features a drag and drop option, multiple timeframes layers, unique overlays, filters, etc. You can also do a voice-over when using this software. It, however, doesn’t support the export of 4k videos, and it can be buggy.
Editing videos on desktop? Don’t miss these free video editing software without a watermark on your computer.
For Win 7 or later (64-bit)
For macOS 10.14 or later
Final Thoughts
Now, you can make and edit videos without watermarks with these applications that we have picked for you. However, your preference should be based on the features you want to use to edit your videos. Also, some applications need you to watch ads, and they have been highlighted in the article. So if you don’t want to watch ads before removing the watermark, do not use them.
Picture Perfect: 5 Valuable Insights Into 16X9 Aspect Ratio Calculators
5 Facts About 16x9 Ratio Calculator You Didn’t Know
An easy yet powerful editor
Numerous effects to choose from
Detailed tutorials provided by the official channel
This article explains major concepts about 16x9 ratio calculator and applies them even if you are a novice.
Read it to conclude the aspect ratio and the type of editing you need for your videos.
In this article
01 [What is Aspect Ratio?](#Part 1)
02 [What’s 16:9 Ratio Calculator?](#Part 2)
03 [Top 16:9 Resolutions](#Part 3)
04 [How to Calculate 16:9 Aspect Ratios?](#Part 4)
05 [How to Use Aspect Ratio Calculator?](#Part 5)
06 [How to Shift Through Aspect Ratio You Prefer in Filmora?](#Part 6)
Part 1 What is aspect ratio?
Aspect ratio is the proportionality ratio that relates between the width and height of the image. When you set your television screen, you often see something like 16:9 in the aspect ratio. These numbers are not related to the quality of the images whatsoever. They mean that the screen’s width will be almost twice as high as its height.
However, most television screens have an aspect ratio that looks like a square. The same does not apply to most cinema screens found in a hall. Thanks to the electricians who made those screens to be rectangular. That makes sure that you don’t miss out on any movie clip because of the low aspect ratio.
Initially, the aspect ratio mainly got restricted to Mathematical aspects like geometry. With time, the term got introduced in the films where it was used to relate the width and height of various images on screens, hence the16*9 aspect ratio calculator.
Usually, the aspect ratio refers to the long side concerning the shorter side of the shape. For example, it can be represented by two unknowns, x: y. The values do not mean much because numbers can substitute them.
Perhaps you have encountered these common aspect ratios: IMAX (1.43:1), Academy Film standard (1.43:1), and the famous golden video with an aspect ratio of 1.6180:1.
Having adequate knowledge about aspect ratios is of great importance. You will have to use an aspect ratio calculator when you want to resize your image to fit the specific location without cutting some sections.
Part 2 What is the 16:9 aspect ratio calculator?
The most significant similarity is the aspect ratio of 16:9. The 16:9 ratio dates back to 2009, when the ratio introduced was declared to be used globally. To prove it, take a minute and check the aspect ratios of your television screen or smartphone. Also, confirm the next time you go to the cinema to watch a movie.
You can take a beautiful photo with a nice image before posting on social media because of the 16:9 aspect ratio. Nowadays, this aspect ratio is a part of most screens and cameras. Even the HD videos always get recorded in the international format ratio.
The16 * 9 aspect ratiocalculator will help you operate correctly for high-quality images. It also helps in the conversion of inches to centimeters and vice versa. For a digital device, pixels are the most common units of images.
Part 3 Top 16:9 resolutions
These are the most common resolutions that are available. The units are in pixels, in descending order.
● 15360×8640 (16K UHD)
● 7680 × 4320 (8K UHD)
● 5120 × 2880 (5K)
● 3840 × 2160 (4K UHD)
● 3200 × 1800 (QHD+)
● 2560 × 1440 (QHD)
● 1920 × 1080 (Full HD)
● 1600 × 900 (HD+)
● 1366 × 768 (WXGA)
● 1280 × 720 (HD)
● 960 × 540 (qHD)
● 854 × 480 (FWVGA)
● 640 × 360 (nHD)
Part 4 How to calculate the 16:9 Aspect ratio?
First, let’s look at the correct pronunciation of the ratio. You can either say it as 16 by 9 or 16 × 9. It implies 16 units of the longest side for each shortest side. It could also mean 32 by 18 or higher values which can still simplify to 16:9. We can also represent the ratio differently when simplified. In this case, a decimal point separates the ratios. For example, 16:9 is represented as 1.78:1 after being simplified.
Earlier screens and monitors produced old ratios like the 4:3. After the recognition of the 16:9 ratios, have made replacements for them. The16*9 ratio calculatoris also the most common. Have you heard of 720p HD, 1080p HD, and others? All of them are still under the 16:9 ratios but expressed differently. For example, a screen of 1920 × 1080p. Check it out here: 2920/1080 equals 16:9.
First, here’s the formula that we will use in this section.
Width (W) /Height (H) = 1.778
Dividing the width and height gives you 1.778, which is still an aspect ratio of 16:9.
1.778 is a constant in the formula that you can use interchangeably to determine the width or height. Here is a couple of examples to illustrate this.
Example 1:
Ben’s video measures 32 panels wide. Find the number of panels he needs to build a 26:9 display.
W/H = 16/9
32/H = 16/9
H =32 × 9/16
H = 18
Therefore, Ben will need 18 panels to install the display unit.
Example 2
Nancy decides to design an image for a post in the ratio 16:9. If it has 720 pixels, calculate the width of the image needed.
W/H = 19/6
W/720 = 19/6
W = 730 × 19/6
Nancy will need 1280 pixels for her image.
Part 5 How to use an aspect ratio calculator?
These calculations may be easy when you’re used to them. Not interested in many calculations? Use the online aspect ratio calculator instead. That will make it easier and save on time. You will only need to have the width and height of the image that if needed. The 16 *9 ratio calculator will give the remaining distance.
Using the calculator is the most preferred method because it is very precise. Supposing you don’t have any idea about the width or height of your image, just key in the aspect ratio and wait for an instant answer. The aspect ratio will still give the same answer, but the calculator is convenient.
The better part, this calculator provides calculations for landscape and portrait orientation for images. Follow these steps to use the calculator:
Step 1: Go to https://insaneimpact.com/aspect-ratio-calculator/
Step 2: Enter units of width and height in the respective tabs provided and instantly get your aspect ratio.

Part 6 How to shift through aspect ratio you prefer in Filmora?
As you edit videos, adjust them to ensure they fit in an email as an attachment. That will help you upload them easily after you have used some video editing tools. This article elaborates more by using Wondershare Filmora.
Here’s why we recommend Wondershare Filmora Video Editor
The obvious reason is many features that will help you edit the video like a pro. For instance, you can resize, zoom and highlight the best parts of the video. These are some features of Wondershare Filmora’s video editing capabilities.
● Effortlessly resize the sizes of videos and aspect ratios
● Cropping the video to highlight an object
● Addition of effects and more videos
● Uploading edited videos online
● Supports diverse operating systems for smartphones and desktops
Navigating Through Various Aspect Ratios Using Wondershare Filmora

Wondershare Filmora - Best Video Editor for Mac/Windows
5,481,435 people have downloaded it.
Build unique custom animations without breaking a sweat.
Focus on creating epic stories and leave the details to Filmora’s auto features.
Start a creative adventure with drag & drop effects and endless possibilities.
Filmora simplifies advanced features to save you time and effort.
Filmora cuts out repetition so you can move on to your next creative breakthrough.
Different social media platforms will only allow users to upload videos of specified sizes. Therefore, it is imperative to know the right size for your videos. Let me take you through ways of changing an aspect ratio for the image to have the required height and width.
Step 1: Select your projects’ aspect ratio.

Upon opening Wondershare Filmora, a window will pop up on the screen to allow you to select the aspect ratio. There are three options to choose widescreen, standard, and portrait with aspect ratios of 16:9, 4:3, and 1.1, respectively. select the one that you require and click “New Project.”
Step 2: Set the new aspect ratio for the project

Go to File, choose a new project, and then aspect ratio in the editing panel. Please select the one you wish to use and alter it according to your desired format. For instance, you can select a video of 16:9 and reduce it to 1:1.
Step 3: Save the video

Select “Export” to export the video and save it in different formats in the Format tab. Do you feel like playing the video on your phone or any other device? Please move to the device tab and ply it on your smartphone or transfer it into a DVD drive format.
Filmora also provides more advanced features for video editing like rotating, cropping, and scaling. You can also match the colors on your videos, include animations, add effects, track the sounds and even record some background sounds for the video to look good. Go ahead and download for a free trial below to start editing your videos!
Key Takeaways from This Episode
● 1 – A detailed overview of the aspect ratio and aspect ratio calculator.
● 2 – Understanding how to calculate aspect ratios manually and through an aspect ratio calculator.
● 3 – Navigation through different aspect ratios via the wonderful editor, i.e., Wondershare Filmora.
● Finally, a16×9 aspect ratio calculatoris simple to use, provided you follow the steps given. However, an online calculator will make your videos fit in the equipped area. Use Wondershare Filmora for easy editing and changing of the aspect ratio. It is a pro image and video editor and the easiest to use. Start with its trial version by downloading it for free.
This article explains major concepts about 16x9 ratio calculator and applies them even if you are a novice.
Read it to conclude the aspect ratio and the type of editing you need for your videos.
In this article
01 [What is Aspect Ratio?](#Part 1)
02 [What’s 16:9 Ratio Calculator?](#Part 2)
03 [Top 16:9 Resolutions](#Part 3)
04 [How to Calculate 16:9 Aspect Ratios?](#Part 4)
05 [How to Use Aspect Ratio Calculator?](#Part 5)
06 [How to Shift Through Aspect Ratio You Prefer in Filmora?](#Part 6)
Part 1 What is aspect ratio?
Aspect ratio is the proportionality ratio that relates between the width and height of the image. When you set your television screen, you often see something like 16:9 in the aspect ratio. These numbers are not related to the quality of the images whatsoever. They mean that the screen’s width will be almost twice as high as its height.
However, most television screens have an aspect ratio that looks like a square. The same does not apply to most cinema screens found in a hall. Thanks to the electricians who made those screens to be rectangular. That makes sure that you don’t miss out on any movie clip because of the low aspect ratio.
Initially, the aspect ratio mainly got restricted to Mathematical aspects like geometry. With time, the term got introduced in the films where it was used to relate the width and height of various images on screens, hence the16*9 aspect ratio calculator.
Usually, the aspect ratio refers to the long side concerning the shorter side of the shape. For example, it can be represented by two unknowns, x: y. The values do not mean much because numbers can substitute them.
Perhaps you have encountered these common aspect ratios: IMAX (1.43:1), Academy Film standard (1.43:1), and the famous golden video with an aspect ratio of 1.6180:1.
Having adequate knowledge about aspect ratios is of great importance. You will have to use an aspect ratio calculator when you want to resize your image to fit the specific location without cutting some sections.
Part 2 What is the 16:9 aspect ratio calculator?
The most significant similarity is the aspect ratio of 16:9. The 16:9 ratio dates back to 2009, when the ratio introduced was declared to be used globally. To prove it, take a minute and check the aspect ratios of your television screen or smartphone. Also, confirm the next time you go to the cinema to watch a movie.
You can take a beautiful photo with a nice image before posting on social media because of the 16:9 aspect ratio. Nowadays, this aspect ratio is a part of most screens and cameras. Even the HD videos always get recorded in the international format ratio.
The16 * 9 aspect ratiocalculator will help you operate correctly for high-quality images. It also helps in the conversion of inches to centimeters and vice versa. For a digital device, pixels are the most common units of images.
Part 3 Top 16:9 resolutions
These are the most common resolutions that are available. The units are in pixels, in descending order.
● 15360×8640 (16K UHD)
● 7680 × 4320 (8K UHD)
● 5120 × 2880 (5K)
● 3840 × 2160 (4K UHD)
● 3200 × 1800 (QHD+)
● 2560 × 1440 (QHD)
● 1920 × 1080 (Full HD)
● 1600 × 900 (HD+)
● 1366 × 768 (WXGA)
● 1280 × 720 (HD)
● 960 × 540 (qHD)
● 854 × 480 (FWVGA)
● 640 × 360 (nHD)
Part 4 How to calculate the 16:9 Aspect ratio?
First, let’s look at the correct pronunciation of the ratio. You can either say it as 16 by 9 or 16 × 9. It implies 16 units of the longest side for each shortest side. It could also mean 32 by 18 or higher values which can still simplify to 16:9. We can also represent the ratio differently when simplified. In this case, a decimal point separates the ratios. For example, 16:9 is represented as 1.78:1 after being simplified.
Earlier screens and monitors produced old ratios like the 4:3. After the recognition of the 16:9 ratios, have made replacements for them. The16*9 ratio calculatoris also the most common. Have you heard of 720p HD, 1080p HD, and others? All of them are still under the 16:9 ratios but expressed differently. For example, a screen of 1920 × 1080p. Check it out here: 2920/1080 equals 16:9.
First, here’s the formula that we will use in this section.
Width (W) /Height (H) = 1.778
Dividing the width and height gives you 1.778, which is still an aspect ratio of 16:9.
1.778 is a constant in the formula that you can use interchangeably to determine the width or height. Here is a couple of examples to illustrate this.
Example 1:
Ben’s video measures 32 panels wide. Find the number of panels he needs to build a 26:9 display.
W/H = 16/9
32/H = 16/9
H =32 × 9/16
H = 18
Therefore, Ben will need 18 panels to install the display unit.
Example 2
Nancy decides to design an image for a post in the ratio 16:9. If it has 720 pixels, calculate the width of the image needed.
W/H = 19/6
W/720 = 19/6
W = 730 × 19/6
Nancy will need 1280 pixels for her image.
Part 5 How to use an aspect ratio calculator?
These calculations may be easy when you’re used to them. Not interested in many calculations? Use the online aspect ratio calculator instead. That will make it easier and save on time. You will only need to have the width and height of the image that if needed. The 16 *9 ratio calculator will give the remaining distance.
Using the calculator is the most preferred method because it is very precise. Supposing you don’t have any idea about the width or height of your image, just key in the aspect ratio and wait for an instant answer. The aspect ratio will still give the same answer, but the calculator is convenient.
The better part, this calculator provides calculations for landscape and portrait orientation for images. Follow these steps to use the calculator:
Step 1: Go to https://insaneimpact.com/aspect-ratio-calculator/
Step 2: Enter units of width and height in the respective tabs provided and instantly get your aspect ratio.
Part 6 How to shift through aspect ratio you prefer in Filmora?
As you edit videos, adjust them to ensure they fit in an email as an attachment. That will help you upload them easily after you have used some video editing tools. This article elaborates more by using Wondershare Filmora.
Here’s why we recommend Wondershare Filmora Video Editor
The obvious reason is many features that will help you edit the video like a pro. For instance, you can resize, zoom and highlight the best parts of the video. These are some features of Wondershare Filmora’s video editing capabilities.
● Effortlessly resize the sizes of videos and aspect ratios
● Cropping the video to highlight an object
● Addition of effects and more videos
● Uploading edited videos online
● Supports diverse operating systems for smartphones and desktops
Navigating Through Various Aspect Ratios Using Wondershare Filmora
Wondershare Filmora - Best Video Editor for Mac/Windows
5,481,435 people have downloaded it.
Build unique custom animations without breaking a sweat.
Focus on creating epic stories and leave the details to Filmora’s auto features.
Start a creative adventure with drag & drop effects and endless possibilities.
Filmora simplifies advanced features to save you time and effort.
Filmora cuts out repetition so you can move on to your next creative breakthrough.
Different social media platforms will only allow users to upload videos of specified sizes. Therefore, it is imperative to know the right size for your videos. Let me take you through ways of changing an aspect ratio for the image to have the required height and width.
Step 1: Select your projects’ aspect ratio.
Upon opening Wondershare Filmora, a window will pop up on the screen to allow you to select the aspect ratio. There are three options to choose widescreen, standard, and portrait with aspect ratios of 16:9, 4:3, and 1.1, respectively. select the one that you require and click “New Project.”
Step 2: Set the new aspect ratio for the project
Go to File, choose a new project, and then aspect ratio in the editing panel. Please select the one you wish to use and alter it according to your desired format. For instance, you can select a video of 16:9 and reduce it to 1:1.
Step 3: Save the video
Select “Export” to export the video and save it in different formats in the Format tab. Do you feel like playing the video on your phone or any other device? Please move to the device tab and ply it on your smartphone or transfer it into a DVD drive format.
Filmora also provides more advanced features for video editing like rotating, cropping, and scaling. You can also match the colors on your videos, include animations, add effects, track the sounds and even record some background sounds for the video to look good. Go ahead and download for a free trial below to start editing your videos!
Key Takeaways from This Episode
● 1 – A detailed overview of the aspect ratio and aspect ratio calculator.
● 2 – Understanding how to calculate aspect ratios manually and through an aspect ratio calculator.
● 3 – Navigation through different aspect ratios via the wonderful editor, i.e., Wondershare Filmora.
● Finally, a16×9 aspect ratio calculatoris simple to use, provided you follow the steps given. However, an online calculator will make your videos fit in the equipped area. Use Wondershare Filmora for easy editing and changing of the aspect ratio. It is a pro image and video editor and the easiest to use. Start with its trial version by downloading it for free.
Smooth Footage Guaranteed: Best Video Stabilizers for iPhone and Android
Stabilize Shaky Videos After Recording Easily
Wondershare Filmora is one of the most popular video editing software among YouTubers , which provides the video stabilization tool to remove shake from videos within one-click. Download and have a try now.
Gone are the days when creating a movie or short video required a high level of technical expertise and the ability to handle video editing and related chores. With today’s smartphone cameras, anyone can shoot and capture video.
Following the introduction of these breakthrough technologies and their everyday applications, video editing has become a simple task, giving you an understanding of which video stabilizer to use. There are several free and premium video stabilizer software solutions available in the market.
These video editing programs have varied features, prices, and some are difficult to use. It doesn’t matter if you’re a beginner or an expert; there’s a lot of excellent software available. This article will give you a fast rundown of the best and most outstanding free and commercial Video Stabilizer App available.
In this article
01 What is Video Stabilization?
02 Best Video Stabilizer Apps for iPhone and Android
03 What Features Should I Look for in a Video Stabilizer App?
Part 1: What is Video Stabilization?
Video stabilization refers to algorithms that remove undesirable camera tremors and jitters caused by hand jiggling and the unintended camera panning to improve video quality.
Without affecting moving objects or purposeful camera panning, video stabilization technology is used to minimize visual quality loss by decreasing undesired shaking and twitches of an image/video capture equipment. This is especially important in portable imaging equipment, which is more susceptible to vibrations due to its smaller size.
Excessive hand wobbling and purposeful camera panning often result in inconsistent photos, while undesired camera position variations result in unstable image sequences. Video stabilization techniques maintain good visual clarity and steady video footage even under less-than-ideal settings.
It is not always feasible to re-enact a video, and in those cases, we must make amends with what we have. This approach will necessitate particular video stabilization software, which will increase the movie’s transparency, allowing more innovation and modification.
Part 2: Best Video Stabilizer Apps for iPhone and Android
Here are the best video stabilizer apps for iPhone and Android for you to choose from.
1. Emulsio

Emulsio is a fantastic iPhone and iPad video stabilizer software for smoothing down jittery footage. You may modify the stabilizer strength using the tool’s stabilization function. Without leaving the application, you may examine the stabilized footage to the original video. Emulsio provides tools for editing and cutting footage and repairing shaky films.
Emulsio allows you to import movies from any location. It offers camera motion correction in horizontal, vertical, and rotating directions and is capable of removing rolling shutter distortion.
Overall, this app provides accurate control as well as previewing capabilities. It offers time-editing capabilities as well as live comparison capabilities. Finally, you may send altered films by email or social media. However, if you want to remove the watermark, you need to pay.
Using Emulsio to stabilize video on iPhone is easy, all you need to do is importing the video to analyse, and the app will analyse the video for you automatically. After analysing, the video will be stabilized accordingly, and you can then modify it based on your needs.
Emulsio also provides some additional settings, such as stabilization profile, rolling shutter, avoid black borders, and discontinuity handling to improve the stabilization result.
2. Shaky Video Stabilizer

The second one on our list is the Shaky Video Stabilizer app for Android phones, which is simple to use and straightforwardly transforms your video into a much more stabilized one. You can now transform a shaky video into a smooth and motion-stabilized one. Watch the results, which seems like it was shot with a gimbal. There are no watermarks! It’s possible to share it right from your phone. A steady video is more enjoyable to view and post on social media.
It’s easy to use Shaky Video Stabilizer app to remove the shakiness. Choose a video from your library. Begin the process of stabilization, and use the Background or wait. After the video is stabilized, save the result. And now you can examine the video’s Before and After result.
3. VideoStabilizer for KineMaster

KineMaster is a common choice amongst expert YouTubers and social networking experts who want to incorporate more sophisticated editing tools into their films. The VideoStabilizer for KineMaster app is for iPhone and Android both, which makes your videos smoother! This app offers all of the essentials and a large selection of professional editing tools and effects not seen in other apps.
At KineMaster, you can change the color of your movies and improve their visual quality with the press of a button. Its loudness tools take your audio to a professional level, allowing you to easily add voice-overs, background music, and other sound effects.
Advanced capabilities include keyframe animation tools for adding movement to your layers and speed control and quality blending options. Your videos may be exported in 4K or 2160p and directly uploaded to social networking sites.
How to use KineMaster to stabilize video? Well, it is easy as well. Tap the Add button to add a video and then tap Next to continue. And this app will analyse the video automatically. After analysed, you will see the original and the stabilized result in the screen. Tap the Save button and set the quality to High from Medium or Low to Medium, depending on your preference.
4. PowerDirector

The PowerDirector app has many options that allow you to create the ideal film from beginning to end—all on your Android hone or tablet.
Speed adjustment, keyframe controls for transparency and placement, animated text and titles, and video stabilization are just a few of the easy-to-use editing capabilities included in PowerDirector.
You can create fantastic effects with filters, overlays, and blending modes, and the app’s green screen chroma-key editor allows altering your background very simple. This program also includes several fine-tuning tools for splicing sequences, rotating films, and adjusting brightness, color, and saturation. However, if you want to unlocks more complex templates and editing tools, you may need to pay for the premium plan.
Stabilizing videos with PowerDirector on Android phone is not complex. Follow the steps below to find out how.
Step 1: Install the PowerDirector app on your smartphone
Step 2: Launch the app, create a new project, then upload the video you wish to stabilize to it.
Step 3: Select the video from the Timeline and then hit the edit (pencil) icon in the upper-left corner.
Step 4: Simply click the Stabilizer button to discover an option to stabilize the video.
5. Deshake

Deshake offers desktop-quality video stabilization to your iPhone, iPad, and iPod touch, so you can fix all those shaky-hand movies of your favorite moments.
Choose a film from your picture gallery and tweak the parameters while seeing the results in real-time on your phone! It’s super-fast due to a next-generation stabilization technology that surpasses most pro programs and has been thoroughly tested on genuine home movies like yours.
6. LumaFusion

LumaFusion is among the “pro” iPad apps that people frequently request. The sophisticated video editor uses the Apple Pencil and touch screen for people who wish to edit on the move. At the same time, Apple has yet to confirm whether or not Final Cut will be released for iPadOS.
LumaFusion is so beautifully built that you can film and edit on an iPhone while on location and make professional-looking shows without having to transfer all of your clips to an iPad or Mac.
You would save a huge amount of time and work by filming and editing on the same device instead of transferring large video files to another place.
To stabilize video footage with LumaFusion, double tap on the footage in the timeline, and in the Clip Editor pane, tap on the Stabilize button to start stabilizing the video.
Part 3: What Features Should I Look for in a Video Stabilizer App?
There are a lot of features to look for when choosing a video stabilizer for your videos. The application for your iPhone or Android should be easy-to-use. It should also allow the stabilization strength adjustment. Further, never compromise on video quality. Choose one that produces high-quality video results.
The stabilizer app should offer a large variety of format support. Plus, it should have many other editing tools to enhance photos or videos for your future projects.
If you are editing videos on Windows and Mac computers, you can try Wondershare Filmora , which is an easy to use and powerful video editing software for all video content creators. Stabilize video in Filmora video editor is easy. All you need to do is import videos to timeline, enable the Video Stabilization tool, and the video is stabilized automatically.
For Win 7 or later (64-bit)
For macOS 10.12 or later
Conclusion
Well, there you have it – your ideal Video Stabilizer App. Oftentimes, your shaky videos kill the entertaining side of the video. If the video is too shaky, the viewer would lose interest soon and not watch the full video. But that’s not the case anymore. With the advanced technology and so many apps on the market, stabilizing a video has never been easier!
Gone are the days when creating a movie or short video required a high level of technical expertise and the ability to handle video editing and related chores. With today’s smartphone cameras, anyone can shoot and capture video.
Following the introduction of these breakthrough technologies and their everyday applications, video editing has become a simple task, giving you an understanding of which video stabilizer to use. There are several free and premium video stabilizer software solutions available in the market.
These video editing programs have varied features, prices, and some are difficult to use. It doesn’t matter if you’re a beginner or an expert; there’s a lot of excellent software available. This article will give you a fast rundown of the best and most outstanding free and commercial Video Stabilizer App available.
In this article
01 What is Video Stabilization?
02 Best Video Stabilizer Apps for iPhone and Android
03 What Features Should I Look for in a Video Stabilizer App?
Part 1: What is Video Stabilization?
Video stabilization refers to algorithms that remove undesirable camera tremors and jitters caused by hand jiggling and the unintended camera panning to improve video quality.
Without affecting moving objects or purposeful camera panning, video stabilization technology is used to minimize visual quality loss by decreasing undesired shaking and twitches of an image/video capture equipment. This is especially important in portable imaging equipment, which is more susceptible to vibrations due to its smaller size.
Excessive hand wobbling and purposeful camera panning often result in inconsistent photos, while undesired camera position variations result in unstable image sequences. Video stabilization techniques maintain good visual clarity and steady video footage even under less-than-ideal settings.
It is not always feasible to re-enact a video, and in those cases, we must make amends with what we have. This approach will necessitate particular video stabilization software, which will increase the movie’s transparency, allowing more innovation and modification.
Part 2: Best Video Stabilizer Apps for iPhone and Android
Here are the best video stabilizer apps for iPhone and Android for you to choose from.
1. Emulsio
Emulsio is a fantastic iPhone and iPad video stabilizer software for smoothing down jittery footage. You may modify the stabilizer strength using the tool’s stabilization function. Without leaving the application, you may examine the stabilized footage to the original video. Emulsio provides tools for editing and cutting footage and repairing shaky films.
Emulsio allows you to import movies from any location. It offers camera motion correction in horizontal, vertical, and rotating directions and is capable of removing rolling shutter distortion.
Overall, this app provides accurate control as well as previewing capabilities. It offers time-editing capabilities as well as live comparison capabilities. Finally, you may send altered films by email or social media. However, if you want to remove the watermark, you need to pay.
Using Emulsio to stabilize video on iPhone is easy, all you need to do is importing the video to analyse, and the app will analyse the video for you automatically. After analysing, the video will be stabilized accordingly, and you can then modify it based on your needs.
Emulsio also provides some additional settings, such as stabilization profile, rolling shutter, avoid black borders, and discontinuity handling to improve the stabilization result.
2. Shaky Video Stabilizer
The second one on our list is the Shaky Video Stabilizer app for Android phones, which is simple to use and straightforwardly transforms your video into a much more stabilized one. You can now transform a shaky video into a smooth and motion-stabilized one. Watch the results, which seems like it was shot with a gimbal. There are no watermarks! It’s possible to share it right from your phone. A steady video is more enjoyable to view and post on social media.
It’s easy to use Shaky Video Stabilizer app to remove the shakiness. Choose a video from your library. Begin the process of stabilization, and use the Background or wait. After the video is stabilized, save the result. And now you can examine the video’s Before and After result.
3. VideoStabilizer for KineMaster
KineMaster is a common choice amongst expert YouTubers and social networking experts who want to incorporate more sophisticated editing tools into their films. The VideoStabilizer for KineMaster app is for iPhone and Android both, which makes your videos smoother! This app offers all of the essentials and a large selection of professional editing tools and effects not seen in other apps.
At KineMaster, you can change the color of your movies and improve their visual quality with the press of a button. Its loudness tools take your audio to a professional level, allowing you to easily add voice-overs, background music, and other sound effects.
Advanced capabilities include keyframe animation tools for adding movement to your layers and speed control and quality blending options. Your videos may be exported in 4K or 2160p and directly uploaded to social networking sites.
How to use KineMaster to stabilize video? Well, it is easy as well. Tap the Add button to add a video and then tap Next to continue. And this app will analyse the video automatically. After analysed, you will see the original and the stabilized result in the screen. Tap the Save button and set the quality to High from Medium or Low to Medium, depending on your preference.
4. PowerDirector
The PowerDirector app has many options that allow you to create the ideal film from beginning to end—all on your Android hone or tablet.
Speed adjustment, keyframe controls for transparency and placement, animated text and titles, and video stabilization are just a few of the easy-to-use editing capabilities included in PowerDirector.
You can create fantastic effects with filters, overlays, and blending modes, and the app’s green screen chroma-key editor allows altering your background very simple. This program also includes several fine-tuning tools for splicing sequences, rotating films, and adjusting brightness, color, and saturation. However, if you want to unlocks more complex templates and editing tools, you may need to pay for the premium plan.
Stabilizing videos with PowerDirector on Android phone is not complex. Follow the steps below to find out how.
Step 1: Install the PowerDirector app on your smartphone
Step 2: Launch the app, create a new project, then upload the video you wish to stabilize to it.
Step 3: Select the video from the Timeline and then hit the edit (pencil) icon in the upper-left corner.
Step 4: Simply click the Stabilizer button to discover an option to stabilize the video.
5. Deshake
Deshake offers desktop-quality video stabilization to your iPhone, iPad, and iPod touch, so you can fix all those shaky-hand movies of your favorite moments.
Choose a film from your picture gallery and tweak the parameters while seeing the results in real-time on your phone! It’s super-fast due to a next-generation stabilization technology that surpasses most pro programs and has been thoroughly tested on genuine home movies like yours.
6. LumaFusion
LumaFusion is among the “pro” iPad apps that people frequently request. The sophisticated video editor uses the Apple Pencil and touch screen for people who wish to edit on the move. At the same time, Apple has yet to confirm whether or not Final Cut will be released for iPadOS.
LumaFusion is so beautifully built that you can film and edit on an iPhone while on location and make professional-looking shows without having to transfer all of your clips to an iPad or Mac.
You would save a huge amount of time and work by filming and editing on the same device instead of transferring large video files to another place.
To stabilize video footage with LumaFusion, double tap on the footage in the timeline, and in the Clip Editor pane, tap on the Stabilize button to start stabilizing the video.
Part 3: What Features Should I Look for in a Video Stabilizer App?
There are a lot of features to look for when choosing a video stabilizer for your videos. The application for your iPhone or Android should be easy-to-use. It should also allow the stabilization strength adjustment. Further, never compromise on video quality. Choose one that produces high-quality video results.
The stabilizer app should offer a large variety of format support. Plus, it should have many other editing tools to enhance photos or videos for your future projects.
If you are editing videos on Windows and Mac computers, you can try Wondershare Filmora , which is an easy to use and powerful video editing software for all video content creators. Stabilize video in Filmora video editor is easy. All you need to do is import videos to timeline, enable the Video Stabilization tool, and the video is stabilized automatically.
For Win 7 or later (64-bit)
For macOS 10.12 or later
Conclusion
Well, there you have it – your ideal Video Stabilizer App. Oftentimes, your shaky videos kill the entertaining side of the video. If the video is too shaky, the viewer would lose interest soon and not watch the full video. But that’s not the case anymore. With the advanced technology and so many apps on the market, stabilizing a video has never been easier!
Also read:
- Updated 2024 Approved Unwatermark Your TikTok Videos Top Online Tools and Tricks
- New In 2024, Slideshow Mastery A Step-by-Step Guide to Final Cut Pro
- 2024 Approved 11 Exceptional Free Music Recording Programs for Beginners and Pros
- New Mac Movie Making 101 Choosing the Right Software for You for 2024
- 2024 Approved Smooth Operator A Plugin-Free Guide to Skin Retouching in FCPX
- Updated Ultimate Selection Top Android Movie Making Apps for 2024
- Updated In 2024, 10 Free Online Neon Text Creators You Need to Try
- Final Cut Pro Hacks Top 5 Time-Saving Editing Secrets Revealed
- 2024 Approved FCPX Essentials The Ultimate Guide to Learning Final Cut Pro X
- 2024 Approved Unlock Stunning Transitions Top 10 Premiere Pro Plugins
- In 2024, The Ultimate Guide to 4K Proxy Video Editing Top Apps
- 2024 Approved Free MOV Video Merger Tools Top 5 Reviews
- In 2024, Mobile Video Editing Alternatives to PowerDirector Top Picks
- New In 2024, Glowing Complexion in Minutes FCPX Skin Smoothing Tutorial
- Best Video Editing Software Like Sony Vegas for PC for 2024
- Cloud Stop Motion Creation Key Features, Pro Tips, and Substitute Software
- Updated In 2024, Best 6 Video Dubbing Apps
- New Is Virtualdub Still the Best? Exploring Modern Video Editing Alternatives
- Updated In 2024, Shaky Video? Fix It for Free The Best Online Stabilization Tools
- Updated In 2024, Androids Finest Top 10 Alternatives to iMovie for Mobile Video Editing
- New If You Are a Creator and Want to Make Your Contents Intro Look Attractive, You Might Be in Search of an Excellent Intro Maker Website. If Thats the Case, This Article Has Got You Covered
- New The Article Introduces some of the Best Free Online Video Loopers for Windows, Mac and Linux
- Updated 2024 Approved Best iMovie Equivalent Apps for Android Top Picks
- Updated Elevate Your Video Game Best 1080P Editing Software for Creators
- 2024 Approved AVS Video Editor Review Pros, Cons, and Verdict
- Cheap Final Cut Pro Alternatives? Nope, Just Smart Student Savings for 2024
- New 2024 Approved From Screens to Success Mastering Vertical Aspect Ratios for Mobile Devices
- New Converting Video to MP3 Tips for Preserving Sound Quality for 2024
- Updated The Ultimate Video Editor Comparison Sony Vegas vs Adobe Premiere
- New Simplify Your Reaction Video Creation A Step-by-Step Guide with Filmora
- New 2024 Approved Windows 10 Video Editors The Best iMovie Lookalikes
- New Instantly Convert Dailymotion Videos to MP3/MP4 for Free for 2024
- Updated 2024 Approved Unleash FCPX Top 10 Free Plugin Essentials
- New 2024 Approved Top 10 Vlogging Apps for iOS and Android Devices
- 16 Top-Rated AVI Video Cutting Tools for Windows, MAC, Android, and iPhone for 2024
- New Top Picks Windows Movie Maker Replacements Youll Love for 2024
- In 2024, The Ultimate Guide to Apples Best Video Editing Tools
- New 2024 Approved Apple Video Editing Essentials Top Software Choices
- Overview of the Best Vivo T2 Pro 5G Screen Mirroring App | Dr.fone
- In 2024, 4 solution to get rid of pokemon fail to detect location On Motorola Moto G23 | Dr.fone
- How Honor 100 Mirror Screen to PC? | Dr.fone
- In 2024, Tips and Tricks for Setting Up your Vivo Y100 Phone Pattern Lock
- Ways to stop parent tracking your Oppo Find N3 | Dr.fone
- Unlock Your Xiaomi Redmi Note 13 Pro+ 5Gs Potential The Top 20 Lock Screen Apps You Need to Try
- All Must-Knows to Use Fake GPS GO Location Spoofer On Vivo S18 Pro | Dr.fone
- New Best Tips for Better Event Videography for 2024
- Additional Tips About Sinnoh Stone For Apple iPhone 11 Pro | Dr.fone
- In 2024, Step-by-Step Tutorial How To Bypass Samsung Galaxy F54 5G FRP
- Pattern Locks Are Unsafe Secure Your Realme C67 4G Phone Now with These Tips
- Updated How to Turn On/Off Motion Blur in Minecraft, In 2024
- New How to Loop Videos on Android Phones
- FRP Hijacker by Hagard Download and Bypass your Motorola FRP Locks
- In 2024, How to Fake Snapchat Location on Nokia C12 Pro | Dr.fone
- Best Ways to Bypass iCloud Activation Lock from iPhone 14 Plus/iPad/iPod
- New 2024 Approved Is Blender 2D Animation As Awesome As 3D?
- Honor Data Retrieval tool – restore lost data from Honor 90
- How to Come up With the Best Pokemon Team On Samsung Galaxy S23 FE? | Dr.fone
- 11 Proven Solutions to Fix Google Play Store Not Working Issue on Nokia C02 | Dr.fone
- Fix Cant Take Screenshot Due to Security Policy on Realme 12+ 5G | Dr.fone
- In 2024, Your Account Has Been Disabled in the App Store and iTunes On iPhone XS Max?
- Fix the Error of Unfortunately the Process.com.android.phone Has Stopped on HTC U23 Pro | Dr.fone
- 3 Easy Solutions to Hard Reset Samsung Galaxy A54 5G | Dr.fone
- How to Share Location in Messenger On Vivo Y200e 5G? | Dr.fone
- Repair Video Tool - Repair all your damaged video files of Nokia C22 on Windows
- New In 2024, AI Has Influenced All Video Editors to Speed up Editing. This Article Discusses the Significance of AI Slow Motion and the Tools that Offer It
- New Looking for the Best Alternatives of iPad Compatible Slideshow Applications to Design High End Graphic Presentations? Rest Assured, You Have Landed at the Correct Spot
- Unlocking the Power of Smart Lock A Beginners Guide for Vivo Y02T Users
- Solutions to restore deleted files from Realme Narzo N53
- Title: Best 20 Free Adobe Premiere Title Templates to Download
- Author: Emma
- Created at : 2024-05-19 05:47:09
- Updated at : 2024-05-20 05:47:09
- Link: https://video-ai-editor.techidaily.com/best-20-free-adobe-premiere-title-templates-to-download/
- License: This work is licensed under CC BY-NC-SA 4.0.
