
:max_bytes(150000):strip_icc():format(webp)/connect-tv-to-stereo-system-3135127-83ec0f315fa54c1290555169d689ad88.jpg)
New 2024 Approved Discover the Top Reaction Video Creation Platforms
Discover the Top Reaction Video Creation Platforms
Top 5 Reaction Video Makers

Ollie Mattison
Mar 27, 2024• Proven solutions
A reaction video can be any type of video in which the host reacts to ideas and opinions that are expressed in another video. Reacting to a video that attracts a lot of attention on the Internet might put you in the middle of the debate the video you’re commenting on is covering.
Reaction videos boil down to expressing your attitude about the topic you feel strongly about, but they must also be entertaining to watch. That is why you are going to need software that enables you to capture both your screen and webcam footage, as the audience needs to see the host and what he or she is reacting to. So, in this article we are going to take you through the top 5 reaction video makers you can use on PC and Mac computers.
Top 5 Reaction Video Makers for Windows and Mac
It is worth noting that besides software that enables you to create reaction videos, you are going to need an external microphone , and in some cases lighting and other equipment that is commonly used for the production of YouTube videos . Let’s take a look at what the top 5 reaction video makers have to offer.
1. Filmora
Price: Freemium
Compatibility: Windows, Mac


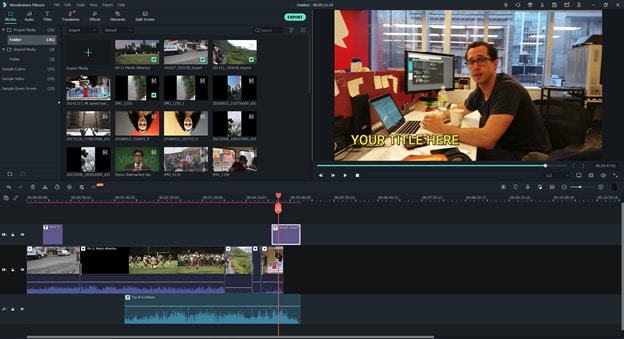
Filmora grants you access to all the tools you are going to need while creating a reaction video Its screen recorder tool enables you to capture your computer’s screen and the webcam footage simultaneously so that you can record the video to which you are recording as well as your reaction at the same time. Watch the video below to explore how Daniel record and make a reaction video with Filmora.
Optionally, you can capture your computer’s screen and your reaction separately and then use Filmora to sync these two video files. The first thing you will have to do if you decide to use this method of creating a reaction video is to create a project and import all footage into it. You should then place the footage on two separate video tracks on the timeline, and readjust the size of each video in the preview window.

Filmora lets you remove the background of the video clips you don’t want to include in the final cut with the human segmentation effect under AI Portrait. This feature allows you to separate people from the video background , and replace them with a new one. And then you can blend the reaction video with the original one fluently. After you complete the video editing process you can export your project to your YouTube or Vimeo account directly from Filmora.

There are several ways to create a reaction video in Filmora, you can read this article to find out the details: How to Make a Reaction Video with Filmora?
Pros
- Excellent screen recording options
- Equipped with a broad range of effects, text overlays, and transitions
- Supports all commonly used video file formats
- Videos can be exported in resolutions up to 4K
Cons
- All reaction videos created with the free version of Filmora are watermarked.
- Requires at least a basic set of video editing skills
2. VSDC
Price: Free
Compatibility: Windows
In order to start making a reaction video with VSDC, you must first record your reaction to the video and make sure that the video you’re reacting to is saved on your computer’s hard drive. You should then create a new project in VSDC, specify the resolution for the entire project and proceed to import all media files you’re going to need during the video editing process, by selecting the Video option from the Add Object menu.
Place the files on the editor’s timeline so that they are positioned one above the other. The reaction video should occupy the full screen, and you can use the preview window to adjust the size of the reaction video. You should than readjust the on-screen position and the size of the video you’re reacting to, before proceeding to preview the resulting video. In case you like the result you should click on the Export button and choose the output file format and the destination to which the reaction video will be exported.
Pros
- No previous video editing experience needed
- Offers a rich selection of transitions and visual effects
- Videos can be exported directly to YouTube from VSDC in resolutions up to 4K
- Offers desktop capturing tools
Cons
- Lacks advanced video editing tools
- Outdated interface design
3. iMovie
Price: Free
Compatibility: macOS, iPhone, iPad
The process of making a reaction video in iMovie isn’t much different from the process of making any other type of video. Before you start working on your new reaction video, you need to make sure that you have all the media files you want you to use in your project. You can then simply import them into iMovie, and place footage of yourself reacting to a video to the timeline. Afterward, you should place the actual video to which you are reacting above or below the video file that contains the footage of your reaction, depending on which video clip you want to use as a background video.
However, the overlaid video is not going to be automatically visible in the preview screen, so you should just click on the Video Overlay Settings and pick the Picture in Picture option. As soon as you select this option the overlay video will become visible in the preview window, where you can adjust its size and position. When ready, you should export your reaction video and upload it to your channel.
Pros
- The quick and easy video editing process
- Available to all Mac users for free
- Excellent for inexperienced video editors
- A rich selection of visual effects
Cons
- No screen capturing tools
- Audio editing options could be better
4. OBS
Price: Free
Compatibility: macOS, Windows, Linux
OBS is a screencasting software that enables you to create live streams or record all actions you perform on your computer’s screen. After you launch OBS, you should select the For Recording option, and this reaction video maker will optimize the project settings automatically. Once the OBS’ main window loads, you just have to specify the sources from which you want to record the footage. Simply right-click anywhere within the Sources tab, select the Add option and choose the Display Capture setting from the submenu.
You can then repeat the same process to select Audio Output Capture option, in order to record the audio from the video you’re reacting to. Afterward, you should head over to the Add menu once more and add the Video Capture Device to the Sources tab. Optionally, you can readjust the size of each video source in the Preview Window, and hit the Start Recording button.
Pros
- Free for PC and Mac users
- Enables users to specify the format of the output video
- Captures videos in HD resolution
- Excellent audio recording features
Cons
- OBS crashes easily
- Not aimed at inexperienced users
5. VegasPro 18
Price: Freemium
Compatibility: Windows
Both the video of your reaction and the video to which you are reacting must be recorded before you start editing them in Sony Vegas Pro. Making a reaction video with this video editing software is a relatively easy task that only requires you to position your footage correctly on the timeline.
The video containing your reaction should be below the video you are commenting on so that the second video can be treated as an overlay. Click on the Event Pan/Crop button and readjust the size and the on-screen location of the video you’re reacting to. When done, you can proceed to sync both videos so that your reactions correspond with the events in the other video. Don’t forget to preview the reaction video you’ve created before exporting it.
Pros
- Offers professional video editing tools
- Grants users full control over the footage
- Intuitive and modernly designed interface
- Supports a broad range of output file formats
Cons
- Aimed only at professional video editors
- Capturing a computer screen with Sony Vegas Pro is not possible
Conclusion
In order to gather thousands of views, comments, and likes, every detail in your reaction videos needs to be perfect. Video reaction makers we featured in this article enable you to have complete creative control over the process of making a reaction video.
Among all these above, if you want to go for a free one, I’ll say you should go for OBS.
If you want to go for a paid one but don’t want to pay too much for it, I’ll suggest you go for Filmora, which provides you several ways to create a reaction video easily on Windows and Mac.
Ollie Mattison
Ollie Mattison is a writer and a lover of all things video.
Follow @Ollie Mattison
Ollie Mattison
Mar 27, 2024• Proven solutions
A reaction video can be any type of video in which the host reacts to ideas and opinions that are expressed in another video. Reacting to a video that attracts a lot of attention on the Internet might put you in the middle of the debate the video you’re commenting on is covering.
Reaction videos boil down to expressing your attitude about the topic you feel strongly about, but they must also be entertaining to watch. That is why you are going to need software that enables you to capture both your screen and webcam footage, as the audience needs to see the host and what he or she is reacting to. So, in this article we are going to take you through the top 5 reaction video makers you can use on PC and Mac computers.
Top 5 Reaction Video Makers for Windows and Mac
It is worth noting that besides software that enables you to create reaction videos, you are going to need an external microphone , and in some cases lighting and other equipment that is commonly used for the production of YouTube videos . Let’s take a look at what the top 5 reaction video makers have to offer.
1. Filmora
Price: Freemium
Compatibility: Windows, Mac
Filmora grants you access to all the tools you are going to need while creating a reaction video Its screen recorder tool enables you to capture your computer’s screen and the webcam footage simultaneously so that you can record the video to which you are recording as well as your reaction at the same time. Watch the video below to explore how Daniel record and make a reaction video with Filmora.
Optionally, you can capture your computer’s screen and your reaction separately and then use Filmora to sync these two video files. The first thing you will have to do if you decide to use this method of creating a reaction video is to create a project and import all footage into it. You should then place the footage on two separate video tracks on the timeline, and readjust the size of each video in the preview window.
Filmora lets you remove the background of the video clips you don’t want to include in the final cut with the human segmentation effect under AI Portrait. This feature allows you to separate people from the video background , and replace them with a new one. And then you can blend the reaction video with the original one fluently. After you complete the video editing process you can export your project to your YouTube or Vimeo account directly from Filmora.
There are several ways to create a reaction video in Filmora, you can read this article to find out the details: How to Make a Reaction Video with Filmora?
Pros
- Excellent screen recording options
- Equipped with a broad range of effects, text overlays, and transitions
- Supports all commonly used video file formats
- Videos can be exported in resolutions up to 4K
Cons
- All reaction videos created with the free version of Filmora are watermarked.
- Requires at least a basic set of video editing skills
2. VSDC
Price: Free
Compatibility: Windows
In order to start making a reaction video with VSDC, you must first record your reaction to the video and make sure that the video you’re reacting to is saved on your computer’s hard drive. You should then create a new project in VSDC, specify the resolution for the entire project and proceed to import all media files you’re going to need during the video editing process, by selecting the Video option from the Add Object menu.
Place the files on the editor’s timeline so that they are positioned one above the other. The reaction video should occupy the full screen, and you can use the preview window to adjust the size of the reaction video. You should than readjust the on-screen position and the size of the video you’re reacting to, before proceeding to preview the resulting video. In case you like the result you should click on the Export button and choose the output file format and the destination to which the reaction video will be exported.
Pros
- No previous video editing experience needed
- Offers a rich selection of transitions and visual effects
- Videos can be exported directly to YouTube from VSDC in resolutions up to 4K
- Offers desktop capturing tools
Cons
- Lacks advanced video editing tools
- Outdated interface design
3. iMovie
Price: Free
Compatibility: macOS, iPhone, iPad
The process of making a reaction video in iMovie isn’t much different from the process of making any other type of video. Before you start working on your new reaction video, you need to make sure that you have all the media files you want you to use in your project. You can then simply import them into iMovie, and place footage of yourself reacting to a video to the timeline. Afterward, you should place the actual video to which you are reacting above or below the video file that contains the footage of your reaction, depending on which video clip you want to use as a background video.
However, the overlaid video is not going to be automatically visible in the preview screen, so you should just click on the Video Overlay Settings and pick the Picture in Picture option. As soon as you select this option the overlay video will become visible in the preview window, where you can adjust its size and position. When ready, you should export your reaction video and upload it to your channel.
Pros
- The quick and easy video editing process
- Available to all Mac users for free
- Excellent for inexperienced video editors
- A rich selection of visual effects
Cons
- No screen capturing tools
- Audio editing options could be better
4. OBS
Price: Free
Compatibility: macOS, Windows, Linux
OBS is a screencasting software that enables you to create live streams or record all actions you perform on your computer’s screen. After you launch OBS, you should select the For Recording option, and this reaction video maker will optimize the project settings automatically. Once the OBS’ main window loads, you just have to specify the sources from which you want to record the footage. Simply right-click anywhere within the Sources tab, select the Add option and choose the Display Capture setting from the submenu.
You can then repeat the same process to select Audio Output Capture option, in order to record the audio from the video you’re reacting to. Afterward, you should head over to the Add menu once more and add the Video Capture Device to the Sources tab. Optionally, you can readjust the size of each video source in the Preview Window, and hit the Start Recording button.
Pros
- Free for PC and Mac users
- Enables users to specify the format of the output video
- Captures videos in HD resolution
- Excellent audio recording features
Cons
- OBS crashes easily
- Not aimed at inexperienced users
5. VegasPro 18
Price: Freemium
Compatibility: Windows
Both the video of your reaction and the video to which you are reacting must be recorded before you start editing them in Sony Vegas Pro. Making a reaction video with this video editing software is a relatively easy task that only requires you to position your footage correctly on the timeline.
The video containing your reaction should be below the video you are commenting on so that the second video can be treated as an overlay. Click on the Event Pan/Crop button and readjust the size and the on-screen location of the video you’re reacting to. When done, you can proceed to sync both videos so that your reactions correspond with the events in the other video. Don’t forget to preview the reaction video you’ve created before exporting it.
Pros
- Offers professional video editing tools
- Grants users full control over the footage
- Intuitive and modernly designed interface
- Supports a broad range of output file formats
Cons
- Aimed only at professional video editors
- Capturing a computer screen with Sony Vegas Pro is not possible
Conclusion
In order to gather thousands of views, comments, and likes, every detail in your reaction videos needs to be perfect. Video reaction makers we featured in this article enable you to have complete creative control over the process of making a reaction video.
Among all these above, if you want to go for a free one, I’ll say you should go for OBS.
If you want to go for a paid one but don’t want to pay too much for it, I’ll suggest you go for Filmora, which provides you several ways to create a reaction video easily on Windows and Mac.
Ollie Mattison
Ollie Mattison is a writer and a lover of all things video.
Follow @Ollie Mattison
Unleash Your Game: Top Gaming Intro Makers
The Game’s world is so enthralling that it catches the eyes of all in no time, whether you are playing a game on the board or heading towards the online game versions. Here, what matters the most is the starting few seconds of the game. That decides whether the user traffic will stay to the gaming website or continue with their search online.
This is the point you will explore with this article via the best online Gaming intro makers. Besides, we shall also list the most suitable Gaming Intro maker online free with no watermark.
So, let’s know more about online Gaming intro makers with this article.
In this article
01 Top 10 Best Online Gaming Intro Makers
02 Best Video Editor to Make Gaming Intro on Windows and Mac
03 FAQs about Making Gaming Intro
Part 1: Top 10 Best Online Gaming Intro Makers
So, here you will find the top 10 online gaming intro makers. Go through all of them and make a wise choice.
1. Makewebvideo
Make Web Video online gaming intro maker gives you the option to create your Gaming Intro with special effects such as lightning, particle effects, or more. You need to follow the online instructions to add text and logo design. That’s it. Soon, you will get your video with its pre-customized video templates.
This online intro maker for gameplay offers you a monthly subscription-based purchase or per video purchase option. And if you are looking for an online gaming intro maker without a watermark, this is the option. However, you need to pay a certain amount to purchase the complete file.
2. Intromaker
Want to bring your Gaming video-making business ahead of others? Then selecting Intro maker will be the right choice. This online intro maker for Gaming provides you with multiple instant gaming intro templates that will boost your speed with customization power. So that the output intro video capable of reflecting a professional look.
Multiple gaming intro templates vary from Minecraft content, Fortnite, Letsplay, and more. What you need to do is to browse through all the available templates, select the best one, click on the ‘Customize’ button that is present at the bottom of each template, followed by some prompts. Then, upload your Logo, enter text and define the color. That’s the whole process. Here, you can create your track with the help of YouTube Audio tracks.

3. Photoadking
Your search for a simple gaming intro maker online ends here. As with the customized templates of this online gaming intro maker, it becomes easy for your Gaming world to give an incredible prior vision. In addition to Gaming intro also suggests multiple similar services such as Gaming Banner-making, Gaming Thumbnail making, YouTube art or thumbnail making, etc.
The steps are:
Select one Template> Upload Logo> Change background color, text, font, size, etc.> Add or modify music> Export to MP4 format to download it finally.
Thus, following these simple Do It Yourself steps, you can bring life to your videos.

4. Canva
Here comes the awesome gaming intro maker online with free no watermark features for all the users. Yes! You heard that right. Canva is such an impactful platform for different artful techniques including creating free Gaming intro for a valuable user like you. Even if you have no experience of video editing, still with the simple interactive interface of Canva online intro maker for gaming gives you access to tools to create your Gaming Intro with few clicks, drag, and drop.
Canva interface allowed you to drag and drop different templates, designs, colors, variations, text, names, etc. to your intro video after choosing desired gaming style. Those who need extensive design requirements can opt for its premium features also.

5. Offeo
Offeo is an online gaming intro maker without a watermark. With this online gaming intro maker, you can also share Gaming intro to multiple social media platforms. That will add more benefits to your efforts to create a valuable userbase. Using Offeo, you can give your intro video a professional and customized look with an easy-to-use drag and drop facility.
It offers many templates to adjust the Gaming intro as per the requirements. You will also be provided with options to change the fonts, adding more animations to the short intro videos. That soon will acquire the form to result in successful marketing campaigns.

6. Motionden
On the trail of creating something to promote your brand, Motionden online Gaming intro maker supports free and premium services for those who wish to have Gaming intro maker online free with no watermark. Even with the free services, you will get various templates to form suitable Gaming intro videos with much ease.
After selecting your required template, Motionden provides you with the customized editor to make necessary changes to the video part in music, color, fonts, or other related areas. Once done with all the editing processes, either download or share directly into different social media platforms such as YouTube, Facebook, etc.

7. Video Creek
Video Creek online intro maker for Gaming provides you the opportunity to customize your Gaming intro without any watermark on the videos. That will make it stand out from others gaming intro makers online free no watermark. Different tools that it can offer to your process are multiple templates, music and sound effects, video editing features, preview the content, and a lot more.
Sign up for free, select the theme, name necessary changes, apply them, and Voila, it is done.
The interface gives you a straightforward environment for even novice users to apply the customized templates and get awesome Gaming Intro videos.

8. Veed
Veed online Gaming intro maker makes you enable create free and unique intros for gaming videos. You can easily add different elements, screen recordings, and effects that you can share to various media platforms. You can even add music, motion effects, text, camera effects, or other special effects to your video with Veed.
To create a gaming intro with Veed, drag-drop the video or select it from the folders. Add different gaming elements or modify the content and then export it directly to your device folder. This way, personalization and customization of the video become super easy with editing facilities.

9. Flexclip
Out of the different services offered by Flexclip, gaming intro making is quite popular. Flexclip Gaming intro maker uses the online medium in an organized way. This tool is trusted by prominent organizations such as YouTube, Google, Unsplash, Microsoft, and a lot more to name. While exploring the software, you will realize different attractive Gaming intro templates are available on the website.
You may need gaming intros for multiple purposes that vary from user to user in terms of social engagement, sales enhancement, or traffic boost. Whatever be your concern, the solution lies with Flexclip. So add your media file, proceed with customization, and export it.

10. Panzoid
Now, the time comes to reveal the trump card with Panzoid online intro maker for Gaming**,** which provides you with instant short intro-making solutions. The selection panel is full of various templates that give your broad spectrum of videos for gaming intro. The Discussion board is here to discuss your requirements, among others.
So, jump-start it by creating an account, then log in to it. After that, you can customize your templates by uploading your brand logo, making changes in the background if needed, doing some interactive creations with Panzoid to finalize your intro, and then getting it ready to share on any platform.
Part 2: Best Video Editor to Make Gaming Intro on Windows and Mac
Last but not least, let’s discuss that gaming Intro maker that does not provide one solution but gives your healthy options to modify and customize your video intro in no time. And that name comes with Wondershare Filmora Video Editor.
Filmora is one of the best video editors for gamers provides you an opportunity to make creative changes to your video with different editing options. Some of its related features are:

- Customizable and popular titles, effects, and transitions for making an attractive gaming intro;
- All-in-one screen recorder and video editor for capture and edit gameplay video easily;
- Keyframing animation to animated any subject in the video;
For Win 7 or later (64-bit)
For macOS 10.12 or later
Part 3: FAQs about Making Gaming Intro
All those who are getting set to be in Game making business or planning to create some online games might have some questions. So, here is a quick look over some of the prime FAQs related to online gaming intro makers.
1. What is Gaming Intro?
Gaming intro refers to that glance provided by a brand, company, or gaming website to reflect the area of specialization your brand is dealing with. It represents the customized short video you want to share or view with prospective users or subscribers for your Gaming industry.
2. How long should a YouTube Gaming intro be?
YouTube Gaming’s intro duration should be exact that is neither too long nor too short, simultaneously must be capable of capturing the viewer’s vision instantly. So the optimal period for gaming intro should be around 10-15 seconds.
Conclusion
The Gaming Intro comes at the front desk while working on your Game videos, console, or online advertising your gaming brand. The arrival of so many gaming intro makers online sometimes creates confusion about which one to choose for your specific purpose. Thus, the article guided you on which online intro maker for Gaming suits your gaming business well. Along with that, you also got informed about online Gaming Intro without a watermark that leaves a better impression.
02 Best Video Editor to Make Gaming Intro on Windows and Mac
03 FAQs about Making Gaming Intro
Part 1: Top 10 Best Online Gaming Intro Makers
So, here you will find the top 10 online gaming intro makers. Go through all of them and make a wise choice.
1. Makewebvideo
Make Web Video online gaming intro maker gives you the option to create your Gaming Intro with special effects such as lightning, particle effects, or more. You need to follow the online instructions to add text and logo design. That’s it. Soon, you will get your video with its pre-customized video templates.
This online intro maker for gameplay offers you a monthly subscription-based purchase or per video purchase option. And if you are looking for an online gaming intro maker without a watermark, this is the option. However, you need to pay a certain amount to purchase the complete file.
2. Intromaker
Want to bring your Gaming video-making business ahead of others? Then selecting Intro maker will be the right choice. This online intro maker for Gaming provides you with multiple instant gaming intro templates that will boost your speed with customization power. So that the output intro video capable of reflecting a professional look.
Multiple gaming intro templates vary from Minecraft content, Fortnite, Letsplay, and more. What you need to do is to browse through all the available templates, select the best one, click on the ‘Customize’ button that is present at the bottom of each template, followed by some prompts. Then, upload your Logo, enter text and define the color. That’s the whole process. Here, you can create your track with the help of YouTube Audio tracks.
3. Photoadking
Your search for a simple gaming intro maker online ends here. As with the customized templates of this online gaming intro maker, it becomes easy for your Gaming world to give an incredible prior vision. In addition to Gaming intro also suggests multiple similar services such as Gaming Banner-making, Gaming Thumbnail making, YouTube art or thumbnail making, etc.
The steps are:
Select one Template> Upload Logo> Change background color, text, font, size, etc.> Add or modify music> Export to MP4 format to download it finally.
Thus, following these simple Do It Yourself steps, you can bring life to your videos.
4. Canva
Here comes the awesome gaming intro maker online with free no watermark features for all the users. Yes! You heard that right. Canva is such an impactful platform for different artful techniques including creating free Gaming intro for a valuable user like you. Even if you have no experience of video editing, still with the simple interactive interface of Canva online intro maker for gaming gives you access to tools to create your Gaming Intro with few clicks, drag, and drop.
Canva interface allowed you to drag and drop different templates, designs, colors, variations, text, names, etc. to your intro video after choosing desired gaming style. Those who need extensive design requirements can opt for its premium features also.
5. Offeo
Offeo is an online gaming intro maker without a watermark. With this online gaming intro maker, you can also share Gaming intro to multiple social media platforms. That will add more benefits to your efforts to create a valuable userbase. Using Offeo, you can give your intro video a professional and customized look with an easy-to-use drag and drop facility.
It offers many templates to adjust the Gaming intro as per the requirements. You will also be provided with options to change the fonts, adding more animations to the short intro videos. That soon will acquire the form to result in successful marketing campaigns.
6. Motionden
On the trail of creating something to promote your brand, Motionden online Gaming intro maker supports free and premium services for those who wish to have Gaming intro maker online free with no watermark. Even with the free services, you will get various templates to form suitable Gaming intro videos with much ease.
After selecting your required template, Motionden provides you with the customized editor to make necessary changes to the video part in music, color, fonts, or other related areas. Once done with all the editing processes, either download or share directly into different social media platforms such as YouTube, Facebook, etc.
7. Video Creek
Video Creek online intro maker for Gaming provides you the opportunity to customize your Gaming intro without any watermark on the videos. That will make it stand out from others gaming intro makers online free no watermark. Different tools that it can offer to your process are multiple templates, music and sound effects, video editing features, preview the content, and a lot more.
Sign up for free, select the theme, name necessary changes, apply them, and Voila, it is done.
The interface gives you a straightforward environment for even novice users to apply the customized templates and get awesome Gaming Intro videos.
8. Veed
Veed online Gaming intro maker makes you enable create free and unique intros for gaming videos. You can easily add different elements, screen recordings, and effects that you can share to various media platforms. You can even add music, motion effects, text, camera effects, or other special effects to your video with Veed.
To create a gaming intro with Veed, drag-drop the video or select it from the folders. Add different gaming elements or modify the content and then export it directly to your device folder. This way, personalization and customization of the video become super easy with editing facilities.
9. Flexclip
Out of the different services offered by Flexclip, gaming intro making is quite popular. Flexclip Gaming intro maker uses the online medium in an organized way. This tool is trusted by prominent organizations such as YouTube, Google, Unsplash, Microsoft, and a lot more to name. While exploring the software, you will realize different attractive Gaming intro templates are available on the website.
You may need gaming intros for multiple purposes that vary from user to user in terms of social engagement, sales enhancement, or traffic boost. Whatever be your concern, the solution lies with Flexclip. So add your media file, proceed with customization, and export it.
10. Panzoid
Now, the time comes to reveal the trump card with Panzoid online intro maker for Gaming**,** which provides you with instant short intro-making solutions. The selection panel is full of various templates that give your broad spectrum of videos for gaming intro. The Discussion board is here to discuss your requirements, among others.
So, jump-start it by creating an account, then log in to it. After that, you can customize your templates by uploading your brand logo, making changes in the background if needed, doing some interactive creations with Panzoid to finalize your intro, and then getting it ready to share on any platform.
Part 2: Best Video Editor to Make Gaming Intro on Windows and Mac
Last but not least, let’s discuss that gaming Intro maker that does not provide one solution but gives your healthy options to modify and customize your video intro in no time. And that name comes with Wondershare Filmora Video Editor.
Filmora is one of the best video editors for gamers provides you an opportunity to make creative changes to your video with different editing options. Some of its related features are:
- Customizable and popular titles, effects, and transitions for making an attractive gaming intro;
- All-in-one screen recorder and video editor for capture and edit gameplay video easily;
- Keyframing animation to animated any subject in the video;
For Win 7 or later (64-bit)
For macOS 10.12 or later
Part 3: FAQs about Making Gaming Intro
All those who are getting set to be in Game making business or planning to create some online games might have some questions. So, here is a quick look over some of the prime FAQs related to online gaming intro makers.
1. What is Gaming Intro?
Gaming intro refers to that glance provided by a brand, company, or gaming website to reflect the area of specialization your brand is dealing with. It represents the customized short video you want to share or view with prospective users or subscribers for your Gaming industry.
2. How long should a YouTube Gaming intro be?
YouTube Gaming’s intro duration should be exact that is neither too long nor too short, simultaneously must be capable of capturing the viewer’s vision instantly. So the optimal period for gaming intro should be around 10-15 seconds.
Conclusion
The Gaming Intro comes at the front desk while working on your Game videos, console, or online advertising your gaming brand. The arrival of so many gaming intro makers online sometimes creates confusion about which one to choose for your specific purpose. Thus, the article guided you on which online intro maker for Gaming suits your gaming business well. Along with that, you also got informed about online Gaming Intro without a watermark that leaves a better impression.
10+ Alternatives to Windows Movie Maker Alternatives
Windows Movie Maker has been a cornerstone tool for video editors for quite a while. There are a lot of amateurs who’ve made use of the free program and have done wonders with it. As it is discontinued, many Windows Movie Maker alternatives claim to offer ‘just the right video editing tool for you,’ few can live up to their promises—and most are very expensive.
We have ten other programs that can be used to create videos that include everything from Apple iMovie to other basic alternatives.
So whether you’re a beginner who wants to learn how to make a movie, a pro looking for an excellent alternative to Windows Movie Maker, or someone who wants to make a simple slide presentation or online video, you’re bound to find a video creation program here.
- Wondershare Filmora
- Avidemux Video Editor
- VirtualDub
- Sony Vegas Movie Studio
- WeVideo
- Lightworks
- ShotCut
- OpenShot
- Movavi Video Editor Plus
- VSDC Free Video Editor
- VideoPad Video Editor
- HitFilm
- Magix Movie Studio
- How To Edit a Video With a Windows Movie Maker Alternative
- Hot FAQs on Windows Movie Maker Alternatives
Part 1: Top 3 Picks for Windows Movie Maker Alternatives
The world’s best video editing software is about to change. We look at three of the most popular and valuable alternatives to Windows Movie Maker.
You will need to consider these alternatives to ensure they meet your expectations and needs.
1. Wondershare Filmora - Best Overall

Filmora is the best Windows Movie Maker Alternative designed according to your convenience.
Ratings: 4.4 Stars out 5
Starting from $49.99
2. Magix Movie Studio - Best for Collages

This alternative offers a variety of tools and plugins for anyone who wants to create professional-level videos in under a minute.
Download on Windows
Ratings: 4 stars out of 5
30-day free trials, then starts from $69.99 all the way to $129
3. Avidemux Video Editor - Best Open-Source Editor

An open-source editor that supports a wide range of formats is free! Avidemux has an interface similar to Windows Movie Maker, which makes it a perfect alternative.
Download on Windows
Ratings: 4.0 stars out of 5
Free Trial
Part 2: Ultimate Overview on 13 Best Alternatives to Windows Movie Maker
We live in visual culture, and we constantly see, capture, upload, and share videos on our smartphones, tablets, and laptops. So, it is only natural that more people seek ways to edit their videos. Windows Movie Maker was one of the most popular video editing apps. So it’s time to dig into the best Windows Movie Maker alternatives, which are arguably better and feature-rich.
| Software | OS | Media Resources | AI editing | Easy to Use | Free Trial |
|---|---|---|---|---|---|
| Wondershare Filmora | WindowsMacMobile | Yes | Yes | Yes | Yes |
| Avidemux | WindowsOS XLinuxBSD | Yes | No | Yes | Yes |
| Virtual Dub | Windows | No | No | Yes | Yes |
| Vegas Movie Studio | Windows | Yes | Yes | No | No |
| WeVideo | Online | Yes | No | Yes | Yes |
| Lightworks | LinuxOS X Windows | Yes | Yes | No | No |
| ShotCut | WindowsMacLinuxBSD | Yes | No | No | Yes |
| OpenShot | WindowsMacLinuxChrome OS | Yes | No | Yes | Yes |
| Movavi Plus | WindowsMac | Yes | No | Yes | Yes |
| VSDC | Windows | Yes | No | Yes | Yes |
| VideoPad | WindowsMaciPad/iPhone | Yes | No | Yes | Yes |
| HitFilm | WindowsMac | Yes | Yes | Yes | Yes |
| Magix Movie Studio | Windows | Yes | Yes | No | Yes |
Part 3: 13 Best Windows Movie Maker Alternatives for Windows
As we all know, Windows Movie Maker is the most used and trusted tool for creating videos in Windows. With its unique features and user-friendly interface, people often use this software to develop short and entertaining videos.
However, the fact is that Windows Movie Maker is not the current best video editing software for creating complex video projects. For this reason, we compiled a list of the 12 best alternatives to offer you a better option for Windows Movie Maker.
1. Wondershare Filmora
Filmora 11 is a powerful, easy-to-use video editor specially designed to streamline your workflow and save you hours weekly. It supports everything from Windows, Mac, and IOS to Android. The latest update to the flagship app includes several key enhancements that result in a much more efficient video creation workflow and one that’s easier to use than its rivals.
Key features
- Preset Templates
- Instant Mode
- Motion Tracking
- AI Editing Effects
- Auto Synchronization
- Plug-ins
Price
- Annual Plan: $49.99
- Perpetual Plan: $79.99
Pros
- Seamless interface for beginners
- Great customer support
- Plenty of effects and preset templates
- 4K video output options
Cons
- Rendering requires too much time
- The mobile app requires separate subscription
Supported OS: Windows , Mac , iOS , Android , iPad
G2 Ratings: 4.4 stars out of 5
Summary
Filmora’s intuitive interface allows experienced and brand-new users to create incredible videos with flawless special effects. Its high ratings and multiple supported formats make it quite popular among users.
2. Avidemux Video Editor
If you are a beginner and want to use a free, open-source software program for basic video editing, then Avidemux is a good choice. The interface is not as fancy as it could be, but there are some presets that’ll save you a lot of time. Avidemux is a cross-platform video editor that allows you to create custom videos, but it doesn’t feature the ability to share the edited footage to social media directly,
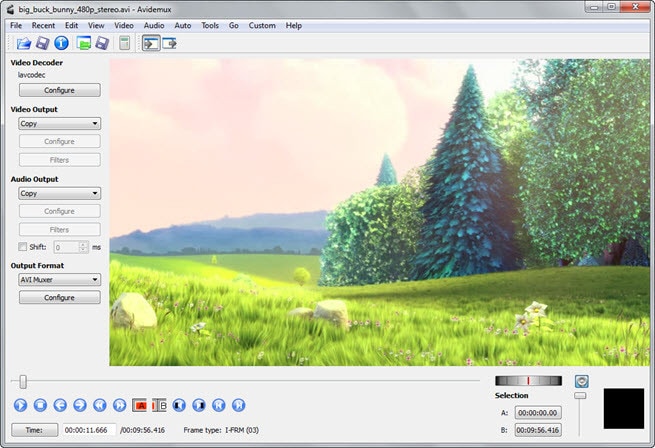
Key features
- Video and Audio Filters
- Support Popular Formats
- Convert Video For Archiving or Publishing
Price: Free
Pros
- It can convert Video To A Smaller Size
- Easy cut, trim, split video
Cons
- Out-dated UI
- Lacks sharing option
Supported OS: Windows , OS X , Linux , BSD
Uptodown Ratings: 4.0 stars out of 5
Summary
An open-source video editor that supports most formats. Due to its obsolete UI and lack of sharing features, Avidemux has average ratings.
3. VirtualDub
This open-source software is user-friendly and allows users with little experience to navigate the software without much trouble. It supports 3rd party apps and also offers batch-processing, which means working on multiple videos simultaneously makes it possible.
Key features
- Integrated volume and histogram meter
- Optimized disk
- Noise reduction
- Fractional frame rates
Price: Free
Pros
- Clean interface, easy to use
- Keyboard and mouse shortcuts for faster operation
- Free to use
Cons
- Not suitable for 4K editing
- Lack learning material
- Obsolete Interface
Supported OS: Windows
Compare Camp Ratings: 4.0 stars out of 5
Summary
Virtual Dub supports multitasking, and its features are pretty helpful. However, it lacks 4k editing and a friendly interface. Overall Virtual Dub is a good choice.
4. Sony Vegas Movie Studio
This video editing software makes it easy to create professional-looking videos in minimum time and effort. Vegas Movie Studio software is best for video editing professionals who have been doing it for some time and are looking for something a little more sophisticated than free alternatives. Not only does it has a high retail price, but its internal elements can be too complex for those just beginning.
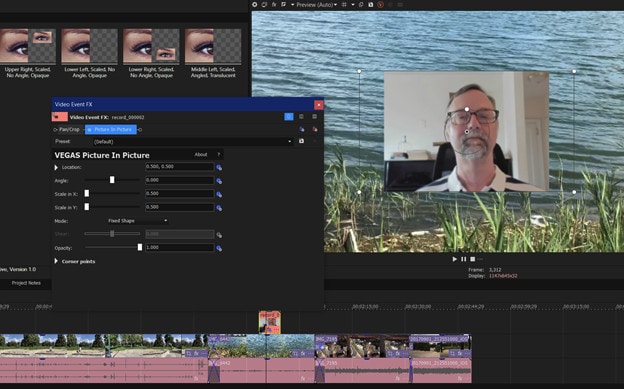
Key features
- Color correction
- HDV and AVCHD-editing
- DV batch capture
- Wide variety of file formats and codecs
Price: Starting from $7.99 USD per month
Pros
- Customizable interface
- Multicam editing
- Lots of effects and transitions, with plug-in capability
- Good slow motion and warp flow transition tools
Cons
- Less intuitive interface than competitors
- Import from camcorder not ideal
- Some tools are complex
Supported OS: Windows
G2 Ratings: 4.4 out of 5
Summary
Vegas Movie Studio is the choice of professionals. It does all the work without taking up a lot of resources, and like most programs, there is a learning curve. It’s not always intuitive for beginners, but its professional and powerful features score decent in most reviews.
5. WeVideo
This cloud-based application is a simple-to-use video editing and sharing suite. WeVideo is a full-featured video editing application that uses JumpStart technology to create amazing videos. It’s an innovative app that offers a seamless editing experience as it supports multiple formats of video, images, audio, and graphics.
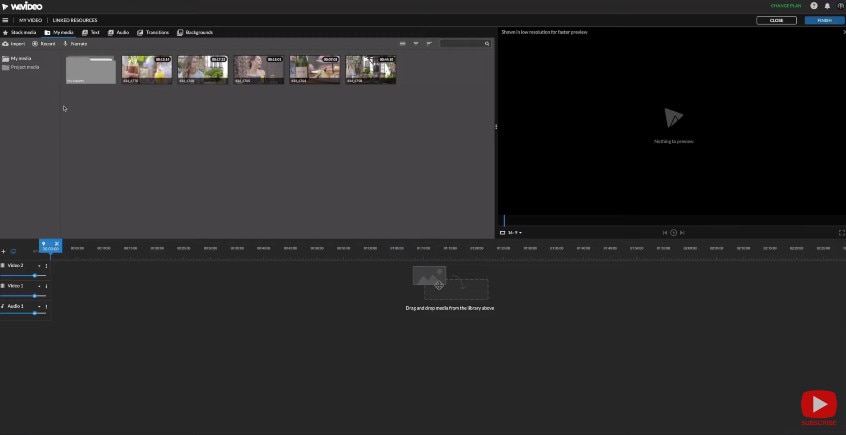
Key features
- WeVideo JumpStart
- Cloud storage
- Built-in graphics
- Customizable environment
- Advanced text editing
- Multi-track editing and storyboard
Price
- Free trial
- Power Plan: $9.99/month
- Unlimited Plan: $15.99/month
- Professional Plan: $39.99/month
- Business Plan: $73.99/month
Pros
- Constantly improving features
- Ease of use
- Storage is cloud-based
Cons
- Old fashion transition
- Leaves a watermark on free trial
Supported OS: Online
Trustpilot Ratings: 4 stars out of 5
Summary
WeVideo is a straightforward yet robust video editor. It offers a variety of features and supports multiple formats, plus its comprehensive pricing plan makes it useful for everyone.
6. Lightworks
Lightworks is the most powerful video editor in its class and an excellent tool for professionals who want to make amazing videos quickly. Lightworks is very fast and straightforward to use, and it has some great features you won’t find in any other video editor. It is available on all popular OS.

Key features
- Audio and Video Effect Plugin Support
- Cloud Connected
- Motion Graphics
- Advanced Metadata
- Proxy Workflows
- Apple ProRes decoding
Price
- Monthly Plan: $9.99/user
- Yearly Plan: $9.99/user
- Perpetual: $154.99
Pros
- High-resolution timeline rendering
- It has social media export templates
- Interfaces for multiple OS are consistent
- Instant autosave
Cons
- Commands are not always intuitive
- A bit pricey as compared to its competitors
Supported OS: Windows , Mac , Linux
Techradar Pro Ratings: 4 stars out of 5
Summary
Lightworks is not any other video editing tool available on the market of video editing tools. This video editing tool provides amateurs with the most sophisticated features in an optimized platform. Its scores are the highest on almost every review site.
7. ShotCut
Shotcut is a multiplatform video editor that lets you work with various formats for audio, video, image files, etc. This video editor makes it easy to mix and match the resolution and frame rates in a video file. All the changes you make in the editor can be undone and redone often. Shotcut is the best choice for video editing, without question.

Key features
- Webcam capture
- Audio scopes and filters
- Deinterlacing
- Eyedropper tool
- Video wipe transitions
- Keyframes for filter parameters
Price: Free
Pros
- Support for 4K resolutions
- Free
Cons
- Less intuitive than commercial apps
- Lacks built-in sharing to popular sites
Supported OS: Windows , Mac , Linux
GetApp Ratings: 4.5 out of 5 stars
Summary
Shotcut is an open-source video editor for creative professionals and is available on mac, Windows, and Linux. The free version of Shotcut has many excellent features, but it doesn’t have the slick interface or advanced techniques of the top paid editors.
8. OpenShot
An award-winning open-source video editor that creates stunning videos. OpenShot is a fast, easy-to-use, and surprisingly powerful video editor. OpenShot Video Editor allows you to work with many different types of tracks so that your edits will seem natural. OpenShot Video Editor allows you to add your custom animations or titles. The options are endless, so it all depends on your time and interest. It is available in more than 70 languages, making it ideal for all types of users.
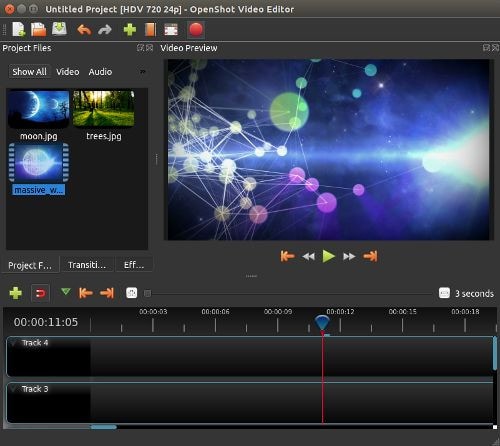
Key features
- 3D animations
- Animation and keyframes
- Multiple languages and formats
- Cross-platform
- Video-effects
Price: Free
Pros
- It is a non-linear editor with infinite tracks
- 100% free without watermark
- Frequent updates
Cons
- Obsolete interface
- Unstable performance
- Lacks some editing features
Supported OS: Window , Mac , Linux , Chrome OS
Getapp Ratings: 4.2 stars out of 5
Summary
Another open-source video-editor in the list is named OpenShot. It’s a multi-lingual and multi-supported app with unique features. Despite its unstable performance, OpenShot is still an ideal choice for many users.
9. Movavi Video Editor Plus
Movavi Video Editor Plus is the perfect tool to bring your creative ideas to life. It has special effects, ready-made intros, and keyframe animation. Using chroma keying, you can change the background of your video clips to any color or pattern that suits your need. Movavi has now redesigned its user interface to make it easy to use.
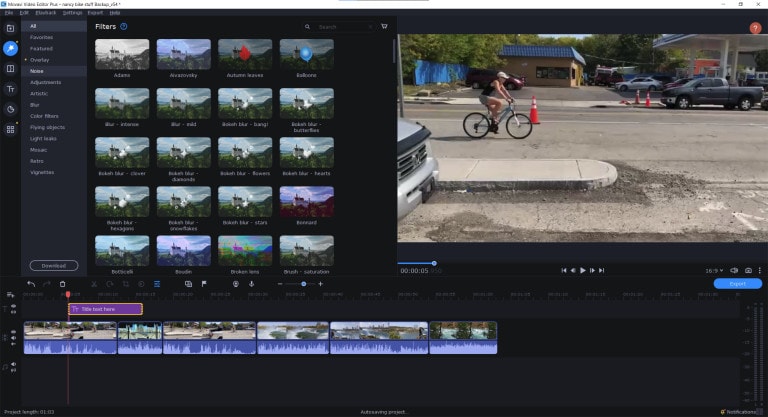
Key features
- Effects and transitions
- Built-in media pack
- Fast processing of 4K videos
- Keyframe animation
- Automatic video creation
- Cutting, trimming, joining
Price
- Free version: 7 days
- Video Editor Plus 1 year /1 PC: $49.95
- Video Editor Plus Lifetime /1 PC: $69.95
- Video Suite Lifetime /1 PC: $89.95
Pros
- Easy-to-understand user interface
- Transitions with sound
- Motion tracking and picture-in-picture tools
- Chroma-key capability
- Quick movie-creation tool
Cons
- Lacks advanced trim modes
- Slow rendering
PCMag Ratings: 4.0 stars out of 5
Summary
If you want to edit your videos with a minimal learning curve, try Movavi. You get PiP, chroma-keying, titling, basic keying, and motion tracking. The program is simple to use but doesn’t have all the features and stands four stars.
10. VSDC Free Video Editor
VSDC Free Video Editor is an online tool that lets you edit audio and video files to make your creations like movies, YouTube tutorial videos, and more. The audio and video files supported are extensive, and the software includes a codec manager. The Pro version isn’t necessary if you’re using the free edition of the software; it’s more than enough to get the job done.
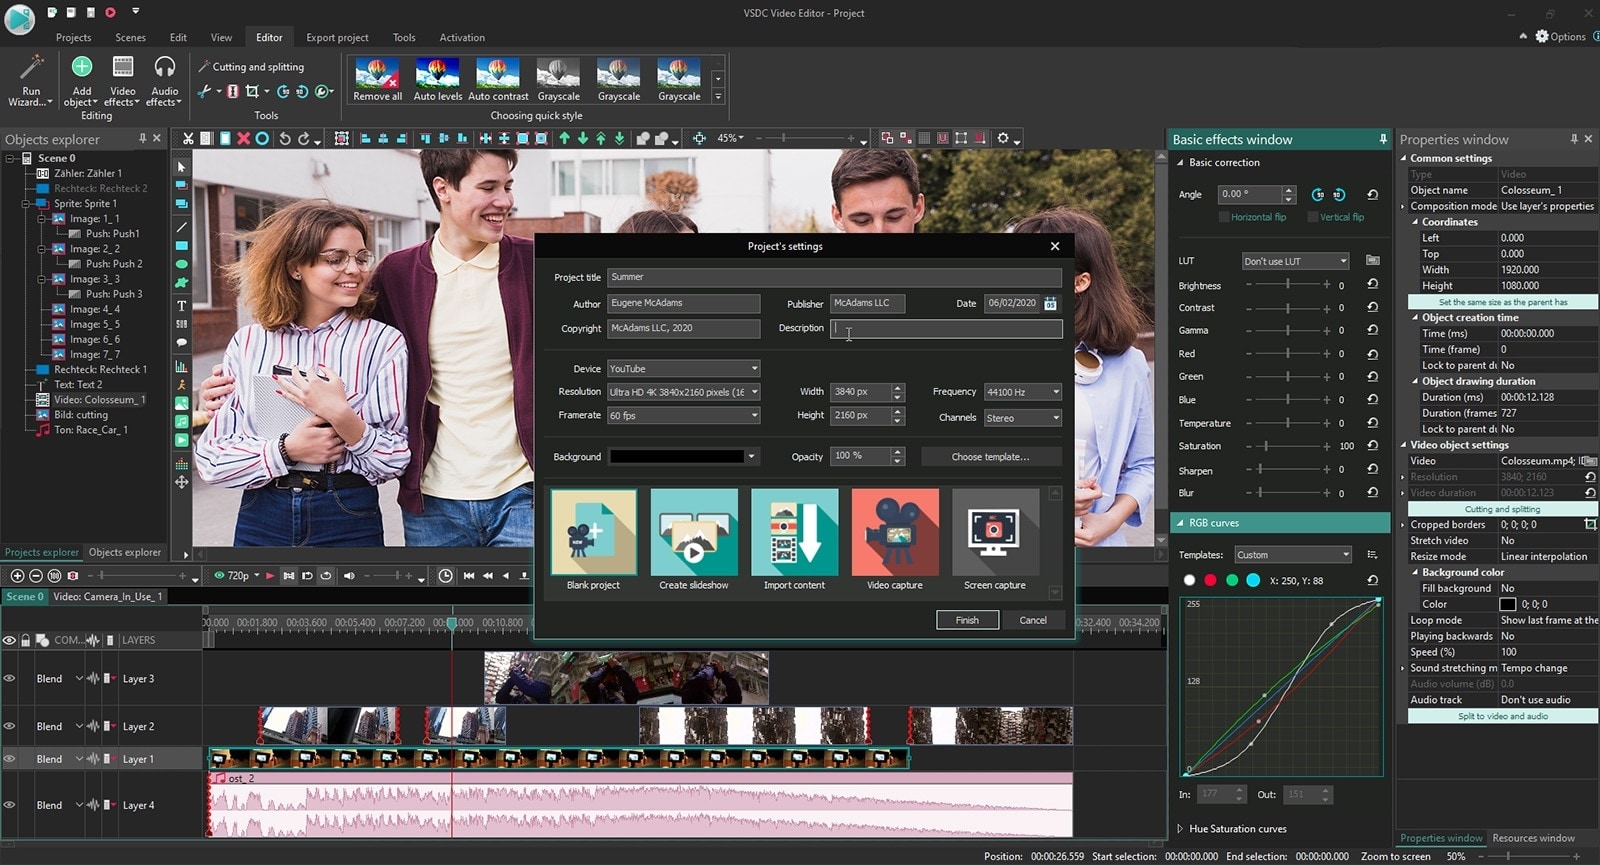
Key features
- Dark theme
- Subpixel Accuracy
- Powerful Chroma Key tool
- Trendy video effects, filters, and transitions
- Color Blending And Filters
- Built-In DVD Burning Tool
Price: Free
Pros
- Non-linear
- Video effects library
- Video stabilization
- Masking
Cons
- Outdated interface
- Lack keyboard shortcuts
- Only available on Windows
Supported OS: Windows
Capterra Ratings: 4.5 stars out 5
Summary
VSDC is a non-linear editor with extensive format support. It includes all the essential features an editor requires but with an obsolete UI. It is also ideal for many who need a powerful yet free video editor.
11. VideoPad Video Editor
VideoPad is a free video editor that can create stunning videos and perform basic editing tasks. A good video editor can help you to create videos for different social media platforms. You can make your videos look professional and polished with a few clicks and some simple editing skills. There’s nothing particularly exciting or advanced about this app; it’s simple enough for anyone new to video editing or even for seasoned editors. But the simple and easy-to-use interface makes the entire process very exciting.
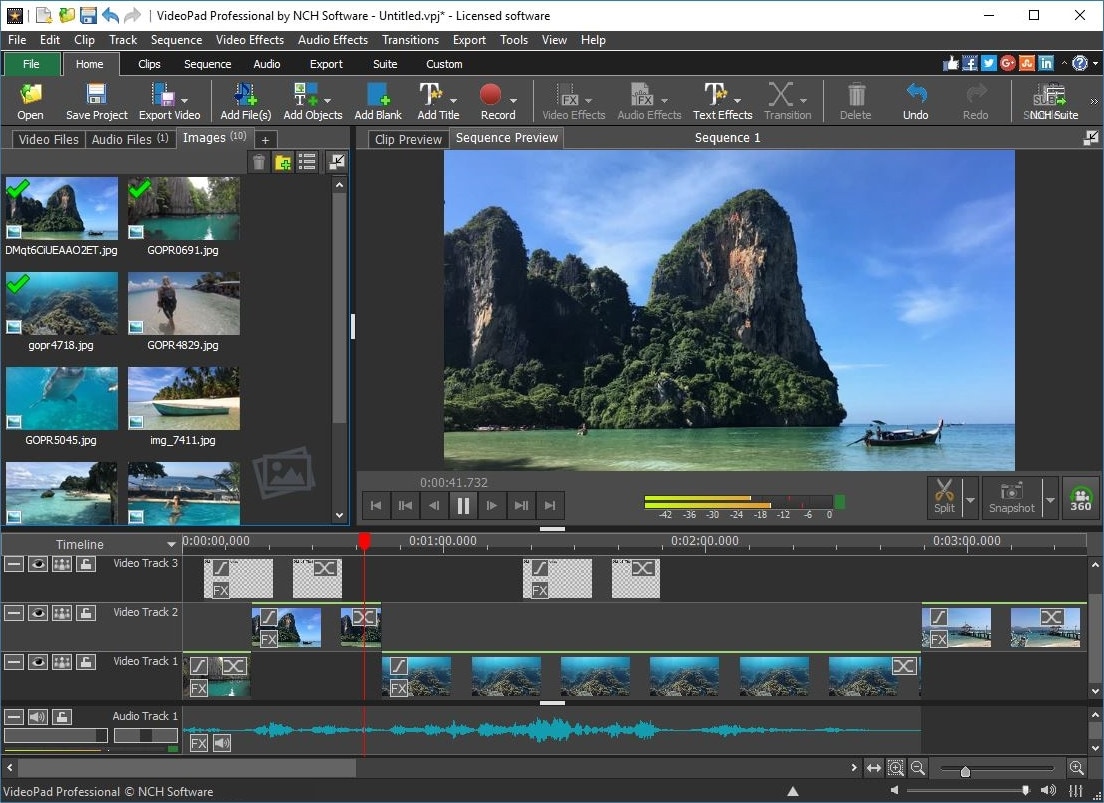
Key features
- Text snippets
- Range of transitional effects
- Plug-ins Library
- Burn finished videos to Blu-Ray, DVD, etc.
- Color correction and light balance.
Price: Free
Pros
- Simple and clean interface
- Supports multiple file formats
- Includes video effects
- Lightweight on system resources
Cons
- Lack of advanced features
Supported OS: Windows , Mac , iPad/iPhone
Tom’s guide Ratings: 3.5 stars out of 5
Summary
Video pad is a free video editor designed for beginners that is lightweight and simple. VideoPad is also great for creating quick videos for social media purposes like Youtube and Facebook. The software has a high rating, as shown above, and it’s available on Windows.
12. HitFilm
HitFilm is a helpful video editing software that makes editing easier for users. In addition to basic features, the program also provides advanced-level functions that make edited videos pop. Hitfilm Express Download has more than 400 features to help casual video editors save time. Features like: visual effects, cinematic elements, and compositing tools preset help unleash your creativity.
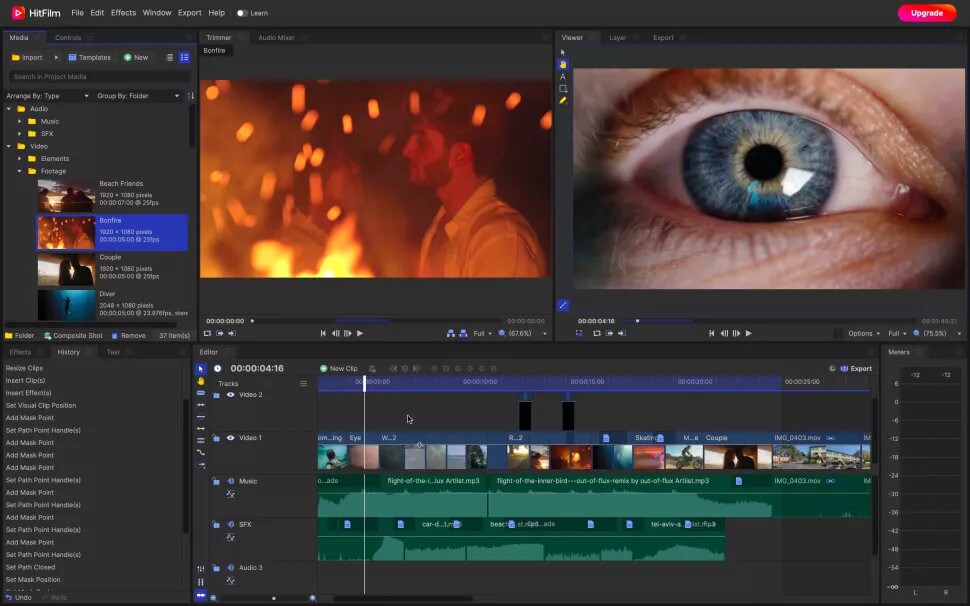
Key features
- Color Grading and correction
- Smart search
- Commentator recorder
- Lightning and lens flares
- 3D camera tracker
Price
- Free trial
- Creator: $7.50
- Pro: $12.50
- Enterprise: Custom pricing
Pros
- Intuitive interface
- It offers free tutorials and masterclasses
- Works on both Windows and Mac
Cons
- It requires heavy system requirements
TechRadar Ratings: 4.5 stars out of 5
Summary
HitFilm Express 15 is a powerful free video editing program that enables you to create high-quality videos in minutes with an intuitive interface. It offers advanced editing features such as advanced video trimming, 3D editing, and more.
13. Magix Movie Studio
Magix is the world’s leading professional audiovisual media software, with Sequoia being its industry-standard audio editing software. This movie editor is an enthusiast-level video editing software that competes with software from Adobe and CyberLink, and it even boasts support for 4K content and 360 degrees. There are many reasons to upgrade. This year’s update includes stabilization, 8K editing, motion tracking, and an in-app plug-in store.
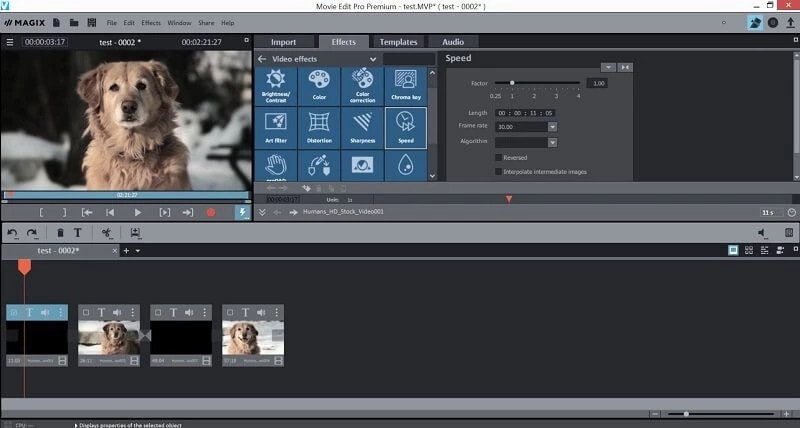
Key features
- NewBlue effects
- Fly-in animation
- New filter view
- Stabilization
- Motion tracking
- 8k support
Price
- Movie Studio 2024: $69.99 (30-day free trial)
- Movie Studio 2024 Platinum: $99.99 (30-day free trial)
- Movie Studio 2024 Suite: $129.00 (30-day free trial)
Pros
- Lots of video effects
- Responsive editing interface
- Multicam
- Trailer-like movie templates
- Solid audio editing
Cons
- Slower project rendering than others
- Lacks import and organization tools
Supported OS: Windows
PCMag Ratings: 3 stars out of 5
Summary
Magix movie studio is a powerful all-around video editing tool with many features that professional users have come to expect. It’s also relatively simple to use. But usability and performance are poor compared to other software programs like Filmora .
Part 4: How To Edit a Video With a Windows Movie Maker Alternative
Windows Movie Maker was great for editing a video, but it’s no match for some of the best video editing software. We’re talking about software capable of creating a cinematic experience in seconds, all on your computer.
When you need to edit a video with simple, quick edits, like adding a special effect or changing the background, try Filmora . Filmora is an easy-to-use application that allows you to create a movie using simple tools that don’t require additional training. You can’t beat this option if you want to create a professional-quality video for your blog or website.
Let’s dive into a quick tutorial on editing videos in Filmora:
Free Download For Win 7 or later(64-bit)
Free Download For macOS 10.14 or later
Step1 Open Wondershare Filmora on your PC or Mac
You can start a new project by clicking on ‘New Project’. And you can also change the ‘Aspect Ratio’ according to your project demand.
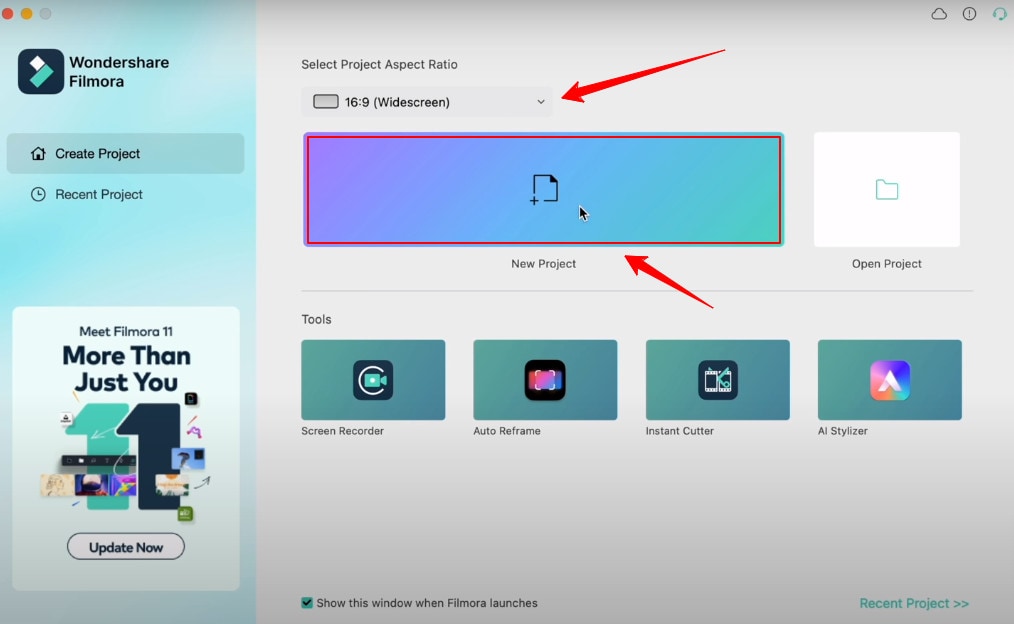
Step2 Import Videos
You can import your file by clicking the import tab on the upper-left side or clicking the import icon on the main window.
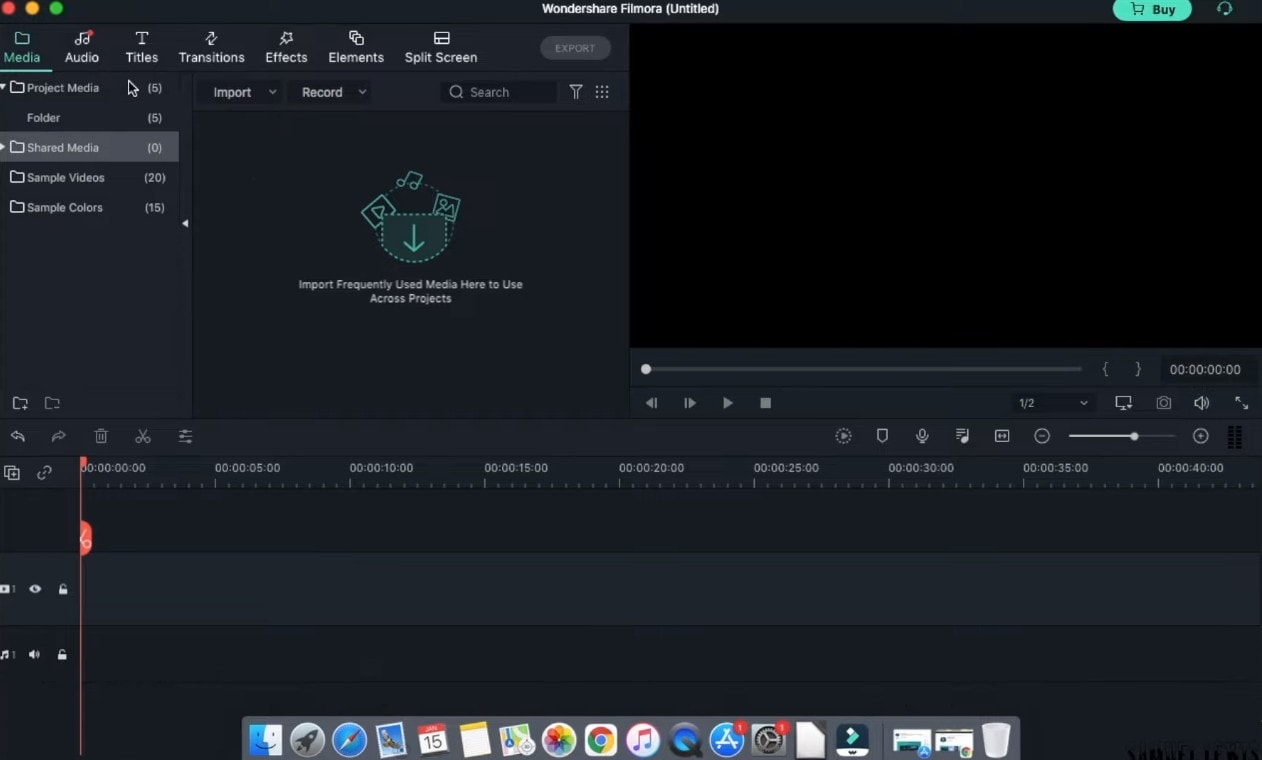
Step3 Drag and drop your footage to the timeline
After importing all the files, click and hold each individual video and drag and drop it to the timeline area according to your ideal sequence.
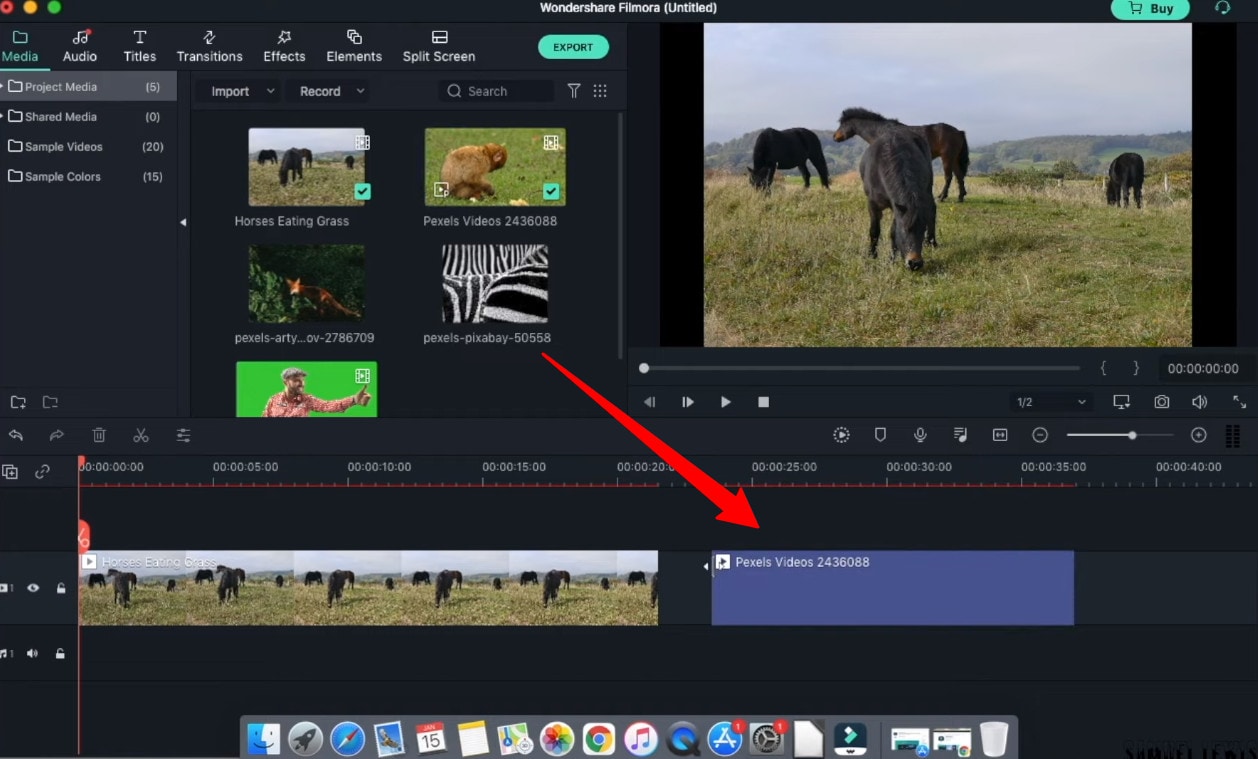
Step4 Add Audio
Go to the ‘Audio’ tab and select the audio file from the audio library. Once selected, drag and drop the audio file into the music timeline.
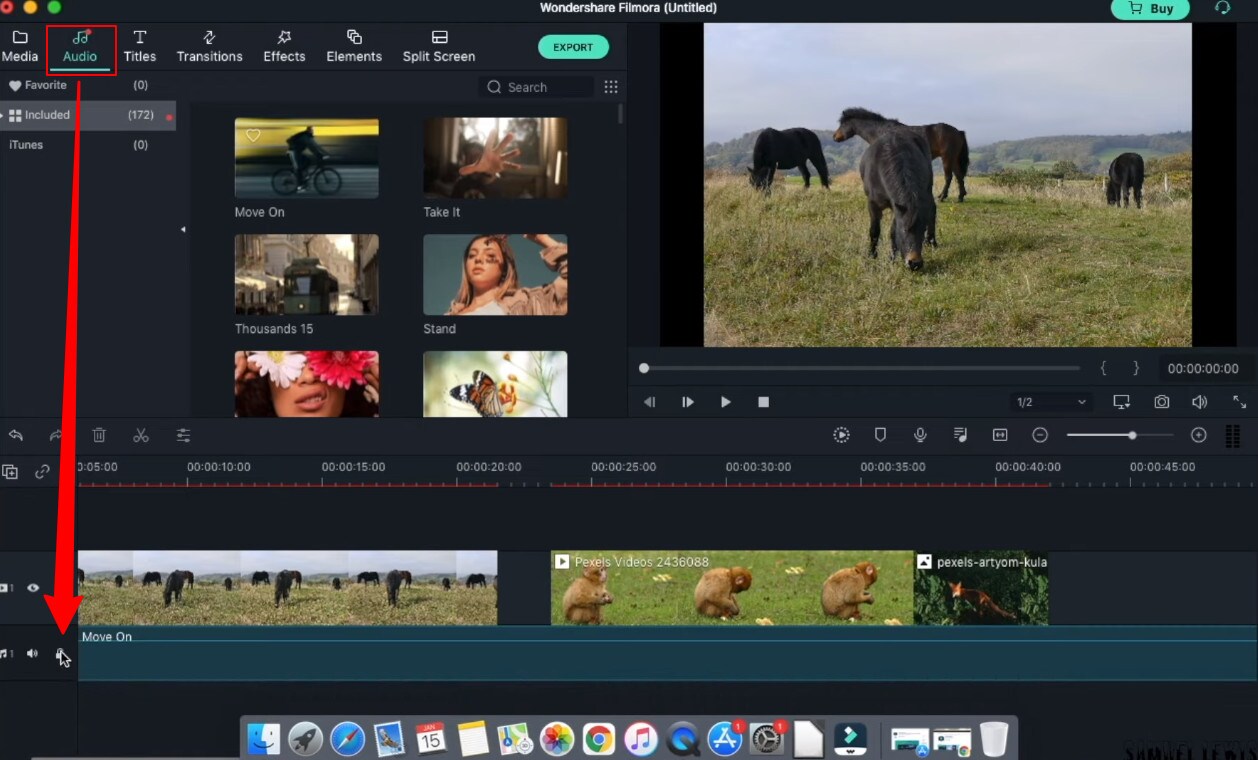
Step5 Add Titles
In your video intro, you can insert some title text. Go to the ‘Titles’ tab and select the one you like, and drag and drop it on top of the timeline. Double-click and edit the text and state your ideal statements. You can customize your text fonts and color too.
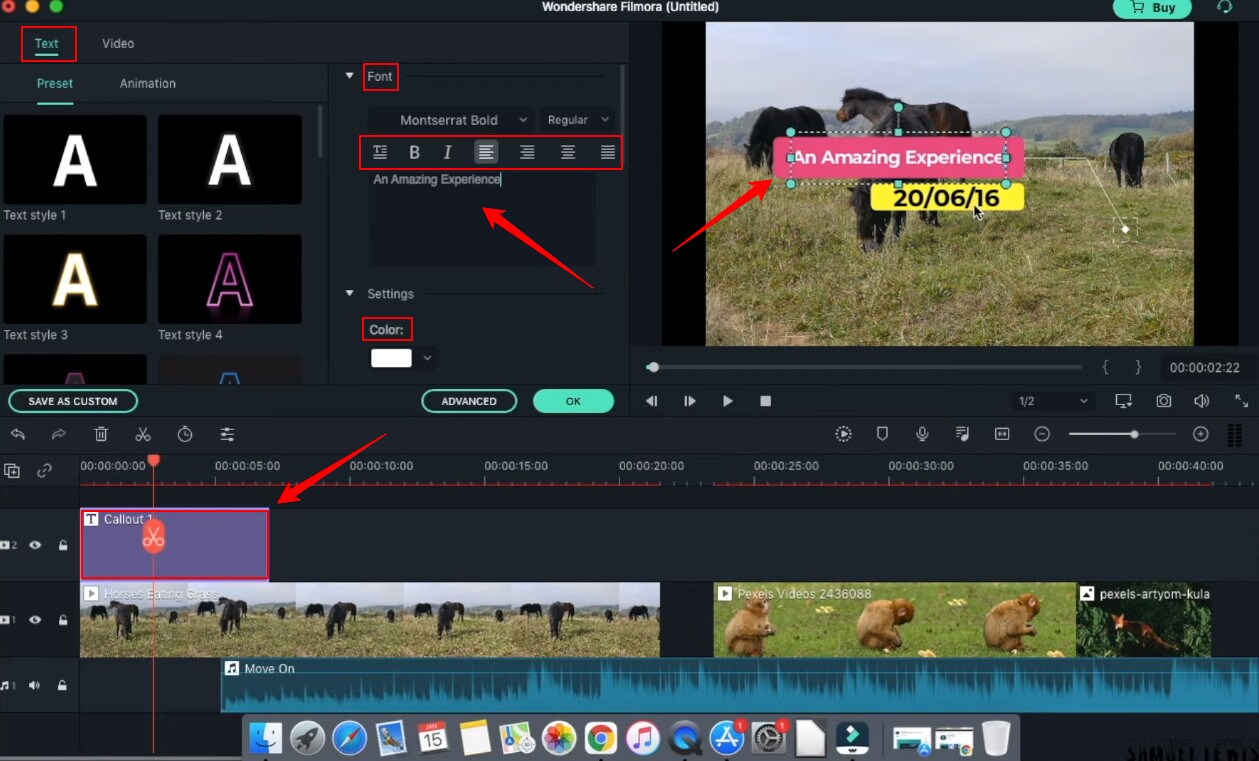
Step6 Add Transitions
You can add transition effects to ensure a smooth transition from one scene to another. The overall will get more professional look.
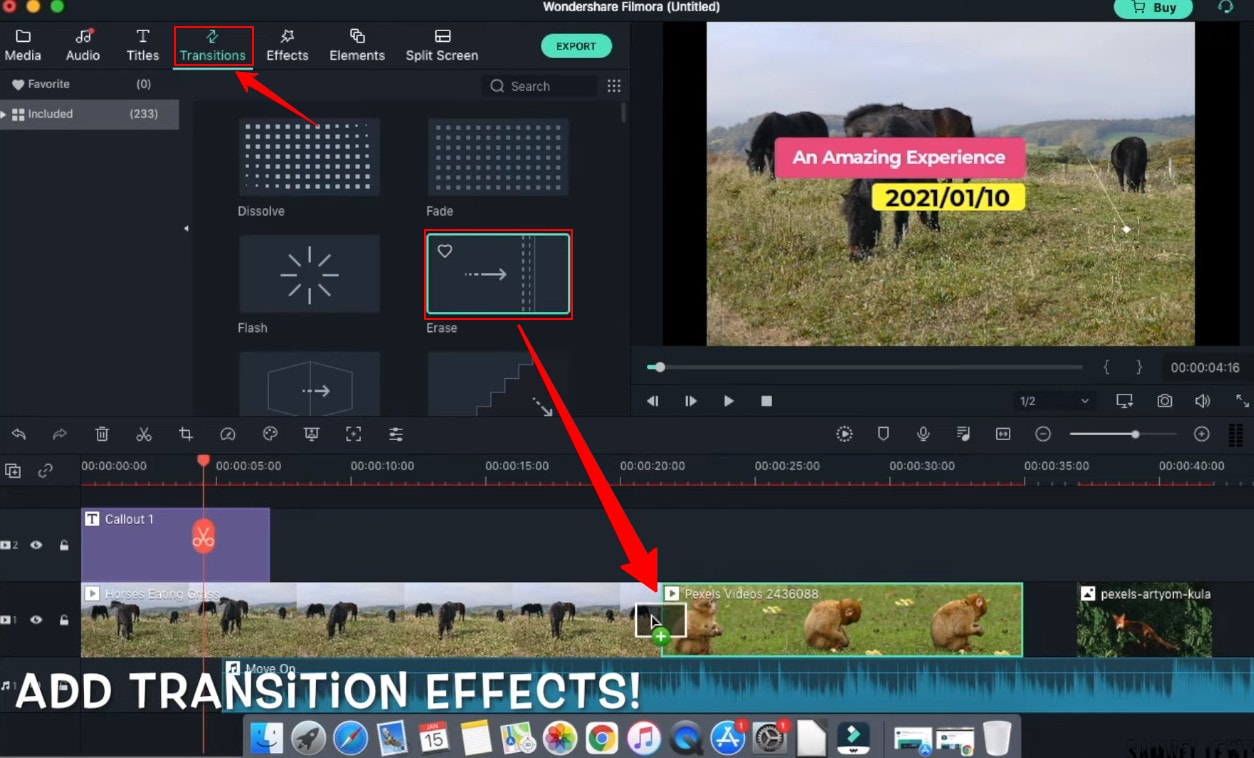
Step7 Add Effects
Next; you can get special effects to your video to make them more attractive and engaging to watch. Simple drag down the effect to your video and watch the effect take place in your selective scene.
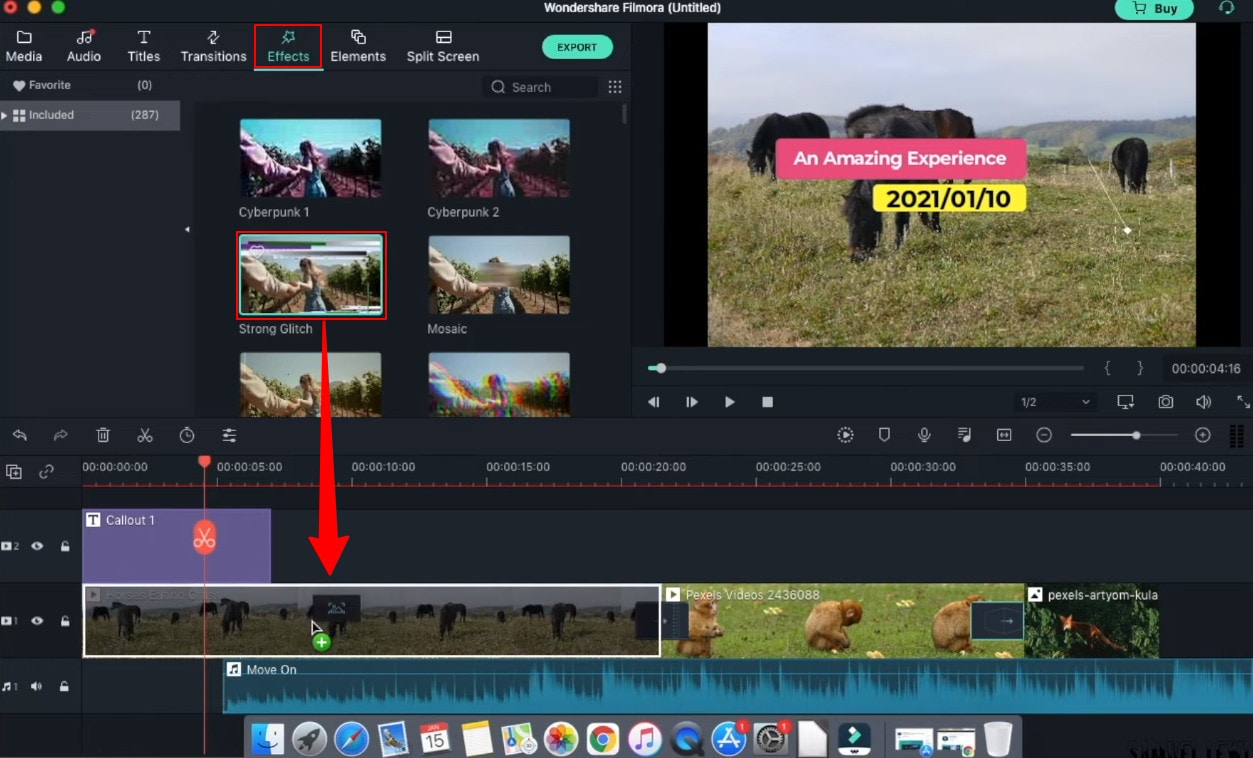
Step8 Export your work
Once all the changes have been made, hit ‘export’ from the top tab. A window will appear where you can change the settings, resolution, frame rate, bit rate, etc. Next, click the ‘export’ button down on that window, and then you can save the file in your drive.
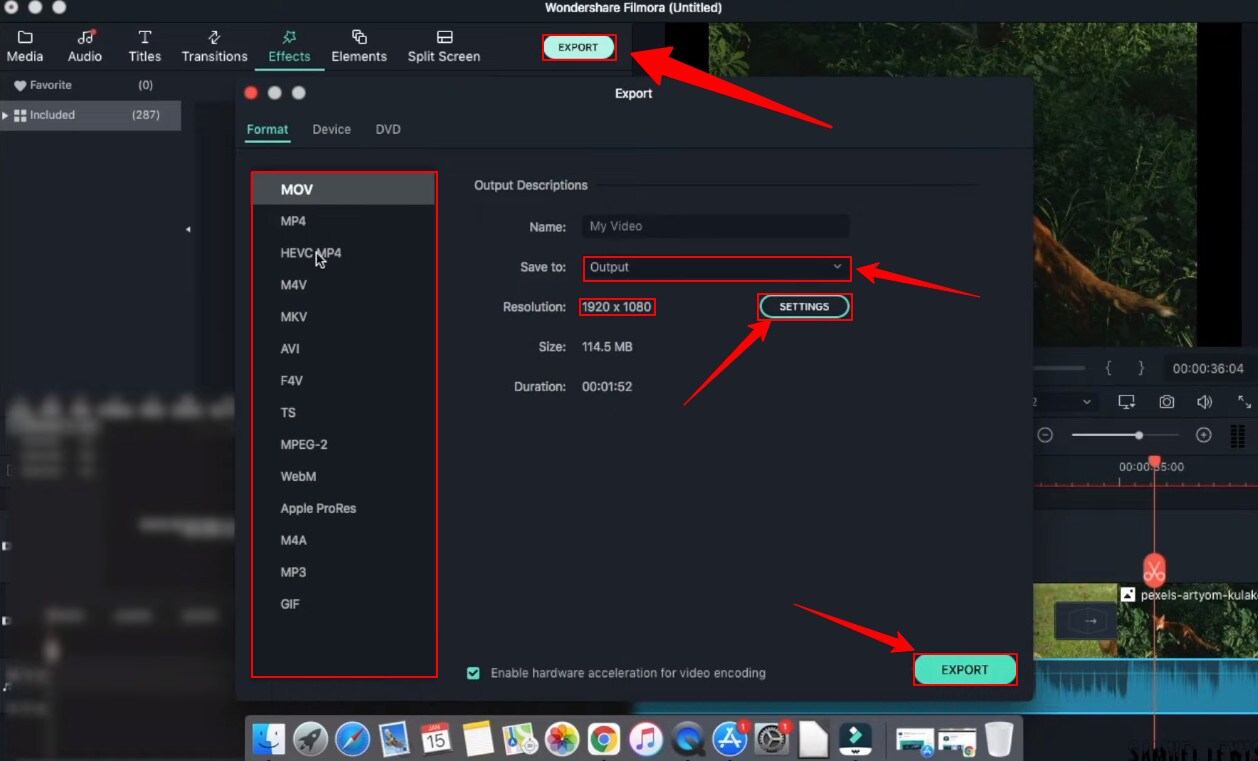
Part 5: Hot FAQs on Windows Movie Maker Alternatives
1. Why is Windows Movie Maker discontinued?
Microsoft’s video editing program, Windows Movie Maker, did not become a big hit with the public because it failed to do well on the market. Microsoft couldn’t get the support they were looking for from the program’s users. As a result, Microsoft had to cease its support of the program.
2. Is there a free version of Windows Movie Maker?
Microsoft Windows Movie maker was always accessible and pre-installed every windows product. Microsoft has discontinued support for Movie Maker and warns about free downloads of Movie Maker provided by third parties that might contain malware, viruses, or other issues.
3. What are the best free Windows Movie Maker Alternatives for Mac?
After switching to a Mac, you’ll find that the Windows Movie Maker alternatives offer much more than just a simple video editor. They provide advanced features, easy transitions, and less technical know-how to create pro-quality results. You should try using these platforms on your Mac if you have a video to edit.
- Wondershare Filmora
- Movavi
- OpenShot
Final Words
Windows Movie Maker is an excellent Windows video editor application for Windows users. But in recent years, it has become outdated due to the continuous development of new technologies. There are many alternatives for Windows Movie Maker, and here we listed some of the best ones. Most of them are free and featured packs. Each program has its unique set of features and capabilities, and each one excels in different areas. Check them out and see what you think.
Free Download For Win 7 or later(64-bit)
Free Download For macOS 10.14 or later
Part 1: Top 3 Picks for Windows Movie Maker Alternatives
The world’s best video editing software is about to change. We look at three of the most popular and valuable alternatives to Windows Movie Maker.
You will need to consider these alternatives to ensure they meet your expectations and needs.
1. Wondershare Filmora - Best Overall
Filmora is the best Windows Movie Maker Alternative designed according to your convenience.
Ratings: 4.4 Stars out 5
Starting from $49.99
2. Magix Movie Studio - Best for Collages
This alternative offers a variety of tools and plugins for anyone who wants to create professional-level videos in under a minute.
Download on Windows
Ratings: 4 stars out of 5
30-day free trials, then starts from $69.99 all the way to $129
3. Avidemux Video Editor - Best Open-Source Editor
An open-source editor that supports a wide range of formats is free! Avidemux has an interface similar to Windows Movie Maker, which makes it a perfect alternative.
Download on Windows
Ratings: 4.0 stars out of 5
Free Trial
Part 2: Ultimate Overview on 13 Best Alternatives to Windows Movie Maker
We live in visual culture, and we constantly see, capture, upload, and share videos on our smartphones, tablets, and laptops. So, it is only natural that more people seek ways to edit their videos. Windows Movie Maker was one of the most popular video editing apps. So it’s time to dig into the best Windows Movie Maker alternatives, which are arguably better and feature-rich.
| Software | OS | Media Resources | AI editing | Easy to Use | Free Trial |
|---|---|---|---|---|---|
| Wondershare Filmora | WindowsMacMobile | Yes | Yes | Yes | Yes |
| Avidemux | WindowsOS XLinuxBSD | Yes | No | Yes | Yes |
| Virtual Dub | Windows | No | No | Yes | Yes |
| Vegas Movie Studio | Windows | Yes | Yes | No | No |
| WeVideo | Online | Yes | No | Yes | Yes |
| Lightworks | LinuxOS X Windows | Yes | Yes | No | No |
| ShotCut | WindowsMacLinuxBSD | Yes | No | No | Yes |
| OpenShot | WindowsMacLinuxChrome OS | Yes | No | Yes | Yes |
| Movavi Plus | WindowsMac | Yes | No | Yes | Yes |
| VSDC | Windows | Yes | No | Yes | Yes |
| VideoPad | WindowsMaciPad/iPhone | Yes | No | Yes | Yes |
| HitFilm | WindowsMac | Yes | Yes | Yes | Yes |
| Magix Movie Studio | Windows | Yes | Yes | No | Yes |
Part 3: 13 Best Windows Movie Maker Alternatives for Windows
As we all know, Windows Movie Maker is the most used and trusted tool for creating videos in Windows. With its unique features and user-friendly interface, people often use this software to develop short and entertaining videos.
However, the fact is that Windows Movie Maker is not the current best video editing software for creating complex video projects. For this reason, we compiled a list of the 12 best alternatives to offer you a better option for Windows Movie Maker.
1. Wondershare Filmora
Filmora 11 is a powerful, easy-to-use video editor specially designed to streamline your workflow and save you hours weekly. It supports everything from Windows, Mac, and IOS to Android. The latest update to the flagship app includes several key enhancements that result in a much more efficient video creation workflow and one that’s easier to use than its rivals.
Key features
- Preset Templates
- Instant Mode
- Motion Tracking
- AI Editing Effects
- Auto Synchronization
- Plug-ins
Price
- Annual Plan: $49.99
- Perpetual Plan: $79.99
Pros
- Seamless interface for beginners
- Great customer support
- Plenty of effects and preset templates
- 4K video output options
Cons
- Rendering requires too much time
- The mobile app requires separate subscription
Supported OS: Windows , Mac , iOS , Android , iPad
G2 Ratings: 4.4 stars out of 5
Summary
Filmora’s intuitive interface allows experienced and brand-new users to create incredible videos with flawless special effects. Its high ratings and multiple supported formats make it quite popular among users.
2. Avidemux Video Editor
If you are a beginner and want to use a free, open-source software program for basic video editing, then Avidemux is a good choice. The interface is not as fancy as it could be, but there are some presets that’ll save you a lot of time. Avidemux is a cross-platform video editor that allows you to create custom videos, but it doesn’t feature the ability to share the edited footage to social media directly,
Key features
- Video and Audio Filters
- Support Popular Formats
- Convert Video For Archiving or Publishing
Price: Free
Pros
- It can convert Video To A Smaller Size
- Easy cut, trim, split video
Cons
- Out-dated UI
- Lacks sharing option
Supported OS: Windows , OS X , Linux , BSD
Uptodown Ratings: 4.0 stars out of 5
Summary
An open-source video editor that supports most formats. Due to its obsolete UI and lack of sharing features, Avidemux has average ratings.
3. VirtualDub
This open-source software is user-friendly and allows users with little experience to navigate the software without much trouble. It supports 3rd party apps and also offers batch-processing, which means working on multiple videos simultaneously makes it possible.
Key features
- Integrated volume and histogram meter
- Optimized disk
- Noise reduction
- Fractional frame rates
Price: Free
Pros
- Clean interface, easy to use
- Keyboard and mouse shortcuts for faster operation
- Free to use
Cons
- Not suitable for 4K editing
- Lack learning material
- Obsolete Interface
Supported OS: Windows
Compare Camp Ratings: 4.0 stars out of 5
Summary
Virtual Dub supports multitasking, and its features are pretty helpful. However, it lacks 4k editing and a friendly interface. Overall Virtual Dub is a good choice.
4. Sony Vegas Movie Studio
This video editing software makes it easy to create professional-looking videos in minimum time and effort. Vegas Movie Studio software is best for video editing professionals who have been doing it for some time and are looking for something a little more sophisticated than free alternatives. Not only does it has a high retail price, but its internal elements can be too complex for those just beginning.
Key features
- Color correction
- HDV and AVCHD-editing
- DV batch capture
- Wide variety of file formats and codecs
Price: Starting from $7.99 USD per month
Pros
- Customizable interface
- Multicam editing
- Lots of effects and transitions, with plug-in capability
- Good slow motion and warp flow transition tools
Cons
- Less intuitive interface than competitors
- Import from camcorder not ideal
- Some tools are complex
Supported OS: Windows
G2 Ratings: 4.4 out of 5
Summary
Vegas Movie Studio is the choice of professionals. It does all the work without taking up a lot of resources, and like most programs, there is a learning curve. It’s not always intuitive for beginners, but its professional and powerful features score decent in most reviews.
5. WeVideo
This cloud-based application is a simple-to-use video editing and sharing suite. WeVideo is a full-featured video editing application that uses JumpStart technology to create amazing videos. It’s an innovative app that offers a seamless editing experience as it supports multiple formats of video, images, audio, and graphics.
Key features
- WeVideo JumpStart
- Cloud storage
- Built-in graphics
- Customizable environment
- Advanced text editing
- Multi-track editing and storyboard
Price
- Free trial
- Power Plan: $9.99/month
- Unlimited Plan: $15.99/month
- Professional Plan: $39.99/month
- Business Plan: $73.99/month
Pros
- Constantly improving features
- Ease of use
- Storage is cloud-based
Cons
- Old fashion transition
- Leaves a watermark on free trial
Supported OS: Online
Trustpilot Ratings: 4 stars out of 5
Summary
WeVideo is a straightforward yet robust video editor. It offers a variety of features and supports multiple formats, plus its comprehensive pricing plan makes it useful for everyone.
6. Lightworks
Lightworks is the most powerful video editor in its class and an excellent tool for professionals who want to make amazing videos quickly. Lightworks is very fast and straightforward to use, and it has some great features you won’t find in any other video editor. It is available on all popular OS.
Key features
- Audio and Video Effect Plugin Support
- Cloud Connected
- Motion Graphics
- Advanced Metadata
- Proxy Workflows
- Apple ProRes decoding
Price
- Monthly Plan: $9.99/user
- Yearly Plan: $9.99/user
- Perpetual: $154.99
Pros
- High-resolution timeline rendering
- It has social media export templates
- Interfaces for multiple OS are consistent
- Instant autosave
Cons
- Commands are not always intuitive
- A bit pricey as compared to its competitors
Supported OS: Windows , Mac , Linux
Techradar Pro Ratings: 4 stars out of 5
Summary
Lightworks is not any other video editing tool available on the market of video editing tools. This video editing tool provides amateurs with the most sophisticated features in an optimized platform. Its scores are the highest on almost every review site.
7. ShotCut
Shotcut is a multiplatform video editor that lets you work with various formats for audio, video, image files, etc. This video editor makes it easy to mix and match the resolution and frame rates in a video file. All the changes you make in the editor can be undone and redone often. Shotcut is the best choice for video editing, without question.
Key features
- Webcam capture
- Audio scopes and filters
- Deinterlacing
- Eyedropper tool
- Video wipe transitions
- Keyframes for filter parameters
Price: Free
Pros
- Support for 4K resolutions
- Free
Cons
- Less intuitive than commercial apps
- Lacks built-in sharing to popular sites
Supported OS: Windows , Mac , Linux
GetApp Ratings: 4.5 out of 5 stars
Summary
Shotcut is an open-source video editor for creative professionals and is available on mac, Windows, and Linux. The free version of Shotcut has many excellent features, but it doesn’t have the slick interface or advanced techniques of the top paid editors.
8. OpenShot
An award-winning open-source video editor that creates stunning videos. OpenShot is a fast, easy-to-use, and surprisingly powerful video editor. OpenShot Video Editor allows you to work with many different types of tracks so that your edits will seem natural. OpenShot Video Editor allows you to add your custom animations or titles. The options are endless, so it all depends on your time and interest. It is available in more than 70 languages, making it ideal for all types of users.
Key features
- 3D animations
- Animation and keyframes
- Multiple languages and formats
- Cross-platform
- Video-effects
Price: Free
Pros
- It is a non-linear editor with infinite tracks
- 100% free without watermark
- Frequent updates
Cons
- Obsolete interface
- Unstable performance
- Lacks some editing features
Supported OS: Window , Mac , Linux , Chrome OS
Getapp Ratings: 4.2 stars out of 5
Summary
Another open-source video-editor in the list is named OpenShot. It’s a multi-lingual and multi-supported app with unique features. Despite its unstable performance, OpenShot is still an ideal choice for many users.
9. Movavi Video Editor Plus
Movavi Video Editor Plus is the perfect tool to bring your creative ideas to life. It has special effects, ready-made intros, and keyframe animation. Using chroma keying, you can change the background of your video clips to any color or pattern that suits your need. Movavi has now redesigned its user interface to make it easy to use.
Key features
- Effects and transitions
- Built-in media pack
- Fast processing of 4K videos
- Keyframe animation
- Automatic video creation
- Cutting, trimming, joining
Price
- Free version: 7 days
- Video Editor Plus 1 year /1 PC: $49.95
- Video Editor Plus Lifetime /1 PC: $69.95
- Video Suite Lifetime /1 PC: $89.95
Pros
- Easy-to-understand user interface
- Transitions with sound
- Motion tracking and picture-in-picture tools
- Chroma-key capability
- Quick movie-creation tool
Cons
- Lacks advanced trim modes
- Slow rendering
PCMag Ratings: 4.0 stars out of 5
Summary
If you want to edit your videos with a minimal learning curve, try Movavi. You get PiP, chroma-keying, titling, basic keying, and motion tracking. The program is simple to use but doesn’t have all the features and stands four stars.
10. VSDC Free Video Editor
VSDC Free Video Editor is an online tool that lets you edit audio and video files to make your creations like movies, YouTube tutorial videos, and more. The audio and video files supported are extensive, and the software includes a codec manager. The Pro version isn’t necessary if you’re using the free edition of the software; it’s more than enough to get the job done.
Key features
- Dark theme
- Subpixel Accuracy
- Powerful Chroma Key tool
- Trendy video effects, filters, and transitions
- Color Blending And Filters
- Built-In DVD Burning Tool
Price: Free
Pros
- Non-linear
- Video effects library
- Video stabilization
- Masking
Cons
- Outdated interface
- Lack keyboard shortcuts
- Only available on Windows
Supported OS: Windows
Capterra Ratings: 4.5 stars out 5
Summary
VSDC is a non-linear editor with extensive format support. It includes all the essential features an editor requires but with an obsolete UI. It is also ideal for many who need a powerful yet free video editor.
11. VideoPad Video Editor
VideoPad is a free video editor that can create stunning videos and perform basic editing tasks. A good video editor can help you to create videos for different social media platforms. You can make your videos look professional and polished with a few clicks and some simple editing skills. There’s nothing particularly exciting or advanced about this app; it’s simple enough for anyone new to video editing or even for seasoned editors. But the simple and easy-to-use interface makes the entire process very exciting.
Key features
- Text snippets
- Range of transitional effects
- Plug-ins Library
- Burn finished videos to Blu-Ray, DVD, etc.
- Color correction and light balance.
Price: Free
Pros
- Simple and clean interface
- Supports multiple file formats
- Includes video effects
- Lightweight on system resources
Cons
- Lack of advanced features
Supported OS: Windows , Mac , iPad/iPhone
Tom’s guide Ratings: 3.5 stars out of 5
Summary
Video pad is a free video editor designed for beginners that is lightweight and simple. VideoPad is also great for creating quick videos for social media purposes like Youtube and Facebook. The software has a high rating, as shown above, and it’s available on Windows.
12. HitFilm
HitFilm is a helpful video editing software that makes editing easier for users. In addition to basic features, the program also provides advanced-level functions that make edited videos pop. Hitfilm Express Download has more than 400 features to help casual video editors save time. Features like: visual effects, cinematic elements, and compositing tools preset help unleash your creativity.
Key features
- Color Grading and correction
- Smart search
- Commentator recorder
- Lightning and lens flares
- 3D camera tracker
Price
- Free trial
- Creator: $7.50
- Pro: $12.50
- Enterprise: Custom pricing
Pros
- Intuitive interface
- It offers free tutorials and masterclasses
- Works on both Windows and Mac
Cons
- It requires heavy system requirements
TechRadar Ratings: 4.5 stars out of 5
Summary
HitFilm Express 15 is a powerful free video editing program that enables you to create high-quality videos in minutes with an intuitive interface. It offers advanced editing features such as advanced video trimming, 3D editing, and more.
13. Magix Movie Studio
Magix is the world’s leading professional audiovisual media software, with Sequoia being its industry-standard audio editing software. This movie editor is an enthusiast-level video editing software that competes with software from Adobe and CyberLink, and it even boasts support for 4K content and 360 degrees. There are many reasons to upgrade. This year’s update includes stabilization, 8K editing, motion tracking, and an in-app plug-in store.
Key features
- NewBlue effects
- Fly-in animation
- New filter view
- Stabilization
- Motion tracking
- 8k support
Price
- Movie Studio 2024: $69.99 (30-day free trial)
- Movie Studio 2024 Platinum: $99.99 (30-day free trial)
- Movie Studio 2024 Suite: $129.00 (30-day free trial)
Pros
- Lots of video effects
- Responsive editing interface
- Multicam
- Trailer-like movie templates
- Solid audio editing
Cons
- Slower project rendering than others
- Lacks import and organization tools
Supported OS: Windows
PCMag Ratings: 3 stars out of 5
Summary
Magix movie studio is a powerful all-around video editing tool with many features that professional users have come to expect. It’s also relatively simple to use. But usability and performance are poor compared to other software programs like Filmora .
Part 4: How To Edit a Video With a Windows Movie Maker Alternative
Windows Movie Maker was great for editing a video, but it’s no match for some of the best video editing software. We’re talking about software capable of creating a cinematic experience in seconds, all on your computer.
When you need to edit a video with simple, quick edits, like adding a special effect or changing the background, try Filmora . Filmora is an easy-to-use application that allows you to create a movie using simple tools that don’t require additional training. You can’t beat this option if you want to create a professional-quality video for your blog or website.
Let’s dive into a quick tutorial on editing videos in Filmora:
Free Download For Win 7 or later(64-bit)
Free Download For macOS 10.14 or later
Step1 Open Wondershare Filmora on your PC or Mac
You can start a new project by clicking on ‘New Project’. And you can also change the ‘Aspect Ratio’ according to your project demand.
Step2 Import Videos
You can import your file by clicking the import tab on the upper-left side or clicking the import icon on the main window.
Step3 Drag and drop your footage to the timeline
After importing all the files, click and hold each individual video and drag and drop it to the timeline area according to your ideal sequence.
Step4 Add Audio
Go to the ‘Audio’ tab and select the audio file from the audio library. Once selected, drag and drop the audio file into the music timeline.
Step5 Add Titles
In your video intro, you can insert some title text. Go to the ‘Titles’ tab and select the one you like, and drag and drop it on top of the timeline. Double-click and edit the text and state your ideal statements. You can customize your text fonts and color too.
Step6 Add Transitions
You can add transition effects to ensure a smooth transition from one scene to another. The overall will get more professional look.
Step7 Add Effects
Next; you can get special effects to your video to make them more attractive and engaging to watch. Simple drag down the effect to your video and watch the effect take place in your selective scene.
Step8 Export your work
Once all the changes have been made, hit ‘export’ from the top tab. A window will appear where you can change the settings, resolution, frame rate, bit rate, etc. Next, click the ‘export’ button down on that window, and then you can save the file in your drive.
Part 5: Hot FAQs on Windows Movie Maker Alternatives
1. Why is Windows Movie Maker discontinued?
Microsoft’s video editing program, Windows Movie Maker, did not become a big hit with the public because it failed to do well on the market. Microsoft couldn’t get the support they were looking for from the program’s users. As a result, Microsoft had to cease its support of the program.
2. Is there a free version of Windows Movie Maker?
Microsoft Windows Movie maker was always accessible and pre-installed every windows product. Microsoft has discontinued support for Movie Maker and warns about free downloads of Movie Maker provided by third parties that might contain malware, viruses, or other issues.
3. What are the best free Windows Movie Maker Alternatives for Mac?
After switching to a Mac, you’ll find that the Windows Movie Maker alternatives offer much more than just a simple video editor. They provide advanced features, easy transitions, and less technical know-how to create pro-quality results. You should try using these platforms on your Mac if you have a video to edit.
- Wondershare Filmora
- Movavi
- OpenShot
Final Words
Windows Movie Maker is an excellent Windows video editor application for Windows users. But in recent years, it has become outdated due to the continuous development of new technologies. There are many alternatives for Windows Movie Maker, and here we listed some of the best ones. Most of them are free and featured packs. Each program has its unique set of features and capabilities, and each one excels in different areas. Check them out and see what you think.
Free Download For Win 7 or later(64-bit)
Free Download For macOS 10.14 or later
Create a Face From Scratch: Best Free Online Generators
While signing up for a social media account, you may not want to use your real photograph as your profile picture, but at the same time, you might not find it ethical to use someone else’s image either. This is where a face generation portal comes into play. You can easily create a virtual face that looks almost like you and sometimes even better with a face generator.
Similarly, run a business where you want to publish your clients’ reviews without showing their real photos as they might not like the idea. You can use a good face generator online tool to create a virtual face that resembles their look and post it along with their feedback.
Considering the above scenarios and many others that may come up over time, the following list some of the best free online face generators to create fake faces.
Watch Video! Best Free Online Face Generators
Best Free Online Face Generators to Get Virtual Faces in 2022
1. Generated Photos: Faces
Website: https://generated.photos/faces
This online portal enables you to create virtual faces by specifying the physical attributes of a character, such as gender, age, hair color, eye color, and much more. You can be as creative as you want to generate a face that appears somewhat like you with the available options. Once a look is generated, you can download and use it as needed.
The steps that are given below explain how you can use Generated Photos’ Faces section to create and download a virtual face:
- Launch your favorite web browser and go to the URL given above, and then you will see all free AI-generated photos on this website.

- Use the filters given in the left pane to define your character’s physical attributes and click Apply from the bottom to get the results. You can customize the face from its head post, gender, age, hair, eye, and emotion aspects.
- Click your preferred character from the AI-generated faces, and then click Download from the page that opens next. Choose your preferred method to sign up, and then sign in to download the virtual face to your PC.
2. Generated Photos: Anonymizer
Website: https://generated.photos/anonymizer
Anonymizer is another section from the Generated Photos portal that allows you to upload your image. Then it uses AI technology to generate similar virtual faces that you can download and use wherever needed.
However, sometimes the pictures that the website creates may not resemble your face as closely as you expect them to be, but that’s OK. Isn’t it? The main idea is to keep your privacy intact, and that’s what Generated Photos: Anonymizer does.
You can learn how to use this section by following the instructions given below:
- Use the URL given above to get to the Anonymizer’s web page and then click Upload photo;
- Select and upload your photo from your PC to the portal and wait while Anonymizer uses AI to generate similar faces.
- Click the photo that you want to use, and when the next page opens up, click Sign up or sign in to download the photo and use it wherever needed

3. Generated Photos Face Generator
Website: https://generated.photos/face-generator
This online face generator from Generated Photos allows you to create a unique realt-time face from scratch in one click. And if you don’t like the face generated, you can change the parameters such as gender, skin tone, hair, eye and head pose.
Generated Photos Face Generator tool is a good choice for people who don’t want to upload any photos online, and need to customize the face at maximum.
Below is a brief tutorial about how to generate a face with it step by step:
- Go to the website give above and then click the Generate faces
- Select the parameters accordingly based on your needs. You can generate the same face young or old with different emotions.

You can then download the generated photo by signing up or logging in, but you need to pay to remove the watermark.
4. Massless
Website: https://massless.io/tool/face-maker-ai
Massless allows you to use its tools to sketch a portrait, and then it uses AI technology to generate a virtual face out of your drawing. However, because you can’t always be precise while sketching with the mouse, it would be good to have access to a digital drawing pad to create the faces with a pen. With Massless, you can explore your creativity to the full and draw beautiful faces to use them as your avatar.
You can follow the procedure given below to use Massless to draw virtual faces:
- Open a web browser, and visit the URL given above. Click any icons from the toolbox at the top (E.g., Nose).
- Draw a shape on its corresponding face area on the left (E.g., Nose), and wait while the portal automatically updates the photo on the right.
- Repeat the process to sketch other parts of the face, and click the More icon (with three vertical dots) from the top-right corner.
- Click Download images from the page that opens next to download the photo to your PC and use it wherever needed.

5. This Person Does Not Exist
Website: https://thispersondoesnotexist.com/
This free online virtual face generator is probably the easiest and quickest. As you go to the website, it displays a random realistic image of a person that may not exist. If you don’t like the idea, you can change it with merely a single mouse click. Because the portal doesn’t have any Download button at the time of this writing, you must rely on the web browser’s default downloading process to get the image to your PC.
You can follow the instructions that are given below to switch between the images and download the one you like:
- Use your preferred web browser (Google Chrome here) to visit the URL provided above, and then notice the random image that appears on the page;
- Click Another from the box that appears at the bottom-right corner to change the image, repeat this process until you find a good photo for your avatar, and then right-click anywhere on the image.
- Click Save image from the context menu to save the photo. And then go to the default download folder to access the downloaded image, and use the picture wherever needed.
Note: Different browsers may have this feature with other names

6. BoredHumans
Website: https://boredhumans.com/faces.php
This web portal is identical to the previous one as it generates random virtual faces with merely one mouse click. Even this website doesn’t have any Download button to help you download the image. Therefore, you must use the browser’s built-in feature to obtain the photo you want to save to your PC.
You can learn how to use BoredHumans to generate virtual faces and download them to your computer by following the steps given below:
- Open a web browser (Google Chrome here) and visit the URL provided above, and then click Generate Another Fake Human if you don’t like the one that appears;
- Keep clicking the button until you find a face that can be used as your avatar. Alternatively, you can click the Generate A Human button to create a less realistic image of a random person.

- Right-click the image and click Save image to download the photo to your PC; and then get to the default download location to access the photo and use it wherever needed.
7. faceMaker
Website: https://facemaker.uvrg.org/
faceMaker allows you to generate virtual faces out of the fine details that you specify during the creation process. These details are adjusted using the sliders that affect the corresponding physical attributes of the avatars. For example, you can modify the lips, eye color, hair, face roundness, mouse depth, jaw shape, etc. using their respective sliders.
You can follow the steps that are given below to learn how to create a virtual face using faceMaker, and save it to your PC to use it as an avatar:
- Use your preferred web browser to visit the URL given above and click Start from the main page.
- Fill out the questionnaire by choosing your preferred options and agreeing to the term and conditions.
- Click Start and then click Continue on the next page. Use the sliders on the left and right panels to customize the face as needed, and once done, you can use any screen capturing tool to take a snapshot and remove the sliders by cropping the image, thus having only the virtual face.

- Save the cropped photo on your PC, and then back on the webpage, click Finished from the bottom-right corner.

- On the next page, choose the radio buttons according to your choice. Once done, click Yes, submit now from the bottom to submit the customized virtual face to the portal.

Conclusion
With all the cybercrime reports circulating everywhere nowadays, it is important to stay cautious about what you post on any social media website. To add an extra layer of security, you can avoid using your real photograph as a profile picture, and go with the fake faces instead. You can generate these virtual faces using any of the free online face generator websites, some of which even allow you to define the shape of a face quite minutely. Because the generated faces are not of any real human, they can be used as your avatar without any risk.
Wondershare Filmora
Get started easily with Filmora’s powerful performance, intuitive interface, and countless effects!
Try It Free Try It Free Try It Free Learn More about Video Editing

Best Free Online Face Generators to Get Virtual Faces in 2022
1. Generated Photos: Faces
Website: https://generated.photos/faces
This online portal enables you to create virtual faces by specifying the physical attributes of a character, such as gender, age, hair color, eye color, and much more. You can be as creative as you want to generate a face that appears somewhat like you with the available options. Once a look is generated, you can download and use it as needed.
The steps that are given below explain how you can use Generated Photos’ Faces section to create and download a virtual face:
- Launch your favorite web browser and go to the URL given above, and then you will see all free AI-generated photos on this website.
- Use the filters given in the left pane to define your character’s physical attributes and click Apply from the bottom to get the results. You can customize the face from its head post, gender, age, hair, eye, and emotion aspects.
- Click your preferred character from the AI-generated faces, and then click Download from the page that opens next. Choose your preferred method to sign up, and then sign in to download the virtual face to your PC.
2. Generated Photos: Anonymizer
Website: https://generated.photos/anonymizer
Anonymizer is another section from the Generated Photos portal that allows you to upload your image. Then it uses AI technology to generate similar virtual faces that you can download and use wherever needed.
However, sometimes the pictures that the website creates may not resemble your face as closely as you expect them to be, but that’s OK. Isn’t it? The main idea is to keep your privacy intact, and that’s what Generated Photos: Anonymizer does.
You can learn how to use this section by following the instructions given below:
- Use the URL given above to get to the Anonymizer’s web page and then click Upload photo;
- Select and upload your photo from your PC to the portal and wait while Anonymizer uses AI to generate similar faces.
- Click the photo that you want to use, and when the next page opens up, click Sign up or sign in to download the photo and use it wherever needed
3. Generated Photos Face Generator
Website: https://generated.photos/face-generator
This online face generator from Generated Photos allows you to create a unique realt-time face from scratch in one click. And if you don’t like the face generated, you can change the parameters such as gender, skin tone, hair, eye and head pose.
Generated Photos Face Generator tool is a good choice for people who don’t want to upload any photos online, and need to customize the face at maximum.
Below is a brief tutorial about how to generate a face with it step by step:
- Go to the website give above and then click the Generate faces
- Select the parameters accordingly based on your needs. You can generate the same face young or old with different emotions.
You can then download the generated photo by signing up or logging in, but you need to pay to remove the watermark.
4. Massless
Website: https://massless.io/tool/face-maker-ai
Massless allows you to use its tools to sketch a portrait, and then it uses AI technology to generate a virtual face out of your drawing. However, because you can’t always be precise while sketching with the mouse, it would be good to have access to a digital drawing pad to create the faces with a pen. With Massless, you can explore your creativity to the full and draw beautiful faces to use them as your avatar.
You can follow the procedure given below to use Massless to draw virtual faces:
- Open a web browser, and visit the URL given above. Click any icons from the toolbox at the top (E.g., Nose).
- Draw a shape on its corresponding face area on the left (E.g., Nose), and wait while the portal automatically updates the photo on the right.
- Repeat the process to sketch other parts of the face, and click the More icon (with three vertical dots) from the top-right corner.
- Click Download images from the page that opens next to download the photo to your PC and use it wherever needed.
5. This Person Does Not Exist
Website: https://thispersondoesnotexist.com/
This free online virtual face generator is probably the easiest and quickest. As you go to the website, it displays a random realistic image of a person that may not exist. If you don’t like the idea, you can change it with merely a single mouse click. Because the portal doesn’t have any Download button at the time of this writing, you must rely on the web browser’s default downloading process to get the image to your PC.
You can follow the instructions that are given below to switch between the images and download the one you like:
- Use your preferred web browser (Google Chrome here) to visit the URL provided above, and then notice the random image that appears on the page;
- Click Another from the box that appears at the bottom-right corner to change the image, repeat this process until you find a good photo for your avatar, and then right-click anywhere on the image.
- Click Save image from the context menu to save the photo. And then go to the default download folder to access the downloaded image, and use the picture wherever needed.
Note: Different browsers may have this feature with other names
6. BoredHumans
Website: https://boredhumans.com/faces.php
This web portal is identical to the previous one as it generates random virtual faces with merely one mouse click. Even this website doesn’t have any Download button to help you download the image. Therefore, you must use the browser’s built-in feature to obtain the photo you want to save to your PC.
You can learn how to use BoredHumans to generate virtual faces and download them to your computer by following the steps given below:
- Open a web browser (Google Chrome here) and visit the URL provided above, and then click Generate Another Fake Human if you don’t like the one that appears;
- Keep clicking the button until you find a face that can be used as your avatar. Alternatively, you can click the Generate A Human button to create a less realistic image of a random person.
- Right-click the image and click Save image to download the photo to your PC; and then get to the default download location to access the photo and use it wherever needed.
7. faceMaker
Website: https://facemaker.uvrg.org/
faceMaker allows you to generate virtual faces out of the fine details that you specify during the creation process. These details are adjusted using the sliders that affect the corresponding physical attributes of the avatars. For example, you can modify the lips, eye color, hair, face roundness, mouse depth, jaw shape, etc. using their respective sliders.
You can follow the steps that are given below to learn how to create a virtual face using faceMaker, and save it to your PC to use it as an avatar:
- Use your preferred web browser to visit the URL given above and click Start from the main page.
- Fill out the questionnaire by choosing your preferred options and agreeing to the term and conditions.
- Click Start and then click Continue on the next page. Use the sliders on the left and right panels to customize the face as needed, and once done, you can use any screen capturing tool to take a snapshot and remove the sliders by cropping the image, thus having only the virtual face.
- Save the cropped photo on your PC, and then back on the webpage, click Finished from the bottom-right corner.
- On the next page, choose the radio buttons according to your choice. Once done, click Yes, submit now from the bottom to submit the customized virtual face to the portal.
Conclusion
With all the cybercrime reports circulating everywhere nowadays, it is important to stay cautious about what you post on any social media website. To add an extra layer of security, you can avoid using your real photograph as a profile picture, and go with the fake faces instead. You can generate these virtual faces using any of the free online face generator websites, some of which even allow you to define the shape of a face quite minutely. Because the generated faces are not of any real human, they can be used as your avatar without any risk.
Wondershare Filmora
Get started easily with Filmora’s powerful performance, intuitive interface, and countless effects!
Try It Free Try It Free Try It Free Learn More about Video Editing
Also read:
- New New to Video Editing? Here Are the Best Software Options for 2024
- Unleash the Power of Motion Blur in Your FCP Edits for 2024
- Updated In 2024, Shaky Videos Be Gone! Top Video Stabilizer Apps for Mobile
- New Top 10 Free Online Tools for Creating Stunning Glitch Effects
- New 2024 Approved Despite the Aforementioned Restrictions, Cartoon Video Makers Still Offer a Sea of Possibilities to Their Users, so Lets Dive Into the Magical World of Animated Video
- New 2024 Approved Edit Videos Like a Pro on Mac VN Video Editor and Its Competitors
- New 2024 Approved Rotate Videos on iPhone for Free Top 5 Essential Tools
- New Brighten Up Best Video Enhancement Tools
- Updated In 2024, The Best Free Video Trimmers for Watermark-Free Edits
- Mobile Video Editing Showdown PowerDirector Alternatives
- Optimize Your LinkedIn Videos A Guide to Custom Thumbnails for 2024
- Cut and Edit Videos Easily with Kapwings Online Tool
- New In 2024, Take Your LinkedIn Videos to the Next Level Custom Thumbnail Tutorial
- Updated 2024 Approved Unbranded Video Editing 10 Top Free Android Apps
- 2024 Approved Get the Perfect Fit Top 5 Aspect Ratio Calculators Online
- New 2024 Approved The 7 Best Video Merging Tools with No Watermark Limitations
- New From Flat to Fabulous How to Add 3D Effects to Your Windows Videos
- New Premiere Rush Not Your Cup of Tea? Try These 4 Alternatives for 2024
- Best Video Editing Software for Windows 11/10 IMovie Alternatives
- In 2024, FCPX Audio Cleanup Tips and Tricks for Removing Unwanted Sounds
- Updated 2024 Approved The Ultimate List 10 Meme Creation Apps for Mobile
- New 2024 Approved Transform Your Videos Learn How to Add Effects in FCP X in 3 Steps
- In 2024, Film Like a Pro Easy Movie Creation for Beginners
- In 2024, Avidemux Sound Repair Expert Solutions
- New In 2024, Master the Art of Animation Top Tools and Software for Beginners, Pros, and Everyone in Between
- Free AVI Video Rotator Software and Apps for All Devices for 2024
- New In 2024, Revolutionize Your Videos Best Quality Improvement Tools
- Updated Best of the Best 10 Webcam Recording Programs for Windows 10 for 2024
- Updated 2024 Approved Make Unforgettable Moments Top Video Collage Apps for iOS
- New Make an Impact Top 10 Intro Creator Websites for Your Videos for 2024
- In 2024, Ways to Find a Suitable YouTube to MP3 Converter
- From Boring to Brilliant How to Customize Your LinkedIn Video Thumbnails
- New In 2024, Mobile Animation Made Easy Top Free 3D Apps for Beginners
- Updated GoPro Quik on PC How to Use It and Explore Other Options
- Updated The Ultimate Guide to Compressor Settings in FCPX
- New The Best Video Editing Software for Music Lovers
- In 2024, Mobile Video Editing Alternatives to PowerDirector Top Picks
- New 2024 Approved Calculating Image Proportions Aspect Ratio, Resolution, and More
- Updated Crack-Free and Worry-Free How to Get Filmora for Free Legally for 2024
- Updated From Capture to Cut Editing GoPro Footage on Mac
- New S Most Popular Video Editing Apps with Music Capabilities
- New How to Get Images for Commercial Use Free Ways
- Updated 2024 ApprovedHow to Make a Valentines Day Video for the Person You Love?
- iPogo will be the new iSpoofer On Vivo S17? | Dr.fone
- 5 Best Route Generator Apps You Should Try On OnePlus Nord CE 3 Lite 5G | Dr.fone
- 5 Easy Ways to Change Location on YouTube TV On Motorola Defy 2 | Dr.fone
- My Videos Arent Playing on Samsung Galaxy M14 4G – What Can I Do? | Dr.fone
- In 2024, The Best Android SIM Unlock Code Generators Unlock Your Lava Blaze Pro 5G Phone Hassle-Free
- In 2024, How To Unlock Any Xiaomi 13T Phone Password Using Emergency Call
- How to Unlock Apple iPhone 14 Pro with a Mask On | Dr.fone
- How to Transfer Photos from Nokia 150 (2023) to Laptop Without USB | Dr.fone
- How to rescue lost call logs from Infinix Note 30i
- Updated 2024 Approved Take Your Editing to the Next Level Top 40 FCPX Keyboard Shortcuts and Tricks
- 5 Solutions For Infinix Hot 40 Pro Unlock Without Password
- Why is iPogo not working On Nokia 105 Classic? Fixed | Dr.fone
- Best Android Data Recovery - Undelete Lost Music from Oppo
- Top 8 Video Editor with Useful Masking
- How to Find & Make Animated Christmas GIFs, In 2024
- Trouble with Apple iPhone 13 Swipe-Up? Try These 11 Solutions
- Forgot Locked Apple iPhone 12 Pro Password? Learn the Best Methods To Unlock
- Updated Reduce File Size Download VirtualDub for MPEG2 Compression
- 3 Best Tools to Hard Reset Motorola Moto G13 | Dr.fone
- Complete Tutorial to Use GPS Joystick to Fake GPS Location On Asus ROG Phone 8 | Dr.fone
- In 2024, Complete Tutorial to Use GPS Joystick to Fake GPS Location On Poco M6 5G | Dr.fone
- In 2024, How to Convert SRT to DOCX
- 2024 Approved Add Professional Sound Effects to Final Cut Pro without Breaking the Bank
- In 2024, How to Watch Hulu Outside US On Samsung Galaxy M34 | Dr.fone
- In 2024, Ultimate Guide from OnePlus Ace 3 FRP Bypass
- Title: New 2024 Approved Discover the Top Reaction Video Creation Platforms
- Author: Emma
- Created at : 2024-04-29 02:21:08
- Updated at : 2024-04-30 02:21:08
- Link: https://video-ai-editor.techidaily.com/new-2024-approved-discover-the-top-reaction-video-creation-platforms/
- License: This work is licensed under CC BY-NC-SA 4.0.
