:max_bytes(150000):strip_icc():format(webp)/GettyImages-850120538-4d2af54c23a641c8a5f2e00ef7a9aa37.jpg)
New The Ultimate FCP X Green Screen Tutorial From Basics to Advanced

The Ultimate FCP X Green Screen Tutorial: From Basics to Advanced
FCP X: Create a Chroma-Key (Green-screen) Effect

Benjamin Arango
Mar 27, 2024• Proven solutions
Chroma-key (also called “green screen”) effects are a staple in video production. What FCP X effect does is allow you to make the background behind an actor transparent so you can place the actor into a different environment than a studio.
This is a basic tutorial about Apple Final Cut Pro X, professional video editing software. However, if video editing is new to you, consider Wondershare Filmora for Mac . This is a powerful but easy-to-use tool for users just starting out. Download the free trial version below.
 Download Mac Version ](https://tools.techidaily.com/wondershare/filmora/download/ )
Getting Started
First, the best thing you can do to improve the quality of your keys is to improve how you shoot them. Here are seven basic production rules:
- Actors should be at least 10 feet in front of the green screen. This avoids light from the background “spilling” around their body or shoulders.
- In general, don’t cast shadows on the green screen. Be very careful shooting feet.
- The green background should be as smooth as possible. Paint is always better than fabric; avoid wrinkles and folds.
- The green background should be lit smoothly, both from side to side and top to bottom. I try to have the green background display between 40-50% level on the waveform monitor.
- There is NO relationship between how the background is lit and how your actors are lit. This article will illustrate that.
- Light your background for smoothness. Light your actors for drama.
- Don’t worry about having the green background fill the frame. It only needs to completely surround the edges of your actors. Garbage mattes are used to get rid of junk around the edges.
Setting up the Key

The green screen image is always placed above the background. You can place either the green screen or background image into the Primary Storyline. I find it easier to put the background in the Primary Storyline, because it makes editing the green screen image easier. But this is purely personal choice.
Step 1: Select the green screen clip
From the Effects Browser > Keying category, double-click the Keyer effect, which applies it to the selected clip. (You can also drag the effect on top of the clip, if you forgot to select the green-screen clip first.)

Don’t panic if your image looks weird – we will fix it.

Click the Sample Color icon. This allows fine-tuning the selection of the background color.

In the green-screen image, drag to select a representative section of the background. I try to get close to the face, but not so close that I accidentally select loose hair or skin.
Your key should look better immediately. Most of the time, you can probably stop here. But there are three other adjustments that can make your key look even better:
- Cleaning up the matte
- Edge adjustments
- Light wrap

Click the Matte button to display your key as a white foreground on a black background.

Your goal is the make the foreground solid white, which means opaque, and the background solid black, which means transparent. Adjust the Fill Holes and Edge Distance sliders until your key looks solid. (For REALLY bad keys, you’ll need to also adjust Color Selection, mentioned below.)

If an edge is too pronounced, or needs help, click the Edges icon.

Step 2: Tweaks Video
Then, click and drag a line from the foreground to the background in the Canvas. Drag the midpoint slider (where my cursor is) until the edge looks the best it can. Different video formats make this easy (ProRes), while others (HDV, avchd) make this much harder. Perfection is impossible – do the best you can.

Final Cut provides four additional tweaks at the bottom of the keyer filter:
- Color Selection
- Matte Tools
- Spill Suppression
- Light Wrap
The first three are designed to clean up poorly shot keys – read the FCP X Help files to learn how these work. (I used the Color Selection tools to clean up the very dark key I use an example later in this article.)
Light wrap, though, is aesthetic. What it does is blend colors from the background into the edges of the foreground, to make the entire key look more “organic,” as if the foreground and background were actually in the same space.
This is a subtle effect, but very cool.

Twirl down Light Wrap and adjust the Amount slider and watch what happens. Drag the other sliders around and see what happens. The nice thing about this setting is that when it looks good to you, it is good. The amount of the effect is totally up to you. Remember, Light Wrap only affects the edges of the foreground and should be used subtly.

When you are done, you have a great looking key!
Clean up the Image with a Garbage Mask

Sometimes, however, you don’t have, ah, perhaps, the best green-screen image to work with. Here, for example, there are lighting instruments in the foreground, with a very inadequately lit green screen in the background. (Sigh… this is just pitiful.)
Once you pull the key – which is film-speak for creating a green-screen shot, as I described above – and get it looking as good as possible, there’s one more step: adding a garbage matte to get rid of all the garbage surrounding your actors.

Once you get your key looking as good as you can – which in this case isn’t all that good – drag the Mask effect (Effects > Keying > Mask) on top of the green-screen clip.
NOTE: The Mask effect should always be added after the Keying effect, so that the Mask is below the Keyer in the Inspector.

Then, drag each of the four circles to create a shape such that your foreground image is contained inside it, and everything you want to exclude is outside. Here, for instance, we removed the light stand, the edge of the green background and the tearing at the top of the image. I’ve found this Mask effect works best when applied to a connected clip.
However, the big limitation of the Mask effect is that you only have four points to work with. That’s where a free effect comes in, which allows you to create far more flexible shapes with it. It’s written by Alex Gollner and is available on his website – alex4d.wordpress.com/fcpx/ – I recommend his effects highly.
How to Create a Chroma-Key in easier ways?
Chroma-key, or green screen, is an essential part of every editor to make all kinds of effects. Is there any way to make this sophisticated procedure easier way? Yes, try Filmora.
In version 10.5 for Mac, Filmora added a new feature: AI portrait. It allows you to do a green screen effect with just one click.
By adopting AI portrait, you can add those stunning effects in simple steps: How to Remove or Change Video Background in One Step?
Or: How to Add a Shake Effect to your Videos?
Conclusion
The chroma-key filter in FCP X allows us to create some amazing effects. If you want to use green screen effects more easily, here is Filmora for you. You can appaly Chroma-Key effects with just a few click. Have fun playing with it.
 Download Mac Version ](https://tools.techidaily.com/wondershare/filmora/download/ )

Benjamin Arango
Benjamin Arango is a writer and a lover of all things video.
Follow @Benjamin Arango
Benjamin Arango
Mar 27, 2024• Proven solutions
Chroma-key (also called “green screen”) effects are a staple in video production. What FCP X effect does is allow you to make the background behind an actor transparent so you can place the actor into a different environment than a studio.
This is a basic tutorial about Apple Final Cut Pro X, professional video editing software. However, if video editing is new to you, consider Wondershare Filmora for Mac . This is a powerful but easy-to-use tool for users just starting out. Download the free trial version below.
 Download Mac Version ](https://tools.techidaily.com/wondershare/filmora/download/ )
Getting Started
First, the best thing you can do to improve the quality of your keys is to improve how you shoot them. Here are seven basic production rules:
- Actors should be at least 10 feet in front of the green screen. This avoids light from the background “spilling” around their body or shoulders.
- In general, don’t cast shadows on the green screen. Be very careful shooting feet.
- The green background should be as smooth as possible. Paint is always better than fabric; avoid wrinkles and folds.
- The green background should be lit smoothly, both from side to side and top to bottom. I try to have the green background display between 40-50% level on the waveform monitor.
- There is NO relationship between how the background is lit and how your actors are lit. This article will illustrate that.
- Light your background for smoothness. Light your actors for drama.
- Don’t worry about having the green background fill the frame. It only needs to completely surround the edges of your actors. Garbage mattes are used to get rid of junk around the edges.
Setting up the Key

The green screen image is always placed above the background. You can place either the green screen or background image into the Primary Storyline. I find it easier to put the background in the Primary Storyline, because it makes editing the green screen image easier. But this is purely personal choice.
Step 1: Select the green screen clip
From the Effects Browser > Keying category, double-click the Keyer effect, which applies it to the selected clip. (You can also drag the effect on top of the clip, if you forgot to select the green-screen clip first.)

Don’t panic if your image looks weird – we will fix it.

Click the Sample Color icon. This allows fine-tuning the selection of the background color.

In the green-screen image, drag to select a representative section of the background. I try to get close to the face, but not so close that I accidentally select loose hair or skin.
Your key should look better immediately. Most of the time, you can probably stop here. But there are three other adjustments that can make your key look even better:
- Cleaning up the matte
- Edge adjustments
- Light wrap

Click the Matte button to display your key as a white foreground on a black background.

Your goal is the make the foreground solid white, which means opaque, and the background solid black, which means transparent. Adjust the Fill Holes and Edge Distance sliders until your key looks solid. (For REALLY bad keys, you’ll need to also adjust Color Selection, mentioned below.)

If an edge is too pronounced, or needs help, click the Edges icon.

Step 2: Tweaks Video
Then, click and drag a line from the foreground to the background in the Canvas. Drag the midpoint slider (where my cursor is) until the edge looks the best it can. Different video formats make this easy (ProRes), while others (HDV, avchd) make this much harder. Perfection is impossible – do the best you can.

Final Cut provides four additional tweaks at the bottom of the keyer filter:
- Color Selection
- Matte Tools
- Spill Suppression
- Light Wrap
The first three are designed to clean up poorly shot keys – read the FCP X Help files to learn how these work. (I used the Color Selection tools to clean up the very dark key I use an example later in this article.)
Light wrap, though, is aesthetic. What it does is blend colors from the background into the edges of the foreground, to make the entire key look more “organic,” as if the foreground and background were actually in the same space.
This is a subtle effect, but very cool.

Twirl down Light Wrap and adjust the Amount slider and watch what happens. Drag the other sliders around and see what happens. The nice thing about this setting is that when it looks good to you, it is good. The amount of the effect is totally up to you. Remember, Light Wrap only affects the edges of the foreground and should be used subtly.

When you are done, you have a great looking key!
Clean up the Image with a Garbage Mask

Sometimes, however, you don’t have, ah, perhaps, the best green-screen image to work with. Here, for example, there are lighting instruments in the foreground, with a very inadequately lit green screen in the background. (Sigh… this is just pitiful.)
Once you pull the key – which is film-speak for creating a green-screen shot, as I described above – and get it looking as good as possible, there’s one more step: adding a garbage matte to get rid of all the garbage surrounding your actors.

Once you get your key looking as good as you can – which in this case isn’t all that good – drag the Mask effect (Effects > Keying > Mask) on top of the green-screen clip.
NOTE: The Mask effect should always be added after the Keying effect, so that the Mask is below the Keyer in the Inspector.

Then, drag each of the four circles to create a shape such that your foreground image is contained inside it, and everything you want to exclude is outside. Here, for instance, we removed the light stand, the edge of the green background and the tearing at the top of the image. I’ve found this Mask effect works best when applied to a connected clip.
However, the big limitation of the Mask effect is that you only have four points to work with. That’s where a free effect comes in, which allows you to create far more flexible shapes with it. It’s written by Alex Gollner and is available on his website – alex4d.wordpress.com/fcpx/ – I recommend his effects highly.
How to Create a Chroma-Key in easier ways?
Chroma-key, or green screen, is an essential part of every editor to make all kinds of effects. Is there any way to make this sophisticated procedure easier way? Yes, try Filmora.
In version 10.5 for Mac, Filmora added a new feature: AI portrait. It allows you to do a green screen effect with just one click.
By adopting AI portrait, you can add those stunning effects in simple steps: How to Remove or Change Video Background in One Step?
Or: How to Add a Shake Effect to your Videos?
Conclusion
The chroma-key filter in FCP X allows us to create some amazing effects. If you want to use green screen effects more easily, here is Filmora for you. You can appaly Chroma-Key effects with just a few click. Have fun playing with it.
 Download Mac Version ](https://tools.techidaily.com/wondershare/filmora/download/ )

Benjamin Arango
Benjamin Arango is a writer and a lover of all things video.
Follow @Benjamin Arango
Benjamin Arango
Mar 27, 2024• Proven solutions
Chroma-key (also called “green screen”) effects are a staple in video production. What FCP X effect does is allow you to make the background behind an actor transparent so you can place the actor into a different environment than a studio.
This is a basic tutorial about Apple Final Cut Pro X, professional video editing software. However, if video editing is new to you, consider Wondershare Filmora for Mac . This is a powerful but easy-to-use tool for users just starting out. Download the free trial version below.
 Download Mac Version ](https://tools.techidaily.com/wondershare/filmora/download/ )
Getting Started
First, the best thing you can do to improve the quality of your keys is to improve how you shoot them. Here are seven basic production rules:
- Actors should be at least 10 feet in front of the green screen. This avoids light from the background “spilling” around their body or shoulders.
- In general, don’t cast shadows on the green screen. Be very careful shooting feet.
- The green background should be as smooth as possible. Paint is always better than fabric; avoid wrinkles and folds.
- The green background should be lit smoothly, both from side to side and top to bottom. I try to have the green background display between 40-50% level on the waveform monitor.
- There is NO relationship between how the background is lit and how your actors are lit. This article will illustrate that.
- Light your background for smoothness. Light your actors for drama.
- Don’t worry about having the green background fill the frame. It only needs to completely surround the edges of your actors. Garbage mattes are used to get rid of junk around the edges.
Setting up the Key

The green screen image is always placed above the background. You can place either the green screen or background image into the Primary Storyline. I find it easier to put the background in the Primary Storyline, because it makes editing the green screen image easier. But this is purely personal choice.
Step 1: Select the green screen clip
From the Effects Browser > Keying category, double-click the Keyer effect, which applies it to the selected clip. (You can also drag the effect on top of the clip, if you forgot to select the green-screen clip first.)

Don’t panic if your image looks weird – we will fix it.

Click the Sample Color icon. This allows fine-tuning the selection of the background color.

In the green-screen image, drag to select a representative section of the background. I try to get close to the face, but not so close that I accidentally select loose hair or skin.
Your key should look better immediately. Most of the time, you can probably stop here. But there are three other adjustments that can make your key look even better:
- Cleaning up the matte
- Edge adjustments
- Light wrap

Click the Matte button to display your key as a white foreground on a black background.

Your goal is the make the foreground solid white, which means opaque, and the background solid black, which means transparent. Adjust the Fill Holes and Edge Distance sliders until your key looks solid. (For REALLY bad keys, you’ll need to also adjust Color Selection, mentioned below.)

If an edge is too pronounced, or needs help, click the Edges icon.

Step 2: Tweaks Video
Then, click and drag a line from the foreground to the background in the Canvas. Drag the midpoint slider (where my cursor is) until the edge looks the best it can. Different video formats make this easy (ProRes), while others (HDV, avchd) make this much harder. Perfection is impossible – do the best you can.

Final Cut provides four additional tweaks at the bottom of the keyer filter:
- Color Selection
- Matte Tools
- Spill Suppression
- Light Wrap
The first three are designed to clean up poorly shot keys – read the FCP X Help files to learn how these work. (I used the Color Selection tools to clean up the very dark key I use an example later in this article.)
Light wrap, though, is aesthetic. What it does is blend colors from the background into the edges of the foreground, to make the entire key look more “organic,” as if the foreground and background were actually in the same space.
This is a subtle effect, but very cool.

Twirl down Light Wrap and adjust the Amount slider and watch what happens. Drag the other sliders around and see what happens. The nice thing about this setting is that when it looks good to you, it is good. The amount of the effect is totally up to you. Remember, Light Wrap only affects the edges of the foreground and should be used subtly.

When you are done, you have a great looking key!
Clean up the Image with a Garbage Mask

Sometimes, however, you don’t have, ah, perhaps, the best green-screen image to work with. Here, for example, there are lighting instruments in the foreground, with a very inadequately lit green screen in the background. (Sigh… this is just pitiful.)
Once you pull the key – which is film-speak for creating a green-screen shot, as I described above – and get it looking as good as possible, there’s one more step: adding a garbage matte to get rid of all the garbage surrounding your actors.

Once you get your key looking as good as you can – which in this case isn’t all that good – drag the Mask effect (Effects > Keying > Mask) on top of the green-screen clip.
NOTE: The Mask effect should always be added after the Keying effect, so that the Mask is below the Keyer in the Inspector.

Then, drag each of the four circles to create a shape such that your foreground image is contained inside it, and everything you want to exclude is outside. Here, for instance, we removed the light stand, the edge of the green background and the tearing at the top of the image. I’ve found this Mask effect works best when applied to a connected clip.
However, the big limitation of the Mask effect is that you only have four points to work with. That’s where a free effect comes in, which allows you to create far more flexible shapes with it. It’s written by Alex Gollner and is available on his website – alex4d.wordpress.com/fcpx/ – I recommend his effects highly.
How to Create a Chroma-Key in easier ways?
Chroma-key, or green screen, is an essential part of every editor to make all kinds of effects. Is there any way to make this sophisticated procedure easier way? Yes, try Filmora.
In version 10.5 for Mac, Filmora added a new feature: AI portrait. It allows you to do a green screen effect with just one click.
By adopting AI portrait, you can add those stunning effects in simple steps: How to Remove or Change Video Background in One Step?
Or: How to Add a Shake Effect to your Videos?
Conclusion
The chroma-key filter in FCP X allows us to create some amazing effects. If you want to use green screen effects more easily, here is Filmora for you. You can appaly Chroma-Key effects with just a few click. Have fun playing with it.
 Download Mac Version ](https://tools.techidaily.com/wondershare/filmora/download/ )

Benjamin Arango
Benjamin Arango is a writer and a lover of all things video.
Follow @Benjamin Arango
Benjamin Arango
Mar 27, 2024• Proven solutions
Chroma-key (also called “green screen”) effects are a staple in video production. What FCP X effect does is allow you to make the background behind an actor transparent so you can place the actor into a different environment than a studio.
This is a basic tutorial about Apple Final Cut Pro X, professional video editing software. However, if video editing is new to you, consider Wondershare Filmora for Mac . This is a powerful but easy-to-use tool for users just starting out. Download the free trial version below.
 Download Mac Version ](https://tools.techidaily.com/wondershare/filmora/download/ )
Getting Started
First, the best thing you can do to improve the quality of your keys is to improve how you shoot them. Here are seven basic production rules:
- Actors should be at least 10 feet in front of the green screen. This avoids light from the background “spilling” around their body or shoulders.
- In general, don’t cast shadows on the green screen. Be very careful shooting feet.
- The green background should be as smooth as possible. Paint is always better than fabric; avoid wrinkles and folds.
- The green background should be lit smoothly, both from side to side and top to bottom. I try to have the green background display between 40-50% level on the waveform monitor.
- There is NO relationship between how the background is lit and how your actors are lit. This article will illustrate that.
- Light your background for smoothness. Light your actors for drama.
- Don’t worry about having the green background fill the frame. It only needs to completely surround the edges of your actors. Garbage mattes are used to get rid of junk around the edges.
Setting up the Key

The green screen image is always placed above the background. You can place either the green screen or background image into the Primary Storyline. I find it easier to put the background in the Primary Storyline, because it makes editing the green screen image easier. But this is purely personal choice.
Step 1: Select the green screen clip
From the Effects Browser > Keying category, double-click the Keyer effect, which applies it to the selected clip. (You can also drag the effect on top of the clip, if you forgot to select the green-screen clip first.)

Don’t panic if your image looks weird – we will fix it.

Click the Sample Color icon. This allows fine-tuning the selection of the background color.

In the green-screen image, drag to select a representative section of the background. I try to get close to the face, but not so close that I accidentally select loose hair or skin.
Your key should look better immediately. Most of the time, you can probably stop here. But there are three other adjustments that can make your key look even better:
- Cleaning up the matte
- Edge adjustments
- Light wrap

Click the Matte button to display your key as a white foreground on a black background.

Your goal is the make the foreground solid white, which means opaque, and the background solid black, which means transparent. Adjust the Fill Holes and Edge Distance sliders until your key looks solid. (For REALLY bad keys, you’ll need to also adjust Color Selection, mentioned below.)

If an edge is too pronounced, or needs help, click the Edges icon.

Step 2: Tweaks Video
Then, click and drag a line from the foreground to the background in the Canvas. Drag the midpoint slider (where my cursor is) until the edge looks the best it can. Different video formats make this easy (ProRes), while others (HDV, avchd) make this much harder. Perfection is impossible – do the best you can.

Final Cut provides four additional tweaks at the bottom of the keyer filter:
- Color Selection
- Matte Tools
- Spill Suppression
- Light Wrap
The first three are designed to clean up poorly shot keys – read the FCP X Help files to learn how these work. (I used the Color Selection tools to clean up the very dark key I use an example later in this article.)
Light wrap, though, is aesthetic. What it does is blend colors from the background into the edges of the foreground, to make the entire key look more “organic,” as if the foreground and background were actually in the same space.
This is a subtle effect, but very cool.

Twirl down Light Wrap and adjust the Amount slider and watch what happens. Drag the other sliders around and see what happens. The nice thing about this setting is that when it looks good to you, it is good. The amount of the effect is totally up to you. Remember, Light Wrap only affects the edges of the foreground and should be used subtly.

When you are done, you have a great looking key!
Clean up the Image with a Garbage Mask

Sometimes, however, you don’t have, ah, perhaps, the best green-screen image to work with. Here, for example, there are lighting instruments in the foreground, with a very inadequately lit green screen in the background. (Sigh… this is just pitiful.)
Once you pull the key – which is film-speak for creating a green-screen shot, as I described above – and get it looking as good as possible, there’s one more step: adding a garbage matte to get rid of all the garbage surrounding your actors.

Once you get your key looking as good as you can – which in this case isn’t all that good – drag the Mask effect (Effects > Keying > Mask) on top of the green-screen clip.
NOTE: The Mask effect should always be added after the Keying effect, so that the Mask is below the Keyer in the Inspector.

Then, drag each of the four circles to create a shape such that your foreground image is contained inside it, and everything you want to exclude is outside. Here, for instance, we removed the light stand, the edge of the green background and the tearing at the top of the image. I’ve found this Mask effect works best when applied to a connected clip.
However, the big limitation of the Mask effect is that you only have four points to work with. That’s where a free effect comes in, which allows you to create far more flexible shapes with it. It’s written by Alex Gollner and is available on his website – alex4d.wordpress.com/fcpx/ – I recommend his effects highly.
How to Create a Chroma-Key in easier ways?
Chroma-key, or green screen, is an essential part of every editor to make all kinds of effects. Is there any way to make this sophisticated procedure easier way? Yes, try Filmora.
In version 10.5 for Mac, Filmora added a new feature: AI portrait. It allows you to do a green screen effect with just one click.
By adopting AI portrait, you can add those stunning effects in simple steps: How to Remove or Change Video Background in One Step?
Or: How to Add a Shake Effect to your Videos?
Conclusion
The chroma-key filter in FCP X allows us to create some amazing effects. If you want to use green screen effects more easily, here is Filmora for you. You can appaly Chroma-Key effects with just a few click. Have fun playing with it.
 Download Mac Version ](https://tools.techidaily.com/wondershare/filmora/download/ )

Benjamin Arango
Benjamin Arango is a writer and a lover of all things video.
Follow @Benjamin Arango
Get Lumafusion on Mac or Discover Its Best Replacements
Lumafusion for Mac: Install It or Get Alternatives

Max Wales
Mar 27, 2024• Proven solutions
LumaFusion is one of those applications that cannot go unmentioned in the list of best video editors for touch screen users. And for a reason: LumaFusion incorporates all that is expected from a good video editing software.
Scroll down to find more about LumaFusion Mac, how to install LumaFusion on M1-based Mac and iOS devices, and its alternatives!
- Part 1: What is Lumafusion
- Part 2: Lumafusion Can Run on M1-Based Mac
- Part 3: Lumafusion Alternatives on Mac
Part 1: What is Lumafusion?
LumaFusion is a powerful multitrack video editor that provides you with limitless options to edit a video to the finest quality, especially on touch screens. Recommended for journalists, filmmakers, and professional video producers, LumaFusion is the best application if you are looking to edit videos on the go!

Key Features:
- Employ up to six layers of video and audio tracks simultaneously
- Use preset transition options or create one yourself
- Display the edited video on another monitor in real-time while editing on the other
- Fine-tune and keyframe audio levels to perfect mixes
- Use multilayer titles with the desired shapes and sizes
- Work in frame rates from 18fps to 240fps and more!
Part 2: Lumafusion can Run on M1-Based Mac
While LumaFusion does not have a Mac version yet, it made clear that M1-based Mac supports the LumaFusion to run on a macOS environment. Yes, it might get inconvenient if you are not used to mouse navigation. Still, all features remain the same, and you can edit the videos to the same level. Plus, given the recent upgrades, LumaFusion has enabled users to change the touch option to mouse and keyboard, so you can customize the options accordingly and even use keyboard shortcuts to work seamlessly.
How to install Lumafusion
Here’s how to install LumaFusion on M1-based Mac:
- Open the App Store.
- Type in LumaFusion in the Search menu.
- Navigate to the right pane and find the LumaFusion application from the list.
- And select Get to install the LumaFusion application on M1-based Mac.
Once LumaFusion is installed on the Mac, you can work around the software like on iOS devices. All you have to do is go to Touch Alternatives options to change the customizing options.
Part 3: LumaFusion Alternatives on Mac
Although mighty and powerful, LumaFusion can be an annoyance to some based on personal preference. So, we are listing the two best alternatives of LumaFusion that includes almost all the features and enables you to edit the video to the same level.
1. Wondershare Filmora for Mac[for beginner and intermediate]
Filmora for Mac is suitable for all i.e., beginners, intermediate, and advanced video editors who want to utilize all the professional options yet need a simple interface. And given this smooth shift from beginners to experts — we recommend Filmora to the beginners and intermediate users who want to make a career or follow their passion for video-editing for years to come.
Coming to the features, Filmora includes all that is needed to enhance the video clips’ quality and give it unique and personalized effects.
Here are the key features of Filmora:
- Intuitive and simple interface, allowing even the least video-editor literates to personalize their videos to the full extent
- Pre-created filters and color pallets to color-correct the videos or you can utilize the professional color wheel and automated color-correction features to allow users to balance the color themselves
- Create simple animations with one-click preset options or take animation into your hands and personalize every aspect of the video manually, including position, size, opacity, and volume
- Includes a library of royalty-free music to incorporate tunes to the videos or you can utilize customizable options to bring consistency to your sound
- Large effects library with numerous customizing options and built-in filters, effects, overlays, and transitions to apply them with one-click
You may also interested in: How to edit video with Filmora
2. Final Cut Pro [for professionals]

Apple’s native Final Cut Pro X is another perfect alternative that has managed to make the top list when it comes to the best video editing software for the Mac since its release in 2011. And although it’s a pricey option, Final Cut Pro X offers a 90-day trial period to judge the application for yourself. Of course, the trial version excludes some additional content like extra sound effects, presets, the space designer plugin, and advanced video formats. Still, it should be enough to review the application.
Coming to the features, Final Cut Pro X takes things to a different level and offers you the best-in-trade functions to edit the videos to perfection. Including superior organization tools, libraries, ratings, tagging, auto analysis for faces, scenes — the interface of Final Cut Pro X speaks of the effort the designers have put into the software. Moreover, the multi-cam support, multiple later editing, audio effects, and the recent upgrade of smoothing 360-degree footage and HDR modes have shown that Apple will leave no stone unturned when it comes to perfecting its native professional video-editing tool, i.e., Final Cut Pro X.
However, there is a learning curve if you are new to Final Cut Pro X (regardless of whether you are an expert or not), as it incorporates a unique magnetic, trackless timeline that is not common to the video-editing software. But that initial learning time is worth it because once you start utilizing Final Cut Pro X, you will not see (or like) any other software in the industry — given the regular and timely updates to the application.
Can’t choose between Final Cut Pro and Lumafusion for professional video editing? This article may help you: Final Cut Pro vs. Lumafusion, Which Suits You Better
Conclusion
While LumaFusion can be installed on the new M1-Based Macs, it is not that great to work on it (especially, if you are used to the touch version). And that is why this guide list the two-best alternatives to LumaFusion, i.e., Filmora and Final Cut Pro.And we highly recommend Filmora to all non-professional users.

Max Wales
Max Wales is a writer and a lover of all things video.
Follow @Max Wales
Max Wales
Mar 27, 2024• Proven solutions
LumaFusion is one of those applications that cannot go unmentioned in the list of best video editors for touch screen users. And for a reason: LumaFusion incorporates all that is expected from a good video editing software.
Scroll down to find more about LumaFusion Mac, how to install LumaFusion on M1-based Mac and iOS devices, and its alternatives!
- Part 1: What is Lumafusion
- Part 2: Lumafusion Can Run on M1-Based Mac
- Part 3: Lumafusion Alternatives on Mac
Part 1: What is Lumafusion?
LumaFusion is a powerful multitrack video editor that provides you with limitless options to edit a video to the finest quality, especially on touch screens. Recommended for journalists, filmmakers, and professional video producers, LumaFusion is the best application if you are looking to edit videos on the go!

Key Features:
- Employ up to six layers of video and audio tracks simultaneously
- Use preset transition options or create one yourself
- Display the edited video on another monitor in real-time while editing on the other
- Fine-tune and keyframe audio levels to perfect mixes
- Use multilayer titles with the desired shapes and sizes
- Work in frame rates from 18fps to 240fps and more!
Part 2: Lumafusion can Run on M1-Based Mac
While LumaFusion does not have a Mac version yet, it made clear that M1-based Mac supports the LumaFusion to run on a macOS environment. Yes, it might get inconvenient if you are not used to mouse navigation. Still, all features remain the same, and you can edit the videos to the same level. Plus, given the recent upgrades, LumaFusion has enabled users to change the touch option to mouse and keyboard, so you can customize the options accordingly and even use keyboard shortcuts to work seamlessly.
How to install Lumafusion
Here’s how to install LumaFusion on M1-based Mac:
- Open the App Store.
- Type in LumaFusion in the Search menu.
- Navigate to the right pane and find the LumaFusion application from the list.
- And select Get to install the LumaFusion application on M1-based Mac.
Once LumaFusion is installed on the Mac, you can work around the software like on iOS devices. All you have to do is go to Touch Alternatives options to change the customizing options.
Part 3: LumaFusion Alternatives on Mac
Although mighty and powerful, LumaFusion can be an annoyance to some based on personal preference. So, we are listing the two best alternatives of LumaFusion that includes almost all the features and enables you to edit the video to the same level.
1. Wondershare Filmora for Mac[for beginner and intermediate]
Filmora for Mac is suitable for all i.e., beginners, intermediate, and advanced video editors who want to utilize all the professional options yet need a simple interface. And given this smooth shift from beginners to experts — we recommend Filmora to the beginners and intermediate users who want to make a career or follow their passion for video-editing for years to come.
Coming to the features, Filmora includes all that is needed to enhance the video clips’ quality and give it unique and personalized effects.
Here are the key features of Filmora:
- Intuitive and simple interface, allowing even the least video-editor literates to personalize their videos to the full extent
- Pre-created filters and color pallets to color-correct the videos or you can utilize the professional color wheel and automated color-correction features to allow users to balance the color themselves
- Create simple animations with one-click preset options or take animation into your hands and personalize every aspect of the video manually, including position, size, opacity, and volume
- Includes a library of royalty-free music to incorporate tunes to the videos or you can utilize customizable options to bring consistency to your sound
- Large effects library with numerous customizing options and built-in filters, effects, overlays, and transitions to apply them with one-click
You may also interested in: How to edit video with Filmora
2. Final Cut Pro [for professionals]

Apple’s native Final Cut Pro X is another perfect alternative that has managed to make the top list when it comes to the best video editing software for the Mac since its release in 2011. And although it’s a pricey option, Final Cut Pro X offers a 90-day trial period to judge the application for yourself. Of course, the trial version excludes some additional content like extra sound effects, presets, the space designer plugin, and advanced video formats. Still, it should be enough to review the application.
Coming to the features, Final Cut Pro X takes things to a different level and offers you the best-in-trade functions to edit the videos to perfection. Including superior organization tools, libraries, ratings, tagging, auto analysis for faces, scenes — the interface of Final Cut Pro X speaks of the effort the designers have put into the software. Moreover, the multi-cam support, multiple later editing, audio effects, and the recent upgrade of smoothing 360-degree footage and HDR modes have shown that Apple will leave no stone unturned when it comes to perfecting its native professional video-editing tool, i.e., Final Cut Pro X.
However, there is a learning curve if you are new to Final Cut Pro X (regardless of whether you are an expert or not), as it incorporates a unique magnetic, trackless timeline that is not common to the video-editing software. But that initial learning time is worth it because once you start utilizing Final Cut Pro X, you will not see (or like) any other software in the industry — given the regular and timely updates to the application.
Can’t choose between Final Cut Pro and Lumafusion for professional video editing? This article may help you: Final Cut Pro vs. Lumafusion, Which Suits You Better
Conclusion
While LumaFusion can be installed on the new M1-Based Macs, it is not that great to work on it (especially, if you are used to the touch version). And that is why this guide list the two-best alternatives to LumaFusion, i.e., Filmora and Final Cut Pro.And we highly recommend Filmora to all non-professional users.

Max Wales
Max Wales is a writer and a lover of all things video.
Follow @Max Wales
Max Wales
Mar 27, 2024• Proven solutions
LumaFusion is one of those applications that cannot go unmentioned in the list of best video editors for touch screen users. And for a reason: LumaFusion incorporates all that is expected from a good video editing software.
Scroll down to find more about LumaFusion Mac, how to install LumaFusion on M1-based Mac and iOS devices, and its alternatives!
- Part 1: What is Lumafusion
- Part 2: Lumafusion Can Run on M1-Based Mac
- Part 3: Lumafusion Alternatives on Mac
Part 1: What is Lumafusion?
LumaFusion is a powerful multitrack video editor that provides you with limitless options to edit a video to the finest quality, especially on touch screens. Recommended for journalists, filmmakers, and professional video producers, LumaFusion is the best application if you are looking to edit videos on the go!

Key Features:
- Employ up to six layers of video and audio tracks simultaneously
- Use preset transition options or create one yourself
- Display the edited video on another monitor in real-time while editing on the other
- Fine-tune and keyframe audio levels to perfect mixes
- Use multilayer titles with the desired shapes and sizes
- Work in frame rates from 18fps to 240fps and more!
Part 2: Lumafusion can Run on M1-Based Mac
While LumaFusion does not have a Mac version yet, it made clear that M1-based Mac supports the LumaFusion to run on a macOS environment. Yes, it might get inconvenient if you are not used to mouse navigation. Still, all features remain the same, and you can edit the videos to the same level. Plus, given the recent upgrades, LumaFusion has enabled users to change the touch option to mouse and keyboard, so you can customize the options accordingly and even use keyboard shortcuts to work seamlessly.
How to install Lumafusion
Here’s how to install LumaFusion on M1-based Mac:
- Open the App Store.
- Type in LumaFusion in the Search menu.
- Navigate to the right pane and find the LumaFusion application from the list.
- And select Get to install the LumaFusion application on M1-based Mac.
Once LumaFusion is installed on the Mac, you can work around the software like on iOS devices. All you have to do is go to Touch Alternatives options to change the customizing options.
Part 3: LumaFusion Alternatives on Mac
Although mighty and powerful, LumaFusion can be an annoyance to some based on personal preference. So, we are listing the two best alternatives of LumaFusion that includes almost all the features and enables you to edit the video to the same level.
1. Wondershare Filmora for Mac[for beginner and intermediate]
Filmora for Mac is suitable for all i.e., beginners, intermediate, and advanced video editors who want to utilize all the professional options yet need a simple interface. And given this smooth shift from beginners to experts — we recommend Filmora to the beginners and intermediate users who want to make a career or follow their passion for video-editing for years to come.
Coming to the features, Filmora includes all that is needed to enhance the video clips’ quality and give it unique and personalized effects.
Here are the key features of Filmora:
- Intuitive and simple interface, allowing even the least video-editor literates to personalize their videos to the full extent
- Pre-created filters and color pallets to color-correct the videos or you can utilize the professional color wheel and automated color-correction features to allow users to balance the color themselves
- Create simple animations with one-click preset options or take animation into your hands and personalize every aspect of the video manually, including position, size, opacity, and volume
- Includes a library of royalty-free music to incorporate tunes to the videos or you can utilize customizable options to bring consistency to your sound
- Large effects library with numerous customizing options and built-in filters, effects, overlays, and transitions to apply them with one-click
You may also interested in: How to edit video with Filmora
2. Final Cut Pro [for professionals]

Apple’s native Final Cut Pro X is another perfect alternative that has managed to make the top list when it comes to the best video editing software for the Mac since its release in 2011. And although it’s a pricey option, Final Cut Pro X offers a 90-day trial period to judge the application for yourself. Of course, the trial version excludes some additional content like extra sound effects, presets, the space designer plugin, and advanced video formats. Still, it should be enough to review the application.
Coming to the features, Final Cut Pro X takes things to a different level and offers you the best-in-trade functions to edit the videos to perfection. Including superior organization tools, libraries, ratings, tagging, auto analysis for faces, scenes — the interface of Final Cut Pro X speaks of the effort the designers have put into the software. Moreover, the multi-cam support, multiple later editing, audio effects, and the recent upgrade of smoothing 360-degree footage and HDR modes have shown that Apple will leave no stone unturned when it comes to perfecting its native professional video-editing tool, i.e., Final Cut Pro X.
However, there is a learning curve if you are new to Final Cut Pro X (regardless of whether you are an expert or not), as it incorporates a unique magnetic, trackless timeline that is not common to the video-editing software. But that initial learning time is worth it because once you start utilizing Final Cut Pro X, you will not see (or like) any other software in the industry — given the regular and timely updates to the application.
Can’t choose between Final Cut Pro and Lumafusion for professional video editing? This article may help you: Final Cut Pro vs. Lumafusion, Which Suits You Better
Conclusion
While LumaFusion can be installed on the new M1-Based Macs, it is not that great to work on it (especially, if you are used to the touch version). And that is why this guide list the two-best alternatives to LumaFusion, i.e., Filmora and Final Cut Pro.And we highly recommend Filmora to all non-professional users.

Max Wales
Max Wales is a writer and a lover of all things video.
Follow @Max Wales
Max Wales
Mar 27, 2024• Proven solutions
LumaFusion is one of those applications that cannot go unmentioned in the list of best video editors for touch screen users. And for a reason: LumaFusion incorporates all that is expected from a good video editing software.
Scroll down to find more about LumaFusion Mac, how to install LumaFusion on M1-based Mac and iOS devices, and its alternatives!
- Part 1: What is Lumafusion
- Part 2: Lumafusion Can Run on M1-Based Mac
- Part 3: Lumafusion Alternatives on Mac
Part 1: What is Lumafusion?
LumaFusion is a powerful multitrack video editor that provides you with limitless options to edit a video to the finest quality, especially on touch screens. Recommended for journalists, filmmakers, and professional video producers, LumaFusion is the best application if you are looking to edit videos on the go!

Key Features:
- Employ up to six layers of video and audio tracks simultaneously
- Use preset transition options or create one yourself
- Display the edited video on another monitor in real-time while editing on the other
- Fine-tune and keyframe audio levels to perfect mixes
- Use multilayer titles with the desired shapes and sizes
- Work in frame rates from 18fps to 240fps and more!
Part 2: Lumafusion can Run on M1-Based Mac
While LumaFusion does not have a Mac version yet, it made clear that M1-based Mac supports the LumaFusion to run on a macOS environment. Yes, it might get inconvenient if you are not used to mouse navigation. Still, all features remain the same, and you can edit the videos to the same level. Plus, given the recent upgrades, LumaFusion has enabled users to change the touch option to mouse and keyboard, so you can customize the options accordingly and even use keyboard shortcuts to work seamlessly.
How to install Lumafusion
Here’s how to install LumaFusion on M1-based Mac:
- Open the App Store.
- Type in LumaFusion in the Search menu.
- Navigate to the right pane and find the LumaFusion application from the list.
- And select Get to install the LumaFusion application on M1-based Mac.
Once LumaFusion is installed on the Mac, you can work around the software like on iOS devices. All you have to do is go to Touch Alternatives options to change the customizing options.
Part 3: LumaFusion Alternatives on Mac
Although mighty and powerful, LumaFusion can be an annoyance to some based on personal preference. So, we are listing the two best alternatives of LumaFusion that includes almost all the features and enables you to edit the video to the same level.
1. Wondershare Filmora for Mac[for beginner and intermediate]
Filmora for Mac is suitable for all i.e., beginners, intermediate, and advanced video editors who want to utilize all the professional options yet need a simple interface. And given this smooth shift from beginners to experts — we recommend Filmora to the beginners and intermediate users who want to make a career or follow their passion for video-editing for years to come.
Coming to the features, Filmora includes all that is needed to enhance the video clips’ quality and give it unique and personalized effects.
Here are the key features of Filmora:
- Intuitive and simple interface, allowing even the least video-editor literates to personalize their videos to the full extent
- Pre-created filters and color pallets to color-correct the videos or you can utilize the professional color wheel and automated color-correction features to allow users to balance the color themselves
- Create simple animations with one-click preset options or take animation into your hands and personalize every aspect of the video manually, including position, size, opacity, and volume
- Includes a library of royalty-free music to incorporate tunes to the videos or you can utilize customizable options to bring consistency to your sound
- Large effects library with numerous customizing options and built-in filters, effects, overlays, and transitions to apply them with one-click
You may also interested in: How to edit video with Filmora
2. Final Cut Pro [for professionals]

Apple’s native Final Cut Pro X is another perfect alternative that has managed to make the top list when it comes to the best video editing software for the Mac since its release in 2011. And although it’s a pricey option, Final Cut Pro X offers a 90-day trial period to judge the application for yourself. Of course, the trial version excludes some additional content like extra sound effects, presets, the space designer plugin, and advanced video formats. Still, it should be enough to review the application.
Coming to the features, Final Cut Pro X takes things to a different level and offers you the best-in-trade functions to edit the videos to perfection. Including superior organization tools, libraries, ratings, tagging, auto analysis for faces, scenes — the interface of Final Cut Pro X speaks of the effort the designers have put into the software. Moreover, the multi-cam support, multiple later editing, audio effects, and the recent upgrade of smoothing 360-degree footage and HDR modes have shown that Apple will leave no stone unturned when it comes to perfecting its native professional video-editing tool, i.e., Final Cut Pro X.
However, there is a learning curve if you are new to Final Cut Pro X (regardless of whether you are an expert or not), as it incorporates a unique magnetic, trackless timeline that is not common to the video-editing software. But that initial learning time is worth it because once you start utilizing Final Cut Pro X, you will not see (or like) any other software in the industry — given the regular and timely updates to the application.
Can’t choose between Final Cut Pro and Lumafusion for professional video editing? This article may help you: Final Cut Pro vs. Lumafusion, Which Suits You Better
Conclusion
While LumaFusion can be installed on the new M1-Based Macs, it is not that great to work on it (especially, if you are used to the touch version). And that is why this guide list the two-best alternatives to LumaFusion, i.e., Filmora and Final Cut Pro.And we highly recommend Filmora to all non-professional users.

Max Wales
Max Wales is a writer and a lover of all things video.
Follow @Max Wales
This Article Tells You Several Tips to Make a Better Home Movie. Master the Home Movie Making Tips and Obey the Rules so that You Can Make a Great Movie
Home Video Editing Tips - How to Make a Great Home Movie

Ollie Mattison
Mar 27, 2024• Proven solutions
Many people have camcorders and shoot a lot of movies and want to preserve home movies for long lasting memories. If you’d like to make some home movies that can be treasured and liked by the families, try to follow the home video editing tips below.
Home video editing tips for better home movie making
1. Know your camcorder well
Make sure that you are very familiar with your camcorder before recording so that you can shoot good videos and photos. If you are not, read the manual and practice shooting before you going to shoot the videos for your home movie.
2. Make a home movie plan
Keep in mind what your home movie is going to be adorable and pay much attention to the content. And when you record the videos, take the plan into consideration. By doing this, you can make your home movie more coherent.
3. Shoot good videos
Make sure your videos have plenty of light and are not blurry. And be conscious of the background sound, and try to control it as much as possible. Besides, try to shoot scenes from different angles.
4. Add video editing effects
When you are editing your movies using some video editing software , you can trim, split, rotate, split videos before or after using the PIP, Jump-cut, Face Off effects, but do not use too many transition effects.
5. Combine photos and videos together
To make your home video more advanced, you can insert some still photos to the videos or use some advanced video effects such as picture in picture effect in iMovie. They will surely make you video more interesting.
6. Don’t make the home video too long
Most home videos are long and boring. However, people usually don’t like to see very trifle. So make your home video short, sweet and attractive. Get the best scenes and discard those trivial things.
7. Get some humor
Successful TV commercials are with good humor and make people happy. Adding some humor to your home videos will bring them to the next level instantly. You can find some funny video online and find some inspirations from them on how to make the video funny and attractive.
Remember that great home videos should be short, funny, tight and easy to watch. Here are just simple home video editing tips. The following is the trial version of Wondershare Filmora (originally Wondershare Video Editor) (Windows and Mac version), which can achieve all your dreams about video editing software.
 Download Mac Version ](https://download.wondershare.com/mac-video-editor%5Ffull718.dmg )

Ollie Mattison
Ollie Mattison is a writer and a lover of all things video.
Follow @Ollie Mattison
Ollie Mattison
Mar 27, 2024• Proven solutions
Many people have camcorders and shoot a lot of movies and want to preserve home movies for long lasting memories. If you’d like to make some home movies that can be treasured and liked by the families, try to follow the home video editing tips below.
Home video editing tips for better home movie making
1. Know your camcorder well
Make sure that you are very familiar with your camcorder before recording so that you can shoot good videos and photos. If you are not, read the manual and practice shooting before you going to shoot the videos for your home movie.
2. Make a home movie plan
Keep in mind what your home movie is going to be adorable and pay much attention to the content. And when you record the videos, take the plan into consideration. By doing this, you can make your home movie more coherent.
3. Shoot good videos
Make sure your videos have plenty of light and are not blurry. And be conscious of the background sound, and try to control it as much as possible. Besides, try to shoot scenes from different angles.
4. Add video editing effects
When you are editing your movies using some video editing software , you can trim, split, rotate, split videos before or after using the PIP, Jump-cut, Face Off effects, but do not use too many transition effects.
5. Combine photos and videos together
To make your home video more advanced, you can insert some still photos to the videos or use some advanced video effects such as picture in picture effect in iMovie. They will surely make you video more interesting.
6. Don’t make the home video too long
Most home videos are long and boring. However, people usually don’t like to see very trifle. So make your home video short, sweet and attractive. Get the best scenes and discard those trivial things.
7. Get some humor
Successful TV commercials are with good humor and make people happy. Adding some humor to your home videos will bring them to the next level instantly. You can find some funny video online and find some inspirations from them on how to make the video funny and attractive.
Remember that great home videos should be short, funny, tight and easy to watch. Here are just simple home video editing tips. The following is the trial version of Wondershare Filmora (originally Wondershare Video Editor) (Windows and Mac version), which can achieve all your dreams about video editing software.
 Download Mac Version ](https://download.wondershare.com/mac-video-editor%5Ffull718.dmg )

Ollie Mattison
Ollie Mattison is a writer and a lover of all things video.
Follow @Ollie Mattison
Ollie Mattison
Mar 27, 2024• Proven solutions
Many people have camcorders and shoot a lot of movies and want to preserve home movies for long lasting memories. If you’d like to make some home movies that can be treasured and liked by the families, try to follow the home video editing tips below.
Home video editing tips for better home movie making
1. Know your camcorder well
Make sure that you are very familiar with your camcorder before recording so that you can shoot good videos and photos. If you are not, read the manual and practice shooting before you going to shoot the videos for your home movie.
2. Make a home movie plan
Keep in mind what your home movie is going to be adorable and pay much attention to the content. And when you record the videos, take the plan into consideration. By doing this, you can make your home movie more coherent.
3. Shoot good videos
Make sure your videos have plenty of light and are not blurry. And be conscious of the background sound, and try to control it as much as possible. Besides, try to shoot scenes from different angles.
4. Add video editing effects
When you are editing your movies using some video editing software , you can trim, split, rotate, split videos before or after using the PIP, Jump-cut, Face Off effects, but do not use too many transition effects.
5. Combine photos and videos together
To make your home video more advanced, you can insert some still photos to the videos or use some advanced video effects such as picture in picture effect in iMovie. They will surely make you video more interesting.
6. Don’t make the home video too long
Most home videos are long and boring. However, people usually don’t like to see very trifle. So make your home video short, sweet and attractive. Get the best scenes and discard those trivial things.
7. Get some humor
Successful TV commercials are with good humor and make people happy. Adding some humor to your home videos will bring them to the next level instantly. You can find some funny video online and find some inspirations from them on how to make the video funny and attractive.
Remember that great home videos should be short, funny, tight and easy to watch. Here are just simple home video editing tips. The following is the trial version of Wondershare Filmora (originally Wondershare Video Editor) (Windows and Mac version), which can achieve all your dreams about video editing software.
 Download Mac Version ](https://download.wondershare.com/mac-video-editor%5Ffull718.dmg )

Ollie Mattison
Ollie Mattison is a writer and a lover of all things video.
Follow @Ollie Mattison
Ollie Mattison
Mar 27, 2024• Proven solutions
Many people have camcorders and shoot a lot of movies and want to preserve home movies for long lasting memories. If you’d like to make some home movies that can be treasured and liked by the families, try to follow the home video editing tips below.
Home video editing tips for better home movie making
1. Know your camcorder well
Make sure that you are very familiar with your camcorder before recording so that you can shoot good videos and photos. If you are not, read the manual and practice shooting before you going to shoot the videos for your home movie.
2. Make a home movie plan
Keep in mind what your home movie is going to be adorable and pay much attention to the content. And when you record the videos, take the plan into consideration. By doing this, you can make your home movie more coherent.
3. Shoot good videos
Make sure your videos have plenty of light and are not blurry. And be conscious of the background sound, and try to control it as much as possible. Besides, try to shoot scenes from different angles.
4. Add video editing effects
When you are editing your movies using some video editing software , you can trim, split, rotate, split videos before or after using the PIP, Jump-cut, Face Off effects, but do not use too many transition effects.
5. Combine photos and videos together
To make your home video more advanced, you can insert some still photos to the videos or use some advanced video effects such as picture in picture effect in iMovie. They will surely make you video more interesting.
6. Don’t make the home video too long
Most home videos are long and boring. However, people usually don’t like to see very trifle. So make your home video short, sweet and attractive. Get the best scenes and discard those trivial things.
7. Get some humor
Successful TV commercials are with good humor and make people happy. Adding some humor to your home videos will bring them to the next level instantly. You can find some funny video online and find some inspirations from them on how to make the video funny and attractive.
Remember that great home videos should be short, funny, tight and easy to watch. Here are just simple home video editing tips. The following is the trial version of Wondershare Filmora (originally Wondershare Video Editor) (Windows and Mac version), which can achieve all your dreams about video editing software.
 Download Mac Version ](https://download.wondershare.com/mac-video-editor%5Ffull718.dmg )

Ollie Mattison
Ollie Mattison is a writer and a lover of all things video.
Follow @Ollie Mattison
Expert-Approved Video Editing Software
Top 10 Professional Video Editing Software [Free Download]

Ollie Mattison
Mar 27, 2024• Proven solutions
The advent of digital video technology has opened an unprecedented opportunity for novice and professional filmmakers alike. Professional video editing software is an essential tool to create high-quality productions and visuals with accuracy, speed, and flexibility.
Whether you are a filmmaker looking to create content for the big screen or a commercial director trying to make your mark in the industry, a professional video editing program can give you the tools needed to produce highly polished visuals. Today’s advanced editors come with preloaded templates and effects that enable filmmakers to save time without sacrificing quality.
We’ve done some extensive research on what some consider to be the 10 best professional video editing software currently on the market, and we’re here to present what we’ve managed to find.
- Part 1: Top 10 Professional Video Editing Software Free Download
- Part 2: Tips for Choosing Professional Video Editing Software
- Part 3: FAQ about Professional Video Editing Software
Part 1: Top 10 Professional Video Editing Software Free Download
Here is the 10 best professional video editing software for you to free download.
| 1 - Filmora | 2 - EDIUS |
|---|---|
| 3 - Autodesk Smoke | 4 - Avid Media Composer |
| 5 - Adobe Premiere Pro CC | 6 - Final Cut Pro |
| 7 - HitFilm Pr | 8 - Lightworks |
| 9 - Blender | 10 - Magix Video Pro X |
1. Filmora
Price: $79.99 Customers can add $36.96/month for effects and plugins, $49.99 Customers can add $18.99/month for effects and plugins
Pros: The best value on the list, covers everything a pro video editor should have, Easy-to-use.
The newly released professional video editor app from Wondershare is specially designed for pros looking for a quick way to edit videos in a professional way.
The Filmora video editing software makes professional video editing easy. You can add unlimited video and audio tracks and control the panels at your hand.
You can also use customizable animations to establish your style and use high-quality presets to get a detailed color correction.
2. EDIUS
Price: $499, One-Time Purchase
Pros: Genderless video editing, 4K HDR workflow, flexible user interface, real-time conversion rates, support for a wide variety of video formats, fast AVCHD editing, motion tracking, 3-way color correction.
Cons: Relatively broadcast-oriented.
EDIUS is a free download video editing software that evolved out of what was originally a number of Adobe Premiere Plus plugins.
Ever since its release, EDIUS has gained a loyal following that appreciates both its business model and the operations that the program can perform.
More than a handful of broadcasters worldwide use EDIUS as their program of choice, both due to its flexibility when dealing with various video formats and because it’s quite easy to use when compared to some of its competitors.
Why do so many people swear by EDIUS? Well, according to its fanbase, EDIUS tends to be quite fast when processing, importing, editing, and exporting videos - couple that with the fact that EDIUS doesn’t require a subscription, and you’ve got yourself a thoroughly solid video editing software that can go toe to toe with its rivals.
3. Autodesk Smoke
Price: $190, Monthly Subscription, 1505$, Yearly Subscription
Pros: Timeline-based creative workflow, node-based compositing, ability to flawlessly make use of 3D animations and modeling, a high degree of stability (no crashes!).
Cons: Can only be used on a single monitor. Furthermore, Autodesk Smoke is exclusively for Mac users.
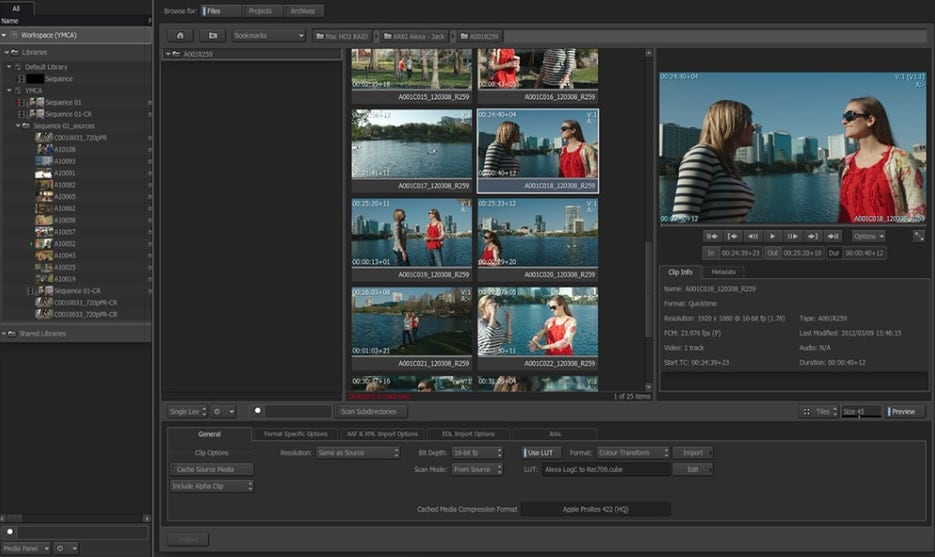
Autodesk is a video editing software that is favored by many people to due to its node-based compositing.
To put it as simple as possible, the video editor achieves a higher level of complexity than other popular software.
Smoke’s real strength lies in editorial and finishing functions. While the professional video editing software that is free to download doesn’t necessarily offer anything that its competitors don’t, this video editing software comes out on top when it comes to 3D effects.
4. Avid Media Composer
Price: $199.99 for a Year’s Subscription, or $24.99 Monthly
Pros: Free download, Advanced color-correction, built-in metadata and effect tools, HDR support, Multicam editing, FrameFlex, keyboard mapping, background rendering, real-time editing, a very high degree of stability, and serves as a great starting point for budding video editors.
Cons: Steep learning curve and outdated interface. However, learning how to use Avid Media Composer will enable you to jump right into other video editing software with ease.
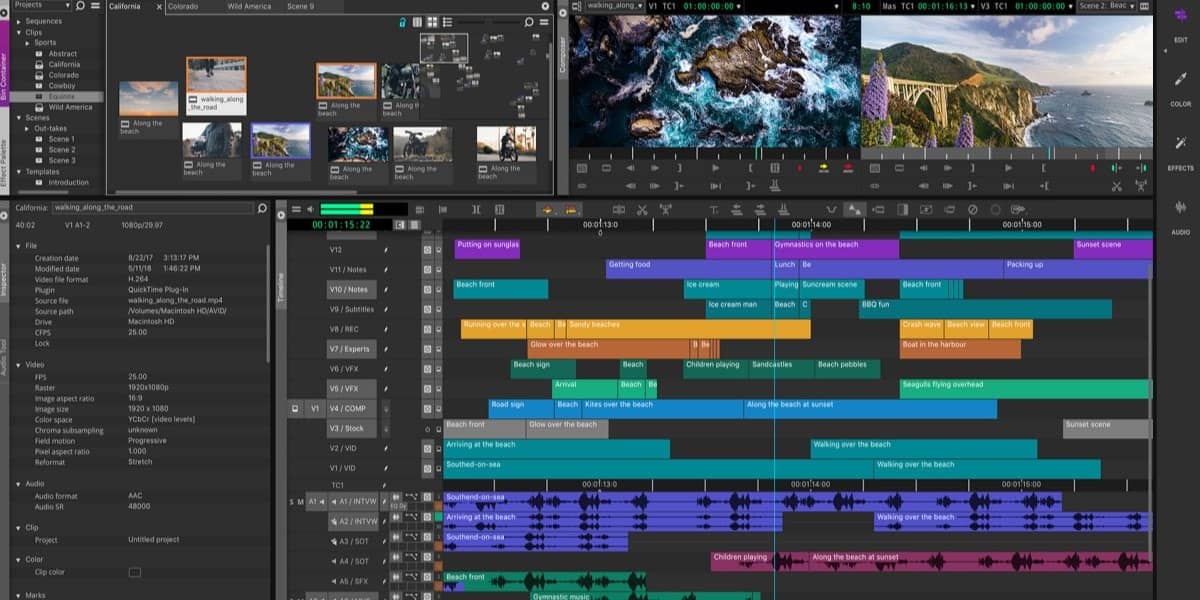
Check the detailed tutorial about How to Edit Videos with avidemux
Most people interested in the business have heard of Avid Media Composer because it’s what most professional video editors use for big blockbuster Hollywood movies.
Avid Media Composer is, arguably, the video editing industry’s preferred software you can download freely - and it’s easy to see why, since it pretty much has everything you might ever need, all rolled up into one neat package.
While some complain that it’s hard to use and the interface looks very outdated, many insist that this allows you to build a solid foundation from which your video editing career can skyrocket.
As a matter of fact, its popularity only serves to show that people prefer it for a reason: and that’s because Avid Media Composer is stunningly robust.

Wondershare Filmora Video Editor
Filmora - Best Professional Video Editor Ever
• Easily to create and edit videos with plenty of pro effects and filters
• Automatically convert audio to text for adding subtitiles and captions
• Cross-platform supported - (Windows, Mac, iOS, Android)
Try Pro Video Editor Try Pro Video Editor Try Pro Video Editor Learn More >
5. Adobe Premiere Pro CC
Price: $31.49 Monthly Subscription, $239.88 Yearly Subscription
Pros: Highly customizable and streamlined interface, easy to use for people with past experience in Adobe products but no previous video editing experience, a large variety of tools such as color matching and multi-camera rendering, and a fast rendering speed.
Cons: New updates might have a couple of bugs, so you should be a bit patient before you update if you want to keep it on the safe side. Mac users also report that it runs a bit slow on their systems.

You may also like: Best Transition Plugins for Adobe Premiere Pro
Adobe Premiere Pro CC is one of the best choices an amateur video editor could make when choosing his apparatus.
Both affordable and intuitive, this software has been at the top of the market for more than a couple of years, and now shows no sign of stopping, since it is constantly being supplied with new updates with free downloading.
If you’re looking to achieve a professional level of video editing with little to no previous experience, then look no further, as Adobe Premiere Pro CC might just be the perfect tool for you. With that being said, professional video editors should not shy away from this Adobe video editing software.
6. Final Cut Pro
Price: $299, One-Time Purchase
Pros: Support for 360-degree VR, HDR, multi-camera editing, fast rendering speed, a large variety of interesting tools, expansive library of plugins, and easy-to-use color correction, grading, and adjustment tools. Final Cut Pro has also been designed and optimized for Mac operating systems.
Cons: Only for Mac users. Large project files can also be slow.
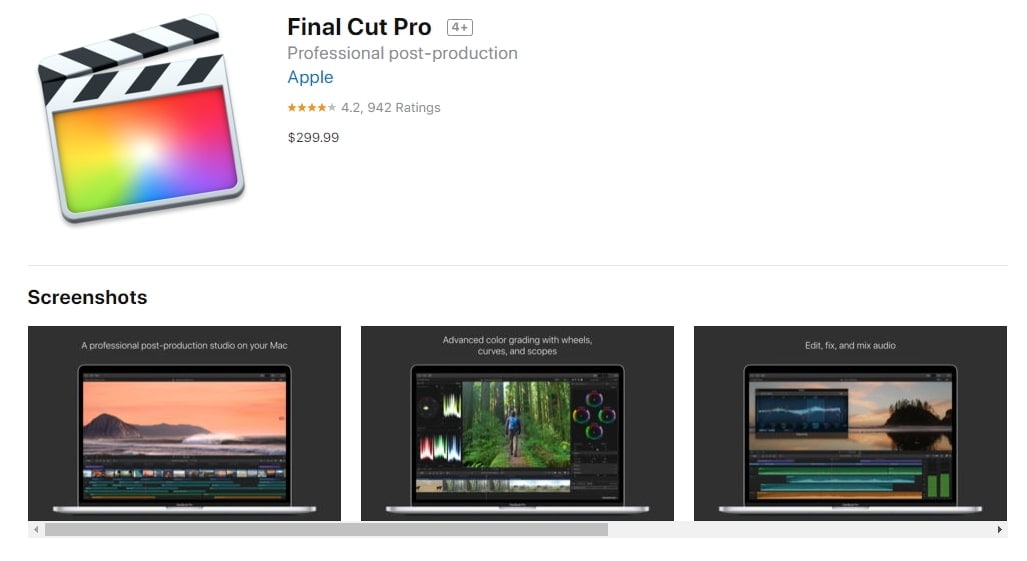
You may also like: How to Edit YouTube Videos in FCP
Final Cut Pro is Apple’s response to video editing software. The UI design is sleek and modern, the workflow is intuitive and easy to work with, and the program is impressively fast, even when working with 4K resolutions.
For many Mac users, Final Cut Pro is the definitive answer to their search for a strong video editing software that has been created with macOS in mind (free download).
7. HitFilm Pro
Price: $341.01, One-Time Purchase, $0 for Hitfilm Express (Free)
Pros: Color grading, familiar workflow, a large variety of video effects and presets, automatic audio syncing, impressive 3D graphics.
Cons: Complex for beginners. Effects oriented.
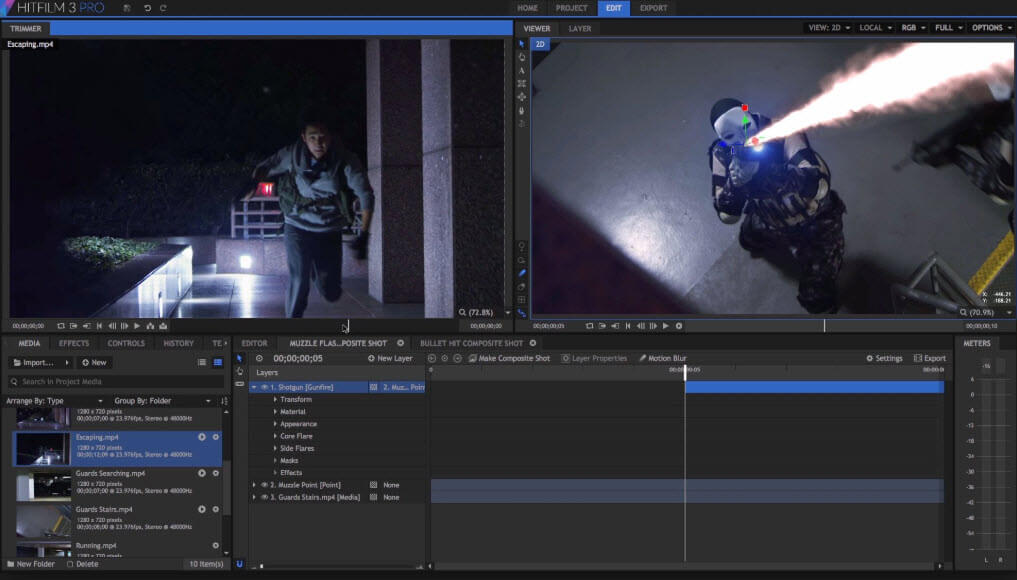
HitFilm Pro is an NLE that puts a heavy focus on the graphical aspect of such free download software. Additions like the automatic audio syncing is highly valued as a convenient quality of life tool. Multiple plugins can be added, though they cost a fee.
The program features several video tutorials that are targeted towards amateur video editors, as well.

Filmora Video Editor
Create AI-Generated Video with Filmora
Filmora video editor offers a ChatGPT plug-in and AI tools to enhance your creative vision. Make your idea into reality. Combine AI with this professional video editing software!
Edit Video with AI Edit Video with AI Edit Video with AI Learn More >
8. Lightworks
Price: $24.99 monthly for Lightworks Pro, $0 (Free)
Pros: Simplified video editing process, extensive format and codec support, a large number of effects and tools, photo slideshows, 4K support, audio mixing, and 60 fps rendering.
Cons: Outdated UI, learning curve.
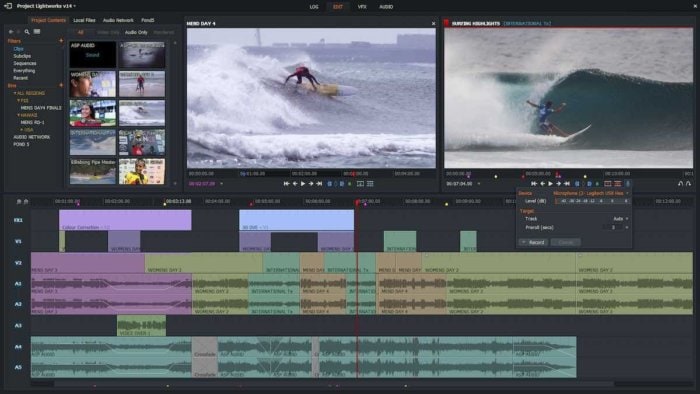
You may also like: Best Plugins for Lightworks
Lightworks is a flexible video editing software that has gained a good position on the mark due to its consistent design structure.
The workspace is customizable, and while the UI can feel outdated at first, those with experience in video editing should not find it too much of a hassle.
Lightworks is the type of software that is robust all-around - and there’s also a free version out there, so amateurs can get to know what they’re getting into.
9. Blender
Price: $0 (Free)
Pros: Easy to use, with a good variety of tools and the ability to quickly add text and effects to produced animations. Compositing is very impressive.
Cons: No audio editing. Lacks complexity when compared to a couple of its competitors.
While Blender is mostly known for being a software whose main focus is animation, it also features a built-in video editor that is by no means lackluster. Blender has the bonus of being able to work on 3D animations and take care of the video editing process at the same time.
10. Magix Video Pro X
Price: $399, One-Time Purchase
Pros: Supports free download, Wide format support, multi-cam editing, lookup table handling, 3-way color correction, 360 degree video support, many available effects, strong performance.
Cons: Does not work with Mac operating systems. No import tools.
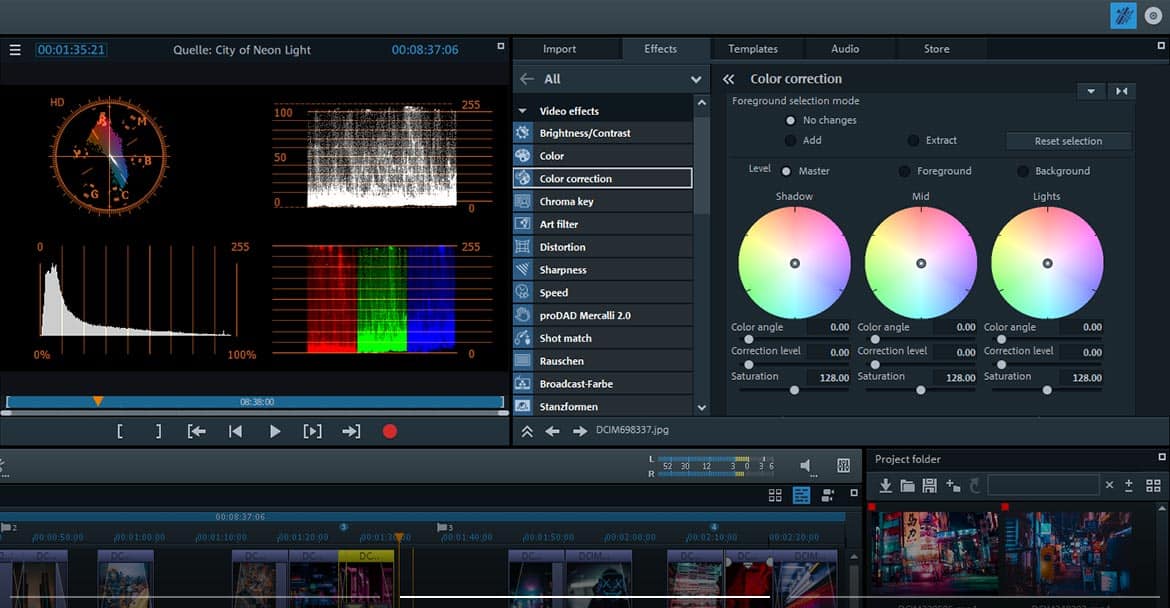
Learn some Magix Movie Edit Pro Video Editing Tips for Beginners
Magix Video Pro X is an NLE that has recently been making a name for itself due to its consistency and welcoming attitude towards amateur video editors. This tool is versatile and can deal with a wide range of situations head-on with no issue whatsoever.
While this isn’t the easiest program to start using, if you don’t quite know what you’re doing, you’ll be happy to know that Magix Video Pro X features a basic mode that has been designed to ease newcomers into the industry.
Try Filmora to Make Professional Videos!
Filmora Video Editor is an expert in creating and editing videos, you can follow the easy-to-use interface to make videos like a pro! It can also capture any area of the PC screen and webcam, and add different effects and filters to upgrade your video to an upper level! Worth to have a try!
Start Video Recording Start Video Recording Start Video Recording Learn More >
Part 2: Tips for Choosing Professional Video Editing Software
1. Check your computer specification and performance before purchasing
Professional video editing software may use lots of resources. It is recommended that you check computer specification and the system requirements of the professional editing software that you want to purchase.
To get the full experience of professional video editing, your computer would be better to equipped higher than meeting the mini requirements.
2. How to master the professional video editing software
If you have limited video editing experience and want to become a professional video editor, it is recommended to spend time in editing and take some training or course to master it.
You can find many tutorials about Adobe Premiere Pro, Adobe After Effects, and Final Cut Pro X on YouTube. Or, you can attain online courses on Udemy or Lynda. If you want to convince people that you are a professional video editor, it is recommended to take some certifications.
As you may know that Adobe and Apple both provide official certification exams. A certification will be more convincing when people doubt your editing skills.
3. What should I consider before going for a Pro video editor
If you are reading this line, you can ask yourself a question ‘what intrigues me to choose a pro video editor? It is because you see other professional YouTuber using them? Do I have the time to learn these professional video editors?;’ If it is the case, you should consider the price you’re paying and whether those high-end features and functions are the things you’ll need.
With its extremely low-learning-curve and user-friendly interface, Filmora can deal with 95% of your video editing needs with just $49.99 per year. With Filmora, you don’t have to spend time on a boring guide and you can do video editing right away since everything is designed for this purpose.
A cross-platform for making videos anywhere for all creators

Why your video editing isn’t good enough? How about some creative inspo?
- 100 Million+ Users
- 150+ Countries and Regions
- 4 Million+ Social Media Followers
- 5 Million+ Stock Media for Use
* Secure Download

Part 3: FAQ about Professional Video Editing Software
What software do professional video editors use?
Many people ask what software professional video editors use. The truth is for professional editors use various tools to improve video editing efficiency. For audio editing, they use Adobe Audition. For color grading, many people choose Final Cut Pro. For video editing workflow, they also use Premiere Pro and Lightworks. For semi-pros, they use Filmora to accelerate the video editing process.
What do most YouTubers use to edit their videos?
Most YouTubers, they like easy to use a video editor to make YouTube videos. They choose Filmora to add more than 300 built-in effects, intros, text, and transitions. A group of YouTubers with advanced video editing skills, tend to use Premiere Pro.
What is the best video editing software for beginners?
For beginners, the most important criteria you need to consider are simplicity and price. They like to use Filmora, Movavi, Powerdirector, and iMovie on their PC. For mobile video editing, they like to use LumaFusion, KineMaster, and Apple Clips.
Is Adobe Premiere Pro free?
No, it is not free. Adobe Premiere Pro includes 3 different price plans. Annual plan, paid monthly at $20.99/month. Annual plan, prepaid $239.98/year. A monthly plan, $31.48/month.
Conclusion
We hope this list will have guided you toward making the right choice when it comes to investing in professional video editing software. While this was by no means an extensive list, we aimed to summarize professional video editing software information to help you make an informed decision when purchasing your tool of the trade.

Ollie Mattison
Ollie Mattison is a writer and a lover of all things video.
Follow @Ollie Mattison
Ollie Mattison
Mar 27, 2024• Proven solutions
The advent of digital video technology has opened an unprecedented opportunity for novice and professional filmmakers alike. Professional video editing software is an essential tool to create high-quality productions and visuals with accuracy, speed, and flexibility.
Whether you are a filmmaker looking to create content for the big screen or a commercial director trying to make your mark in the industry, a professional video editing program can give you the tools needed to produce highly polished visuals. Today’s advanced editors come with preloaded templates and effects that enable filmmakers to save time without sacrificing quality.
We’ve done some extensive research on what some consider to be the 10 best professional video editing software currently on the market, and we’re here to present what we’ve managed to find.
- Part 1: Top 10 Professional Video Editing Software Free Download
- Part 2: Tips for Choosing Professional Video Editing Software
- Part 3: FAQ about Professional Video Editing Software
Part 1: Top 10 Professional Video Editing Software Free Download
Here is the 10 best professional video editing software for you to free download.
| 1 - Filmora | 2 - EDIUS |
|---|---|
| 3 - Autodesk Smoke | 4 - Avid Media Composer |
| 5 - Adobe Premiere Pro CC | 6 - Final Cut Pro |
| 7 - HitFilm Pr | 8 - Lightworks |
| 9 - Blender | 10 - Magix Video Pro X |
1. Filmora
Price: $79.99 Customers can add $36.96/month for effects and plugins, $49.99 Customers can add $18.99/month for effects and plugins
Pros: The best value on the list, covers everything a pro video editor should have, Easy-to-use.
The newly released professional video editor app from Wondershare is specially designed for pros looking for a quick way to edit videos in a professional way.
The Filmora video editing software makes professional video editing easy. You can add unlimited video and audio tracks and control the panels at your hand.
You can also use customizable animations to establish your style and use high-quality presets to get a detailed color correction.
2. EDIUS
Price: $499, One-Time Purchase
Pros: Genderless video editing, 4K HDR workflow, flexible user interface, real-time conversion rates, support for a wide variety of video formats, fast AVCHD editing, motion tracking, 3-way color correction.
Cons: Relatively broadcast-oriented.
EDIUS is a free download video editing software that evolved out of what was originally a number of Adobe Premiere Plus plugins.
Ever since its release, EDIUS has gained a loyal following that appreciates both its business model and the operations that the program can perform.
More than a handful of broadcasters worldwide use EDIUS as their program of choice, both due to its flexibility when dealing with various video formats and because it’s quite easy to use when compared to some of its competitors.
Why do so many people swear by EDIUS? Well, according to its fanbase, EDIUS tends to be quite fast when processing, importing, editing, and exporting videos - couple that with the fact that EDIUS doesn’t require a subscription, and you’ve got yourself a thoroughly solid video editing software that can go toe to toe with its rivals.
3. Autodesk Smoke
Price: $190, Monthly Subscription, 1505$, Yearly Subscription
Pros: Timeline-based creative workflow, node-based compositing, ability to flawlessly make use of 3D animations and modeling, a high degree of stability (no crashes!).
Cons: Can only be used on a single monitor. Furthermore, Autodesk Smoke is exclusively for Mac users.

Autodesk is a video editing software that is favored by many people to due to its node-based compositing.
To put it as simple as possible, the video editor achieves a higher level of complexity than other popular software.
Smoke’s real strength lies in editorial and finishing functions. While the professional video editing software that is free to download doesn’t necessarily offer anything that its competitors don’t, this video editing software comes out on top when it comes to 3D effects.
4. Avid Media Composer
Price: $199.99 for a Year’s Subscription, or $24.99 Monthly
Pros: Free download, Advanced color-correction, built-in metadata and effect tools, HDR support, Multicam editing, FrameFlex, keyboard mapping, background rendering, real-time editing, a very high degree of stability, and serves as a great starting point for budding video editors.
Cons: Steep learning curve and outdated interface. However, learning how to use Avid Media Composer will enable you to jump right into other video editing software with ease.

Check the detailed tutorial about How to Edit Videos with avidemux
Most people interested in the business have heard of Avid Media Composer because it’s what most professional video editors use for big blockbuster Hollywood movies.
Avid Media Composer is, arguably, the video editing industry’s preferred software you can download freely - and it’s easy to see why, since it pretty much has everything you might ever need, all rolled up into one neat package.
While some complain that it’s hard to use and the interface looks very outdated, many insist that this allows you to build a solid foundation from which your video editing career can skyrocket.
As a matter of fact, its popularity only serves to show that people prefer it for a reason: and that’s because Avid Media Composer is stunningly robust.

Wondershare Filmora Video Editor
Filmora - Best Professional Video Editor Ever
• Easily to create and edit videos with plenty of pro effects and filters
• Automatically convert audio to text for adding subtitiles and captions
• Cross-platform supported - (Windows, Mac, iOS, Android)
Try Pro Video Editor Try Pro Video Editor Try Pro Video Editor Learn More >
5. Adobe Premiere Pro CC
Price: $31.49 Monthly Subscription, $239.88 Yearly Subscription
Pros: Highly customizable and streamlined interface, easy to use for people with past experience in Adobe products but no previous video editing experience, a large variety of tools such as color matching and multi-camera rendering, and a fast rendering speed.
Cons: New updates might have a couple of bugs, so you should be a bit patient before you update if you want to keep it on the safe side. Mac users also report that it runs a bit slow on their systems.

You may also like: Best Transition Plugins for Adobe Premiere Pro
Adobe Premiere Pro CC is one of the best choices an amateur video editor could make when choosing his apparatus.
Both affordable and intuitive, this software has been at the top of the market for more than a couple of years, and now shows no sign of stopping, since it is constantly being supplied with new updates with free downloading.
If you’re looking to achieve a professional level of video editing with little to no previous experience, then look no further, as Adobe Premiere Pro CC might just be the perfect tool for you. With that being said, professional video editors should not shy away from this Adobe video editing software.
6. Final Cut Pro
Price: $299, One-Time Purchase
Pros: Support for 360-degree VR, HDR, multi-camera editing, fast rendering speed, a large variety of interesting tools, expansive library of plugins, and easy-to-use color correction, grading, and adjustment tools. Final Cut Pro has also been designed and optimized for Mac operating systems.
Cons: Only for Mac users. Large project files can also be slow.

You may also like: How to Edit YouTube Videos in FCP
Final Cut Pro is Apple’s response to video editing software. The UI design is sleek and modern, the workflow is intuitive and easy to work with, and the program is impressively fast, even when working with 4K resolutions.
For many Mac users, Final Cut Pro is the definitive answer to their search for a strong video editing software that has been created with macOS in mind (free download).
7. HitFilm Pro
Price: $341.01, One-Time Purchase, $0 for Hitfilm Express (Free)
Pros: Color grading, familiar workflow, a large variety of video effects and presets, automatic audio syncing, impressive 3D graphics.
Cons: Complex for beginners. Effects oriented.

HitFilm Pro is an NLE that puts a heavy focus on the graphical aspect of such free download software. Additions like the automatic audio syncing is highly valued as a convenient quality of life tool. Multiple plugins can be added, though they cost a fee.
The program features several video tutorials that are targeted towards amateur video editors, as well.

Filmora Video Editor
Create AI-Generated Video with Filmora
Filmora video editor offers a ChatGPT plug-in and AI tools to enhance your creative vision. Make your idea into reality. Combine AI with this professional video editing software!
Edit Video with AI Edit Video with AI Edit Video with AI Learn More >
8. Lightworks
Price: $24.99 monthly for Lightworks Pro, $0 (Free)
Pros: Simplified video editing process, extensive format and codec support, a large number of effects and tools, photo slideshows, 4K support, audio mixing, and 60 fps rendering.
Cons: Outdated UI, learning curve.

You may also like: Best Plugins for Lightworks
Lightworks is a flexible video editing software that has gained a good position on the mark due to its consistent design structure.
The workspace is customizable, and while the UI can feel outdated at first, those with experience in video editing should not find it too much of a hassle.
Lightworks is the type of software that is robust all-around - and there’s also a free version out there, so amateurs can get to know what they’re getting into.
9. Blender
Price: $0 (Free)
Pros: Easy to use, with a good variety of tools and the ability to quickly add text and effects to produced animations. Compositing is very impressive.
Cons: No audio editing. Lacks complexity when compared to a couple of its competitors.
While Blender is mostly known for being a software whose main focus is animation, it also features a built-in video editor that is by no means lackluster. Blender has the bonus of being able to work on 3D animations and take care of the video editing process at the same time.
10. Magix Video Pro X
Price: $399, One-Time Purchase
Pros: Supports free download, Wide format support, multi-cam editing, lookup table handling, 3-way color correction, 360 degree video support, many available effects, strong performance.
Cons: Does not work with Mac operating systems. No import tools.

Learn some Magix Movie Edit Pro Video Editing Tips for Beginners
Magix Video Pro X is an NLE that has recently been making a name for itself due to its consistency and welcoming attitude towards amateur video editors. This tool is versatile and can deal with a wide range of situations head-on with no issue whatsoever.
While this isn’t the easiest program to start using, if you don’t quite know what you’re doing, you’ll be happy to know that Magix Video Pro X features a basic mode that has been designed to ease newcomers into the industry.
Try Filmora to Make Professional Videos!
Filmora Video Editor is an expert in creating and editing videos, you can follow the easy-to-use interface to make videos like a pro! It can also capture any area of the PC screen and webcam, and add different effects and filters to upgrade your video to an upper level! Worth to have a try!
Start Video Recording Start Video Recording Start Video Recording Learn More >
Part 2: Tips for Choosing Professional Video Editing Software
1. Check your computer specification and performance before purchasing
Professional video editing software may use lots of resources. It is recommended that you check computer specification and the system requirements of the professional editing software that you want to purchase.
To get the full experience of professional video editing, your computer would be better to equipped higher than meeting the mini requirements.
2. How to master the professional video editing software
If you have limited video editing experience and want to become a professional video editor, it is recommended to spend time in editing and take some training or course to master it.
You can find many tutorials about Adobe Premiere Pro, Adobe After Effects, and Final Cut Pro X on YouTube. Or, you can attain online courses on Udemy or Lynda. If you want to convince people that you are a professional video editor, it is recommended to take some certifications.
As you may know that Adobe and Apple both provide official certification exams. A certification will be more convincing when people doubt your editing skills.
3. What should I consider before going for a Pro video editor
If you are reading this line, you can ask yourself a question ‘what intrigues me to choose a pro video editor? It is because you see other professional YouTuber using them? Do I have the time to learn these professional video editors?;’ If it is the case, you should consider the price you’re paying and whether those high-end features and functions are the things you’ll need.
With its extremely low-learning-curve and user-friendly interface, Filmora can deal with 95% of your video editing needs with just $49.99 per year. With Filmora, you don’t have to spend time on a boring guide and you can do video editing right away since everything is designed for this purpose.
A cross-platform for making videos anywhere for all creators

Why your video editing isn’t good enough? How about some creative inspo?
- 100 Million+ Users
- 150+ Countries and Regions
- 4 Million+ Social Media Followers
- 5 Million+ Stock Media for Use
* Secure Download

Part 3: FAQ about Professional Video Editing Software
What software do professional video editors use?
Many people ask what software professional video editors use. The truth is for professional editors use various tools to improve video editing efficiency. For audio editing, they use Adobe Audition. For color grading, many people choose Final Cut Pro. For video editing workflow, they also use Premiere Pro and Lightworks. For semi-pros, they use Filmora to accelerate the video editing process.
What do most YouTubers use to edit their videos?
Most YouTubers, they like easy to use a video editor to make YouTube videos. They choose Filmora to add more than 300 built-in effects, intros, text, and transitions. A group of YouTubers with advanced video editing skills, tend to use Premiere Pro.
What is the best video editing software for beginners?
For beginners, the most important criteria you need to consider are simplicity and price. They like to use Filmora, Movavi, Powerdirector, and iMovie on their PC. For mobile video editing, they like to use LumaFusion, KineMaster, and Apple Clips.
Is Adobe Premiere Pro free?
No, it is not free. Adobe Premiere Pro includes 3 different price plans. Annual plan, paid monthly at $20.99/month. Annual plan, prepaid $239.98/year. A monthly plan, $31.48/month.
Conclusion
We hope this list will have guided you toward making the right choice when it comes to investing in professional video editing software. While this was by no means an extensive list, we aimed to summarize professional video editing software information to help you make an informed decision when purchasing your tool of the trade.

Ollie Mattison
Ollie Mattison is a writer and a lover of all things video.
Follow @Ollie Mattison
Ollie Mattison
Mar 27, 2024• Proven solutions
The advent of digital video technology has opened an unprecedented opportunity for novice and professional filmmakers alike. Professional video editing software is an essential tool to create high-quality productions and visuals with accuracy, speed, and flexibility.
Whether you are a filmmaker looking to create content for the big screen or a commercial director trying to make your mark in the industry, a professional video editing program can give you the tools needed to produce highly polished visuals. Today’s advanced editors come with preloaded templates and effects that enable filmmakers to save time without sacrificing quality.
We’ve done some extensive research on what some consider to be the 10 best professional video editing software currently on the market, and we’re here to present what we’ve managed to find.
- Part 1: Top 10 Professional Video Editing Software Free Download
- Part 2: Tips for Choosing Professional Video Editing Software
- Part 3: FAQ about Professional Video Editing Software
Part 1: Top 10 Professional Video Editing Software Free Download
Here is the 10 best professional video editing software for you to free download.
| 1 - Filmora | 2 - EDIUS |
|---|---|
| 3 - Autodesk Smoke | 4 - Avid Media Composer |
| 5 - Adobe Premiere Pro CC | 6 - Final Cut Pro |
| 7 - HitFilm Pr | 8 - Lightworks |
| 9 - Blender | 10 - Magix Video Pro X |
1. Filmora
Price: $79.99 Customers can add $36.96/month for effects and plugins, $49.99 Customers can add $18.99/month for effects and plugins
Pros: The best value on the list, covers everything a pro video editor should have, Easy-to-use.
The newly released professional video editor app from Wondershare is specially designed for pros looking for a quick way to edit videos in a professional way.
The Filmora video editing software makes professional video editing easy. You can add unlimited video and audio tracks and control the panels at your hand.
You can also use customizable animations to establish your style and use high-quality presets to get a detailed color correction.
2. EDIUS
Price: $499, One-Time Purchase
Pros: Genderless video editing, 4K HDR workflow, flexible user interface, real-time conversion rates, support for a wide variety of video formats, fast AVCHD editing, motion tracking, 3-way color correction.
Cons: Relatively broadcast-oriented.
EDIUS is a free download video editing software that evolved out of what was originally a number of Adobe Premiere Plus plugins.
Ever since its release, EDIUS has gained a loyal following that appreciates both its business model and the operations that the program can perform.
More than a handful of broadcasters worldwide use EDIUS as their program of choice, both due to its flexibility when dealing with various video formats and because it’s quite easy to use when compared to some of its competitors.
Why do so many people swear by EDIUS? Well, according to its fanbase, EDIUS tends to be quite fast when processing, importing, editing, and exporting videos - couple that with the fact that EDIUS doesn’t require a subscription, and you’ve got yourself a thoroughly solid video editing software that can go toe to toe with its rivals.
3. Autodesk Smoke
Price: $190, Monthly Subscription, 1505$, Yearly Subscription
Pros: Timeline-based creative workflow, node-based compositing, ability to flawlessly make use of 3D animations and modeling, a high degree of stability (no crashes!).
Cons: Can only be used on a single monitor. Furthermore, Autodesk Smoke is exclusively for Mac users.

Autodesk is a video editing software that is favored by many people to due to its node-based compositing.
To put it as simple as possible, the video editor achieves a higher level of complexity than other popular software.
Smoke’s real strength lies in editorial and finishing functions. While the professional video editing software that is free to download doesn’t necessarily offer anything that its competitors don’t, this video editing software comes out on top when it comes to 3D effects.
4. Avid Media Composer
Price: $199.99 for a Year’s Subscription, or $24.99 Monthly
Pros: Free download, Advanced color-correction, built-in metadata and effect tools, HDR support, Multicam editing, FrameFlex, keyboard mapping, background rendering, real-time editing, a very high degree of stability, and serves as a great starting point for budding video editors.
Cons: Steep learning curve and outdated interface. However, learning how to use Avid Media Composer will enable you to jump right into other video editing software with ease.

Check the detailed tutorial about How to Edit Videos with avidemux
Most people interested in the business have heard of Avid Media Composer because it’s what most professional video editors use for big blockbuster Hollywood movies.
Avid Media Composer is, arguably, the video editing industry’s preferred software you can download freely - and it’s easy to see why, since it pretty much has everything you might ever need, all rolled up into one neat package.
While some complain that it’s hard to use and the interface looks very outdated, many insist that this allows you to build a solid foundation from which your video editing career can skyrocket.
As a matter of fact, its popularity only serves to show that people prefer it for a reason: and that’s because Avid Media Composer is stunningly robust.

Wondershare Filmora Video Editor
Filmora - Best Professional Video Editor Ever
• Easily to create and edit videos with plenty of pro effects and filters
• Automatically convert audio to text for adding subtitiles and captions
• Cross-platform supported - (Windows, Mac, iOS, Android)
Try Pro Video Editor Try Pro Video Editor Try Pro Video Editor Learn More >
5. Adobe Premiere Pro CC
Price: $31.49 Monthly Subscription, $239.88 Yearly Subscription
Pros: Highly customizable and streamlined interface, easy to use for people with past experience in Adobe products but no previous video editing experience, a large variety of tools such as color matching and multi-camera rendering, and a fast rendering speed.
Cons: New updates might have a couple of bugs, so you should be a bit patient before you update if you want to keep it on the safe side. Mac users also report that it runs a bit slow on their systems.

You may also like: Best Transition Plugins for Adobe Premiere Pro
Adobe Premiere Pro CC is one of the best choices an amateur video editor could make when choosing his apparatus.
Both affordable and intuitive, this software has been at the top of the market for more than a couple of years, and now shows no sign of stopping, since it is constantly being supplied with new updates with free downloading.
If you’re looking to achieve a professional level of video editing with little to no previous experience, then look no further, as Adobe Premiere Pro CC might just be the perfect tool for you. With that being said, professional video editors should not shy away from this Adobe video editing software.
6. Final Cut Pro
Price: $299, One-Time Purchase
Pros: Support for 360-degree VR, HDR, multi-camera editing, fast rendering speed, a large variety of interesting tools, expansive library of plugins, and easy-to-use color correction, grading, and adjustment tools. Final Cut Pro has also been designed and optimized for Mac operating systems.
Cons: Only for Mac users. Large project files can also be slow.

You may also like: How to Edit YouTube Videos in FCP
Final Cut Pro is Apple’s response to video editing software. The UI design is sleek and modern, the workflow is intuitive and easy to work with, and the program is impressively fast, even when working with 4K resolutions.
For many Mac users, Final Cut Pro is the definitive answer to their search for a strong video editing software that has been created with macOS in mind (free download).
7. HitFilm Pro
Price: $341.01, One-Time Purchase, $0 for Hitfilm Express (Free)
Pros: Color grading, familiar workflow, a large variety of video effects and presets, automatic audio syncing, impressive 3D graphics.
Cons: Complex for beginners. Effects oriented.

HitFilm Pro is an NLE that puts a heavy focus on the graphical aspect of such free download software. Additions like the automatic audio syncing is highly valued as a convenient quality of life tool. Multiple plugins can be added, though they cost a fee.
The program features several video tutorials that are targeted towards amateur video editors, as well.

Filmora Video Editor
Create AI-Generated Video with Filmora
Filmora video editor offers a ChatGPT plug-in and AI tools to enhance your creative vision. Make your idea into reality. Combine AI with this professional video editing software!
Edit Video with AI Edit Video with AI Edit Video with AI Learn More >
8. Lightworks
Price: $24.99 monthly for Lightworks Pro, $0 (Free)
Pros: Simplified video editing process, extensive format and codec support, a large number of effects and tools, photo slideshows, 4K support, audio mixing, and 60 fps rendering.
Cons: Outdated UI, learning curve.

You may also like: Best Plugins for Lightworks
Lightworks is a flexible video editing software that has gained a good position on the mark due to its consistent design structure.
The workspace is customizable, and while the UI can feel outdated at first, those with experience in video editing should not find it too much of a hassle.
Lightworks is the type of software that is robust all-around - and there’s also a free version out there, so amateurs can get to know what they’re getting into.
9. Blender
Price: $0 (Free)
Pros: Easy to use, with a good variety of tools and the ability to quickly add text and effects to produced animations. Compositing is very impressive.
Cons: No audio editing. Lacks complexity when compared to a couple of its competitors.
While Blender is mostly known for being a software whose main focus is animation, it also features a built-in video editor that is by no means lackluster. Blender has the bonus of being able to work on 3D animations and take care of the video editing process at the same time.
10. Magix Video Pro X
Price: $399, One-Time Purchase
Pros: Supports free download, Wide format support, multi-cam editing, lookup table handling, 3-way color correction, 360 degree video support, many available effects, strong performance.
Cons: Does not work with Mac operating systems. No import tools.

Learn some Magix Movie Edit Pro Video Editing Tips for Beginners
Magix Video Pro X is an NLE that has recently been making a name for itself due to its consistency and welcoming attitude towards amateur video editors. This tool is versatile and can deal with a wide range of situations head-on with no issue whatsoever.
While this isn’t the easiest program to start using, if you don’t quite know what you’re doing, you’ll be happy to know that Magix Video Pro X features a basic mode that has been designed to ease newcomers into the industry.
Try Filmora to Make Professional Videos!
Filmora Video Editor is an expert in creating and editing videos, you can follow the easy-to-use interface to make videos like a pro! It can also capture any area of the PC screen and webcam, and add different effects and filters to upgrade your video to an upper level! Worth to have a try!
Start Video Recording Start Video Recording Start Video Recording Learn More >
Part 2: Tips for Choosing Professional Video Editing Software
1. Check your computer specification and performance before purchasing
Professional video editing software may use lots of resources. It is recommended that you check computer specification and the system requirements of the professional editing software that you want to purchase.
To get the full experience of professional video editing, your computer would be better to equipped higher than meeting the mini requirements.
2. How to master the professional video editing software
If you have limited video editing experience and want to become a professional video editor, it is recommended to spend time in editing and take some training or course to master it.
You can find many tutorials about Adobe Premiere Pro, Adobe After Effects, and Final Cut Pro X on YouTube. Or, you can attain online courses on Udemy or Lynda. If you want to convince people that you are a professional video editor, it is recommended to take some certifications.
As you may know that Adobe and Apple both provide official certification exams. A certification will be more convincing when people doubt your editing skills.
3. What should I consider before going for a Pro video editor
If you are reading this line, you can ask yourself a question ‘what intrigues me to choose a pro video editor? It is because you see other professional YouTuber using them? Do I have the time to learn these professional video editors?;’ If it is the case, you should consider the price you’re paying and whether those high-end features and functions are the things you’ll need.
With its extremely low-learning-curve and user-friendly interface, Filmora can deal with 95% of your video editing needs with just $49.99 per year. With Filmora, you don’t have to spend time on a boring guide and you can do video editing right away since everything is designed for this purpose.
A cross-platform for making videos anywhere for all creators

Why your video editing isn’t good enough? How about some creative inspo?
- 100 Million+ Users
- 150+ Countries and Regions
- 4 Million+ Social Media Followers
- 5 Million+ Stock Media for Use
* Secure Download

Part 3: FAQ about Professional Video Editing Software
What software do professional video editors use?
Many people ask what software professional video editors use. The truth is for professional editors use various tools to improve video editing efficiency. For audio editing, they use Adobe Audition. For color grading, many people choose Final Cut Pro. For video editing workflow, they also use Premiere Pro and Lightworks. For semi-pros, they use Filmora to accelerate the video editing process.
What do most YouTubers use to edit their videos?
Most YouTubers, they like easy to use a video editor to make YouTube videos. They choose Filmora to add more than 300 built-in effects, intros, text, and transitions. A group of YouTubers with advanced video editing skills, tend to use Premiere Pro.
What is the best video editing software for beginners?
For beginners, the most important criteria you need to consider are simplicity and price. They like to use Filmora, Movavi, Powerdirector, and iMovie on their PC. For mobile video editing, they like to use LumaFusion, KineMaster, and Apple Clips.
Is Adobe Premiere Pro free?
No, it is not free. Adobe Premiere Pro includes 3 different price plans. Annual plan, paid monthly at $20.99/month. Annual plan, prepaid $239.98/year. A monthly plan, $31.48/month.
Conclusion
We hope this list will have guided you toward making the right choice when it comes to investing in professional video editing software. While this was by no means an extensive list, we aimed to summarize professional video editing software information to help you make an informed decision when purchasing your tool of the trade.

Ollie Mattison
Ollie Mattison is a writer and a lover of all things video.
Follow @Ollie Mattison
Ollie Mattison
Mar 27, 2024• Proven solutions
The advent of digital video technology has opened an unprecedented opportunity for novice and professional filmmakers alike. Professional video editing software is an essential tool to create high-quality productions and visuals with accuracy, speed, and flexibility.
Whether you are a filmmaker looking to create content for the big screen or a commercial director trying to make your mark in the industry, a professional video editing program can give you the tools needed to produce highly polished visuals. Today’s advanced editors come with preloaded templates and effects that enable filmmakers to save time without sacrificing quality.
We’ve done some extensive research on what some consider to be the 10 best professional video editing software currently on the market, and we’re here to present what we’ve managed to find.
- Part 1: Top 10 Professional Video Editing Software Free Download
- Part 2: Tips for Choosing Professional Video Editing Software
- Part 3: FAQ about Professional Video Editing Software
Part 1: Top 10 Professional Video Editing Software Free Download
Here is the 10 best professional video editing software for you to free download.
| 1 - Filmora | 2 - EDIUS |
|---|---|
| 3 - Autodesk Smoke | 4 - Avid Media Composer |
| 5 - Adobe Premiere Pro CC | 6 - Final Cut Pro |
| 7 - HitFilm Pr | 8 - Lightworks |
| 9 - Blender | 10 - Magix Video Pro X |
1. Filmora
Price: $79.99 Customers can add $36.96/month for effects and plugins, $49.99 Customers can add $18.99/month for effects and plugins
Pros: The best value on the list, covers everything a pro video editor should have, Easy-to-use.
The newly released professional video editor app from Wondershare is specially designed for pros looking for a quick way to edit videos in a professional way.
The Filmora video editing software makes professional video editing easy. You can add unlimited video and audio tracks and control the panels at your hand.
You can also use customizable animations to establish your style and use high-quality presets to get a detailed color correction.
2. EDIUS
Price: $499, One-Time Purchase
Pros: Genderless video editing, 4K HDR workflow, flexible user interface, real-time conversion rates, support for a wide variety of video formats, fast AVCHD editing, motion tracking, 3-way color correction.
Cons: Relatively broadcast-oriented.
EDIUS is a free download video editing software that evolved out of what was originally a number of Adobe Premiere Plus plugins.
Ever since its release, EDIUS has gained a loyal following that appreciates both its business model and the operations that the program can perform.
More than a handful of broadcasters worldwide use EDIUS as their program of choice, both due to its flexibility when dealing with various video formats and because it’s quite easy to use when compared to some of its competitors.
Why do so many people swear by EDIUS? Well, according to its fanbase, EDIUS tends to be quite fast when processing, importing, editing, and exporting videos - couple that with the fact that EDIUS doesn’t require a subscription, and you’ve got yourself a thoroughly solid video editing software that can go toe to toe with its rivals.
3. Autodesk Smoke
Price: $190, Monthly Subscription, 1505$, Yearly Subscription
Pros: Timeline-based creative workflow, node-based compositing, ability to flawlessly make use of 3D animations and modeling, a high degree of stability (no crashes!).
Cons: Can only be used on a single monitor. Furthermore, Autodesk Smoke is exclusively for Mac users.

Autodesk is a video editing software that is favored by many people to due to its node-based compositing.
To put it as simple as possible, the video editor achieves a higher level of complexity than other popular software.
Smoke’s real strength lies in editorial and finishing functions. While the professional video editing software that is free to download doesn’t necessarily offer anything that its competitors don’t, this video editing software comes out on top when it comes to 3D effects.
4. Avid Media Composer
Price: $199.99 for a Year’s Subscription, or $24.99 Monthly
Pros: Free download, Advanced color-correction, built-in metadata and effect tools, HDR support, Multicam editing, FrameFlex, keyboard mapping, background rendering, real-time editing, a very high degree of stability, and serves as a great starting point for budding video editors.
Cons: Steep learning curve and outdated interface. However, learning how to use Avid Media Composer will enable you to jump right into other video editing software with ease.

Check the detailed tutorial about How to Edit Videos with avidemux
Most people interested in the business have heard of Avid Media Composer because it’s what most professional video editors use for big blockbuster Hollywood movies.
Avid Media Composer is, arguably, the video editing industry’s preferred software you can download freely - and it’s easy to see why, since it pretty much has everything you might ever need, all rolled up into one neat package.
While some complain that it’s hard to use and the interface looks very outdated, many insist that this allows you to build a solid foundation from which your video editing career can skyrocket.
As a matter of fact, its popularity only serves to show that people prefer it for a reason: and that’s because Avid Media Composer is stunningly robust.

Wondershare Filmora Video Editor
Filmora - Best Professional Video Editor Ever
• Easily to create and edit videos with plenty of pro effects and filters
• Automatically convert audio to text for adding subtitiles and captions
• Cross-platform supported - (Windows, Mac, iOS, Android)
Try Pro Video Editor Try Pro Video Editor Try Pro Video Editor Learn More >
5. Adobe Premiere Pro CC
Price: $31.49 Monthly Subscription, $239.88 Yearly Subscription
Pros: Highly customizable and streamlined interface, easy to use for people with past experience in Adobe products but no previous video editing experience, a large variety of tools such as color matching and multi-camera rendering, and a fast rendering speed.
Cons: New updates might have a couple of bugs, so you should be a bit patient before you update if you want to keep it on the safe side. Mac users also report that it runs a bit slow on their systems.

You may also like: Best Transition Plugins for Adobe Premiere Pro
Adobe Premiere Pro CC is one of the best choices an amateur video editor could make when choosing his apparatus.
Both affordable and intuitive, this software has been at the top of the market for more than a couple of years, and now shows no sign of stopping, since it is constantly being supplied with new updates with free downloading.
If you’re looking to achieve a professional level of video editing with little to no previous experience, then look no further, as Adobe Premiere Pro CC might just be the perfect tool for you. With that being said, professional video editors should not shy away from this Adobe video editing software.
6. Final Cut Pro
Price: $299, One-Time Purchase
Pros: Support for 360-degree VR, HDR, multi-camera editing, fast rendering speed, a large variety of interesting tools, expansive library of plugins, and easy-to-use color correction, grading, and adjustment tools. Final Cut Pro has also been designed and optimized for Mac operating systems.
Cons: Only for Mac users. Large project files can also be slow.

You may also like: How to Edit YouTube Videos in FCP
Final Cut Pro is Apple’s response to video editing software. The UI design is sleek and modern, the workflow is intuitive and easy to work with, and the program is impressively fast, even when working with 4K resolutions.
For many Mac users, Final Cut Pro is the definitive answer to their search for a strong video editing software that has been created with macOS in mind (free download).
7. HitFilm Pro
Price: $341.01, One-Time Purchase, $0 for Hitfilm Express (Free)
Pros: Color grading, familiar workflow, a large variety of video effects and presets, automatic audio syncing, impressive 3D graphics.
Cons: Complex for beginners. Effects oriented.

HitFilm Pro is an NLE that puts a heavy focus on the graphical aspect of such free download software. Additions like the automatic audio syncing is highly valued as a convenient quality of life tool. Multiple plugins can be added, though they cost a fee.
The program features several video tutorials that are targeted towards amateur video editors, as well.

Filmora Video Editor
Create AI-Generated Video with Filmora
Filmora video editor offers a ChatGPT plug-in and AI tools to enhance your creative vision. Make your idea into reality. Combine AI with this professional video editing software!
Edit Video with AI Edit Video with AI Edit Video with AI Learn More >
8. Lightworks
Price: $24.99 monthly for Lightworks Pro, $0 (Free)
Pros: Simplified video editing process, extensive format and codec support, a large number of effects and tools, photo slideshows, 4K support, audio mixing, and 60 fps rendering.
Cons: Outdated UI, learning curve.

You may also like: Best Plugins for Lightworks
Lightworks is a flexible video editing software that has gained a good position on the mark due to its consistent design structure.
The workspace is customizable, and while the UI can feel outdated at first, those with experience in video editing should not find it too much of a hassle.
Lightworks is the type of software that is robust all-around - and there’s also a free version out there, so amateurs can get to know what they’re getting into.
9. Blender
Price: $0 (Free)
Pros: Easy to use, with a good variety of tools and the ability to quickly add text and effects to produced animations. Compositing is very impressive.
Cons: No audio editing. Lacks complexity when compared to a couple of its competitors.
While Blender is mostly known for being a software whose main focus is animation, it also features a built-in video editor that is by no means lackluster. Blender has the bonus of being able to work on 3D animations and take care of the video editing process at the same time.
10. Magix Video Pro X
Price: $399, One-Time Purchase
Pros: Supports free download, Wide format support, multi-cam editing, lookup table handling, 3-way color correction, 360 degree video support, many available effects, strong performance.
Cons: Does not work with Mac operating systems. No import tools.

Learn some Magix Movie Edit Pro Video Editing Tips for Beginners
Magix Video Pro X is an NLE that has recently been making a name for itself due to its consistency and welcoming attitude towards amateur video editors. This tool is versatile and can deal with a wide range of situations head-on with no issue whatsoever.
While this isn’t the easiest program to start using, if you don’t quite know what you’re doing, you’ll be happy to know that Magix Video Pro X features a basic mode that has been designed to ease newcomers into the industry.
Try Filmora to Make Professional Videos!
Filmora Video Editor is an expert in creating and editing videos, you can follow the easy-to-use interface to make videos like a pro! It can also capture any area of the PC screen and webcam, and add different effects and filters to upgrade your video to an upper level! Worth to have a try!
Start Video Recording Start Video Recording Start Video Recording Learn More >
Part 2: Tips for Choosing Professional Video Editing Software
1. Check your computer specification and performance before purchasing
Professional video editing software may use lots of resources. It is recommended that you check computer specification and the system requirements of the professional editing software that you want to purchase.
To get the full experience of professional video editing, your computer would be better to equipped higher than meeting the mini requirements.
2. How to master the professional video editing software
If you have limited video editing experience and want to become a professional video editor, it is recommended to spend time in editing and take some training or course to master it.
You can find many tutorials about Adobe Premiere Pro, Adobe After Effects, and Final Cut Pro X on YouTube. Or, you can attain online courses on Udemy or Lynda. If you want to convince people that you are a professional video editor, it is recommended to take some certifications.
As you may know that Adobe and Apple both provide official certification exams. A certification will be more convincing when people doubt your editing skills.
3. What should I consider before going for a Pro video editor
If you are reading this line, you can ask yourself a question ‘what intrigues me to choose a pro video editor? It is because you see other professional YouTuber using them? Do I have the time to learn these professional video editors?;’ If it is the case, you should consider the price you’re paying and whether those high-end features and functions are the things you’ll need.
With its extremely low-learning-curve and user-friendly interface, Filmora can deal with 95% of your video editing needs with just $49.99 per year. With Filmora, you don’t have to spend time on a boring guide and you can do video editing right away since everything is designed for this purpose.
A cross-platform for making videos anywhere for all creators

Why your video editing isn’t good enough? How about some creative inspo?
- 100 Million+ Users
- 150+ Countries and Regions
- 4 Million+ Social Media Followers
- 5 Million+ Stock Media for Use
* Secure Download

Part 3: FAQ about Professional Video Editing Software
What software do professional video editors use?
Many people ask what software professional video editors use. The truth is for professional editors use various tools to improve video editing efficiency. For audio editing, they use Adobe Audition. For color grading, many people choose Final Cut Pro. For video editing workflow, they also use Premiere Pro and Lightworks. For semi-pros, they use Filmora to accelerate the video editing process.
What do most YouTubers use to edit their videos?
Most YouTubers, they like easy to use a video editor to make YouTube videos. They choose Filmora to add more than 300 built-in effects, intros, text, and transitions. A group of YouTubers with advanced video editing skills, tend to use Premiere Pro.
What is the best video editing software for beginners?
For beginners, the most important criteria you need to consider are simplicity and price. They like to use Filmora, Movavi, Powerdirector, and iMovie on their PC. For mobile video editing, they like to use LumaFusion, KineMaster, and Apple Clips.
Is Adobe Premiere Pro free?
No, it is not free. Adobe Premiere Pro includes 3 different price plans. Annual plan, paid monthly at $20.99/month. Annual plan, prepaid $239.98/year. A monthly plan, $31.48/month.
Conclusion
We hope this list will have guided you toward making the right choice when it comes to investing in professional video editing software. While this was by no means an extensive list, we aimed to summarize professional video editing software information to help you make an informed decision when purchasing your tool of the trade.

Ollie Mattison
Ollie Mattison is a writer and a lover of all things video.
Follow @Ollie Mattison
Also read:
- In 2024, Enhance Your Streaming Experience Amazon Prime Video Aspect Ratio Guide
- New Top-Rated MP4 Video Tag Editing Tools for Windows and Mac for 2024
- Updated 2024 Approved How to Pick the Best YouTube to MP3 Converter for Your Music Needs
- Updated 2024 Approved Video Aspect Ratio A Step-by-Step Guide to Resizing
- Updated How to Split/Cut/Trim AVI Files Easily-2023 Update for 2024
- New The Art of Editing 10 Notable Movies Shaped by Final Cut Pro
- Updated Unleash Your Creativity Top Video Editors for Windows 11
- New 2024 Approved The Best Free Video Invitation Designers for Your Next Event
- Updated In 2024, Make Unforgettable Videos Top 10 iPhone and iPad Collage Apps 2023
- The Inside Scoop on Mp3 Converter Windows An Essential Read for Anyone Who Loves Music
- Updated Top Picks Simple Video Editors for Beginners
- Linux on a Chromebook The Ultimate Setup Tutorial for 2024
- New Make Subtitles Online for Free Top 10 Resources for 2024
- Updated AVS Video Editor Review Pros, Cons, and Features
- Updated Steady Shots Ahead The Best Free Online Video Stabilizers
- Updated 2024 Approved Split, Cut, and Trim AVI Files Like a Pro The Ultimate Tutorial
- Intro Video Mastery Top 8 Tools for Movie-Like Openers
- New In 2024, Unleash Your Creativity Easy Video Editing with GoPro Quik for MacBook
- New 2024 Approved Beginners Paradise The Best Free and Paid Video Editing Software
- New 2024 Approved 10 Best Video Clipper Tools for Computer
- New 2024 Approved FCPX on the House 10 Amazing Free Plugins to Try
- Updated In 2024, Color Enhancement in Final Cut Pro A Step-by-Step Guide
- New 2024 Approved The Ultimate List 10 Best Intro Generator Sites
- 2024 Approved Create Engaging Audio Waveform Videos with These Online Generators
- Updated Android Video Editing 101 Choosing the Right Movie Maker App
- New Top Video Editing Software for PC GoPro Quik and More
- New In 2024, WhatsApp Status Creators Best Apps for Videos, Photos, and More
- Updated In 2024, The Ultimate Guide to Cropping Images in Final Cut Pro X
- New 2024 Approved Maximize Your FCPX Experience 10 Free Plugins to Try
- Updated In 2024, Transform Your Footage A Step-by-Step Guide to 3D Video Effects on Windows
- In 2024, No Copyright Worries Best Sites for Public Domain Video Downloads
- MKV File Trimming Made Simple Top 3 Mac Apps for 2024
- In 2024, Steady Shots Best Free Video Stabilizers for Better Videos
- In 2024, Best Software for Adjusting Video Brightness
- 2024 Approved The Ultimate Guide to Jump Cuts in Final Cut Pro X Tips and Tricks
- In 2024, Get the Job Done with These 10 Reliable Vegas Pro Alternatives for Mac
- In 2024, Add Depth and Dimension A Guide to Creating 3D Videos on Windows
- Updated In 2024, Move Over WMM 10 Free Video Editing Tools You Should Know
- Best Facebook to MP3 Conversion Tools Online for 2024
- Updated 2024 Approved The Top Gaming Destinations Best Sites to Download PC Games
- The way to recover deleted pictures on Note 30 without backup.
- How To Transfer WhatsApp From iPhone 14 Plus to other iPhone 14 devices? | Dr.fone
- New How To Make Talking Emoji on iPhone in Easy Steps for 2024
- How to Transfer Photos from Honor X8b to Laptop Without USB | Dr.fone
- How to Reset a ZTE Nubia Z60 Ultra Phone that is Locked?
- In 2024, How Do I Stop Someone From Tracking My ZTE Axon 40 Lite? | Dr.fone
- In 2024, How to Detect and Remove Spyware on Xiaomi Redmi Note 12 Pro 5G? | Dr.fone
- Unlock Your Disabled Apple iPhone 12 mini Without iTunes in 5 Ways | Dr.fone
- In 2024, How Can I Catch the Regional Pokémon without Traveling On Asus ROG Phone 7 Ultimate | Dr.fone
- Complete Tutorial to Use VPNa to Fake GPS Location On Itel S23+ | Dr.fone
- Easy Ways to Manage Your Samsung Galaxy A05 Location Settings | Dr.fone
- Is GSM Flasher ADB Legit? Full Review To Bypass Your Asus Phone FRP Lock
- In 2024, Top 15 Apps To Hack WiFi Password On Motorola Moto G24
- In 2024, Oppo A38 ADB Format Tool for PC vs. Other Unlocking Tools Which One is the Best?
- In 2024, How To Bypass iCloud Activation Lock on Mac For iPhone 14?
- In 2024, How to Unlock Vivo Y56 5G Pattern Lock if Forgotten? 6 Ways
- Will iSpoofer update On Realme Narzo N55 | Dr.fone
- In 2024, 3 Methods to Mirror Xiaomi Civi 3 Disney 100th Anniversary Edition to Roku | Dr.fone
- In 2024, iCloud Unlocker Download Unlock iCloud Lock for your iPhone 6 Plus
- In 2024, How to Transfer Data After Switching From OnePlus 12 to Latest Samsung | Dr.fone
- In 2024, Create Talking Cartoon Images Using Top Tools
- Home Button Not Working on Nokia G42 5G? Here Are Real Fixes | Dr.fone
- New 5 Best Video Denoisers
- Unlocking iPhone 14 Pro Passcode without a Computer
- In 2024, 5 Ways to Transfer Music from Tecno Spark 20 to Other Android Devices Easily | Dr.fone
- How to Mirror Apple iPhone 13 mini to Roku? | Dr.fone
- In 2024, Complete Guide on Unlocking Apple iPhone SE with a Broken Screen? | Dr.fone
- How to Use Life360 on Windows PC For Oppo F25 Pro 5G? | Dr.fone
- New 2024 Approved Discover the Ultimate LUTs for Wondershare Filmora Uncover the Answer
- What is the best Pokemon for pokemon pvp ranking On OnePlus Nord N30 5G? | Dr.fone
- Title: New The Ultimate FCP X Green Screen Tutorial From Basics to Advanced
- Author: Emma
- Created at : 2024-05-19 05:48:06
- Updated at : 2024-05-20 05:48:06
- Link: https://video-ai-editor.techidaily.com/new-the-ultimate-fcp-x-green-screen-tutorial-from-basics-to-advanced/
- License: This work is licensed under CC BY-NC-SA 4.0.


