
:max_bytes(150000):strip_icc():format(webp)/audio-books-56a324b93df78cf7727c00f5.jpg)
New The Ultimate Guide to Rotating Videos with Ease
The Ultimate Guide to Rotating Videos with Ease
How to Flip Video Quickly and Easily

Ollie Mattison
Mar 27, 2024• Proven solutions
It’s very common that you filmed some amazing portrait or landscape videos but in the wrong direction. This is an error made by many people because not everyone will always think about orientation when filming. Is there an easy way to flip/rotate videos so that you can watch them without turning your head sideways?
What you need is just an ease to use video editor like Wondershare Filmora to flip/rotate your video clips easily and quickly. This application offers a remarkably easy way to flip videos clockwise or anticlockwise, horizontal or vertical. What’s more, this flip software also offers a broad range of video editing features, effects and intro/credits.
In the following, I’ll describe how to flip a video in Windows using this video flip program. If you’re a Mac user, just adopt Wondershare Filmora X for Mac (Latest Filmora version X for Mac) to achieve the same.
First, please download Filmora X for free as per your operating system, and then follow the steps below.


1. Import Your Original Video Clips
After launching Filmora X, click “New Project” to begin. Click “Import” to browse your file folder on computer or drag the video clips directly into the media library.
When you import all of them, click the thumbnails showing in the left pane to preview in the right screen window.
Note that this video editor supports an array of video & audio formats, such as MOV, MP4, AVI, WMV, DV, avchd (MTS, M2TS). And still image files like JPG, BMP, JPEG, PNG. TIFF are all fully compatible.
And then drag your video files from media library to the video Timeline.

Learn the complete list of supported files formats of Filmora X.
2. Flip the Whole Video
Then double click the video in the timeline to access the editing panel. In the window that appears, switch to Video tab and you will find Transform option located on the top.
Click on the Transform to expand the four options including Rotate, Flip, Scale and Position. To get the effect you need, you can adjust the Rotate and Flip settings and check the real-time effect in the previewing window. Though only four buttons available, you can create more options by using them together.
- Rotate: rotate video at any angle by entering the angle value or moving the Rotate slide: rotate 90° clockwise & anti-clockwise, rotate at 180°, rotate 270°, and more
- Flip: Flip video horizontally, i.e. flip video left to right; flip video vertically that is fliping video upside down
- You can combine Rotate and Flip feature to flip video vertically and rotate 90°clockwise or flip video vertically and rotate 90°counterclockwise.

Besides, you can also change the video position and the video scale. This is the step of flips the whole part of the video.
3. Flip Only a Part of the Video
Sometimes, you may just need to flip parts of your video file, e.g. only 1 minute instead of the whole video. In this case, you need to split your video into separate files , and then repeat step 2 to flip them individually.
To do it, just move the playhead to the position you want to split, and click the “Scissors” icon in the menu bar.

Learn more about how to split videos
4 Export Flipped Video
When you’re satisfied with the result, click “Export” in the middle right to save the flipped video. In the pop-up output window that appears, select your wanted format or configured preset for your portable player directly to watch on the go.
You may also want to upload your creation to YouTube or burn to DVD disc for better preservation, just go for it. Finally, click Export to let this video flip program perform the rest.

With the latest Filmora X video editor, you can do more than just flipping video files. For example, you can apply special effects, add background music, create picture-in-picture effect, and more. Try it now!
Check Best Program to Flip Video
Conclusion
If you are someone that can’t be bothered to learn a new video editor or someone that doesn’t want to fuss around and just want to get things done, Filmora is designed for you. Known for its lowest learning curve and low price, Filmora can help you to get the job done easily. Try it out with the buttons below to see if it matches your appetite.
Ollie Mattison
Ollie Mattison is a writer and a lover of all things video.
Follow @Ollie Mattison
Ollie Mattison
Mar 27, 2024• Proven solutions
It’s very common that you filmed some amazing portrait or landscape videos but in the wrong direction. This is an error made by many people because not everyone will always think about orientation when filming. Is there an easy way to flip/rotate videos so that you can watch them without turning your head sideways?
What you need is just an ease to use video editor like Wondershare Filmora to flip/rotate your video clips easily and quickly. This application offers a remarkably easy way to flip videos clockwise or anticlockwise, horizontal or vertical. What’s more, this flip software also offers a broad range of video editing features, effects and intro/credits.
In the following, I’ll describe how to flip a video in Windows using this video flip program. If you’re a Mac user, just adopt Wondershare Filmora X for Mac (Latest Filmora version X for Mac) to achieve the same.
First, please download Filmora X for free as per your operating system, and then follow the steps below.
1. Import Your Original Video Clips
After launching Filmora X, click “New Project” to begin. Click “Import” to browse your file folder on computer or drag the video clips directly into the media library.
When you import all of them, click the thumbnails showing in the left pane to preview in the right screen window.
Note that this video editor supports an array of video & audio formats, such as MOV, MP4, AVI, WMV, DV, avchd (MTS, M2TS). And still image files like JPG, BMP, JPEG, PNG. TIFF are all fully compatible.
And then drag your video files from media library to the video Timeline.
Learn the complete list of supported files formats of Filmora X.
2. Flip the Whole Video
Then double click the video in the timeline to access the editing panel. In the window that appears, switch to Video tab and you will find Transform option located on the top.
Click on the Transform to expand the four options including Rotate, Flip, Scale and Position. To get the effect you need, you can adjust the Rotate and Flip settings and check the real-time effect in the previewing window. Though only four buttons available, you can create more options by using them together.
- Rotate: rotate video at any angle by entering the angle value or moving the Rotate slide: rotate 90° clockwise & anti-clockwise, rotate at 180°, rotate 270°, and more
- Flip: Flip video horizontally, i.e. flip video left to right; flip video vertically that is fliping video upside down
- You can combine Rotate and Flip feature to flip video vertically and rotate 90°clockwise or flip video vertically and rotate 90°counterclockwise.
Besides, you can also change the video position and the video scale. This is the step of flips the whole part of the video.
3. Flip Only a Part of the Video
Sometimes, you may just need to flip parts of your video file, e.g. only 1 minute instead of the whole video. In this case, you need to split your video into separate files , and then repeat step 2 to flip them individually.
To do it, just move the playhead to the position you want to split, and click the “Scissors” icon in the menu bar.
Learn more about how to split videos
4 Export Flipped Video
When you’re satisfied with the result, click “Export” in the middle right to save the flipped video. In the pop-up output window that appears, select your wanted format or configured preset for your portable player directly to watch on the go.
You may also want to upload your creation to YouTube or burn to DVD disc for better preservation, just go for it. Finally, click Export to let this video flip program perform the rest.
With the latest Filmora X video editor, you can do more than just flipping video files. For example, you can apply special effects, add background music, create picture-in-picture effect, and more. Try it now!
Check Best Program to Flip Video
Conclusion
If you are someone that can’t be bothered to learn a new video editor or someone that doesn’t want to fuss around and just want to get things done, Filmora is designed for you. Known for its lowest learning curve and low price, Filmora can help you to get the job done easily. Try it out with the buttons below to see if it matches your appetite.
Ollie Mattison
Ollie Mattison is a writer and a lover of all things video.
Follow @Ollie Mattison
Top 10+ Websites to Download Games
Top 10+ Websites to Download Games
Ollie Mattison
Mar 27, 2024• Proven solutions

Gaming has been an exciting and addictive way to relax and have fun since forever. It has been an essential part of every culture, and many countries have their national games as well. Gaming enhances not only our physical capabilities but also our mental capabilities since we have to use our imagination and brain to choose every next move. Games are a form of social bonding; our games have evolved with the rest of things as time has passed. The gaming world for humans started with “Knucklebones” and dice games, and now we have reached the era of video games with various types like action games, car games, arcade games, etc. You can get games from CDs, Apple App Stores, or GooglePlay, or you can download them from various websites. In this article, I’ll share with you the best websites to download games on a PC or Mac computer as well as game download sites for Android devices.
- Part 1: Best PC Game Download Sites
- Part 2: Top Android Game Download Sites
- Part 3: FAQs About Game Download Sites
You may also like:
- 8 Best Free Video Game Sound Effects You Need to Know
- Difference and Debate Between Roguelite and Roguelike Games
- Best TV for Your PS5 in 2021
Bonus: Best Gaming Video Editing Software
For those who are interested in sharing the gameplay experience on YouTube or other video sharing platforms, editing the gameplay video with a reliable video editing software is one of the most important things. Besides the normally trimming and cutting, you may also need some cool visual effects, filters, overlays, and titles as well. Here, we recommend you to try Wondershare Filmora to edit your videos . Remember to join in the Wondershare Video Community to watch more inspirational videos.
Part 1: Best PC Game Download Sites [2024 Updates]
Here is a list of top 8 websites to download games on your PC.
1 Steam
This website for downloading games is developed by Valve Corporations and has been functioning for the past thirteen years. Steam is considered to be the largest digital distribution platform for video games up to date. They have over a thousand games, from indie games to action games, they have everything available for their players. Furthermore, Steam operates in 28 languages.
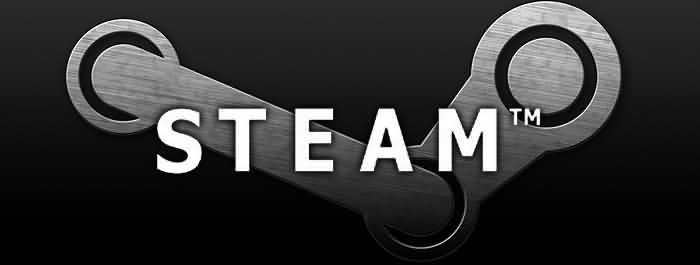
Single Player and Multiplayer
Games at Steam allow single-player gaming as well as multiplayer gaming. You can have fun with friends by challenging them over a game and have fun while relaxing at the same time. You can challenge a local multiplayer as well as challenge someone online.
Video streaming
This gaming platform allows the players to stream videos of games in the form of movies, demos, tutorials, or episodes. The categories include anime, comedy, drama, horror, action, and sci-fi.
Social Networking
The platform offers the players to connect socially, meet millions of new people, form clans, and chat during the game through their community.
Availability
Steam is available on Windows, Linux, and Mac. This gives the players the freedom to buy a game once and play anywhere and at any time.
Create and Share
This digital platform allows you to create new games through the ‘Steam Workshop’. It allows animation and modeling of the game, sound production, photo editing, game development, and various other features. You can also give gifts to your friends and trade items as well.
Pros:
- It has a variety of games and allows early access to some games for a limited time.
- You can play with an automated player, with your friend or with a stranger online, which enhances the fun.
- It is available in 28 languages due to its built-in translator, so it is easier to use and understand by people all over the world.
- It is easily accessible and easy to download.
Cons:
- Some of the games are rather pricey.
- The games available for free lack variety and have very few features to incite excitement in a player.
![]()
A cross-platform for making videos anywhere for all creators

Why your video editing isn’t good enough? How about some creative inspo?
- 100 Million+ Users
- 150+ Countries and Regions
- 4 Million+ Social Media Followers
- 5 Million+ Stock Media for Use
* Secure Download

2 GOG
GOG.com is operated by GOG Limited. It was formerly known as Good Old Games. GOG.com is a Cypriot digital platform for video games and movies. These movies and games can be downloaded and purchased online.
Install and auto-update
You can install the game with just one click, and you do not have to install a special client to run games or download. The game will always be updated with new features automatically, but if you do not want to update your game, then you can choose to stop the automatic updates.
Cloud Saving
You will never lose your game progress because the game will be saved in the cloud automatically and will stay synced with all of your devices.
Offline Mode
The games installed from this platform do not need an internet connection to run. You can even play offline, and the game will still be backed up.
Rollback the updates
If you do not like the new game update, then you can choose to restore your prior update.
Pros:
- It is easy to use, download, and access.
- The games are not pricey, and GOG.com also puts many games up for occasional sales and accepts gift cards as well.
- It has a large variety of games with excellent features.
- It is compatible with Mac, Windows, and Linux.
Cons:
- The games are old, and not many new games are introduced.
- It does not have multiplayer gaming features.
3 G2A

G2A.com is considered to be the fastest-growing global digital marketplace. It has over 12 million customers and 2 million sellers all over the world. G2A.com acts as an intermediary and connects the buyer and the seller. It does not sell or purchase games itself but only delivers different platforms for others to sell and buy digital products.
Variety in platforms
G2A provides all sorts of platforms to its customers like Xbox, Steam, PSN, Origin, Apple, Gameforge, Battlenet, Uplay, GOG, etc.
Variety in genres
This digital marketplace contains various genres like action, arcade, games for children, puzzle, simulation, song games, racing, sport, etc.
Gift cards
Gift cards for different platforms are also sold here.
G2A 3D+
This feature allows the customer to choose their favorite hero or a legendary weapon from their favorite game, and then G2A will print it, color it and ship it to your doorstep.
G2A Goldmine
This feature allows you to earn real money for promoting G2A.com products to other gamers worldwide. No registration fee or investment is required, and you can do this from your home.
Pros:
- G2A.com offers a home-based job with a competitive salary so gamers can earn and play side by side.
- A lot of new projects are introduced, so the excitement never dies.
- The site can be accessed in more than 20 languages.
Cons:
- The site is not very well protected and is exposed to scams.
4 Origin

Origin is a digital distribution software that promotes online gaming. It has been developed by Electronic Arts, a company behind many globally successful games. You can purchases games on your PC as well as on your mobile.
Social Features
Origin provides its users with many social features like profile management, networking with friends through chatting and video streaming via TwitchTV. You can also share your game library and community integration through social media and networking sites like Facebook, Xbox Live, PlayStation Network, and Nintendo Network.
Variety in games
It provides a large variety in games from PC games to Fifa, and even classic games like Plant Vs. Zombies are also available.
Deals
It offers the best and cheapest deals and also puts up a few games for sale occasionally.
Pros:
- It provides great game streaming features.
- It is developed by a renowned and successful company so it can be trusted.
- There ‘on the house specials’ are appreciated by a lot of gamers, which allows them to play a paid game for free every now and then.
Cons:
- It has a lot of updates and takes an unreasonable amount of time to install and update the software.
- Customers have complained that they provide expired discount codes.
- Customer service needs to be improved as it is not very responsive.
5 PC games

PC games is an online gaming site. You can purchase and download various games from this site. It is operated by EA games.
Categories
PC games contain various genres like action, arcade, games for children, puzzle, simulation, song games, racing, sport, etc.
Origin
It allows you to buy the games from origin.com, which is also operated under EA games.
Community forum
It has a community forum that is available to answer your questions 24/7.
Pros:
- It is easy to access and download.
- It contains one of the most interesting and addictive games.
Cons:
- The quantity of games available is very less, so there is not a lot of variety of games.
- Sometimes the site crashes, and the games have to be downloaded from the start.
6 Ocean of Games
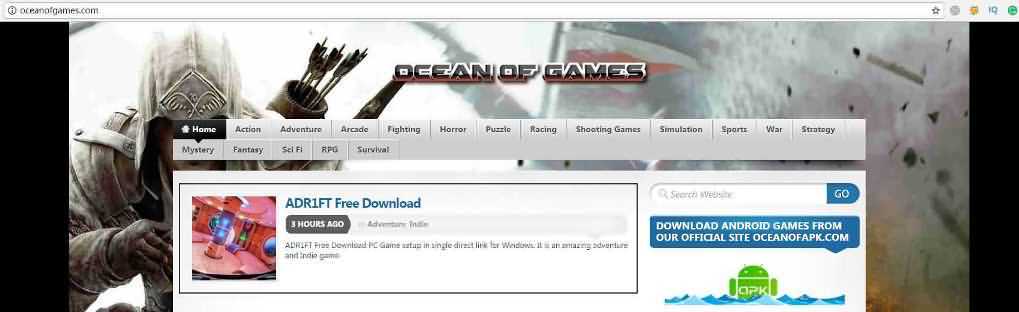
It is developed by a British software company Ocean software.
- It has a large variety of games like action games, song games, arcade games, RPG, survival and fantasy games, etc.
- It provides networking features through its community forum where all the players can meet new people and chat even during gaming.
- It allows both single-player and multiplayer gaming.
Pros:
- The player can challenge an automated player, with your friend or with a stranger online, which enhances the fun.
- It provides great game streaming features.
- It is compatible with Mac, Windows, and Linux.
Cons:
- It is not very well protected and hence exposed to scams.
- The games are not updated, and old versions are still played.
- Some people use the community forum to harass other players, and no action is taken regarding it.
7 Softpedia

Softpedia is an online gaming site that provides the customers the facility to purchase and download games at a very reasonable price.
- Softpedia contains a large library of games of various categories like action games, song games, arcade games, RPG, survival and fantasy games, etc.
- It offers free game cheats and demos to the players.
- Its game application finder feature allows you to find the exact game that you are looking for.
- The games are available for Windows, Mac, Linux, Android, and Drivers as well.
Pros:
- The games are not pricey and are available at a very low price.
Cons:
- The community forum is barely used.
- The website is not updated, so there are no new games available.
- The games are not automatically updated.
8 Skidrow reloaded
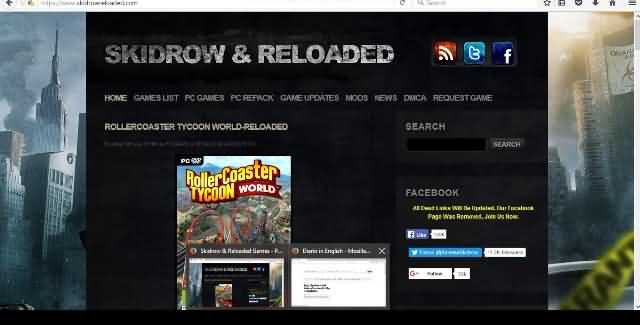
Skidrow reloaded is an online gaming site from where you can purchase and download games.
- Softpedia contains a large library of games of various categories like action games, song games, arcade games, RPG, survival and fantasy games, etc.
- The website is not updated very well, so this site does not provide its user with enough features.
- The games can be downloaded through torrent, Multilink, KatFile, GO4UP, Hitfile, Turbobit, Jheberg, DownAce, and various other links.
- It provides its customers to request any games to which they need links for downloading.
Pros:
- It allows users to request games.
- It provides a lot of links to download a game.
Cons:
- The website is not properly maintained.
- There is no community forum.
- There is no such variety of games.
- The games are not of high quality.
If you’re looking for some websites to download games for free, you can check our free game download sites list.
Part 2: Top Android Game Download Sites
Android is the fastest growing software and is preferred by the majority. Besides the above websites that we picked for downloading games on PC or Mac computer, we’ve done some research and figured out some best sites to download games on android are as follows:
1 Google play

Google play is operated by Google for the Android operating system, and it has been functioning for the past three years. It was formerly known as the android market. Google play contains millions of apps of various categories, so there is something for everyone. Google Play provides a large range of categories of games.
- Every game is easily downloadable, but it depends merely upon your internet connection.
- The purchasing methods are through credit cards, and the procedure is very easy.
- The platform allows everyone and anyone to sell their games.
- Sign up through your Google account is necessary to get access to these features.
Pros:
- It is easy to access.
- It is preinstalled in all android supported devices.
- It contains a huge collection of unique games.
Cons:
- Since everyone and anyone can access it without paying any registration fee, it is exposed to scams and harassment.
- A few games do not function and keep crashing.
2 Android Games Room

It has thousands of free and paid games.
- It has thousands of games in various categories.
- The games are very easily downloaded.
- The games can be even downloaded on your android mobile.
- You can access this site on your mobile by just scanning a QR code.
Pros:
- The site is easily accessible.
- The games are cheap and easily downloadable.
Cons:
- The site does not have a community forum.
- The customer service is not responsive.
- The downloading process is slow.
- No multiplayer gaming.
3 Android Apps

It is an online gaming site where games are handpicked every day, either for free or for a reasonable price.
- It contains a large library of games of various categories.
- You can promote your games also by using the ‘promote your app’ feature.
Pros:
- It is easily accessible and is easy to use.
- The site is updated every day, so new games are available each day.
Cons:
- Multiplayer gaming is not available.
- The customer service is not responsive.
- It has a lot of updates and takes an unreasonable amount of time to install and update the software.
Above are the top websites to download games. I hope you will get interesting games and have fun playing it. For making a great gaming video, you can also add some interesting visual effects and elements to the video.
Part 3: FAQs About Game Download Sites
1. Where can I download PC games for free?
There are plenty of free PC games available in the App Store & Microsoft stores. You can play & download free mini-games from sites like myplaycity.com & miniclip.com. Major game distributing platforms such as Steam, GOG, Uplay, Itch.io, etc. provide numerous free-to-play titles. These sites also frequently hold limited-time giveaways of paid games.
2. What is the safest website to download free games?
Downloading free games puts you at the risk of malware attacks, phishing, spoofing, viruses, and more. Therefore, we highly recommend that you don’t download games from websites without a proper security check. The safest website for downloading free PC games would be Steam. It is a cross-platform game distribution service with thousands of free-to-play games. All the games are vigorously checked and tested for security vulnerabilities. The increasing support for gaming on Linux makes it critical for Linux gamers.
3. Can we download PC games on Android?
There isn’t a straightforward answer to this question. By ‘download,’ if you mean installing or playing, you can only play specific ported titles. GTA San Andreas is one such PC game ported to Android. Some game streaming services like Stadia & Nvidia Geforce Now let you play PC games on Android. However, you can certainly download (not install or play) PC games on Android. There are a few things to keep in mind though. Android internal (& in some cases external) storage does not support single files that are over 4 GB in size. For downloading files greater than 4 GB, you will have to flash your storage in the exFAT or NTFS file system. Moreover, game distributors such as Steam do not allow downloading PC games on Android.
Ollie Mattison
Ollie Mattison is a writer and a lover of all things video.
Follow @Ollie Mattison
Ollie Mattison
Mar 27, 2024• Proven solutions
Gaming has been an exciting and addictive way to relax and have fun since forever. It has been an essential part of every culture, and many countries have their national games as well. Gaming enhances not only our physical capabilities but also our mental capabilities since we have to use our imagination and brain to choose every next move. Games are a form of social bonding; our games have evolved with the rest of things as time has passed. The gaming world for humans started with “Knucklebones” and dice games, and now we have reached the era of video games with various types like action games, car games, arcade games, etc. You can get games from CDs, Apple App Stores, or GooglePlay, or you can download them from various websites. In this article, I’ll share with you the best websites to download games on a PC or Mac computer as well as game download sites for Android devices.
- Part 1: Best PC Game Download Sites
- Part 2: Top Android Game Download Sites
- Part 3: FAQs About Game Download Sites
You may also like:
- 8 Best Free Video Game Sound Effects You Need to Know
- Difference and Debate Between Roguelite and Roguelike Games
- Best TV for Your PS5 in 2021
Bonus: Best Gaming Video Editing Software
For those who are interested in sharing the gameplay experience on YouTube or other video sharing platforms, editing the gameplay video with a reliable video editing software is one of the most important things. Besides the normally trimming and cutting, you may also need some cool visual effects, filters, overlays, and titles as well. Here, we recommend you to try Wondershare Filmora to edit your videos . Remember to join in the Wondershare Video Community to watch more inspirational videos.
Part 1: Best PC Game Download Sites [2024 Updates]
Here is a list of top 8 websites to download games on your PC.
1 Steam
This website for downloading games is developed by Valve Corporations and has been functioning for the past thirteen years. Steam is considered to be the largest digital distribution platform for video games up to date. They have over a thousand games, from indie games to action games, they have everything available for their players. Furthermore, Steam operates in 28 languages.
Single Player and Multiplayer
Games at Steam allow single-player gaming as well as multiplayer gaming. You can have fun with friends by challenging them over a game and have fun while relaxing at the same time. You can challenge a local multiplayer as well as challenge someone online.
Video streaming
This gaming platform allows the players to stream videos of games in the form of movies, demos, tutorials, or episodes. The categories include anime, comedy, drama, horror, action, and sci-fi.
Social Networking
The platform offers the players to connect socially, meet millions of new people, form clans, and chat during the game through their community.
Availability
Steam is available on Windows, Linux, and Mac. This gives the players the freedom to buy a game once and play anywhere and at any time.
Create and Share
This digital platform allows you to create new games through the ‘Steam Workshop’. It allows animation and modeling of the game, sound production, photo editing, game development, and various other features. You can also give gifts to your friends and trade items as well.
Pros:
- It has a variety of games and allows early access to some games for a limited time.
- You can play with an automated player, with your friend or with a stranger online, which enhances the fun.
- It is available in 28 languages due to its built-in translator, so it is easier to use and understand by people all over the world.
- It is easily accessible and easy to download.
Cons:
- Some of the games are rather pricey.
- The games available for free lack variety and have very few features to incite excitement in a player.
![]()
A cross-platform for making videos anywhere for all creators
Why your video editing isn’t good enough? How about some creative inspo?
- 100 Million+ Users
- 150+ Countries and Regions
- 4 Million+ Social Media Followers
- 5 Million+ Stock Media for Use
* Secure Download
2 GOG
GOG.com is operated by GOG Limited. It was formerly known as Good Old Games. GOG.com is a Cypriot digital platform for video games and movies. These movies and games can be downloaded and purchased online.
Install and auto-update
You can install the game with just one click, and you do not have to install a special client to run games or download. The game will always be updated with new features automatically, but if you do not want to update your game, then you can choose to stop the automatic updates.
Cloud Saving
You will never lose your game progress because the game will be saved in the cloud automatically and will stay synced with all of your devices.
Offline Mode
The games installed from this platform do not need an internet connection to run. You can even play offline, and the game will still be backed up.
Rollback the updates
If you do not like the new game update, then you can choose to restore your prior update.
Pros:
- It is easy to use, download, and access.
- The games are not pricey, and GOG.com also puts many games up for occasional sales and accepts gift cards as well.
- It has a large variety of games with excellent features.
- It is compatible with Mac, Windows, and Linux.
Cons:
- The games are old, and not many new games are introduced.
- It does not have multiplayer gaming features.
3 G2A
G2A.com is considered to be the fastest-growing global digital marketplace. It has over 12 million customers and 2 million sellers all over the world. G2A.com acts as an intermediary and connects the buyer and the seller. It does not sell or purchase games itself but only delivers different platforms for others to sell and buy digital products.
Variety in platforms
G2A provides all sorts of platforms to its customers like Xbox, Steam, PSN, Origin, Apple, Gameforge, Battlenet, Uplay, GOG, etc.
Variety in genres
This digital marketplace contains various genres like action, arcade, games for children, puzzle, simulation, song games, racing, sport, etc.
Gift cards
Gift cards for different platforms are also sold here.
G2A 3D+
This feature allows the customer to choose their favorite hero or a legendary weapon from their favorite game, and then G2A will print it, color it and ship it to your doorstep.
G2A Goldmine
This feature allows you to earn real money for promoting G2A.com products to other gamers worldwide. No registration fee or investment is required, and you can do this from your home.
Pros:
- G2A.com offers a home-based job with a competitive salary so gamers can earn and play side by side.
- A lot of new projects are introduced, so the excitement never dies.
- The site can be accessed in more than 20 languages.
Cons:
- The site is not very well protected and is exposed to scams.
4 Origin
Origin is a digital distribution software that promotes online gaming. It has been developed by Electronic Arts, a company behind many globally successful games. You can purchases games on your PC as well as on your mobile.
Social Features
Origin provides its users with many social features like profile management, networking with friends through chatting and video streaming via TwitchTV. You can also share your game library and community integration through social media and networking sites like Facebook, Xbox Live, PlayStation Network, and Nintendo Network.
Variety in games
It provides a large variety in games from PC games to Fifa, and even classic games like Plant Vs. Zombies are also available.
Deals
It offers the best and cheapest deals and also puts up a few games for sale occasionally.
Pros:
- It provides great game streaming features.
- It is developed by a renowned and successful company so it can be trusted.
- There ‘on the house specials’ are appreciated by a lot of gamers, which allows them to play a paid game for free every now and then.
Cons:
- It has a lot of updates and takes an unreasonable amount of time to install and update the software.
- Customers have complained that they provide expired discount codes.
- Customer service needs to be improved as it is not very responsive.
5 PC games
PC games is an online gaming site. You can purchase and download various games from this site. It is operated by EA games.
Categories
PC games contain various genres like action, arcade, games for children, puzzle, simulation, song games, racing, sport, etc.
Origin
It allows you to buy the games from origin.com, which is also operated under EA games.
Community forum
It has a community forum that is available to answer your questions 24/7.
Pros:
- It is easy to access and download.
- It contains one of the most interesting and addictive games.
Cons:
- The quantity of games available is very less, so there is not a lot of variety of games.
- Sometimes the site crashes, and the games have to be downloaded from the start.
6 Ocean of Games
It is developed by a British software company Ocean software.
- It has a large variety of games like action games, song games, arcade games, RPG, survival and fantasy games, etc.
- It provides networking features through its community forum where all the players can meet new people and chat even during gaming.
- It allows both single-player and multiplayer gaming.
Pros:
- The player can challenge an automated player, with your friend or with a stranger online, which enhances the fun.
- It provides great game streaming features.
- It is compatible with Mac, Windows, and Linux.
Cons:
- It is not very well protected and hence exposed to scams.
- The games are not updated, and old versions are still played.
- Some people use the community forum to harass other players, and no action is taken regarding it.
7 Softpedia
Softpedia is an online gaming site that provides the customers the facility to purchase and download games at a very reasonable price.
- Softpedia contains a large library of games of various categories like action games, song games, arcade games, RPG, survival and fantasy games, etc.
- It offers free game cheats and demos to the players.
- Its game application finder feature allows you to find the exact game that you are looking for.
- The games are available for Windows, Mac, Linux, Android, and Drivers as well.
Pros:
- The games are not pricey and are available at a very low price.
Cons:
- The community forum is barely used.
- The website is not updated, so there are no new games available.
- The games are not automatically updated.
8 Skidrow reloaded
Skidrow reloaded is an online gaming site from where you can purchase and download games.
- Softpedia contains a large library of games of various categories like action games, song games, arcade games, RPG, survival and fantasy games, etc.
- The website is not updated very well, so this site does not provide its user with enough features.
- The games can be downloaded through torrent, Multilink, KatFile, GO4UP, Hitfile, Turbobit, Jheberg, DownAce, and various other links.
- It provides its customers to request any games to which they need links for downloading.
Pros:
- It allows users to request games.
- It provides a lot of links to download a game.
Cons:
- The website is not properly maintained.
- There is no community forum.
- There is no such variety of games.
- The games are not of high quality.
If you’re looking for some websites to download games for free, you can check our free game download sites list.
Part 2: Top Android Game Download Sites
Android is the fastest growing software and is preferred by the majority. Besides the above websites that we picked for downloading games on PC or Mac computer, we’ve done some research and figured out some best sites to download games on android are as follows:
1 Google play
Google play is operated by Google for the Android operating system, and it has been functioning for the past three years. It was formerly known as the android market. Google play contains millions of apps of various categories, so there is something for everyone. Google Play provides a large range of categories of games.
- Every game is easily downloadable, but it depends merely upon your internet connection.
- The purchasing methods are through credit cards, and the procedure is very easy.
- The platform allows everyone and anyone to sell their games.
- Sign up through your Google account is necessary to get access to these features.
Pros:
- It is easy to access.
- It is preinstalled in all android supported devices.
- It contains a huge collection of unique games.
Cons:
- Since everyone and anyone can access it without paying any registration fee, it is exposed to scams and harassment.
- A few games do not function and keep crashing.
2 Android Games Room
It has thousands of free and paid games.
- It has thousands of games in various categories.
- The games are very easily downloaded.
- The games can be even downloaded on your android mobile.
- You can access this site on your mobile by just scanning a QR code.
Pros:
- The site is easily accessible.
- The games are cheap and easily downloadable.
Cons:
- The site does not have a community forum.
- The customer service is not responsive.
- The downloading process is slow.
- No multiplayer gaming.
3 Android Apps
It is an online gaming site where games are handpicked every day, either for free or for a reasonable price.
- It contains a large library of games of various categories.
- You can promote your games also by using the ‘promote your app’ feature.
Pros:
- It is easily accessible and is easy to use.
- The site is updated every day, so new games are available each day.
Cons:
- Multiplayer gaming is not available.
- The customer service is not responsive.
- It has a lot of updates and takes an unreasonable amount of time to install and update the software.
Above are the top websites to download games. I hope you will get interesting games and have fun playing it. For making a great gaming video, you can also add some interesting visual effects and elements to the video.
Part 3: FAQs About Game Download Sites
1. Where can I download PC games for free?
There are plenty of free PC games available in the App Store & Microsoft stores. You can play & download free mini-games from sites like myplaycity.com & miniclip.com. Major game distributing platforms such as Steam, GOG, Uplay, Itch.io, etc. provide numerous free-to-play titles. These sites also frequently hold limited-time giveaways of paid games.
2. What is the safest website to download free games?
Downloading free games puts you at the risk of malware attacks, phishing, spoofing, viruses, and more. Therefore, we highly recommend that you don’t download games from websites without a proper security check. The safest website for downloading free PC games would be Steam. It is a cross-platform game distribution service with thousands of free-to-play games. All the games are vigorously checked and tested for security vulnerabilities. The increasing support for gaming on Linux makes it critical for Linux gamers.
3. Can we download PC games on Android?
There isn’t a straightforward answer to this question. By ‘download,’ if you mean installing or playing, you can only play specific ported titles. GTA San Andreas is one such PC game ported to Android. Some game streaming services like Stadia & Nvidia Geforce Now let you play PC games on Android. However, you can certainly download (not install or play) PC games on Android. There are a few things to keep in mind though. Android internal (& in some cases external) storage does not support single files that are over 4 GB in size. For downloading files greater than 4 GB, you will have to flash your storage in the exFAT or NTFS file system. Moreover, game distributors such as Steam do not allow downloading PC games on Android.
Ollie Mattison
Ollie Mattison is a writer and a lover of all things video.
Follow @Ollie Mattison
Mastering FCP: Essential Tips for Saving and Organizing Your Projects
How to Save Final Cut Pro Project the Right Way?

Shanoon Cox
Mar 27, 2024• Proven solutions
aIn the Final Cut Pro, you can find the autosave option to store the changes made on the file automatically without any manual intervention.
To overcome the manual mechanism, the autosave feature in the FCP app keeps the last changes on the file precisely. In this article, you can find insightful ideas about the autosave mechanism and the manual storage process.
In addition, you will learn how to save the finished projects on the external drives effortlessly. A detailed focus on saving the completed projects on the Final Cut Pro app has been highlighted in the below content. Synopsis on the usage of batch export and discovery of the missing files are discussed to enlighten you with the essential data.
Part 1: The autosave mechanism of Final Cut Pro X and manual storage procedure
In this section, get some mind-blowing facts on the autosave and manual options on the Final Cut Pro app!
The FCP tool autosaves the changes every 15 minutes. The saved projects are available in the libraries file as a backup for the restore process. You can go to the library folder to view the autosaved projects. The last edited changes can be reflected by tapping the undo option in the Edit menu.
Stepwise instructions to modify the autosave settings in the FCPX program
Step 1: Launch the FCPX app, press Ctrl+Q to open the ‘User Preferences’ window.
Step 2: In the ‘User Preferences’ screen, you can find a wide range of options to modify. Alter the levels of Undo, autosave vault attributes according to your needs, and save the changes. You can witness these parameters in the General section in the User Preference screen.
Use the User Preference window to make necessary changes according to your requirement. BY default, the Autosave Vault is enabled, and you can work on the projects without any hesitation. Additionally, you can modify the attributes like ‘Save a copy for every’, ‘ Keep at most’, and ‘Maximum of’ to personalize your projects.

When the FCP file is open, you need not worry about the saving procedure. The app triggers the autosave mechanism for regular intervals, and the changes will be up-to-date. If you want to store the files manually, then work with its library files. A simple operation like Ctrl+c and Ctrl+v helps you to move the autosaved projects to any storage location. Here are few tips to restore the autosaved FCP files.
Detailed guidelines on the restoration of autosaved files.
Step 1 Open the Final Cut Pro app on your device.
Step 2 Tap the ‘Libraries Sidebar’ to choose the desired library for restore action. Now hit File -> Open Library -> Backup options on the screen.
Step 3 Surf the backup files and choose the desired one that requires a view. Press the Restore from’ option from the pop-up items. Finally, press the ‘Open’ button.

The manual storage option is feasible only after deactivating the autosave mechanism on the FCPX tool. It is not advisable to carry out this activity. The autosave option keeps your works up-to-date, and you will not miss the recent changes at any cost. You can still disable the autosave option to try the manual storage process.
In the FCPX app, press ‘File -> Library Properties’, then from the displayed items, select the ‘Modify Settings’ option beside the ‘Storage Location’ label. Now, in the backups option select ‘Do not Save’ to deactivate the autosave mechanism.

After completing this procedure, save the changes and get back to the working timeline of
FCPX to continue with your projects. When you edit any projects use the save option without fail else the changes made will be lost in no time.
Part 2: How to save FCPX projects to desktop or external drives?
Many experts recommend opting for an external storage location to save the FCPX files. It occupies more space, and you need to be careful while selecting the drives to store the library files of the FCPX projects. While saving the files, remove the generated data to optimize the storage process.
First, remove the generated files in the library
Step 1: Tap the Libraries sidebar in the FCPX tool and select ‘Library’ and choose the ’Cache’ option in the property window of Library.
Step 2: Next, press ‘File -> Delete Generated Library Files’. To remove the unnecessary generated files.

The above action helps to clear up the space occupied by the project. If you want to free up more space, then delete most of the listed generated files.
Secondly, now transfer the FCPX project to external drives.
Step 1 Select the Libraries Sidebar in the FCPX program and choose the desired ‘Library’. Then hit ‘File -> Reveal in Finder. Now, the file opens in the new finder window.
Step 2 Close the FCPX screen and drag the library files from the Finder window to the external hard drive.

Finally, you had made it. The FCPX projects were successfully moved on to the external drives quickly. Use the above technique to carry out flawless storage or transfer process.
Part 3: Where to find missing files or projects in final cut pro?
Many users feel that their project files were lost in the event of renaming. It becomes a missed file, and they will feel that the files were no were on their system. To handle this scenario, you must learn to think out of the box. You can use the relink technique to find the missed files in the Final Cut Pro app.
The procedure is like the method of searching a particular file in your system using the ‘Search’ option. Here, Relink file functionality is available to set up a link again with the lost file to get back its storage space.
Open the application and select the clip you want to discover. Go to the File menu on the title bar and choose Relink File option from the expanded items. A bunch of files will be displayed below, and you can choose the desired missed file from the collections. There are options to filter the discovered files by choosing between Missing and All options.
Click the ‘Locate All’ button available at the bottom right side of the screen and navigate the folders to link with the perfect file. Press the ‘Choose’ button after selecting the missed file from the list.
From the selected options, The Final Cut Pro application analyses all the attributes in the files and lists out the original files. Now hit the ‘Relink Files’ option to complete the file hunt process.

Part 4: How to use Batch Export to save multiple projects in FCPX?
Perform the batch export for the files that carry similar settings. You can proceed with the flawless export procedure when the project files have the same roles, captions, and settings. The export option becomes limited if the project contains a mix of these attributes.
Batch Export is the processing of sharing multiple files to desired storage space from your app ambiance. Appropriate clicks on the correct controls simplify the task. This procedure requires special attention because there is a chance of data loss when you handle bulk files at a time. The purpose of opting for the bunch export option is that you can complete the transfer tasks quickly. Exporting individual files is time-consuming and requires many clicks to move the desired files to the respective destination. This Batch Export feature in FCPX program enhances the users while working with many files.
Step 1 Launch the FCPX app on your device.
Step 2 In the Libraries sidebar, tap the library option, and select the desired projects that require the batch export.
Step 1 Now, click the File -> Share option to trigger the export process.

It is advisable to export the Master files to retain the quality of the project. You can share the projects without compromising their quality factors.
Conclusion
As you all know that saving a project after successful completion is a crucial action. Few designers, editors, and developers unknowingly ignore this step. There are many applications embeds automatic saving function to enhance the editors to store their finished tasks.
Thus, this article had given valuable insights on how to save the FCPX projects and the methods to backup and restore them. You had acquired an idea about the effective way to spot the missed project files. Finally, tips and tricks associated with the batch export were discussed to ensure flawless bulk file sharing in the secure channel. Use the above content to work comfortably with the FCPX app. Stay tuned to this article to discover enlightening facts on the Final Cut Pro application.
Shanoon Cox
Shanoon Cox is a writer and a lover of all things video.
Follow @Shanoon Cox
Shanoon Cox
Mar 27, 2024• Proven solutions
aIn the Final Cut Pro, you can find the autosave option to store the changes made on the file automatically without any manual intervention.
To overcome the manual mechanism, the autosave feature in the FCP app keeps the last changes on the file precisely. In this article, you can find insightful ideas about the autosave mechanism and the manual storage process.
In addition, you will learn how to save the finished projects on the external drives effortlessly. A detailed focus on saving the completed projects on the Final Cut Pro app has been highlighted in the below content. Synopsis on the usage of batch export and discovery of the missing files are discussed to enlighten you with the essential data.
Part 1: The autosave mechanism of Final Cut Pro X and manual storage procedure
In this section, get some mind-blowing facts on the autosave and manual options on the Final Cut Pro app!
The FCP tool autosaves the changes every 15 minutes. The saved projects are available in the libraries file as a backup for the restore process. You can go to the library folder to view the autosaved projects. The last edited changes can be reflected by tapping the undo option in the Edit menu.
Stepwise instructions to modify the autosave settings in the FCPX program
Step 1: Launch the FCPX app, press Ctrl+Q to open the ‘User Preferences’ window.
Step 2: In the ‘User Preferences’ screen, you can find a wide range of options to modify. Alter the levels of Undo, autosave vault attributes according to your needs, and save the changes. You can witness these parameters in the General section in the User Preference screen.
Use the User Preference window to make necessary changes according to your requirement. BY default, the Autosave Vault is enabled, and you can work on the projects without any hesitation. Additionally, you can modify the attributes like ‘Save a copy for every’, ‘ Keep at most’, and ‘Maximum of’ to personalize your projects.
When the FCP file is open, you need not worry about the saving procedure. The app triggers the autosave mechanism for regular intervals, and the changes will be up-to-date. If you want to store the files manually, then work with its library files. A simple operation like Ctrl+c and Ctrl+v helps you to move the autosaved projects to any storage location. Here are few tips to restore the autosaved FCP files.
Detailed guidelines on the restoration of autosaved files.
Step 1 Open the Final Cut Pro app on your device.
Step 2 Tap the ‘Libraries Sidebar’ to choose the desired library for restore action. Now hit File -> Open Library -> Backup options on the screen.
Step 3 Surf the backup files and choose the desired one that requires a view. Press the Restore from’ option from the pop-up items. Finally, press the ‘Open’ button.
The manual storage option is feasible only after deactivating the autosave mechanism on the FCPX tool. It is not advisable to carry out this activity. The autosave option keeps your works up-to-date, and you will not miss the recent changes at any cost. You can still disable the autosave option to try the manual storage process.
In the FCPX app, press ‘File -> Library Properties’, then from the displayed items, select the ‘Modify Settings’ option beside the ‘Storage Location’ label. Now, in the backups option select ‘Do not Save’ to deactivate the autosave mechanism.
After completing this procedure, save the changes and get back to the working timeline of
FCPX to continue with your projects. When you edit any projects use the save option without fail else the changes made will be lost in no time.
Part 2: How to save FCPX projects to desktop or external drives?
Many experts recommend opting for an external storage location to save the FCPX files. It occupies more space, and you need to be careful while selecting the drives to store the library files of the FCPX projects. While saving the files, remove the generated data to optimize the storage process.
First, remove the generated files in the library
Step 1: Tap the Libraries sidebar in the FCPX tool and select ‘Library’ and choose the ’Cache’ option in the property window of Library.
Step 2: Next, press ‘File -> Delete Generated Library Files’. To remove the unnecessary generated files.
The above action helps to clear up the space occupied by the project. If you want to free up more space, then delete most of the listed generated files.
Secondly, now transfer the FCPX project to external drives.
Step 1 Select the Libraries Sidebar in the FCPX program and choose the desired ‘Library’. Then hit ‘File -> Reveal in Finder. Now, the file opens in the new finder window.
Step 2 Close the FCPX screen and drag the library files from the Finder window to the external hard drive.
Finally, you had made it. The FCPX projects were successfully moved on to the external drives quickly. Use the above technique to carry out flawless storage or transfer process.
Part 3: Where to find missing files or projects in final cut pro?
Many users feel that their project files were lost in the event of renaming. It becomes a missed file, and they will feel that the files were no were on their system. To handle this scenario, you must learn to think out of the box. You can use the relink technique to find the missed files in the Final Cut Pro app.
The procedure is like the method of searching a particular file in your system using the ‘Search’ option. Here, Relink file functionality is available to set up a link again with the lost file to get back its storage space.
Open the application and select the clip you want to discover. Go to the File menu on the title bar and choose Relink File option from the expanded items. A bunch of files will be displayed below, and you can choose the desired missed file from the collections. There are options to filter the discovered files by choosing between Missing and All options.
Click the ‘Locate All’ button available at the bottom right side of the screen and navigate the folders to link with the perfect file. Press the ‘Choose’ button after selecting the missed file from the list.
From the selected options, The Final Cut Pro application analyses all the attributes in the files and lists out the original files. Now hit the ‘Relink Files’ option to complete the file hunt process.
Part 4: How to use Batch Export to save multiple projects in FCPX?
Perform the batch export for the files that carry similar settings. You can proceed with the flawless export procedure when the project files have the same roles, captions, and settings. The export option becomes limited if the project contains a mix of these attributes.
Batch Export is the processing of sharing multiple files to desired storage space from your app ambiance. Appropriate clicks on the correct controls simplify the task. This procedure requires special attention because there is a chance of data loss when you handle bulk files at a time. The purpose of opting for the bunch export option is that you can complete the transfer tasks quickly. Exporting individual files is time-consuming and requires many clicks to move the desired files to the respective destination. This Batch Export feature in FCPX program enhances the users while working with many files.
Step 1 Launch the FCPX app on your device.
Step 2 In the Libraries sidebar, tap the library option, and select the desired projects that require the batch export.
Step 1 Now, click the File -> Share option to trigger the export process.
It is advisable to export the Master files to retain the quality of the project. You can share the projects without compromising their quality factors.
Conclusion
As you all know that saving a project after successful completion is a crucial action. Few designers, editors, and developers unknowingly ignore this step. There are many applications embeds automatic saving function to enhance the editors to store their finished tasks.
Thus, this article had given valuable insights on how to save the FCPX projects and the methods to backup and restore them. You had acquired an idea about the effective way to spot the missed project files. Finally, tips and tricks associated with the batch export were discussed to ensure flawless bulk file sharing in the secure channel. Use the above content to work comfortably with the FCPX app. Stay tuned to this article to discover enlightening facts on the Final Cut Pro application.
Shanoon Cox
Shanoon Cox is a writer and a lover of all things video.
Follow @Shanoon Cox
How to Add 3D Effects to Video in Windows Computer
You may want to add 3D effects to a video to make something in it appear realistic. For example, you can have balloons moving in a circle around a person’s head, make a building hit by a thunderstorm, etc. However, adding such properties to a footage requires a lot of focus and precision that comes with in-depth learning and a lot of practice.
That said, here you will learn how to add 3D effects to a video using Windows’s free built-in Photos app. In addition, you will also see how easy the process becomes if you use a dedicated third-party software that has been specifically designed for the purpose.
In this article
01 How to Add 3D Effects in Windows 11 Photos App for Free
02 How to Add 3D Effects to Video with Filmora
Part 1: How to Add 3D Effects in Windows 11 Photos App for Free
To add 3D effects to a video with the Photos app, you must right-click the media file, go to ‘Open with’, and click to select ‘Photos’ from the submenu. Once this is done, you can follow the steps that are given below to complete the remaining procedure:
Step 1: Open the 3D Effects Panel
In the Photos app, pause the video to avoid any distractions. Click the See more icon (with three horizontal dots) from the top-center, hover mouse to Edit more, and click Add 3D effects.

Step 2: Add a 3D Effect and Customize
Make sure that the Effects tab is selected from the top of the right pane, scroll through the available effects, and click the one that you want to add to the video. Once added, in the preview window, use the scaling handles and rotation tools to resize the effect and change its orientation respectively.

Optionally use the Volume slider from the right pane to increase or decrease the sound volume of the effect to blend it in with the audio of the footage. If required, drag the side handles of the effect in the progress bar at the bottom to increase or decrease the duration of the effect in the video.

Step 3: Use Anchor Point
Drag and place the 3D effect to the location you want it to appear at, turn on the Attach to a point button from the right pane, and drag the anchor point to the object where you want it to stick even if the camera moves.

Step 4: Export the Video
Click the Play button from the bottom to preview the video with the 3D effect, and if everything looks fine, click Save a copy from the bottom-right area.

When the Finish your video box appears, choose your preferred resolution from the Video quality drop-down list, and click Export.

Next, choose your preferred destination folder in the Save As box that opens up next, specify the name of the output file in the File name field, and click Export to export the modified clip in MP4 format.
Note: Videos that you export from the Photos app are by default saved in MP4 format.
As one of the best basic video editing software for beginners , the Microsoft Photos app allows you trim video, add text to video and much more. For details, check how to edit videos with the Microsoft Photos app on Windows 10 and Windows 11.
Part 2: How to Add 3D Effects to Video with Filmora
Although Photos is a free app in Windows 11, it has certain limitations. This is where Filmora video editor , a product by Wondershare, comes into play. Wondershare Filmora is a post-production application for both Windows and Mac computers, and is considered a good competitor of some of the industry-standard video editing applications like Adobe Premiere Pro, Final Cut Pro X, DaVinci Resolve, etc.
While the Photos app can add 3D effects to the videos quickly, Filmora gives more control by offering a plethora of editing tools, options, and presets. In addition, Filmora is a timeline-oriented tool that allows you to add effects, filters, and/or elements in their corresponding layers without making any changes to the original footage.
For Win 7 or later (64-bit)
For macOS 10.12 or later
You can follow the step-by-step instructions that are given below to learn how to add 3D effects to a video with Wondershare Filmora:
Step 1: Import Source Video and Add It to the Timeline
After installing Wondershare Filmora on Windows 10 or Windows 11, launch the program, click anywhere inside the Media box present at the upper-left section of the interface, and locate and import the source video to the program. Next, hover the mouse over the thumbnail of the video, click the + icon from the bottom-right corner.
When the confirmation box appears, either click Match to Media or Keep Project Settings to adjust the project settings according to the media clip or modify the media clip according to the project preferences while adding the footage to the Timeline respectively.
Step 2: Add 3D Titles and Transitions
Click Titles from the toolbox at the top, type 3D Titles in the Search titles field present at the upper section of the upper-left box, and click 3D titles from the suggestions list.

From all the available 3D title presets that appear next, drag the one you like to the Timeline, and place it above the video track.

After this, double-click the placeholder text in the Preview window, and replace it with your caption. You can customize the font, color, and alignment of the text from the options that appear on left. Click OK from the lower-left area of the left pane to exit the editing mode. Repeat the process for all the texts that the preset has. Optionally, drag the sides of the 3D title in the Timeline to specify its duration of visibility on the screen.

To add the transitions, click Media from the toolbox at the top, click Import Media from the Media box, and repeat the process explained earlier to add a new video clip to the Timeline. Make sure that both the clips are on the same track, and are placed next to each other. Now, go to Transitions from the toolbox, and drag and place your preferred transition effect between the two media clips in the Timeline. Optionally you can drag the sides of the transition inwards or outwards to increase or decrease the speed of the effect respectively.

After this, move the Playhead (Skimmer) to the beginning of the Timeline, and press the Spacebar on your keyboard to preview the video.
Note: It is a good practice to preview your video several times during the entire editing process. This will help you identify the error sooner, and you will be able to address the issue with fewer hassles.
Step 3: Add Elements and Effects
Go to Elements from the toolbox, drag your preferred element from the upper-left box to the Timeline, and place it on a new track. You can drag the sides of the element in the Timeline to increase or decrease its visibility during video playback.

To add effects, go to Effects from the toolbox, drag your preferred effect from the upper-left box, and place it on a new layer in the Timeline. As it is with other entities, you can drag the sides of the effect to increase or decrease the duration of its impact on the video. Next, double-click the Effects layer in the Timeline, and use the available options in the box to make further adjustments.
Note: The options that you get by double-clicking the effect in the Timeline may vary according to the adjustments it allows you to make.

Once this is done, preview the video, click Export from the top-center, and use the tabs and options on the Export box to export the modified video in your preferred format.
Conclusion
If you are new to the VFX and video editing industry, trying hands with the Photos app would give you a fair idea about how things work. Once you are well-versed or if you are already a post-production professional, you can and you must go for a dedicated program like Wondershare Filmora that not only has an intuitive interface, it is also equipped with a plethora of presets to add 3D titles, elements, transitions, and effects to the videos without much hassle.
02 How to Add 3D Effects to Video with Filmora
Part 1: How to Add 3D Effects in Windows 11 Photos App for Free
To add 3D effects to a video with the Photos app, you must right-click the media file, go to ‘Open with’, and click to select ‘Photos’ from the submenu. Once this is done, you can follow the steps that are given below to complete the remaining procedure:
Step 1: Open the 3D Effects Panel
In the Photos app, pause the video to avoid any distractions. Click the See more icon (with three horizontal dots) from the top-center, hover mouse to Edit more, and click Add 3D effects.
Step 2: Add a 3D Effect and Customize
Make sure that the Effects tab is selected from the top of the right pane, scroll through the available effects, and click the one that you want to add to the video. Once added, in the preview window, use the scaling handles and rotation tools to resize the effect and change its orientation respectively.
Optionally use the Volume slider from the right pane to increase or decrease the sound volume of the effect to blend it in with the audio of the footage. If required, drag the side handles of the effect in the progress bar at the bottom to increase or decrease the duration of the effect in the video.
Step 3: Use Anchor Point
Drag and place the 3D effect to the location you want it to appear at, turn on the Attach to a point button from the right pane, and drag the anchor point to the object where you want it to stick even if the camera moves.
Step 4: Export the Video
Click the Play button from the bottom to preview the video with the 3D effect, and if everything looks fine, click Save a copy from the bottom-right area.
When the Finish your video box appears, choose your preferred resolution from the Video quality drop-down list, and click Export.
Next, choose your preferred destination folder in the Save As box that opens up next, specify the name of the output file in the File name field, and click Export to export the modified clip in MP4 format.
Note: Videos that you export from the Photos app are by default saved in MP4 format.
As one of the best basic video editing software for beginners , the Microsoft Photos app allows you trim video, add text to video and much more. For details, check how to edit videos with the Microsoft Photos app on Windows 10 and Windows 11.
Part 2: How to Add 3D Effects to Video with Filmora
Although Photos is a free app in Windows 11, it has certain limitations. This is where Filmora video editor , a product by Wondershare, comes into play. Wondershare Filmora is a post-production application for both Windows and Mac computers, and is considered a good competitor of some of the industry-standard video editing applications like Adobe Premiere Pro, Final Cut Pro X, DaVinci Resolve, etc.
While the Photos app can add 3D effects to the videos quickly, Filmora gives more control by offering a plethora of editing tools, options, and presets. In addition, Filmora is a timeline-oriented tool that allows you to add effects, filters, and/or elements in their corresponding layers without making any changes to the original footage.
For Win 7 or later (64-bit)
For macOS 10.12 or later
You can follow the step-by-step instructions that are given below to learn how to add 3D effects to a video with Wondershare Filmora:
Step 1: Import Source Video and Add It to the Timeline
After installing Wondershare Filmora on Windows 10 or Windows 11, launch the program, click anywhere inside the Media box present at the upper-left section of the interface, and locate and import the source video to the program. Next, hover the mouse over the thumbnail of the video, click the + icon from the bottom-right corner.
When the confirmation box appears, either click Match to Media or Keep Project Settings to adjust the project settings according to the media clip or modify the media clip according to the project preferences while adding the footage to the Timeline respectively.
Step 2: Add 3D Titles and Transitions
Click Titles from the toolbox at the top, type 3D Titles in the Search titles field present at the upper section of the upper-left box, and click 3D titles from the suggestions list.
From all the available 3D title presets that appear next, drag the one you like to the Timeline, and place it above the video track.
After this, double-click the placeholder text in the Preview window, and replace it with your caption. You can customize the font, color, and alignment of the text from the options that appear on left. Click OK from the lower-left area of the left pane to exit the editing mode. Repeat the process for all the texts that the preset has. Optionally, drag the sides of the 3D title in the Timeline to specify its duration of visibility on the screen.
To add the transitions, click Media from the toolbox at the top, click Import Media from the Media box, and repeat the process explained earlier to add a new video clip to the Timeline. Make sure that both the clips are on the same track, and are placed next to each other. Now, go to Transitions from the toolbox, and drag and place your preferred transition effect between the two media clips in the Timeline. Optionally you can drag the sides of the transition inwards or outwards to increase or decrease the speed of the effect respectively.
After this, move the Playhead (Skimmer) to the beginning of the Timeline, and press the Spacebar on your keyboard to preview the video.
Note: It is a good practice to preview your video several times during the entire editing process. This will help you identify the error sooner, and you will be able to address the issue with fewer hassles.
Step 3: Add Elements and Effects
Go to Elements from the toolbox, drag your preferred element from the upper-left box to the Timeline, and place it on a new track. You can drag the sides of the element in the Timeline to increase or decrease its visibility during video playback.
To add effects, go to Effects from the toolbox, drag your preferred effect from the upper-left box, and place it on a new layer in the Timeline. As it is with other entities, you can drag the sides of the effect to increase or decrease the duration of its impact on the video. Next, double-click the Effects layer in the Timeline, and use the available options in the box to make further adjustments.
Note: The options that you get by double-clicking the effect in the Timeline may vary according to the adjustments it allows you to make.
Once this is done, preview the video, click Export from the top-center, and use the tabs and options on the Export box to export the modified video in your preferred format.
Conclusion
If you are new to the VFX and video editing industry, trying hands with the Photos app would give you a fair idea about how things work. Once you are well-versed or if you are already a post-production professional, you can and you must go for a dedicated program like Wondershare Filmora that not only has an intuitive interface, it is also equipped with a plethora of presets to add 3D titles, elements, transitions, and effects to the videos without much hassle.
Also read:
- Rip Audio From Instagram Fast and Easy Methods
- New 2024 Approved 10 Top-Notch Video Editing Software for Mac Vegas Pro Alternatives
- The Ultimate List of GIF Speed Changer Apps and Websites for 2024
- New Free Video Editing Solutions for Those Just Starting Out Desktop/Online/Mobile
- The Bright Side of Video Editing Top Editors for 2024
- Updated In 2024, Screen Recording 101 How to Use Filmora Scrn for Desktop Capture
- Updated In 2024, From Pixels to Proportions A Guide to Finding the Ideal Picture Ratio
- Elevate Your Videos The Best Free 4K Video Conversion Tools
- Game Recording Made Easy 3 Options for Every Gamer
- 2024 Approved MOV Video Rotator Top 5 Free Downloads
- Rotate, Resize, and Refine Top 10 Online Video Editors for 2024
- New 2024 Approved Find Your Ideal Android Movie Maker A Step-by-Step Guide
- Transform Your Clips Add Slow Motion Effects for Free with Filmora for 2024
- New 2024 Approved How to Play Video in Slow Motion on VLC
- New In 2024, Rotate Your 3GP Videos for Free Top 5 Tools of the Year
- Updated S Top-Rated Free Online Video Invitation Generators for 2024
- Updated 2024 Approved Online Facebook MP3 Converters Top 8 Picks for Easy Use
- New Unlock the Power of Screen Recording A Filmora Scrn Tutorial
- New Rewind to the Past Top Apps for Adding Retro VHS Effects to Your Videos for 2024
- Sony Vegas Not Your Cup of Tea? Discover Top Alternatives for Windows for 2024
- Updated Final Cut Pro 2023 Reversing Video Clips Like a Pro
- Updated 2024 Approved 10 Top-Rated Vegas Pro Alternatives for Mac A Comprehensive Review
- Updated VHS on the Go Best Mobile Apps for Retro Video Playback
- Video Editing for Mac Users AVS Editor Software for 2024
- New FREE Top 10 Best Online Video Editors No Watermark for 2024
- In 2024, Unleash Your Creativity A Beginners Guide to Stop Motion Animation on Instagram
- New Unleash Your Creativity 10 Best Vegas Pro Alternatives for Mac (Free & Paid) for 2024
- 2024 Approved The Ultimate Mac Slideshow App Ezvid Review and Tutorial
- Top 3D Animation Software for Mobile Devices (Free to Use)
- Updated Video Magic How to Capture Stunning Freeze Frames in Minutes for 2024
- New Cutting Through the Noise Final Cut Pro vs LumaFusion for Video Creators for 2024
- New In 2024, How to Add VHS Green Screen to Your Video
- What is Fake GPS Location Pro and Is It Good On Lava Blaze Pro 5G? | Dr.fone
- Complete Fixes To Solve iPhone SE (2022) Randomly Asking for Apple ID Password | Dr.fone
- Updated 2024 Approved Do You Want a LUT that You Can Use for Your High-Definition Content? You Can Use Rec 709 LUT Premiere Pro for Your HD Digital Media to Give the Perfect Result
- Mastering Lock Screen Settings How to Enable and Disable on Poco X6 Pro
- 5 Quick Methods to Bypass Vivo Y200e 5G FRP
- Proven Ways in How To Hide Location on Life360 For Realme Narzo 60x 5G | Dr.fone
- iPogo will be the new iSpoofer On Oppo A56s 5G? | Dr.fone
- 3 Solutions to Hard Reset Nokia C12 Plus Phone Using PC | Dr.fone
- How To Recover Whatsapp Chat History From iPhone 8 | Stellar
- In 2024, How to Change GPS Location on Oppo A58 4G Easily & Safely | Dr.fone
- Your Account Has Been Disabled in the App Store and iTunes On Apple iPhone 13 mini?
- Planning to Use a Pokemon Go Joystick on Apple iPhone 6? | Dr.fone
- Top 10 Fixes for Phone Keep Disconnecting from Wi-Fi On Infinix Note 30 Pro | Dr.fone
- Easy Methods How To Transfer Pictures From Apple iPhone 13 to PC | Dr.fone
- In 2024, All You Need To Know About Mega Greninja For Tecno Spark 10 5G | Dr.fone
- How to Rescue Lost Music from Poco
- Title: New The Ultimate Guide to Rotating Videos with Ease
- Author: Emma
- Created at : 2024-05-19 05:48:07
- Updated at : 2024-05-20 05:48:07
- Link: https://video-ai-editor.techidaily.com/new-the-ultimate-guide-to-rotating-videos-with-ease/
- License: This work is licensed under CC BY-NC-SA 4.0.
