
The Art of Chroma Keying in FCP X Expert Techniques for Stunning Results

The Art of Chroma Keying in FCP X: Expert Techniques for Stunning Results
FCP X: Create a Chroma-Key (Green-screen) Effect

Benjamin Arango
Mar 27, 2024• Proven solutions
Chroma-key (also called “green screen”) effects are a staple in video production. What FCP X effect does is allow you to make the background behind an actor transparent so you can place the actor into a different environment than a studio.
This is a basic tutorial about Apple Final Cut Pro X, professional video editing software. However, if video editing is new to you, consider Wondershare Filmora for Mac . This is a powerful but easy-to-use tool for users just starting out. Download the free trial version below.
 Download Mac Version ](https://tools.techidaily.com/wondershare/filmora/download/ )
Getting Started
First, the best thing you can do to improve the quality of your keys is to improve how you shoot them. Here are seven basic production rules:
- Actors should be at least 10 feet in front of the green screen. This avoids light from the background “spilling” around their body or shoulders.
- In general, don’t cast shadows on the green screen. Be very careful shooting feet.
- The green background should be as smooth as possible. Paint is always better than fabric; avoid wrinkles and folds.
- The green background should be lit smoothly, both from side to side and top to bottom. I try to have the green background display between 40-50% level on the waveform monitor.
- There is NO relationship between how the background is lit and how your actors are lit. This article will illustrate that.
- Light your background for smoothness. Light your actors for drama.
- Don’t worry about having the green background fill the frame. It only needs to completely surround the edges of your actors. Garbage mattes are used to get rid of junk around the edges.
Setting up the Key

The green screen image is always placed above the background. You can place either the green screen or background image into the Primary Storyline. I find it easier to put the background in the Primary Storyline, because it makes editing the green screen image easier. But this is purely personal choice.
Step 1: Select the green screen clip
From the Effects Browser > Keying category, double-click the Keyer effect, which applies it to the selected clip. (You can also drag the effect on top of the clip, if you forgot to select the green-screen clip first.)

Don’t panic if your image looks weird – we will fix it.

Click the Sample Color icon. This allows fine-tuning the selection of the background color.

In the green-screen image, drag to select a representative section of the background. I try to get close to the face, but not so close that I accidentally select loose hair or skin.
Your key should look better immediately. Most of the time, you can probably stop here. But there are three other adjustments that can make your key look even better:
- Cleaning up the matte
- Edge adjustments
- Light wrap

Click the Matte button to display your key as a white foreground on a black background.

Your goal is the make the foreground solid white, which means opaque, and the background solid black, which means transparent. Adjust the Fill Holes and Edge Distance sliders until your key looks solid. (For REALLY bad keys, you’ll need to also adjust Color Selection, mentioned below.)

If an edge is too pronounced, or needs help, click the Edges icon.

Step 2: Tweaks Video
Then, click and drag a line from the foreground to the background in the Canvas. Drag the midpoint slider (where my cursor is) until the edge looks the best it can. Different video formats make this easy (ProRes), while others (HDV, avchd) make this much harder. Perfection is impossible – do the best you can.

Final Cut provides four additional tweaks at the bottom of the keyer filter:
- Color Selection
- Matte Tools
- Spill Suppression
- Light Wrap
The first three are designed to clean up poorly shot keys – read the FCP X Help files to learn how these work. (I used the Color Selection tools to clean up the very dark key I use an example later in this article.)
Light wrap, though, is aesthetic. What it does is blend colors from the background into the edges of the foreground, to make the entire key look more “organic,” as if the foreground and background were actually in the same space.
This is a subtle effect, but very cool.

Twirl down Light Wrap and adjust the Amount slider and watch what happens. Drag the other sliders around and see what happens. The nice thing about this setting is that when it looks good to you, it is good. The amount of the effect is totally up to you. Remember, Light Wrap only affects the edges of the foreground and should be used subtly.

When you are done, you have a great looking key!
Clean up the Image with a Garbage Mask

Sometimes, however, you don’t have, ah, perhaps, the best green-screen image to work with. Here, for example, there are lighting instruments in the foreground, with a very inadequately lit green screen in the background. (Sigh… this is just pitiful.)
Once you pull the key – which is film-speak for creating a green-screen shot, as I described above – and get it looking as good as possible, there’s one more step: adding a garbage matte to get rid of all the garbage surrounding your actors.

Once you get your key looking as good as you can – which in this case isn’t all that good – drag the Mask effect (Effects > Keying > Mask) on top of the green-screen clip.
NOTE: The Mask effect should always be added after the Keying effect, so that the Mask is below the Keyer in the Inspector.

Then, drag each of the four circles to create a shape such that your foreground image is contained inside it, and everything you want to exclude is outside. Here, for instance, we removed the light stand, the edge of the green background and the tearing at the top of the image. I’ve found this Mask effect works best when applied to a connected clip.
However, the big limitation of the Mask effect is that you only have four points to work with. That’s where a free effect comes in, which allows you to create far more flexible shapes with it. It’s written by Alex Gollner and is available on his website – alex4d.wordpress.com/fcpx/ – I recommend his effects highly.
How to Create a Chroma-Key in easier ways?
Chroma-key, or green screen, is an essential part of every editor to make all kinds of effects. Is there any way to make this sophisticated procedure easier way? Yes, try Filmora.
In version 10.5 for Mac, Filmora added a new feature: AI portrait. It allows you to do a green screen effect with just one click.
By adopting AI portrait, you can add those stunning effects in simple steps: How to Remove or Change Video Background in One Step?
Or: How to Add a Shake Effect to your Videos?
Conclusion
The chroma-key filter in FCP X allows us to create some amazing effects. If you want to use green screen effects more easily, here is Filmora for you. You can appaly Chroma-Key effects with just a few click. Have fun playing with it.
 Download Mac Version ](https://tools.techidaily.com/wondershare/filmora/download/ )

Benjamin Arango
Benjamin Arango is a writer and a lover of all things video.
Follow @Benjamin Arango
Benjamin Arango
Mar 27, 2024• Proven solutions
Chroma-key (also called “green screen”) effects are a staple in video production. What FCP X effect does is allow you to make the background behind an actor transparent so you can place the actor into a different environment than a studio.
This is a basic tutorial about Apple Final Cut Pro X, professional video editing software. However, if video editing is new to you, consider Wondershare Filmora for Mac . This is a powerful but easy-to-use tool for users just starting out. Download the free trial version below.
 Download Mac Version ](https://tools.techidaily.com/wondershare/filmora/download/ )
Getting Started
First, the best thing you can do to improve the quality of your keys is to improve how you shoot them. Here are seven basic production rules:
- Actors should be at least 10 feet in front of the green screen. This avoids light from the background “spilling” around their body or shoulders.
- In general, don’t cast shadows on the green screen. Be very careful shooting feet.
- The green background should be as smooth as possible. Paint is always better than fabric; avoid wrinkles and folds.
- The green background should be lit smoothly, both from side to side and top to bottom. I try to have the green background display between 40-50% level on the waveform monitor.
- There is NO relationship between how the background is lit and how your actors are lit. This article will illustrate that.
- Light your background for smoothness. Light your actors for drama.
- Don’t worry about having the green background fill the frame. It only needs to completely surround the edges of your actors. Garbage mattes are used to get rid of junk around the edges.
Setting up the Key

The green screen image is always placed above the background. You can place either the green screen or background image into the Primary Storyline. I find it easier to put the background in the Primary Storyline, because it makes editing the green screen image easier. But this is purely personal choice.
Step 1: Select the green screen clip
From the Effects Browser > Keying category, double-click the Keyer effect, which applies it to the selected clip. (You can also drag the effect on top of the clip, if you forgot to select the green-screen clip first.)

Don’t panic if your image looks weird – we will fix it.

Click the Sample Color icon. This allows fine-tuning the selection of the background color.

In the green-screen image, drag to select a representative section of the background. I try to get close to the face, but not so close that I accidentally select loose hair or skin.
Your key should look better immediately. Most of the time, you can probably stop here. But there are three other adjustments that can make your key look even better:
- Cleaning up the matte
- Edge adjustments
- Light wrap

Click the Matte button to display your key as a white foreground on a black background.

Your goal is the make the foreground solid white, which means opaque, and the background solid black, which means transparent. Adjust the Fill Holes and Edge Distance sliders until your key looks solid. (For REALLY bad keys, you’ll need to also adjust Color Selection, mentioned below.)

If an edge is too pronounced, or needs help, click the Edges icon.

Step 2: Tweaks Video
Then, click and drag a line from the foreground to the background in the Canvas. Drag the midpoint slider (where my cursor is) until the edge looks the best it can. Different video formats make this easy (ProRes), while others (HDV, avchd) make this much harder. Perfection is impossible – do the best you can.

Final Cut provides four additional tweaks at the bottom of the keyer filter:
- Color Selection
- Matte Tools
- Spill Suppression
- Light Wrap
The first three are designed to clean up poorly shot keys – read the FCP X Help files to learn how these work. (I used the Color Selection tools to clean up the very dark key I use an example later in this article.)
Light wrap, though, is aesthetic. What it does is blend colors from the background into the edges of the foreground, to make the entire key look more “organic,” as if the foreground and background were actually in the same space.
This is a subtle effect, but very cool.

Twirl down Light Wrap and adjust the Amount slider and watch what happens. Drag the other sliders around and see what happens. The nice thing about this setting is that when it looks good to you, it is good. The amount of the effect is totally up to you. Remember, Light Wrap only affects the edges of the foreground and should be used subtly.

When you are done, you have a great looking key!
Clean up the Image with a Garbage Mask

Sometimes, however, you don’t have, ah, perhaps, the best green-screen image to work with. Here, for example, there are lighting instruments in the foreground, with a very inadequately lit green screen in the background. (Sigh… this is just pitiful.)
Once you pull the key – which is film-speak for creating a green-screen shot, as I described above – and get it looking as good as possible, there’s one more step: adding a garbage matte to get rid of all the garbage surrounding your actors.

Once you get your key looking as good as you can – which in this case isn’t all that good – drag the Mask effect (Effects > Keying > Mask) on top of the green-screen clip.
NOTE: The Mask effect should always be added after the Keying effect, so that the Mask is below the Keyer in the Inspector.

Then, drag each of the four circles to create a shape such that your foreground image is contained inside it, and everything you want to exclude is outside. Here, for instance, we removed the light stand, the edge of the green background and the tearing at the top of the image. I’ve found this Mask effect works best when applied to a connected clip.
However, the big limitation of the Mask effect is that you only have four points to work with. That’s where a free effect comes in, which allows you to create far more flexible shapes with it. It’s written by Alex Gollner and is available on his website – alex4d.wordpress.com/fcpx/ – I recommend his effects highly.
How to Create a Chroma-Key in easier ways?
Chroma-key, or green screen, is an essential part of every editor to make all kinds of effects. Is there any way to make this sophisticated procedure easier way? Yes, try Filmora.
In version 10.5 for Mac, Filmora added a new feature: AI portrait. It allows you to do a green screen effect with just one click.
By adopting AI portrait, you can add those stunning effects in simple steps: How to Remove or Change Video Background in One Step?
Or: How to Add a Shake Effect to your Videos?
Conclusion
The chroma-key filter in FCP X allows us to create some amazing effects. If you want to use green screen effects more easily, here is Filmora for you. You can appaly Chroma-Key effects with just a few click. Have fun playing with it.
 Download Mac Version ](https://tools.techidaily.com/wondershare/filmora/download/ )

Benjamin Arango
Benjamin Arango is a writer and a lover of all things video.
Follow @Benjamin Arango
Benjamin Arango
Mar 27, 2024• Proven solutions
Chroma-key (also called “green screen”) effects are a staple in video production. What FCP X effect does is allow you to make the background behind an actor transparent so you can place the actor into a different environment than a studio.
This is a basic tutorial about Apple Final Cut Pro X, professional video editing software. However, if video editing is new to you, consider Wondershare Filmora for Mac . This is a powerful but easy-to-use tool for users just starting out. Download the free trial version below.
 Download Mac Version ](https://tools.techidaily.com/wondershare/filmora/download/ )
Getting Started
First, the best thing you can do to improve the quality of your keys is to improve how you shoot them. Here are seven basic production rules:
- Actors should be at least 10 feet in front of the green screen. This avoids light from the background “spilling” around their body or shoulders.
- In general, don’t cast shadows on the green screen. Be very careful shooting feet.
- The green background should be as smooth as possible. Paint is always better than fabric; avoid wrinkles and folds.
- The green background should be lit smoothly, both from side to side and top to bottom. I try to have the green background display between 40-50% level on the waveform monitor.
- There is NO relationship between how the background is lit and how your actors are lit. This article will illustrate that.
- Light your background for smoothness. Light your actors for drama.
- Don’t worry about having the green background fill the frame. It only needs to completely surround the edges of your actors. Garbage mattes are used to get rid of junk around the edges.
Setting up the Key

The green screen image is always placed above the background. You can place either the green screen or background image into the Primary Storyline. I find it easier to put the background in the Primary Storyline, because it makes editing the green screen image easier. But this is purely personal choice.
Step 1: Select the green screen clip
From the Effects Browser > Keying category, double-click the Keyer effect, which applies it to the selected clip. (You can also drag the effect on top of the clip, if you forgot to select the green-screen clip first.)

Don’t panic if your image looks weird – we will fix it.

Click the Sample Color icon. This allows fine-tuning the selection of the background color.

In the green-screen image, drag to select a representative section of the background. I try to get close to the face, but not so close that I accidentally select loose hair or skin.
Your key should look better immediately. Most of the time, you can probably stop here. But there are three other adjustments that can make your key look even better:
- Cleaning up the matte
- Edge adjustments
- Light wrap

Click the Matte button to display your key as a white foreground on a black background.

Your goal is the make the foreground solid white, which means opaque, and the background solid black, which means transparent. Adjust the Fill Holes and Edge Distance sliders until your key looks solid. (For REALLY bad keys, you’ll need to also adjust Color Selection, mentioned below.)

If an edge is too pronounced, or needs help, click the Edges icon.

Step 2: Tweaks Video
Then, click and drag a line from the foreground to the background in the Canvas. Drag the midpoint slider (where my cursor is) until the edge looks the best it can. Different video formats make this easy (ProRes), while others (HDV, avchd) make this much harder. Perfection is impossible – do the best you can.

Final Cut provides four additional tweaks at the bottom of the keyer filter:
- Color Selection
- Matte Tools
- Spill Suppression
- Light Wrap
The first three are designed to clean up poorly shot keys – read the FCP X Help files to learn how these work. (I used the Color Selection tools to clean up the very dark key I use an example later in this article.)
Light wrap, though, is aesthetic. What it does is blend colors from the background into the edges of the foreground, to make the entire key look more “organic,” as if the foreground and background were actually in the same space.
This is a subtle effect, but very cool.

Twirl down Light Wrap and adjust the Amount slider and watch what happens. Drag the other sliders around and see what happens. The nice thing about this setting is that when it looks good to you, it is good. The amount of the effect is totally up to you. Remember, Light Wrap only affects the edges of the foreground and should be used subtly.

When you are done, you have a great looking key!
Clean up the Image with a Garbage Mask

Sometimes, however, you don’t have, ah, perhaps, the best green-screen image to work with. Here, for example, there are lighting instruments in the foreground, with a very inadequately lit green screen in the background. (Sigh… this is just pitiful.)
Once you pull the key – which is film-speak for creating a green-screen shot, as I described above – and get it looking as good as possible, there’s one more step: adding a garbage matte to get rid of all the garbage surrounding your actors.

Once you get your key looking as good as you can – which in this case isn’t all that good – drag the Mask effect (Effects > Keying > Mask) on top of the green-screen clip.
NOTE: The Mask effect should always be added after the Keying effect, so that the Mask is below the Keyer in the Inspector.

Then, drag each of the four circles to create a shape such that your foreground image is contained inside it, and everything you want to exclude is outside. Here, for instance, we removed the light stand, the edge of the green background and the tearing at the top of the image. I’ve found this Mask effect works best when applied to a connected clip.
However, the big limitation of the Mask effect is that you only have four points to work with. That’s where a free effect comes in, which allows you to create far more flexible shapes with it. It’s written by Alex Gollner and is available on his website – alex4d.wordpress.com/fcpx/ – I recommend his effects highly.
How to Create a Chroma-Key in easier ways?
Chroma-key, or green screen, is an essential part of every editor to make all kinds of effects. Is there any way to make this sophisticated procedure easier way? Yes, try Filmora.
In version 10.5 for Mac, Filmora added a new feature: AI portrait. It allows you to do a green screen effect with just one click.
By adopting AI portrait, you can add those stunning effects in simple steps: How to Remove or Change Video Background in One Step?
Or: How to Add a Shake Effect to your Videos?
Conclusion
The chroma-key filter in FCP X allows us to create some amazing effects. If you want to use green screen effects more easily, here is Filmora for you. You can appaly Chroma-Key effects with just a few click. Have fun playing with it.
 Download Mac Version ](https://tools.techidaily.com/wondershare/filmora/download/ )

Benjamin Arango
Benjamin Arango is a writer and a lover of all things video.
Follow @Benjamin Arango
Benjamin Arango
Mar 27, 2024• Proven solutions
Chroma-key (also called “green screen”) effects are a staple in video production. What FCP X effect does is allow you to make the background behind an actor transparent so you can place the actor into a different environment than a studio.
This is a basic tutorial about Apple Final Cut Pro X, professional video editing software. However, if video editing is new to you, consider Wondershare Filmora for Mac . This is a powerful but easy-to-use tool for users just starting out. Download the free trial version below.
 Download Mac Version ](https://tools.techidaily.com/wondershare/filmora/download/ )
Getting Started
First, the best thing you can do to improve the quality of your keys is to improve how you shoot them. Here are seven basic production rules:
- Actors should be at least 10 feet in front of the green screen. This avoids light from the background “spilling” around their body or shoulders.
- In general, don’t cast shadows on the green screen. Be very careful shooting feet.
- The green background should be as smooth as possible. Paint is always better than fabric; avoid wrinkles and folds.
- The green background should be lit smoothly, both from side to side and top to bottom. I try to have the green background display between 40-50% level on the waveform monitor.
- There is NO relationship between how the background is lit and how your actors are lit. This article will illustrate that.
- Light your background for smoothness. Light your actors for drama.
- Don’t worry about having the green background fill the frame. It only needs to completely surround the edges of your actors. Garbage mattes are used to get rid of junk around the edges.
Setting up the Key

The green screen image is always placed above the background. You can place either the green screen or background image into the Primary Storyline. I find it easier to put the background in the Primary Storyline, because it makes editing the green screen image easier. But this is purely personal choice.
Step 1: Select the green screen clip
From the Effects Browser > Keying category, double-click the Keyer effect, which applies it to the selected clip. (You can also drag the effect on top of the clip, if you forgot to select the green-screen clip first.)

Don’t panic if your image looks weird – we will fix it.

Click the Sample Color icon. This allows fine-tuning the selection of the background color.

In the green-screen image, drag to select a representative section of the background. I try to get close to the face, but not so close that I accidentally select loose hair or skin.
Your key should look better immediately. Most of the time, you can probably stop here. But there are three other adjustments that can make your key look even better:
- Cleaning up the matte
- Edge adjustments
- Light wrap

Click the Matte button to display your key as a white foreground on a black background.

Your goal is the make the foreground solid white, which means opaque, and the background solid black, which means transparent. Adjust the Fill Holes and Edge Distance sliders until your key looks solid. (For REALLY bad keys, you’ll need to also adjust Color Selection, mentioned below.)

If an edge is too pronounced, or needs help, click the Edges icon.

Step 2: Tweaks Video
Then, click and drag a line from the foreground to the background in the Canvas. Drag the midpoint slider (where my cursor is) until the edge looks the best it can. Different video formats make this easy (ProRes), while others (HDV, avchd) make this much harder. Perfection is impossible – do the best you can.

Final Cut provides four additional tweaks at the bottom of the keyer filter:
- Color Selection
- Matte Tools
- Spill Suppression
- Light Wrap
The first three are designed to clean up poorly shot keys – read the FCP X Help files to learn how these work. (I used the Color Selection tools to clean up the very dark key I use an example later in this article.)
Light wrap, though, is aesthetic. What it does is blend colors from the background into the edges of the foreground, to make the entire key look more “organic,” as if the foreground and background were actually in the same space.
This is a subtle effect, but very cool.

Twirl down Light Wrap and adjust the Amount slider and watch what happens. Drag the other sliders around and see what happens. The nice thing about this setting is that when it looks good to you, it is good. The amount of the effect is totally up to you. Remember, Light Wrap only affects the edges of the foreground and should be used subtly.

When you are done, you have a great looking key!
Clean up the Image with a Garbage Mask

Sometimes, however, you don’t have, ah, perhaps, the best green-screen image to work with. Here, for example, there are lighting instruments in the foreground, with a very inadequately lit green screen in the background. (Sigh… this is just pitiful.)
Once you pull the key – which is film-speak for creating a green-screen shot, as I described above – and get it looking as good as possible, there’s one more step: adding a garbage matte to get rid of all the garbage surrounding your actors.

Once you get your key looking as good as you can – which in this case isn’t all that good – drag the Mask effect (Effects > Keying > Mask) on top of the green-screen clip.
NOTE: The Mask effect should always be added after the Keying effect, so that the Mask is below the Keyer in the Inspector.

Then, drag each of the four circles to create a shape such that your foreground image is contained inside it, and everything you want to exclude is outside. Here, for instance, we removed the light stand, the edge of the green background and the tearing at the top of the image. I’ve found this Mask effect works best when applied to a connected clip.
However, the big limitation of the Mask effect is that you only have four points to work with. That’s where a free effect comes in, which allows you to create far more flexible shapes with it. It’s written by Alex Gollner and is available on his website – alex4d.wordpress.com/fcpx/ – I recommend his effects highly.
How to Create a Chroma-Key in easier ways?
Chroma-key, or green screen, is an essential part of every editor to make all kinds of effects. Is there any way to make this sophisticated procedure easier way? Yes, try Filmora.
In version 10.5 for Mac, Filmora added a new feature: AI portrait. It allows you to do a green screen effect with just one click.
By adopting AI portrait, you can add those stunning effects in simple steps: How to Remove or Change Video Background in One Step?
Or: How to Add a Shake Effect to your Videos?
Conclusion
The chroma-key filter in FCP X allows us to create some amazing effects. If you want to use green screen effects more easily, here is Filmora for you. You can appaly Chroma-Key effects with just a few click. Have fun playing with it.
 Download Mac Version ](https://tools.techidaily.com/wondershare/filmora/download/ )

Benjamin Arango
Benjamin Arango is a writer and a lover of all things video.
Follow @Benjamin Arango
How to Pick the Perfect Video to Audio Converter: My 5-Step Guide
5 Rules I Follow When Choose Video to Audio Converter App
An easy yet powerful editor
Numerous effects to choose from
Detailed tutorials provided by the official channel
Suppose you possess a documentary or a film clip of your favorite music track where the voice narration is more crucial and informative than its visuals. In that case, you can save a decent amount of space on your storage device with a practical video to audio converter app.
Keeping in mind all the above complexities, you will learn about our top 8 videos to audio converter apps, including our five must-follow to select the best among them.
In this article
01 [Best 8 Video to Audio Converter App](#Part 1)
02 [5 Ways to Choose Video to Audio Converter App](#Part 2)
Part 1 Best 8 Video to Audio Converter App
01Video to MP3 – Trim, and Convert
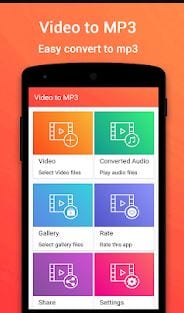
Let’s start with a simple yet beautifully designed video to audio converter app with all the options displayed well on the home screen. You can choose a video file from your device, YouTube video, or play previously converted audio files. In addition, you can choose to save the audio files directly to the SD card to avoid cluttering of native storage space.
The app is simple, with conversion done within a few seconds. The app also supports audio bitrates of up to 320 kb/s and offers high-quality MP3 output. This is a Play Store free-to-download app with ads on board. You will need a smartphone with at least Android 4.1 to use the app.
Features
● Compatible with all Video formats such as MP4, AVI, FLV, MKV, MPEG,3GP, M4V, MOV, MPG, etc.
● Save Your MP3 files in Sdcard Folder.
● It supports All ARM(CPU) devices.
Pros
● Easy to use
● Great compatibility
● Fast conversion
Cons
● It May does not work well often
● Pop up ads
● It May does not work well for extensive size content
02Accountlab Video to MP3 Converter
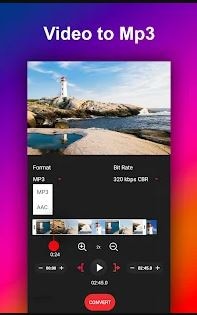
This is a slick video to audio converter app that, in addition to letting you convert videos to audio, the app also acts as a very decent audio/video editor. With good compatibility for audio bitrates of up to 320 kb/s, this video to audio converter app matches some best apps and their features out there. You can easily modify or edit video files and play them back on the app to hone your editing skills.
It has an audio cutter feature to create custom ringtones for your device. Also, it’s a free-to-download app on the Google Play Store but comes with ads. Finally, the app works with Android 2.3.3 or above devices, particularly older Android tablets and smartphones.
Features
● Supports Video formats including WMV, MP4, 3gp, Flv , avi etc.
● Integrated MP3 Cutter for making Ringtone.
● Supports Bitrate 48 kb/s , 64 kb/s , 128 kb/s , 192 kb/s , 256 kb/s , 320 kb/s.
Pros
● Simple user interface
● Fast conversion
● One tap to play music files
Cons
● Lack of batch conversion
● Inefficient video editor
● Not suitable for other features than conversion
03Video MP3 Converter

This is yet another multi-purpose video to audio converter app on our list of top 8. It can help you trim audios and videos in addition to MP3 conversion and edit the converted file’s metadata (artist information, tags, etc.).
The app is also said to be the quickest video to audio converter apps available out there, although we can’t vouch for their claim. The settings and other options on the app are well framed, so it doesn’t take much time to get used to the layout.
Using this app, you can convert videos formats like 3GP, MP4, WEBM, FLV, and WMV. Additionally, this app is entirely free to use and download if you’re OK with a few ads. Finally, the app works on devices running Android 4.1 and more.
Features
● Supported video formats: MP4, 3GP, WEBM, WMV, FLV
● Supported audio formats: MP3, OGG
● Supports editing MP3 metadata
Pros
● Interactive user interface
● Good compatibility
● Fast conversion
Cons
● Lack of other features
● It contains lots of pop up ads
● Loss in quality after conversion
04MP3 Cutter and Merger by InShot
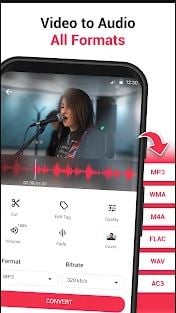
The program lets you do everything that a standard video to audio converter app should, and more. The app not only converts videos into full MP3s but also lets you choose among parameters like frequency, channel (stereo or otherwise), and the volume of the original track.
Users can use their editing skills extensively with the increased audio controls. The app also assists you in trimming and cutting video files, which is an excellent feature.
The user interface is quite innovative here, unlike some of the other apps we’ve mentioned above. The app is free to download on the Google Play Store but is ad-supported and has in-app purchases.
Features
● Video cutter and mute audio
● Merge multiple audios
● Sound boost to increase the volume
Pros
● All in one media converter
● Interactive user interface
● It also contains other editing features
Cons
● Sound quality may ruin after boost
● Not suitable for lengthy projects
● Slow processing
05MP3 Converter – Audio Extractor
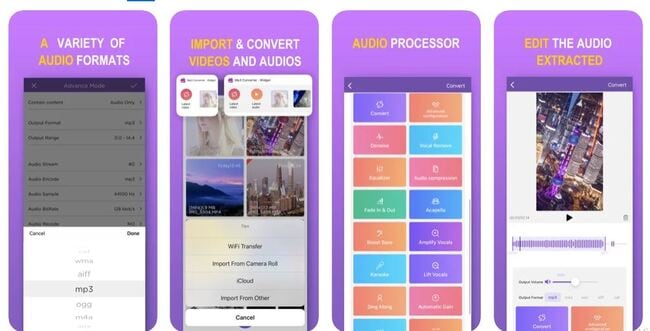
This MP3 Converter – Audio Extractor helps convert video to audio iPhone and requires you to choose a file and begin the conversion process. You won’t even have to state the output format because MP3 is the app’s default output format.
After the conversion, there’s an option to preview the file you have created to make sure the quality level is pretty satisfying. However, it doesn’t support adjusting the output file’s bitrate or modifying other settings to increase the quality of the resultant audio.
Moreover, the app provides only modest file-sharing options, and you may have to go for an in-app purchase if you wish to gain access to all the functions that the MP3 Converter – Audio Extractor has to offer.
Features
● It supports most video formats.
● Support to most audio formats.
● Widget to quickly import video or play recent audio
Pros
● Good in cutting/editing music
● Fantastic user interface
● Fast and easy to use
Cons
● The app may take time to launch
● It doesn’t contain advanced editing features
● Need two devices for conversion
06Media Converter – Video to MP3
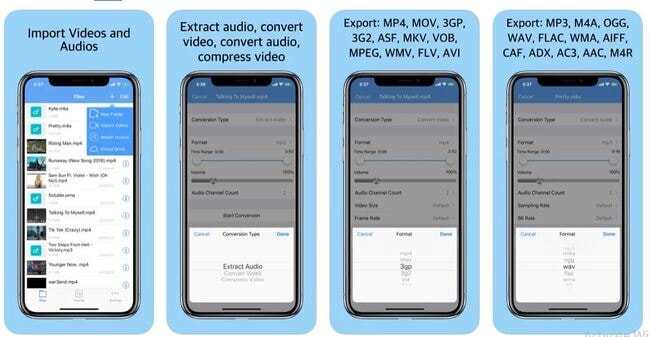
Despite the audio extraction from video, you can use the inbuilt media player of this video to audio converter app to listen to music or watch videos. Media Converter – Video to MP3 is compatible with various input file formats, and it lets you transform to M4A, MP3, WAV, and other audio file formats.
However, this app lacks more advanced MP4 to MP3 file conversion options since you can’t add tags to them or choose the preferred bitrate of the output files. The app consists of different ads, and you must invest in an in-app purchase for premium features. Even the Media Converter – Video to MP3’s pro version doesn’t offer file-sharing options.
Features
● Audio extraction: Extracts audio from the video, Output format: MP3, M4A, OGG, WAV, FLAC, WMA, AIFF, CAF, ADX, AC3, M4R
● Video format conversion, Output format: MP4, MOV, 3GP, 3G2, ASF, MKV, VOB, MPEG, WMV, FLV, AVI
● Video compression: Video size cropping, clip video
Pros
● Supports all formats
● Interactive user interface
● Good compatibility
Cons
● Lack of advanced features
● Slow audio extraction
● It doesn’t support batch conversion
07Video to MP3 – Convert Audio
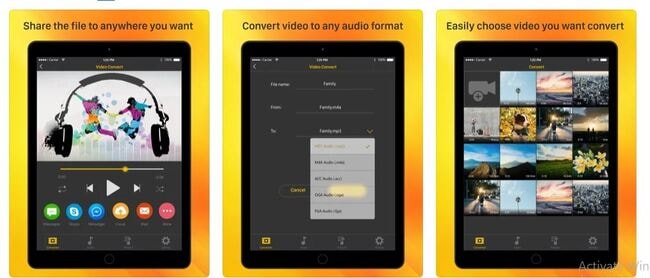
This video to audio converter iPhone app helps transform all videos stored on your phone’s camera roll, or you can upload a video from One Drive, Dropbox, iCloud, and various online hosting platforms.
Video to MP3: Convert Audio helps you adjust the beginning and ending points of the new file of audio, which means that you can convert only a section of an MP4 video file to MP3. The output can easily be shared on social media or messaging apps and various other devices using the iTunes File Sharing feature.
Features
● Get custom bitrate, sample rate, volume
● It supports audio track selection
● Specify start and end with any position
Pros
● Accessible converter
● Good user interface
● Advanced premium features
Cons
● A bit confusing
● Slow processing
● Pop up ads
07MP4, MP3 Video Audio Cutter, Trimmer & Converter
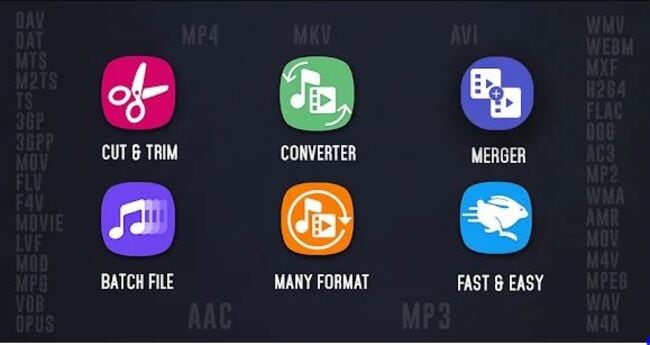
It is our fastest pick-in video to audio converter app in the market that assists you in trimming or cutting both audio and video. It can also convert from almost all video formats to audios out there with namely the supported formats like MP3, M4A, M4B, AC3, WAV, OGG, FLAC, MP4, MKV, AVI, 3GP, FLV, MOV, WEBM, M2TS, TS, MTS, MPEG.
Moreover, the app supports batch audio file conversion as well.
Features
● Trim & Cut audio files
● Trim & Cut video files
● Batch file conversion
Pros
● Good user interface
● Good compatibility
● Support to batch conversion
Cons
● Lots of popup ads
● Sometimes slow processing
● Lack of other advanced features
Part 2 5 Ways to Choose Video to Audio Converter App
Before selecting the ideal video to audio converter app or video to audio converter apk, there are different sections or points you need to consider for selection. So, let’s read them out without any further ado!
01Excellent user interface
Of course, the user interface is the primary essential feature you should be looking for in any video to audio converter app out there. Interaction with the interface is all that counts, and any complexity within this process automatically halts the ultimate performance.
02Compatibility with different audio formats
The next important thing is to consider how compatible your app is in reality. Will it be able to convert to different audio formats or not? How many audio formats are supported by the app? So, every time you convert video to audio, you need to check your requirements beforehand so as not to confuse with the formats later on.
03Processing speed
Yes, it would be best not to overlook the processing speed. The processing speed determines the likability of your end project because time is a precious element in the life of everyone. So, consider the time consumed for conversion and how much wastage of time you can afford.
04Platform compatibility
Platform compatibility refers to the devices or operating systems a particular app is comfortable with. Here, we mainly look for compatibility with Windows, Mac, iPhone, and Android. So, the best is what goes well with almost every OS or device or is compatible with both Windows and Mac simultaneously.
05Other features
Other features could represent the additional or advanced features a particular video to audio converter app consists of. It’s also because you may be looking to enhance that extracted audio, mainly on the same platform, again concerning time. This is why finding an all-rounder video to converter app is challenging but not impossible.
Filmora is a go-to alternative to full-fledged post-production applications like Final Cut Pro X, Adobe Premiere Pro, etc., and can be used to create industry-standard outputs.
Some other features that Filmora consists of the following:
● You can create split-screen effects simply with the presets available
● It helps you to add Elements to enhance your video quality
● Includes several transitions presets
Steps to convert video to audio with Filmora:
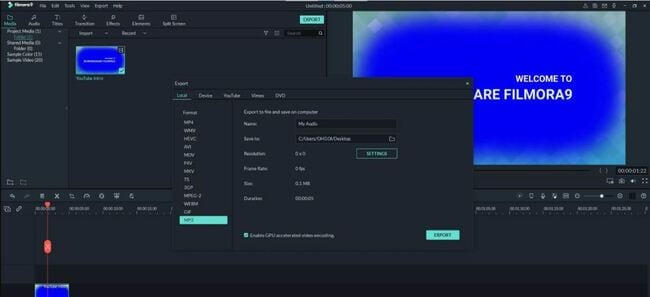
Step 1: Import the video footage to the ‘Media’ box in Wondershare Filmora Video Editor
Step 2: Drag the clip to the Timeline
Step 3: Trim the video as/if needed
Step 4: Get to the ‘Export’ box
Step 5: Choose ‘MP3’ from the ‘Local’ tab’s ‘Format’ list
Step 6: Hit the ‘EXPORT’ tab to start the conversion process
Supported Audio Formats: Filmora supports all major audio formats as a video to audio converter.
Supported Platforms: Filmora is available for both Mac and Windows computers.
Wondershare Filmora
Get started easily with Filmora’s powerful performance, intuitive interface, and countless effects!
Try It Free Try It Free Try It Free Learn More >

Pros
● It can be an alternative to other expensive apps such as Adobe Premiere Pro, Final Cut Pro X, etc.
● Can create a device or portal-specific videos like iPhone, iPad, Samsung, YouTube, Vimeo, etc.
Cons
● Direct video to audio conversion can produce files only in MP3 format
Key Takeaways from This Episode
● Understanding top 8 tools to convert video to audio
● 5 rules to choose the top-rated video to audio converter app
● Finding the all-rounder video to audio converter: Wondershare Filmora
Suppose you possess a documentary or a film clip of your favorite music track where the voice narration is more crucial and informative than its visuals. In that case, you can save a decent amount of space on your storage device with a practical video to audio converter app.
Keeping in mind all the above complexities, you will learn about our top 8 videos to audio converter apps, including our five must-follow to select the best among them.
In this article
01 [Best 8 Video to Audio Converter App](#Part 1)
02 [5 Ways to Choose Video to Audio Converter App](#Part 2)
Part 1 Best 8 Video to Audio Converter App
01Video to MP3 – Trim, and Convert

Let’s start with a simple yet beautifully designed video to audio converter app with all the options displayed well on the home screen. You can choose a video file from your device, YouTube video, or play previously converted audio files. In addition, you can choose to save the audio files directly to the SD card to avoid cluttering of native storage space.
The app is simple, with conversion done within a few seconds. The app also supports audio bitrates of up to 320 kb/s and offers high-quality MP3 output. This is a Play Store free-to-download app with ads on board. You will need a smartphone with at least Android 4.1 to use the app.
Features
● Compatible with all Video formats such as MP4, AVI, FLV, MKV, MPEG,3GP, M4V, MOV, MPG, etc.
● Save Your MP3 files in Sdcard Folder.
● It supports All ARM(CPU) devices.
Pros
● Easy to use
● Great compatibility
● Fast conversion
Cons
● It May does not work well often
● Pop up ads
● It May does not work well for extensive size content
02Accountlab Video to MP3 Converter

This is a slick video to audio converter app that, in addition to letting you convert videos to audio, the app also acts as a very decent audio/video editor. With good compatibility for audio bitrates of up to 320 kb/s, this video to audio converter app matches some best apps and their features out there. You can easily modify or edit video files and play them back on the app to hone your editing skills.
It has an audio cutter feature to create custom ringtones for your device. Also, it’s a free-to-download app on the Google Play Store but comes with ads. Finally, the app works with Android 2.3.3 or above devices, particularly older Android tablets and smartphones.
Features
● Supports Video formats including WMV, MP4, 3gp, Flv , avi etc.
● Integrated MP3 Cutter for making Ringtone.
● Supports Bitrate 48 kb/s , 64 kb/s , 128 kb/s , 192 kb/s , 256 kb/s , 320 kb/s.
Pros
● Simple user interface
● Fast conversion
● One tap to play music files
Cons
● Lack of batch conversion
● Inefficient video editor
● Not suitable for other features than conversion
03Video MP3 Converter

This is yet another multi-purpose video to audio converter app on our list of top 8. It can help you trim audios and videos in addition to MP3 conversion and edit the converted file’s metadata (artist information, tags, etc.).
The app is also said to be the quickest video to audio converter apps available out there, although we can’t vouch for their claim. The settings and other options on the app are well framed, so it doesn’t take much time to get used to the layout.
Using this app, you can convert videos formats like 3GP, MP4, WEBM, FLV, and WMV. Additionally, this app is entirely free to use and download if you’re OK with a few ads. Finally, the app works on devices running Android 4.1 and more.
Features
● Supported video formats: MP4, 3GP, WEBM, WMV, FLV
● Supported audio formats: MP3, OGG
● Supports editing MP3 metadata
Pros
● Interactive user interface
● Good compatibility
● Fast conversion
Cons
● Lack of other features
● It contains lots of pop up ads
● Loss in quality after conversion
04MP3 Cutter and Merger by InShot

The program lets you do everything that a standard video to audio converter app should, and more. The app not only converts videos into full MP3s but also lets you choose among parameters like frequency, channel (stereo or otherwise), and the volume of the original track.
Users can use their editing skills extensively with the increased audio controls. The app also assists you in trimming and cutting video files, which is an excellent feature.
The user interface is quite innovative here, unlike some of the other apps we’ve mentioned above. The app is free to download on the Google Play Store but is ad-supported and has in-app purchases.
Features
● Video cutter and mute audio
● Merge multiple audios
● Sound boost to increase the volume
Pros
● All in one media converter
● Interactive user interface
● It also contains other editing features
Cons
● Sound quality may ruin after boost
● Not suitable for lengthy projects
● Slow processing
05MP3 Converter – Audio Extractor

This MP3 Converter – Audio Extractor helps convert video to audio iPhone and requires you to choose a file and begin the conversion process. You won’t even have to state the output format because MP3 is the app’s default output format.
After the conversion, there’s an option to preview the file you have created to make sure the quality level is pretty satisfying. However, it doesn’t support adjusting the output file’s bitrate or modifying other settings to increase the quality of the resultant audio.
Moreover, the app provides only modest file-sharing options, and you may have to go for an in-app purchase if you wish to gain access to all the functions that the MP3 Converter – Audio Extractor has to offer.
Features
● It supports most video formats.
● Support to most audio formats.
● Widget to quickly import video or play recent audio
Pros
● Good in cutting/editing music
● Fantastic user interface
● Fast and easy to use
Cons
● The app may take time to launch
● It doesn’t contain advanced editing features
● Need two devices for conversion
06Media Converter – Video to MP3

Despite the audio extraction from video, you can use the inbuilt media player of this video to audio converter app to listen to music or watch videos. Media Converter – Video to MP3 is compatible with various input file formats, and it lets you transform to M4A, MP3, WAV, and other audio file formats.
However, this app lacks more advanced MP4 to MP3 file conversion options since you can’t add tags to them or choose the preferred bitrate of the output files. The app consists of different ads, and you must invest in an in-app purchase for premium features. Even the Media Converter – Video to MP3’s pro version doesn’t offer file-sharing options.
Features
● Audio extraction: Extracts audio from the video, Output format: MP3, M4A, OGG, WAV, FLAC, WMA, AIFF, CAF, ADX, AC3, M4R
● Video format conversion, Output format: MP4, MOV, 3GP, 3G2, ASF, MKV, VOB, MPEG, WMV, FLV, AVI
● Video compression: Video size cropping, clip video
Pros
● Supports all formats
● Interactive user interface
● Good compatibility
Cons
● Lack of advanced features
● Slow audio extraction
● It doesn’t support batch conversion
07Video to MP3 – Convert Audio

This video to audio converter iPhone app helps transform all videos stored on your phone’s camera roll, or you can upload a video from One Drive, Dropbox, iCloud, and various online hosting platforms.
Video to MP3: Convert Audio helps you adjust the beginning and ending points of the new file of audio, which means that you can convert only a section of an MP4 video file to MP3. The output can easily be shared on social media or messaging apps and various other devices using the iTunes File Sharing feature.
Features
● Get custom bitrate, sample rate, volume
● It supports audio track selection
● Specify start and end with any position
Pros
● Accessible converter
● Good user interface
● Advanced premium features
Cons
● A bit confusing
● Slow processing
● Pop up ads
07MP4, MP3 Video Audio Cutter, Trimmer & Converter

It is our fastest pick-in video to audio converter app in the market that assists you in trimming or cutting both audio and video. It can also convert from almost all video formats to audios out there with namely the supported formats like MP3, M4A, M4B, AC3, WAV, OGG, FLAC, MP4, MKV, AVI, 3GP, FLV, MOV, WEBM, M2TS, TS, MTS, MPEG.
Moreover, the app supports batch audio file conversion as well.
Features
● Trim & Cut audio files
● Trim & Cut video files
● Batch file conversion
Pros
● Good user interface
● Good compatibility
● Support to batch conversion
Cons
● Lots of popup ads
● Sometimes slow processing
● Lack of other advanced features
Part 2 5 Ways to Choose Video to Audio Converter App
Before selecting the ideal video to audio converter app or video to audio converter apk, there are different sections or points you need to consider for selection. So, let’s read them out without any further ado!
01Excellent user interface
Of course, the user interface is the primary essential feature you should be looking for in any video to audio converter app out there. Interaction with the interface is all that counts, and any complexity within this process automatically halts the ultimate performance.
02Compatibility with different audio formats
The next important thing is to consider how compatible your app is in reality. Will it be able to convert to different audio formats or not? How many audio formats are supported by the app? So, every time you convert video to audio, you need to check your requirements beforehand so as not to confuse with the formats later on.
03Processing speed
Yes, it would be best not to overlook the processing speed. The processing speed determines the likability of your end project because time is a precious element in the life of everyone. So, consider the time consumed for conversion and how much wastage of time you can afford.
04Platform compatibility
Platform compatibility refers to the devices or operating systems a particular app is comfortable with. Here, we mainly look for compatibility with Windows, Mac, iPhone, and Android. So, the best is what goes well with almost every OS or device or is compatible with both Windows and Mac simultaneously.
05Other features
Other features could represent the additional or advanced features a particular video to audio converter app consists of. It’s also because you may be looking to enhance that extracted audio, mainly on the same platform, again concerning time. This is why finding an all-rounder video to converter app is challenging but not impossible.
Filmora is a go-to alternative to full-fledged post-production applications like Final Cut Pro X, Adobe Premiere Pro, etc., and can be used to create industry-standard outputs.
Some other features that Filmora consists of the following:
● You can create split-screen effects simply with the presets available
● It helps you to add Elements to enhance your video quality
● Includes several transitions presets
Steps to convert video to audio with Filmora:

Step 1: Import the video footage to the ‘Media’ box in Wondershare Filmora Video Editor
Step 2: Drag the clip to the Timeline
Step 3: Trim the video as/if needed
Step 4: Get to the ‘Export’ box
Step 5: Choose ‘MP3’ from the ‘Local’ tab’s ‘Format’ list
Step 6: Hit the ‘EXPORT’ tab to start the conversion process
Supported Audio Formats: Filmora supports all major audio formats as a video to audio converter.
Supported Platforms: Filmora is available for both Mac and Windows computers.
Wondershare Filmora
Get started easily with Filmora’s powerful performance, intuitive interface, and countless effects!
Try It Free Try It Free Try It Free Learn More >

Pros
● It can be an alternative to other expensive apps such as Adobe Premiere Pro, Final Cut Pro X, etc.
● Can create a device or portal-specific videos like iPhone, iPad, Samsung, YouTube, Vimeo, etc.
Cons
● Direct video to audio conversion can produce files only in MP3 format
Key Takeaways from This Episode
● Understanding top 8 tools to convert video to audio
● 5 rules to choose the top-rated video to audio converter app
● Finding the all-rounder video to audio converter: Wondershare Filmora
Suppose you possess a documentary or a film clip of your favorite music track where the voice narration is more crucial and informative than its visuals. In that case, you can save a decent amount of space on your storage device with a practical video to audio converter app.
Keeping in mind all the above complexities, you will learn about our top 8 videos to audio converter apps, including our five must-follow to select the best among them.
In this article
01 [Best 8 Video to Audio Converter App](#Part 1)
02 [5 Ways to Choose Video to Audio Converter App](#Part 2)
Part 1 Best 8 Video to Audio Converter App
01Video to MP3 – Trim, and Convert

Let’s start with a simple yet beautifully designed video to audio converter app with all the options displayed well on the home screen. You can choose a video file from your device, YouTube video, or play previously converted audio files. In addition, you can choose to save the audio files directly to the SD card to avoid cluttering of native storage space.
The app is simple, with conversion done within a few seconds. The app also supports audio bitrates of up to 320 kb/s and offers high-quality MP3 output. This is a Play Store free-to-download app with ads on board. You will need a smartphone with at least Android 4.1 to use the app.
Features
● Compatible with all Video formats such as MP4, AVI, FLV, MKV, MPEG,3GP, M4V, MOV, MPG, etc.
● Save Your MP3 files in Sdcard Folder.
● It supports All ARM(CPU) devices.
Pros
● Easy to use
● Great compatibility
● Fast conversion
Cons
● It May does not work well often
● Pop up ads
● It May does not work well for extensive size content
02Accountlab Video to MP3 Converter

This is a slick video to audio converter app that, in addition to letting you convert videos to audio, the app also acts as a very decent audio/video editor. With good compatibility for audio bitrates of up to 320 kb/s, this video to audio converter app matches some best apps and their features out there. You can easily modify or edit video files and play them back on the app to hone your editing skills.
It has an audio cutter feature to create custom ringtones for your device. Also, it’s a free-to-download app on the Google Play Store but comes with ads. Finally, the app works with Android 2.3.3 or above devices, particularly older Android tablets and smartphones.
Features
● Supports Video formats including WMV, MP4, 3gp, Flv , avi etc.
● Integrated MP3 Cutter for making Ringtone.
● Supports Bitrate 48 kb/s , 64 kb/s , 128 kb/s , 192 kb/s , 256 kb/s , 320 kb/s.
Pros
● Simple user interface
● Fast conversion
● One tap to play music files
Cons
● Lack of batch conversion
● Inefficient video editor
● Not suitable for other features than conversion
03Video MP3 Converter

This is yet another multi-purpose video to audio converter app on our list of top 8. It can help you trim audios and videos in addition to MP3 conversion and edit the converted file’s metadata (artist information, tags, etc.).
The app is also said to be the quickest video to audio converter apps available out there, although we can’t vouch for their claim. The settings and other options on the app are well framed, so it doesn’t take much time to get used to the layout.
Using this app, you can convert videos formats like 3GP, MP4, WEBM, FLV, and WMV. Additionally, this app is entirely free to use and download if you’re OK with a few ads. Finally, the app works on devices running Android 4.1 and more.
Features
● Supported video formats: MP4, 3GP, WEBM, WMV, FLV
● Supported audio formats: MP3, OGG
● Supports editing MP3 metadata
Pros
● Interactive user interface
● Good compatibility
● Fast conversion
Cons
● Lack of other features
● It contains lots of pop up ads
● Loss in quality after conversion
04MP3 Cutter and Merger by InShot

The program lets you do everything that a standard video to audio converter app should, and more. The app not only converts videos into full MP3s but also lets you choose among parameters like frequency, channel (stereo or otherwise), and the volume of the original track.
Users can use their editing skills extensively with the increased audio controls. The app also assists you in trimming and cutting video files, which is an excellent feature.
The user interface is quite innovative here, unlike some of the other apps we’ve mentioned above. The app is free to download on the Google Play Store but is ad-supported and has in-app purchases.
Features
● Video cutter and mute audio
● Merge multiple audios
● Sound boost to increase the volume
Pros
● All in one media converter
● Interactive user interface
● It also contains other editing features
Cons
● Sound quality may ruin after boost
● Not suitable for lengthy projects
● Slow processing
05MP3 Converter – Audio Extractor

This MP3 Converter – Audio Extractor helps convert video to audio iPhone and requires you to choose a file and begin the conversion process. You won’t even have to state the output format because MP3 is the app’s default output format.
After the conversion, there’s an option to preview the file you have created to make sure the quality level is pretty satisfying. However, it doesn’t support adjusting the output file’s bitrate or modifying other settings to increase the quality of the resultant audio.
Moreover, the app provides only modest file-sharing options, and you may have to go for an in-app purchase if you wish to gain access to all the functions that the MP3 Converter – Audio Extractor has to offer.
Features
● It supports most video formats.
● Support to most audio formats.
● Widget to quickly import video or play recent audio
Pros
● Good in cutting/editing music
● Fantastic user interface
● Fast and easy to use
Cons
● The app may take time to launch
● It doesn’t contain advanced editing features
● Need two devices for conversion
06Media Converter – Video to MP3

Despite the audio extraction from video, you can use the inbuilt media player of this video to audio converter app to listen to music or watch videos. Media Converter – Video to MP3 is compatible with various input file formats, and it lets you transform to M4A, MP3, WAV, and other audio file formats.
However, this app lacks more advanced MP4 to MP3 file conversion options since you can’t add tags to them or choose the preferred bitrate of the output files. The app consists of different ads, and you must invest in an in-app purchase for premium features. Even the Media Converter – Video to MP3’s pro version doesn’t offer file-sharing options.
Features
● Audio extraction: Extracts audio from the video, Output format: MP3, M4A, OGG, WAV, FLAC, WMA, AIFF, CAF, ADX, AC3, M4R
● Video format conversion, Output format: MP4, MOV, 3GP, 3G2, ASF, MKV, VOB, MPEG, WMV, FLV, AVI
● Video compression: Video size cropping, clip video
Pros
● Supports all formats
● Interactive user interface
● Good compatibility
Cons
● Lack of advanced features
● Slow audio extraction
● It doesn’t support batch conversion
07Video to MP3 – Convert Audio

This video to audio converter iPhone app helps transform all videos stored on your phone’s camera roll, or you can upload a video from One Drive, Dropbox, iCloud, and various online hosting platforms.
Video to MP3: Convert Audio helps you adjust the beginning and ending points of the new file of audio, which means that you can convert only a section of an MP4 video file to MP3. The output can easily be shared on social media or messaging apps and various other devices using the iTunes File Sharing feature.
Features
● Get custom bitrate, sample rate, volume
● It supports audio track selection
● Specify start and end with any position
Pros
● Accessible converter
● Good user interface
● Advanced premium features
Cons
● A bit confusing
● Slow processing
● Pop up ads
07MP4, MP3 Video Audio Cutter, Trimmer & Converter

It is our fastest pick-in video to audio converter app in the market that assists you in trimming or cutting both audio and video. It can also convert from almost all video formats to audios out there with namely the supported formats like MP3, M4A, M4B, AC3, WAV, OGG, FLAC, MP4, MKV, AVI, 3GP, FLV, MOV, WEBM, M2TS, TS, MTS, MPEG.
Moreover, the app supports batch audio file conversion as well.
Features
● Trim & Cut audio files
● Trim & Cut video files
● Batch file conversion
Pros
● Good user interface
● Good compatibility
● Support to batch conversion
Cons
● Lots of popup ads
● Sometimes slow processing
● Lack of other advanced features
Part 2 5 Ways to Choose Video to Audio Converter App
Before selecting the ideal video to audio converter app or video to audio converter apk, there are different sections or points you need to consider for selection. So, let’s read them out without any further ado!
01Excellent user interface
Of course, the user interface is the primary essential feature you should be looking for in any video to audio converter app out there. Interaction with the interface is all that counts, and any complexity within this process automatically halts the ultimate performance.
02Compatibility with different audio formats
The next important thing is to consider how compatible your app is in reality. Will it be able to convert to different audio formats or not? How many audio formats are supported by the app? So, every time you convert video to audio, you need to check your requirements beforehand so as not to confuse with the formats later on.
03Processing speed
Yes, it would be best not to overlook the processing speed. The processing speed determines the likability of your end project because time is a precious element in the life of everyone. So, consider the time consumed for conversion and how much wastage of time you can afford.
04Platform compatibility
Platform compatibility refers to the devices or operating systems a particular app is comfortable with. Here, we mainly look for compatibility with Windows, Mac, iPhone, and Android. So, the best is what goes well with almost every OS or device or is compatible with both Windows and Mac simultaneously.
05Other features
Other features could represent the additional or advanced features a particular video to audio converter app consists of. It’s also because you may be looking to enhance that extracted audio, mainly on the same platform, again concerning time. This is why finding an all-rounder video to converter app is challenging but not impossible.
Filmora is a go-to alternative to full-fledged post-production applications like Final Cut Pro X, Adobe Premiere Pro, etc., and can be used to create industry-standard outputs.
Some other features that Filmora consists of the following:
● You can create split-screen effects simply with the presets available
● It helps you to add Elements to enhance your video quality
● Includes several transitions presets
Steps to convert video to audio with Filmora:

Step 1: Import the video footage to the ‘Media’ box in Wondershare Filmora Video Editor
Step 2: Drag the clip to the Timeline
Step 3: Trim the video as/if needed
Step 4: Get to the ‘Export’ box
Step 5: Choose ‘MP3’ from the ‘Local’ tab’s ‘Format’ list
Step 6: Hit the ‘EXPORT’ tab to start the conversion process
Supported Audio Formats: Filmora supports all major audio formats as a video to audio converter.
Supported Platforms: Filmora is available for both Mac and Windows computers.
Wondershare Filmora
Get started easily with Filmora’s powerful performance, intuitive interface, and countless effects!
Try It Free Try It Free Try It Free Learn More >

Pros
● It can be an alternative to other expensive apps such as Adobe Premiere Pro, Final Cut Pro X, etc.
● Can create a device or portal-specific videos like iPhone, iPad, Samsung, YouTube, Vimeo, etc.
Cons
● Direct video to audio conversion can produce files only in MP3 format
Key Takeaways from This Episode
● Understanding top 8 tools to convert video to audio
● 5 rules to choose the top-rated video to audio converter app
● Finding the all-rounder video to audio converter: Wondershare Filmora
Suppose you possess a documentary or a film clip of your favorite music track where the voice narration is more crucial and informative than its visuals. In that case, you can save a decent amount of space on your storage device with a practical video to audio converter app.
Keeping in mind all the above complexities, you will learn about our top 8 videos to audio converter apps, including our five must-follow to select the best among them.
In this article
01 [Best 8 Video to Audio Converter App](#Part 1)
02 [5 Ways to Choose Video to Audio Converter App](#Part 2)
Part 1 Best 8 Video to Audio Converter App
01Video to MP3 – Trim, and Convert

Let’s start with a simple yet beautifully designed video to audio converter app with all the options displayed well on the home screen. You can choose a video file from your device, YouTube video, or play previously converted audio files. In addition, you can choose to save the audio files directly to the SD card to avoid cluttering of native storage space.
The app is simple, with conversion done within a few seconds. The app also supports audio bitrates of up to 320 kb/s and offers high-quality MP3 output. This is a Play Store free-to-download app with ads on board. You will need a smartphone with at least Android 4.1 to use the app.
Features
● Compatible with all Video formats such as MP4, AVI, FLV, MKV, MPEG,3GP, M4V, MOV, MPG, etc.
● Save Your MP3 files in Sdcard Folder.
● It supports All ARM(CPU) devices.
Pros
● Easy to use
● Great compatibility
● Fast conversion
Cons
● It May does not work well often
● Pop up ads
● It May does not work well for extensive size content
02Accountlab Video to MP3 Converter

This is a slick video to audio converter app that, in addition to letting you convert videos to audio, the app also acts as a very decent audio/video editor. With good compatibility for audio bitrates of up to 320 kb/s, this video to audio converter app matches some best apps and their features out there. You can easily modify or edit video files and play them back on the app to hone your editing skills.
It has an audio cutter feature to create custom ringtones for your device. Also, it’s a free-to-download app on the Google Play Store but comes with ads. Finally, the app works with Android 2.3.3 or above devices, particularly older Android tablets and smartphones.
Features
● Supports Video formats including WMV, MP4, 3gp, Flv , avi etc.
● Integrated MP3 Cutter for making Ringtone.
● Supports Bitrate 48 kb/s , 64 kb/s , 128 kb/s , 192 kb/s , 256 kb/s , 320 kb/s.
Pros
● Simple user interface
● Fast conversion
● One tap to play music files
Cons
● Lack of batch conversion
● Inefficient video editor
● Not suitable for other features than conversion
03Video MP3 Converter

This is yet another multi-purpose video to audio converter app on our list of top 8. It can help you trim audios and videos in addition to MP3 conversion and edit the converted file’s metadata (artist information, tags, etc.).
The app is also said to be the quickest video to audio converter apps available out there, although we can’t vouch for their claim. The settings and other options on the app are well framed, so it doesn’t take much time to get used to the layout.
Using this app, you can convert videos formats like 3GP, MP4, WEBM, FLV, and WMV. Additionally, this app is entirely free to use and download if you’re OK with a few ads. Finally, the app works on devices running Android 4.1 and more.
Features
● Supported video formats: MP4, 3GP, WEBM, WMV, FLV
● Supported audio formats: MP3, OGG
● Supports editing MP3 metadata
Pros
● Interactive user interface
● Good compatibility
● Fast conversion
Cons
● Lack of other features
● It contains lots of pop up ads
● Loss in quality after conversion
04MP3 Cutter and Merger by InShot

The program lets you do everything that a standard video to audio converter app should, and more. The app not only converts videos into full MP3s but also lets you choose among parameters like frequency, channel (stereo or otherwise), and the volume of the original track.
Users can use their editing skills extensively with the increased audio controls. The app also assists you in trimming and cutting video files, which is an excellent feature.
The user interface is quite innovative here, unlike some of the other apps we’ve mentioned above. The app is free to download on the Google Play Store but is ad-supported and has in-app purchases.
Features
● Video cutter and mute audio
● Merge multiple audios
● Sound boost to increase the volume
Pros
● All in one media converter
● Interactive user interface
● It also contains other editing features
Cons
● Sound quality may ruin after boost
● Not suitable for lengthy projects
● Slow processing
05MP3 Converter – Audio Extractor

This MP3 Converter – Audio Extractor helps convert video to audio iPhone and requires you to choose a file and begin the conversion process. You won’t even have to state the output format because MP3 is the app’s default output format.
After the conversion, there’s an option to preview the file you have created to make sure the quality level is pretty satisfying. However, it doesn’t support adjusting the output file’s bitrate or modifying other settings to increase the quality of the resultant audio.
Moreover, the app provides only modest file-sharing options, and you may have to go for an in-app purchase if you wish to gain access to all the functions that the MP3 Converter – Audio Extractor has to offer.
Features
● It supports most video formats.
● Support to most audio formats.
● Widget to quickly import video or play recent audio
Pros
● Good in cutting/editing music
● Fantastic user interface
● Fast and easy to use
Cons
● The app may take time to launch
● It doesn’t contain advanced editing features
● Need two devices for conversion
06Media Converter – Video to MP3

Despite the audio extraction from video, you can use the inbuilt media player of this video to audio converter app to listen to music or watch videos. Media Converter – Video to MP3 is compatible with various input file formats, and it lets you transform to M4A, MP3, WAV, and other audio file formats.
However, this app lacks more advanced MP4 to MP3 file conversion options since you can’t add tags to them or choose the preferred bitrate of the output files. The app consists of different ads, and you must invest in an in-app purchase for premium features. Even the Media Converter – Video to MP3’s pro version doesn’t offer file-sharing options.
Features
● Audio extraction: Extracts audio from the video, Output format: MP3, M4A, OGG, WAV, FLAC, WMA, AIFF, CAF, ADX, AC3, M4R
● Video format conversion, Output format: MP4, MOV, 3GP, 3G2, ASF, MKV, VOB, MPEG, WMV, FLV, AVI
● Video compression: Video size cropping, clip video
Pros
● Supports all formats
● Interactive user interface
● Good compatibility
Cons
● Lack of advanced features
● Slow audio extraction
● It doesn’t support batch conversion
07Video to MP3 – Convert Audio

This video to audio converter iPhone app helps transform all videos stored on your phone’s camera roll, or you can upload a video from One Drive, Dropbox, iCloud, and various online hosting platforms.
Video to MP3: Convert Audio helps you adjust the beginning and ending points of the new file of audio, which means that you can convert only a section of an MP4 video file to MP3. The output can easily be shared on social media or messaging apps and various other devices using the iTunes File Sharing feature.
Features
● Get custom bitrate, sample rate, volume
● It supports audio track selection
● Specify start and end with any position
Pros
● Accessible converter
● Good user interface
● Advanced premium features
Cons
● A bit confusing
● Slow processing
● Pop up ads
07MP4, MP3 Video Audio Cutter, Trimmer & Converter

It is our fastest pick-in video to audio converter app in the market that assists you in trimming or cutting both audio and video. It can also convert from almost all video formats to audios out there with namely the supported formats like MP3, M4A, M4B, AC3, WAV, OGG, FLAC, MP4, MKV, AVI, 3GP, FLV, MOV, WEBM, M2TS, TS, MTS, MPEG.
Moreover, the app supports batch audio file conversion as well.
Features
● Trim & Cut audio files
● Trim & Cut video files
● Batch file conversion
Pros
● Good user interface
● Good compatibility
● Support to batch conversion
Cons
● Lots of popup ads
● Sometimes slow processing
● Lack of other advanced features
Part 2 5 Ways to Choose Video to Audio Converter App
Before selecting the ideal video to audio converter app or video to audio converter apk, there are different sections or points you need to consider for selection. So, let’s read them out without any further ado!
01Excellent user interface
Of course, the user interface is the primary essential feature you should be looking for in any video to audio converter app out there. Interaction with the interface is all that counts, and any complexity within this process automatically halts the ultimate performance.
02Compatibility with different audio formats
The next important thing is to consider how compatible your app is in reality. Will it be able to convert to different audio formats or not? How many audio formats are supported by the app? So, every time you convert video to audio, you need to check your requirements beforehand so as not to confuse with the formats later on.
03Processing speed
Yes, it would be best not to overlook the processing speed. The processing speed determines the likability of your end project because time is a precious element in the life of everyone. So, consider the time consumed for conversion and how much wastage of time you can afford.
04Platform compatibility
Platform compatibility refers to the devices or operating systems a particular app is comfortable with. Here, we mainly look for compatibility with Windows, Mac, iPhone, and Android. So, the best is what goes well with almost every OS or device or is compatible with both Windows and Mac simultaneously.
05Other features
Other features could represent the additional or advanced features a particular video to audio converter app consists of. It’s also because you may be looking to enhance that extracted audio, mainly on the same platform, again concerning time. This is why finding an all-rounder video to converter app is challenging but not impossible.
Filmora is a go-to alternative to full-fledged post-production applications like Final Cut Pro X, Adobe Premiere Pro, etc., and can be used to create industry-standard outputs.
Some other features that Filmora consists of the following:
● You can create split-screen effects simply with the presets available
● It helps you to add Elements to enhance your video quality
● Includes several transitions presets
Steps to convert video to audio with Filmora:

Step 1: Import the video footage to the ‘Media’ box in Wondershare Filmora Video Editor
Step 2: Drag the clip to the Timeline
Step 3: Trim the video as/if needed
Step 4: Get to the ‘Export’ box
Step 5: Choose ‘MP3’ from the ‘Local’ tab’s ‘Format’ list
Step 6: Hit the ‘EXPORT’ tab to start the conversion process
Supported Audio Formats: Filmora supports all major audio formats as a video to audio converter.
Supported Platforms: Filmora is available for both Mac and Windows computers.
Wondershare Filmora
Get started easily with Filmora’s powerful performance, intuitive interface, and countless effects!
Try It Free Try It Free Try It Free Learn More >

Pros
● It can be an alternative to other expensive apps such as Adobe Premiere Pro, Final Cut Pro X, etc.
● Can create a device or portal-specific videos like iPhone, iPad, Samsung, YouTube, Vimeo, etc.
Cons
● Direct video to audio conversion can produce files only in MP3 format
Key Takeaways from This Episode
● Understanding top 8 tools to convert video to audio
● 5 rules to choose the top-rated video to audio converter app
● Finding the all-rounder video to audio converter: Wondershare Filmora
Free Video Dubbing Software for PC: Top Picks
Best 6 Video Dubbing Software for PC in 2024

Shanoon Cox
Mar 27, 2024• Proven solutions
If you are a content creator and want to make your videos appealing to the masses, then you must master the art of video dubbing . It has become a vital part of post-production, making your videos available to an international audience. To get that effortless playback experience, you need to use the best video dubbing software. In this post, I will familiarize you with 6 of the best video dubbing software for PC with a free download option. Let’s begin!
- Part 1: What to Consider before Choosing Video Dubbing Software?
- Part 2: 6 Best Video Dubbing Software for PC [Free Download]
What to Consider While Choosing Video Dubbing Software?
Since there are so many videos dubbing software , picking the right tool to fit your needs can be crucial. I recommend considering the following things in mind while selecting a dubbing tool.
Voice Recording
If you are using different tools for voice recording and dubbing, then it will create a lot of problems. Therefore, getting an all-in-one solution to meet your post-production needs is better.
Audio Editing and Syncing
The tool should be able to extract the audio segment from the video, letting you edit it the way you like. Some applications even come with a syncing tool to save you time.
Learn how to sync video and audio in FCPX here.
Compatibility
Also, ensure that the hardware (like microphone or audio card) you use is supported by the tool. Besides that, it should also be compatible with your computer and the video and audio formats you are using.
Import/Export Features
You should be able to import files from different formats and export the dubbed video in the format of your choice.
Have problems exported? See how to export with Compressor here.
Other Things
Make sure that the application is easy to use. Otherwise, you would have to spend a lot of time learning its features. It should have good customer support and positive feedback from existing users and must come within your budget.
The 6 Best Video Dubbing Software for PC [Free Download]
After carefully considering the above things, I have come up with the following video dubbing software you can try.
1. Wondershare Filmora
Filmora is a complete video editing tool that will meet every requirement of yours in post-production. This video dubbing software has a dedicated music and audio mixer tool that can easily help you dub your videos and add voiceovers.
- With just a single click, you can start recording the voiceover for an existing video and make further edits to it.
- There are already 100+ audio tracks that you will get in the tool to help you manage your video’s voiceover.
- It has a seamless drag-and-drop interface to easily sync your voiceover component with the picture in less time.
- You can extract the audio components separately from the video and make changes to them.
- Other features include audio fade-in/fade-out, noise removal, keyframing, and many others.
Pros
- Tons of video editing features.
- Can import/export files in different formats.
- Extremely easy to use.
Cons
- The premium version is needed to use all features.
2.Magix
Magix is another reliable video dubbing software for PC with a free download option that you can explore. Though, if you want to experience its premium features, you must buy the Magix Pro version.
- Using Magix, you can do audio voiceovers, adjust the recordings, and further edit them for a perfect dubbing experience.
- There are inbuilt audio mixers and editing tools that you can use during the post-production of videos.
- You can also find inbuilt wizards, one-click audio effects, compressors, noise cancelation, and other features.
- Magix also has hundreds of effects and templates that you can try.
Pros
- Easy to use.
- Extensive compatibility.
Cons
- The Pro version is not available for free.
3.CamStudio
If you are looking for video dubbing software for a PC free download option, then CamStudio would be an ideal pick. Since this is an open-source desktop application, you can use it without paying anything.
- You can use this tool to add music and voiceover to your videos.
- It will let you reduce the audio noise, compress it, and further edit it.
- The tool follows a lossless codec compression to ensure your videos stay of the best quality.
- Besides being a video dubbing software, you can also use it to edit your videos.
Pros
- The tool is open-source and free available.
Cons
- Limited features.
- Only supports AVI files.
- Not as user-friendly as other tools.
4.Free Audio Dub
This is another resourceful video dubbing software for PC with a free download that you can consider. While the video dubbing software does not have a lot of features, it will meet your basic post-production needs.
- You can load the video and audio files, and the application will automatically merge them.
- It has an inbuilt algorithm to sync both files and give the best-suited dubbing results.
- Furthermore, you can crop any video/audio file section or move it to sync them together.
Pros
- Lightweight.
- Free available.
Cons
- Limited features.
5.Audacity
Audacity is one of the most popular audio editing tools available for leading platforms. Since it is an open-source application, it can also be used as video dubbing software for free.
- You can import and export your audio files in different formats so that they would be compatible with your video.
- It lets us record audio for voiceover and further make changes in it with its existing presets.
- There are several features to edit, fade in/out, clip, minimize noise, and perform many operations on your audio files.
- You can also put numerous effects on your audio before exporting it for dubbing.
Pros
- Free available.
- Various audio editing features.
Cons
- There are no video editing options.
- You can only record and edit audio, but later, you will need another tool for merging with videos.
6.ApowerSoft Video Editor
Lastly, you can also use the ApowerSoft video editor as a video dubbing software as it has built-in features to record and edit audio.
- The tool is pretty easy to use and lets us record audio and perform different operations on it.
- You can drag and adjust the audio component to sync it with the picture.
- There are several existing effects and presets that you can further implement to save your time.
- Apart from importing files of different formats, you can also export them in the format of your choice.
Pros
- Easy to use.
Cons
- Fewer features for audio editing.
- The premium version is paid.
Conclusion:
Now when you know six different video dubbing software for PC with free download options, you can easily pick up the best tool. While some are free applications, others only have a free demo version. You can explore the video dubbing software on your own and even try a few of them. I would recommend going with a multi-purpose tool like Filmora that will help you edit all kinds of videos and meet your post-production needs in one place.
FAQ:
- Can I use Filmora to make high-quality changes to videos?
Filmora is an all-in-one video editor with many features and can do many things well. It makes professional video editing easy because it offers a user-friendly interface, drag-and-drop editing, and other complex video editing functions.
- How well does Magix work?
Magix Movie Studio is an easy-to-use, stylish movie editor that doesn’t cost too much. There are still some problems, like the reverse track order, but it’s clear that this is a choice, and if you use other video editing programs, you’ll get used to it.
- Is Audacity good for the new learner?
Because it is so easy to use, Audacity is a great software for beginners who want to record and edit voices and recordings like a pro because it is so easy to use. Before we learn how to use Audacity step by step, let’s look at some of the things that make it useful.
- How long can Audacity record for?
Since Audacity stores samples as 64-bit values (even on 32-bit devices), there is no 32-bit rule that says recordings can’t be longer than 231 samples (which is for example, just over 13.5 hours at a 44,100 Hz sample rate).
- How do I change things in Apowersoft?
Use magic and fantasy to make your edits. To cut or crop a video file, click the scissors or cropping icon, depending on what you want to do. To join videos, drag files into the timeline in the order you want. Add filters and video overlay to your movie to make it look better.

Shanoon Cox
Shanoon Cox is a writer and a lover of all things video.
Follow @Shanoon Cox
Shanoon Cox
Mar 27, 2024• Proven solutions
If you are a content creator and want to make your videos appealing to the masses, then you must master the art of video dubbing . It has become a vital part of post-production, making your videos available to an international audience. To get that effortless playback experience, you need to use the best video dubbing software. In this post, I will familiarize you with 6 of the best video dubbing software for PC with a free download option. Let’s begin!
- Part 1: What to Consider before Choosing Video Dubbing Software?
- Part 2: 6 Best Video Dubbing Software for PC [Free Download]
What to Consider While Choosing Video Dubbing Software?
Since there are so many videos dubbing software , picking the right tool to fit your needs can be crucial. I recommend considering the following things in mind while selecting a dubbing tool.
Voice Recording
If you are using different tools for voice recording and dubbing, then it will create a lot of problems. Therefore, getting an all-in-one solution to meet your post-production needs is better.
Audio Editing and Syncing
The tool should be able to extract the audio segment from the video, letting you edit it the way you like. Some applications even come with a syncing tool to save you time.
Learn how to sync video and audio in FCPX here.
Compatibility
Also, ensure that the hardware (like microphone or audio card) you use is supported by the tool. Besides that, it should also be compatible with your computer and the video and audio formats you are using.
Import/Export Features
You should be able to import files from different formats and export the dubbed video in the format of your choice.
Have problems exported? See how to export with Compressor here.
Other Things
Make sure that the application is easy to use. Otherwise, you would have to spend a lot of time learning its features. It should have good customer support and positive feedback from existing users and must come within your budget.
The 6 Best Video Dubbing Software for PC [Free Download]
After carefully considering the above things, I have come up with the following video dubbing software you can try.
1. Wondershare Filmora
Filmora is a complete video editing tool that will meet every requirement of yours in post-production. This video dubbing software has a dedicated music and audio mixer tool that can easily help you dub your videos and add voiceovers.
- With just a single click, you can start recording the voiceover for an existing video and make further edits to it.
- There are already 100+ audio tracks that you will get in the tool to help you manage your video’s voiceover.
- It has a seamless drag-and-drop interface to easily sync your voiceover component with the picture in less time.
- You can extract the audio components separately from the video and make changes to them.
- Other features include audio fade-in/fade-out, noise removal, keyframing, and many others.
Pros
- Tons of video editing features.
- Can import/export files in different formats.
- Extremely easy to use.
Cons
- The premium version is needed to use all features.
2.Magix
Magix is another reliable video dubbing software for PC with a free download option that you can explore. Though, if you want to experience its premium features, you must buy the Magix Pro version.
- Using Magix, you can do audio voiceovers, adjust the recordings, and further edit them for a perfect dubbing experience.
- There are inbuilt audio mixers and editing tools that you can use during the post-production of videos.
- You can also find inbuilt wizards, one-click audio effects, compressors, noise cancelation, and other features.
- Magix also has hundreds of effects and templates that you can try.
Pros
- Easy to use.
- Extensive compatibility.
Cons
- The Pro version is not available for free.
3.CamStudio
If you are looking for video dubbing software for a PC free download option, then CamStudio would be an ideal pick. Since this is an open-source desktop application, you can use it without paying anything.
- You can use this tool to add music and voiceover to your videos.
- It will let you reduce the audio noise, compress it, and further edit it.
- The tool follows a lossless codec compression to ensure your videos stay of the best quality.
- Besides being a video dubbing software, you can also use it to edit your videos.
Pros
- The tool is open-source and free available.
Cons
- Limited features.
- Only supports AVI files.
- Not as user-friendly as other tools.
4.Free Audio Dub
This is another resourceful video dubbing software for PC with a free download that you can consider. While the video dubbing software does not have a lot of features, it will meet your basic post-production needs.
- You can load the video and audio files, and the application will automatically merge them.
- It has an inbuilt algorithm to sync both files and give the best-suited dubbing results.
- Furthermore, you can crop any video/audio file section or move it to sync them together.
Pros
- Lightweight.
- Free available.
Cons
- Limited features.
5.Audacity
Audacity is one of the most popular audio editing tools available for leading platforms. Since it is an open-source application, it can also be used as video dubbing software for free.
- You can import and export your audio files in different formats so that they would be compatible with your video.
- It lets us record audio for voiceover and further make changes in it with its existing presets.
- There are several features to edit, fade in/out, clip, minimize noise, and perform many operations on your audio files.
- You can also put numerous effects on your audio before exporting it for dubbing.
Pros
- Free available.
- Various audio editing features.
Cons
- There are no video editing options.
- You can only record and edit audio, but later, you will need another tool for merging with videos.
6.ApowerSoft Video Editor
Lastly, you can also use the ApowerSoft video editor as a video dubbing software as it has built-in features to record and edit audio.
- The tool is pretty easy to use and lets us record audio and perform different operations on it.
- You can drag and adjust the audio component to sync it with the picture.
- There are several existing effects and presets that you can further implement to save your time.
- Apart from importing files of different formats, you can also export them in the format of your choice.
Pros
- Easy to use.
Cons
- Fewer features for audio editing.
- The premium version is paid.
Conclusion:
Now when you know six different video dubbing software for PC with free download options, you can easily pick up the best tool. While some are free applications, others only have a free demo version. You can explore the video dubbing software on your own and even try a few of them. I would recommend going with a multi-purpose tool like Filmora that will help you edit all kinds of videos and meet your post-production needs in one place.
FAQ:
- Can I use Filmora to make high-quality changes to videos?
Filmora is an all-in-one video editor with many features and can do many things well. It makes professional video editing easy because it offers a user-friendly interface, drag-and-drop editing, and other complex video editing functions.
- How well does Magix work?
Magix Movie Studio is an easy-to-use, stylish movie editor that doesn’t cost too much. There are still some problems, like the reverse track order, but it’s clear that this is a choice, and if you use other video editing programs, you’ll get used to it.
- Is Audacity good for the new learner?
Because it is so easy to use, Audacity is a great software for beginners who want to record and edit voices and recordings like a pro because it is so easy to use. Before we learn how to use Audacity step by step, let’s look at some of the things that make it useful.
- How long can Audacity record for?
Since Audacity stores samples as 64-bit values (even on 32-bit devices), there is no 32-bit rule that says recordings can’t be longer than 231 samples (which is for example, just over 13.5 hours at a 44,100 Hz sample rate).
- How do I change things in Apowersoft?
Use magic and fantasy to make your edits. To cut or crop a video file, click the scissors or cropping icon, depending on what you want to do. To join videos, drag files into the timeline in the order you want. Add filters and video overlay to your movie to make it look better.

Shanoon Cox
Shanoon Cox is a writer and a lover of all things video.
Follow @Shanoon Cox
Shanoon Cox
Mar 27, 2024• Proven solutions
If you are a content creator and want to make your videos appealing to the masses, then you must master the art of video dubbing . It has become a vital part of post-production, making your videos available to an international audience. To get that effortless playback experience, you need to use the best video dubbing software. In this post, I will familiarize you with 6 of the best video dubbing software for PC with a free download option. Let’s begin!
- Part 1: What to Consider before Choosing Video Dubbing Software?
- Part 2: 6 Best Video Dubbing Software for PC [Free Download]
What to Consider While Choosing Video Dubbing Software?
Since there are so many videos dubbing software , picking the right tool to fit your needs can be crucial. I recommend considering the following things in mind while selecting a dubbing tool.
Voice Recording
If you are using different tools for voice recording and dubbing, then it will create a lot of problems. Therefore, getting an all-in-one solution to meet your post-production needs is better.
Audio Editing and Syncing
The tool should be able to extract the audio segment from the video, letting you edit it the way you like. Some applications even come with a syncing tool to save you time.
Learn how to sync video and audio in FCPX here.
Compatibility
Also, ensure that the hardware (like microphone or audio card) you use is supported by the tool. Besides that, it should also be compatible with your computer and the video and audio formats you are using.
Import/Export Features
You should be able to import files from different formats and export the dubbed video in the format of your choice.
Have problems exported? See how to export with Compressor here.
Other Things
Make sure that the application is easy to use. Otherwise, you would have to spend a lot of time learning its features. It should have good customer support and positive feedback from existing users and must come within your budget.
The 6 Best Video Dubbing Software for PC [Free Download]
After carefully considering the above things, I have come up with the following video dubbing software you can try.
1. Wondershare Filmora
Filmora is a complete video editing tool that will meet every requirement of yours in post-production. This video dubbing software has a dedicated music and audio mixer tool that can easily help you dub your videos and add voiceovers.
- With just a single click, you can start recording the voiceover for an existing video and make further edits to it.
- There are already 100+ audio tracks that you will get in the tool to help you manage your video’s voiceover.
- It has a seamless drag-and-drop interface to easily sync your voiceover component with the picture in less time.
- You can extract the audio components separately from the video and make changes to them.
- Other features include audio fade-in/fade-out, noise removal, keyframing, and many others.
Pros
- Tons of video editing features.
- Can import/export files in different formats.
- Extremely easy to use.
Cons
- The premium version is needed to use all features.
2.Magix
Magix is another reliable video dubbing software for PC with a free download option that you can explore. Though, if you want to experience its premium features, you must buy the Magix Pro version.
- Using Magix, you can do audio voiceovers, adjust the recordings, and further edit them for a perfect dubbing experience.
- There are inbuilt audio mixers and editing tools that you can use during the post-production of videos.
- You can also find inbuilt wizards, one-click audio effects, compressors, noise cancelation, and other features.
- Magix also has hundreds of effects and templates that you can try.
Pros
- Easy to use.
- Extensive compatibility.
Cons
- The Pro version is not available for free.
3.CamStudio
If you are looking for video dubbing software for a PC free download option, then CamStudio would be an ideal pick. Since this is an open-source desktop application, you can use it without paying anything.
- You can use this tool to add music and voiceover to your videos.
- It will let you reduce the audio noise, compress it, and further edit it.
- The tool follows a lossless codec compression to ensure your videos stay of the best quality.
- Besides being a video dubbing software, you can also use it to edit your videos.
Pros
- The tool is open-source and free available.
Cons
- Limited features.
- Only supports AVI files.
- Not as user-friendly as other tools.
4.Free Audio Dub
This is another resourceful video dubbing software for PC with a free download that you can consider. While the video dubbing software does not have a lot of features, it will meet your basic post-production needs.
- You can load the video and audio files, and the application will automatically merge them.
- It has an inbuilt algorithm to sync both files and give the best-suited dubbing results.
- Furthermore, you can crop any video/audio file section or move it to sync them together.
Pros
- Lightweight.
- Free available.
Cons
- Limited features.
5.Audacity
Audacity is one of the most popular audio editing tools available for leading platforms. Since it is an open-source application, it can also be used as video dubbing software for free.
- You can import and export your audio files in different formats so that they would be compatible with your video.
- It lets us record audio for voiceover and further make changes in it with its existing presets.
- There are several features to edit, fade in/out, clip, minimize noise, and perform many operations on your audio files.
- You can also put numerous effects on your audio before exporting it for dubbing.
Pros
- Free available.
- Various audio editing features.
Cons
- There are no video editing options.
- You can only record and edit audio, but later, you will need another tool for merging with videos.
6.ApowerSoft Video Editor
Lastly, you can also use the ApowerSoft video editor as a video dubbing software as it has built-in features to record and edit audio.
- The tool is pretty easy to use and lets us record audio and perform different operations on it.
- You can drag and adjust the audio component to sync it with the picture.
- There are several existing effects and presets that you can further implement to save your time.
- Apart from importing files of different formats, you can also export them in the format of your choice.
Pros
- Easy to use.
Cons
- Fewer features for audio editing.
- The premium version is paid.
Conclusion:
Now when you know six different video dubbing software for PC with free download options, you can easily pick up the best tool. While some are free applications, others only have a free demo version. You can explore the video dubbing software on your own and even try a few of them. I would recommend going with a multi-purpose tool like Filmora that will help you edit all kinds of videos and meet your post-production needs in one place.
FAQ:
- Can I use Filmora to make high-quality changes to videos?
Filmora is an all-in-one video editor with many features and can do many things well. It makes professional video editing easy because it offers a user-friendly interface, drag-and-drop editing, and other complex video editing functions.
- How well does Magix work?
Magix Movie Studio is an easy-to-use, stylish movie editor that doesn’t cost too much. There are still some problems, like the reverse track order, but it’s clear that this is a choice, and if you use other video editing programs, you’ll get used to it.
- Is Audacity good for the new learner?
Because it is so easy to use, Audacity is a great software for beginners who want to record and edit voices and recordings like a pro because it is so easy to use. Before we learn how to use Audacity step by step, let’s look at some of the things that make it useful.
- How long can Audacity record for?
Since Audacity stores samples as 64-bit values (even on 32-bit devices), there is no 32-bit rule that says recordings can’t be longer than 231 samples (which is for example, just over 13.5 hours at a 44,100 Hz sample rate).
- How do I change things in Apowersoft?
Use magic and fantasy to make your edits. To cut or crop a video file, click the scissors or cropping icon, depending on what you want to do. To join videos, drag files into the timeline in the order you want. Add filters and video overlay to your movie to make it look better.

Shanoon Cox
Shanoon Cox is a writer and a lover of all things video.
Follow @Shanoon Cox
Shanoon Cox
Mar 27, 2024• Proven solutions
If you are a content creator and want to make your videos appealing to the masses, then you must master the art of video dubbing . It has become a vital part of post-production, making your videos available to an international audience. To get that effortless playback experience, you need to use the best video dubbing software. In this post, I will familiarize you with 6 of the best video dubbing software for PC with a free download option. Let’s begin!
- Part 1: What to Consider before Choosing Video Dubbing Software?
- Part 2: 6 Best Video Dubbing Software for PC [Free Download]
What to Consider While Choosing Video Dubbing Software?
Since there are so many videos dubbing software , picking the right tool to fit your needs can be crucial. I recommend considering the following things in mind while selecting a dubbing tool.
Voice Recording
If you are using different tools for voice recording and dubbing, then it will create a lot of problems. Therefore, getting an all-in-one solution to meet your post-production needs is better.
Audio Editing and Syncing
The tool should be able to extract the audio segment from the video, letting you edit it the way you like. Some applications even come with a syncing tool to save you time.
Learn how to sync video and audio in FCPX here.
Compatibility
Also, ensure that the hardware (like microphone or audio card) you use is supported by the tool. Besides that, it should also be compatible with your computer and the video and audio formats you are using.
Import/Export Features
You should be able to import files from different formats and export the dubbed video in the format of your choice.
Have problems exported? See how to export with Compressor here.
Other Things
Make sure that the application is easy to use. Otherwise, you would have to spend a lot of time learning its features. It should have good customer support and positive feedback from existing users and must come within your budget.
The 6 Best Video Dubbing Software for PC [Free Download]
After carefully considering the above things, I have come up with the following video dubbing software you can try.
1. Wondershare Filmora
Filmora is a complete video editing tool that will meet every requirement of yours in post-production. This video dubbing software has a dedicated music and audio mixer tool that can easily help you dub your videos and add voiceovers.
- With just a single click, you can start recording the voiceover for an existing video and make further edits to it.
- There are already 100+ audio tracks that you will get in the tool to help you manage your video’s voiceover.
- It has a seamless drag-and-drop interface to easily sync your voiceover component with the picture in less time.
- You can extract the audio components separately from the video and make changes to them.
- Other features include audio fade-in/fade-out, noise removal, keyframing, and many others.
Pros
- Tons of video editing features.
- Can import/export files in different formats.
- Extremely easy to use.
Cons
- The premium version is needed to use all features.
2.Magix
Magix is another reliable video dubbing software for PC with a free download option that you can explore. Though, if you want to experience its premium features, you must buy the Magix Pro version.
- Using Magix, you can do audio voiceovers, adjust the recordings, and further edit them for a perfect dubbing experience.
- There are inbuilt audio mixers and editing tools that you can use during the post-production of videos.
- You can also find inbuilt wizards, one-click audio effects, compressors, noise cancelation, and other features.
- Magix also has hundreds of effects and templates that you can try.
Pros
- Easy to use.
- Extensive compatibility.
Cons
- The Pro version is not available for free.
3.CamStudio
If you are looking for video dubbing software for a PC free download option, then CamStudio would be an ideal pick. Since this is an open-source desktop application, you can use it without paying anything.
- You can use this tool to add music and voiceover to your videos.
- It will let you reduce the audio noise, compress it, and further edit it.
- The tool follows a lossless codec compression to ensure your videos stay of the best quality.
- Besides being a video dubbing software, you can also use it to edit your videos.
Pros
- The tool is open-source and free available.
Cons
- Limited features.
- Only supports AVI files.
- Not as user-friendly as other tools.
4.Free Audio Dub
This is another resourceful video dubbing software for PC with a free download that you can consider. While the video dubbing software does not have a lot of features, it will meet your basic post-production needs.
- You can load the video and audio files, and the application will automatically merge them.
- It has an inbuilt algorithm to sync both files and give the best-suited dubbing results.
- Furthermore, you can crop any video/audio file section or move it to sync them together.
Pros
- Lightweight.
- Free available.
Cons
- Limited features.
5.Audacity
Audacity is one of the most popular audio editing tools available for leading platforms. Since it is an open-source application, it can also be used as video dubbing software for free.
- You can import and export your audio files in different formats so that they would be compatible with your video.
- It lets us record audio for voiceover and further make changes in it with its existing presets.
- There are several features to edit, fade in/out, clip, minimize noise, and perform many operations on your audio files.
- You can also put numerous effects on your audio before exporting it for dubbing.
Pros
- Free available.
- Various audio editing features.
Cons
- There are no video editing options.
- You can only record and edit audio, but later, you will need another tool for merging with videos.
6.ApowerSoft Video Editor
Lastly, you can also use the ApowerSoft video editor as a video dubbing software as it has built-in features to record and edit audio.
- The tool is pretty easy to use and lets us record audio and perform different operations on it.
- You can drag and adjust the audio component to sync it with the picture.
- There are several existing effects and presets that you can further implement to save your time.
- Apart from importing files of different formats, you can also export them in the format of your choice.
Pros
- Easy to use.
Cons
- Fewer features for audio editing.
- The premium version is paid.
Conclusion:
Now when you know six different video dubbing software for PC with free download options, you can easily pick up the best tool. While some are free applications, others only have a free demo version. You can explore the video dubbing software on your own and even try a few of them. I would recommend going with a multi-purpose tool like Filmora that will help you edit all kinds of videos and meet your post-production needs in one place.
FAQ:
- Can I use Filmora to make high-quality changes to videos?
Filmora is an all-in-one video editor with many features and can do many things well. It makes professional video editing easy because it offers a user-friendly interface, drag-and-drop editing, and other complex video editing functions.
- How well does Magix work?
Magix Movie Studio is an easy-to-use, stylish movie editor that doesn’t cost too much. There are still some problems, like the reverse track order, but it’s clear that this is a choice, and if you use other video editing programs, you’ll get used to it.
- Is Audacity good for the new learner?
Because it is so easy to use, Audacity is a great software for beginners who want to record and edit voices and recordings like a pro because it is so easy to use. Before we learn how to use Audacity step by step, let’s look at some of the things that make it useful.
- How long can Audacity record for?
Since Audacity stores samples as 64-bit values (even on 32-bit devices), there is no 32-bit rule that says recordings can’t be longer than 231 samples (which is for example, just over 13.5 hours at a 44,100 Hz sample rate).
- How do I change things in Apowersoft?
Use magic and fantasy to make your edits. To cut or crop a video file, click the scissors or cropping icon, depending on what you want to do. To join videos, drag files into the timeline in the order you want. Add filters and video overlay to your movie to make it look better.

Shanoon Cox
Shanoon Cox is a writer and a lover of all things video.
Follow @Shanoon Cox
Optimize Your PC for Premiere Pro: A Step-by-Step Guide
System Requirements for Running Premiere Pro: How to Set Up Computer

Benjamin Arango
Mar 27, 2024• Proven solutions
We all know that Adobe Premiere Pro is one of the best professional video editing software, while to run such a powerful video editing software, you may need a powerful windows PC or Mac as well. Though most modern computer systems can run Adobe Premiere out of the box, there are some steps to take, and potential decisions to make, before installing the software, or if you are building or buying a new computer to make sure you get the best experience possible with the software.
You may also like:Best Adobe Premiere Alternatives >>
Minimum system requirement to run Premiere Pro on Windows and Mac in 2019
Your computer should at least to meet the minimum specification below to run Premiere Pro, and if you need to edit some VR videos, your computer configuration should be higher according to the minimum specifications list on their website .
- Intel 6th or newer CPU
- Windows 10 (64-bit) 1703 or later/ MacOS V10.12 later
- 16GB RAM; 4GB GPU VRAM
- Fast internal SSD
- 1920*1080 Display resolution
- 32-bit video card
- Internet connection
However, it is important to remember this is the minimum specification, and will not necessarily give a satisfactory user experience. The recommended specifications are far more likely to provide the kind of performance expected of the software and those would be the ones to use as a guide for the minimum spec for a new computer or any upgrades being planned prior to installation.
How to check Computer Specifications
Since Premiere Pro CC only works on Windows 10 system after 2018 13.0 release, we will show you how to check if your PC meets the requirements to run Premiere Pro on Windows 10
- Press Windows Key+ E on the keyboard to bring up Windows Explorer.
- Right click the This PC option in the sidebar and then select Properties from the context menu.

- The system specification window will show up which you see the Processor, RAM, system type and other system information.
Checking the specification on your Mac is easy, just click the Apple icon in the top-left corner of your Mac, and then select About This Mac option. In the pop-up window you will see the information including Processor speed, memory and graphic card etc.
How to Set Up Computer for Premiere
1. Processor
Whilst the software will run on a Core2Duo intel or Phenom II AMD processor, it is worth noting that rendering can be highly intensive work for the processor and the fastest possible processor within your budget will pay dividends in speed of editing. In general, even a Core I3, the cheapest of the current Intel range, will be significantly faster than older processors, but because Premiere happily uses multi cored processors to their full, if the budget can reach to a quad core or more processor then do so, Premiere is a piece of software that benefits from the computational power increase more than most.
2. Memory
The next consideration is memory. The minimum specification suggests 4GB of RAM with 8GB recommended, for reliable and smooth running consider 8GB minimum, and go for as much as you can. For a computer that is used for other activities as well, multitasking can see even 24GB of Ram being fully utilized, especially if you are working on HD content. Speaking of content, this is the other aspect of memory to look at. Whilst you can use a storage drive that contains everything else on your computer to keep the media you are working on, for HD content especially, and for trouble free and the fastest possible operation it is advisable to reserve a single drive, preferably a 7200 RPM or faster one, exclusively for your media. Bandwidth and access times means Premiere will be significantly faster in operation with its media on a dedicated drive.
3. Graphic
The final aspect of specification to consider is graphics. Adobe Premiere uses a feature called the Mercury Playback Engine that allows much faster and smoother playback of video without rendering, it has two modes, software only and GPU acceleration mode (Using either CUDA or OpenCL). The GPU acceleration mode offers significant performance increases and is therefore highly desirable. However, not all GPU’s are compatible with the Mercury Playback Engine, the list of those that are is found on the previously linked specification page, so if a new computer is being built or purchased, or upgrades are being considered prior to install, it is highly desirable to utilize a compatible GPU where possible.
5. Settings
Having covered the basic specifications of a computer that will enhance the operation of Premiere, it is now time to look at the computer settings and how this can affect Premiere’s performance and usability.
The first thing to understand is that video editing, especially HD video, is bandwidth intensive, in effect, it fills up the lanes between the CPU, RAM, GPU and Hard Drive during operation. Spreading the use of that bandwidth over several devices can see huge performance gains, so one of the best ways to optimize the computer for Premier is to adjust how the hard drives are used. How effective this can be depends on the computer you are using, so we will try to cover a few different possibilities here.
6. Drive
If your computer contains a single drive, simply install Premiere and start using it, there are no options available here. If there are two drives, keep one for the operating system, programs and cache files. Use the second drive exclusively for video project files, exported projects and previews.
If the computer has three drives then keep one for the operating system and programs, the second one for the video project files, and use the third for previews, cache files and exported projects.
If you have access to even more drives, then split the cache from the previews, and ultimately have one drive each for previews, exports and cache. Spreading the files across as many drives as possible enhances performance by enabling the different read/write operations to occur without interference from each other.
That is the theory, but how do you achieve this? This is done within Premiere itself, there are two parts, accessing where the media cache files are placed is done though the edit menu, following the path edit > preferences > media.

Changing where the project files, previews and exports are stored is just as easy, and is accessed via the project menu by taking the path project > project settings > scratchdisks.

7. Sequence Setting
When working with Premiere it is important to have the correct settings for the type of media you are using and the nature of the final output. This is done within Premiere by a function known as a Sequence.
After creating a new project you are presented with the sequence dialogue box. You can have as many sequences in a single project as you like, but Premiere always assumes you require at least one and so needs the first one to be created to allow work on a project. Any media, both audio and video, placed into a sequence is automatically adapted to the settings of that sequence, so you will want to choose settings that match the original media as closely as possible. Each sequence in a project can have different settings if required, as this lessens the workload on the CPU and makes the process faster and smoother.
The sequence dialogue has three tabs, Sequence Presets, Settings and Tracks
The Preset Tab makes setting up a new sequence much simpler. Choosing a preset enables Premiere to choose the settings that best match the chosen video and audio format. There are a wide range of presets available to suit the most commonly used media types, they are organized based on camera formats. Within each group there are numerous settings and configurations to choose from based around frame sizes and interlacing. Whilst choosing the correct preset can be a little daunting to the uninitiated, ensuring the number of frames per second, the frame size and codec are correct is all that is required.

Once the preset is chosen you can move to the settings tab to adjust the preset manually. Some settings will not be adjustable in this tab due to the specific optimization required for the input media.
Because the presets do such a good job it is not really necessary to adjust anything in the settings tab, and unless you are trying to do something very specific.
While the standard presets are usually suitable, on occasion you may desire a custom setting. To do this, choose a sequence preset that is close to your media, and then make custom selections in the Settings tab. By selecting the Save Preset option on the Settings tab you can then create a custom setting with those parameters. Give the preset a suitable name in the Save Settings dialog and add any notes that are needed. The preset can be found in the Custom folder under Available Presets.
Those with the Apple Prores Codec on their computers can use this as the preview codec if required. By choosing Quicktime as the preview format in a custom editing mode, and lastly Apple Prores as the required codec.
Conclusion
If your computer failed to meet the requirement to run Premiere Pro, you may need to spend some money to buy a powerful computer or choose another professional video editing software similar to Premiere Pro, or choose a video editing software. If your computer isn’t powerful enough to run Premiere Pro, you will get awful experience at editing footage because of the long loading time and stuck playback.

Benjamin Arango
Benjamin Arango is a writer and a lover of all things video.
Follow @Benjamin Arango
Benjamin Arango
Mar 27, 2024• Proven solutions
We all know that Adobe Premiere Pro is one of the best professional video editing software, while to run such a powerful video editing software, you may need a powerful windows PC or Mac as well. Though most modern computer systems can run Adobe Premiere out of the box, there are some steps to take, and potential decisions to make, before installing the software, or if you are building or buying a new computer to make sure you get the best experience possible with the software.
You may also like:Best Adobe Premiere Alternatives >>
Minimum system requirement to run Premiere Pro on Windows and Mac in 2019
Your computer should at least to meet the minimum specification below to run Premiere Pro, and if you need to edit some VR videos, your computer configuration should be higher according to the minimum specifications list on their website .
- Intel 6th or newer CPU
- Windows 10 (64-bit) 1703 or later/ MacOS V10.12 later
- 16GB RAM; 4GB GPU VRAM
- Fast internal SSD
- 1920*1080 Display resolution
- 32-bit video card
- Internet connection
However, it is important to remember this is the minimum specification, and will not necessarily give a satisfactory user experience. The recommended specifications are far more likely to provide the kind of performance expected of the software and those would be the ones to use as a guide for the minimum spec for a new computer or any upgrades being planned prior to installation.
How to check Computer Specifications
Since Premiere Pro CC only works on Windows 10 system after 2018 13.0 release, we will show you how to check if your PC meets the requirements to run Premiere Pro on Windows 10
- Press Windows Key+ E on the keyboard to bring up Windows Explorer.
- Right click the This PC option in the sidebar and then select Properties from the context menu.

- The system specification window will show up which you see the Processor, RAM, system type and other system information.
Checking the specification on your Mac is easy, just click the Apple icon in the top-left corner of your Mac, and then select About This Mac option. In the pop-up window you will see the information including Processor speed, memory and graphic card etc.
How to Set Up Computer for Premiere
1. Processor
Whilst the software will run on a Core2Duo intel or Phenom II AMD processor, it is worth noting that rendering can be highly intensive work for the processor and the fastest possible processor within your budget will pay dividends in speed of editing. In general, even a Core I3, the cheapest of the current Intel range, will be significantly faster than older processors, but because Premiere happily uses multi cored processors to their full, if the budget can reach to a quad core or more processor then do so, Premiere is a piece of software that benefits from the computational power increase more than most.
2. Memory
The next consideration is memory. The minimum specification suggests 4GB of RAM with 8GB recommended, for reliable and smooth running consider 8GB minimum, and go for as much as you can. For a computer that is used for other activities as well, multitasking can see even 24GB of Ram being fully utilized, especially if you are working on HD content. Speaking of content, this is the other aspect of memory to look at. Whilst you can use a storage drive that contains everything else on your computer to keep the media you are working on, for HD content especially, and for trouble free and the fastest possible operation it is advisable to reserve a single drive, preferably a 7200 RPM or faster one, exclusively for your media. Bandwidth and access times means Premiere will be significantly faster in operation with its media on a dedicated drive.
3. Graphic
The final aspect of specification to consider is graphics. Adobe Premiere uses a feature called the Mercury Playback Engine that allows much faster and smoother playback of video without rendering, it has two modes, software only and GPU acceleration mode (Using either CUDA or OpenCL). The GPU acceleration mode offers significant performance increases and is therefore highly desirable. However, not all GPU’s are compatible with the Mercury Playback Engine, the list of those that are is found on the previously linked specification page, so if a new computer is being built or purchased, or upgrades are being considered prior to install, it is highly desirable to utilize a compatible GPU where possible.
5. Settings
Having covered the basic specifications of a computer that will enhance the operation of Premiere, it is now time to look at the computer settings and how this can affect Premiere’s performance and usability.
The first thing to understand is that video editing, especially HD video, is bandwidth intensive, in effect, it fills up the lanes between the CPU, RAM, GPU and Hard Drive during operation. Spreading the use of that bandwidth over several devices can see huge performance gains, so one of the best ways to optimize the computer for Premier is to adjust how the hard drives are used. How effective this can be depends on the computer you are using, so we will try to cover a few different possibilities here.
6. Drive
If your computer contains a single drive, simply install Premiere and start using it, there are no options available here. If there are two drives, keep one for the operating system, programs and cache files. Use the second drive exclusively for video project files, exported projects and previews.
If the computer has three drives then keep one for the operating system and programs, the second one for the video project files, and use the third for previews, cache files and exported projects.
If you have access to even more drives, then split the cache from the previews, and ultimately have one drive each for previews, exports and cache. Spreading the files across as many drives as possible enhances performance by enabling the different read/write operations to occur without interference from each other.
That is the theory, but how do you achieve this? This is done within Premiere itself, there are two parts, accessing where the media cache files are placed is done though the edit menu, following the path edit > preferences > media.

Changing where the project files, previews and exports are stored is just as easy, and is accessed via the project menu by taking the path project > project settings > scratchdisks.

7. Sequence Setting
When working with Premiere it is important to have the correct settings for the type of media you are using and the nature of the final output. This is done within Premiere by a function known as a Sequence.
After creating a new project you are presented with the sequence dialogue box. You can have as many sequences in a single project as you like, but Premiere always assumes you require at least one and so needs the first one to be created to allow work on a project. Any media, both audio and video, placed into a sequence is automatically adapted to the settings of that sequence, so you will want to choose settings that match the original media as closely as possible. Each sequence in a project can have different settings if required, as this lessens the workload on the CPU and makes the process faster and smoother.
The sequence dialogue has three tabs, Sequence Presets, Settings and Tracks
The Preset Tab makes setting up a new sequence much simpler. Choosing a preset enables Premiere to choose the settings that best match the chosen video and audio format. There are a wide range of presets available to suit the most commonly used media types, they are organized based on camera formats. Within each group there are numerous settings and configurations to choose from based around frame sizes and interlacing. Whilst choosing the correct preset can be a little daunting to the uninitiated, ensuring the number of frames per second, the frame size and codec are correct is all that is required.

Once the preset is chosen you can move to the settings tab to adjust the preset manually. Some settings will not be adjustable in this tab due to the specific optimization required for the input media.
Because the presets do such a good job it is not really necessary to adjust anything in the settings tab, and unless you are trying to do something very specific.
While the standard presets are usually suitable, on occasion you may desire a custom setting. To do this, choose a sequence preset that is close to your media, and then make custom selections in the Settings tab. By selecting the Save Preset option on the Settings tab you can then create a custom setting with those parameters. Give the preset a suitable name in the Save Settings dialog and add any notes that are needed. The preset can be found in the Custom folder under Available Presets.
Those with the Apple Prores Codec on their computers can use this as the preview codec if required. By choosing Quicktime as the preview format in a custom editing mode, and lastly Apple Prores as the required codec.
Conclusion
If your computer failed to meet the requirement to run Premiere Pro, you may need to spend some money to buy a powerful computer or choose another professional video editing software similar to Premiere Pro, or choose a video editing software. If your computer isn’t powerful enough to run Premiere Pro, you will get awful experience at editing footage because of the long loading time and stuck playback.

Benjamin Arango
Benjamin Arango is a writer and a lover of all things video.
Follow @Benjamin Arango
Benjamin Arango
Mar 27, 2024• Proven solutions
We all know that Adobe Premiere Pro is one of the best professional video editing software, while to run such a powerful video editing software, you may need a powerful windows PC or Mac as well. Though most modern computer systems can run Adobe Premiere out of the box, there are some steps to take, and potential decisions to make, before installing the software, or if you are building or buying a new computer to make sure you get the best experience possible with the software.
You may also like:Best Adobe Premiere Alternatives >>
Minimum system requirement to run Premiere Pro on Windows and Mac in 2019
Your computer should at least to meet the minimum specification below to run Premiere Pro, and if you need to edit some VR videos, your computer configuration should be higher according to the minimum specifications list on their website .
- Intel 6th or newer CPU
- Windows 10 (64-bit) 1703 or later/ MacOS V10.12 later
- 16GB RAM; 4GB GPU VRAM
- Fast internal SSD
- 1920*1080 Display resolution
- 32-bit video card
- Internet connection
However, it is important to remember this is the minimum specification, and will not necessarily give a satisfactory user experience. The recommended specifications are far more likely to provide the kind of performance expected of the software and those would be the ones to use as a guide for the minimum spec for a new computer or any upgrades being planned prior to installation.
How to check Computer Specifications
Since Premiere Pro CC only works on Windows 10 system after 2018 13.0 release, we will show you how to check if your PC meets the requirements to run Premiere Pro on Windows 10
- Press Windows Key+ E on the keyboard to bring up Windows Explorer.
- Right click the This PC option in the sidebar and then select Properties from the context menu.

- The system specification window will show up which you see the Processor, RAM, system type and other system information.
Checking the specification on your Mac is easy, just click the Apple icon in the top-left corner of your Mac, and then select About This Mac option. In the pop-up window you will see the information including Processor speed, memory and graphic card etc.
How to Set Up Computer for Premiere
1. Processor
Whilst the software will run on a Core2Duo intel or Phenom II AMD processor, it is worth noting that rendering can be highly intensive work for the processor and the fastest possible processor within your budget will pay dividends in speed of editing. In general, even a Core I3, the cheapest of the current Intel range, will be significantly faster than older processors, but because Premiere happily uses multi cored processors to their full, if the budget can reach to a quad core or more processor then do so, Premiere is a piece of software that benefits from the computational power increase more than most.
2. Memory
The next consideration is memory. The minimum specification suggests 4GB of RAM with 8GB recommended, for reliable and smooth running consider 8GB minimum, and go for as much as you can. For a computer that is used for other activities as well, multitasking can see even 24GB of Ram being fully utilized, especially if you are working on HD content. Speaking of content, this is the other aspect of memory to look at. Whilst you can use a storage drive that contains everything else on your computer to keep the media you are working on, for HD content especially, and for trouble free and the fastest possible operation it is advisable to reserve a single drive, preferably a 7200 RPM or faster one, exclusively for your media. Bandwidth and access times means Premiere will be significantly faster in operation with its media on a dedicated drive.
3. Graphic
The final aspect of specification to consider is graphics. Adobe Premiere uses a feature called the Mercury Playback Engine that allows much faster and smoother playback of video without rendering, it has two modes, software only and GPU acceleration mode (Using either CUDA or OpenCL). The GPU acceleration mode offers significant performance increases and is therefore highly desirable. However, not all GPU’s are compatible with the Mercury Playback Engine, the list of those that are is found on the previously linked specification page, so if a new computer is being built or purchased, or upgrades are being considered prior to install, it is highly desirable to utilize a compatible GPU where possible.
5. Settings
Having covered the basic specifications of a computer that will enhance the operation of Premiere, it is now time to look at the computer settings and how this can affect Premiere’s performance and usability.
The first thing to understand is that video editing, especially HD video, is bandwidth intensive, in effect, it fills up the lanes between the CPU, RAM, GPU and Hard Drive during operation. Spreading the use of that bandwidth over several devices can see huge performance gains, so one of the best ways to optimize the computer for Premier is to adjust how the hard drives are used. How effective this can be depends on the computer you are using, so we will try to cover a few different possibilities here.
6. Drive
If your computer contains a single drive, simply install Premiere and start using it, there are no options available here. If there are two drives, keep one for the operating system, programs and cache files. Use the second drive exclusively for video project files, exported projects and previews.
If the computer has three drives then keep one for the operating system and programs, the second one for the video project files, and use the third for previews, cache files and exported projects.
If you have access to even more drives, then split the cache from the previews, and ultimately have one drive each for previews, exports and cache. Spreading the files across as many drives as possible enhances performance by enabling the different read/write operations to occur without interference from each other.
That is the theory, but how do you achieve this? This is done within Premiere itself, there are two parts, accessing where the media cache files are placed is done though the edit menu, following the path edit > preferences > media.

Changing where the project files, previews and exports are stored is just as easy, and is accessed via the project menu by taking the path project > project settings > scratchdisks.

7. Sequence Setting
When working with Premiere it is important to have the correct settings for the type of media you are using and the nature of the final output. This is done within Premiere by a function known as a Sequence.
After creating a new project you are presented with the sequence dialogue box. You can have as many sequences in a single project as you like, but Premiere always assumes you require at least one and so needs the first one to be created to allow work on a project. Any media, both audio and video, placed into a sequence is automatically adapted to the settings of that sequence, so you will want to choose settings that match the original media as closely as possible. Each sequence in a project can have different settings if required, as this lessens the workload on the CPU and makes the process faster and smoother.
The sequence dialogue has three tabs, Sequence Presets, Settings and Tracks
The Preset Tab makes setting up a new sequence much simpler. Choosing a preset enables Premiere to choose the settings that best match the chosen video and audio format. There are a wide range of presets available to suit the most commonly used media types, they are organized based on camera formats. Within each group there are numerous settings and configurations to choose from based around frame sizes and interlacing. Whilst choosing the correct preset can be a little daunting to the uninitiated, ensuring the number of frames per second, the frame size and codec are correct is all that is required.

Once the preset is chosen you can move to the settings tab to adjust the preset manually. Some settings will not be adjustable in this tab due to the specific optimization required for the input media.
Because the presets do such a good job it is not really necessary to adjust anything in the settings tab, and unless you are trying to do something very specific.
While the standard presets are usually suitable, on occasion you may desire a custom setting. To do this, choose a sequence preset that is close to your media, and then make custom selections in the Settings tab. By selecting the Save Preset option on the Settings tab you can then create a custom setting with those parameters. Give the preset a suitable name in the Save Settings dialog and add any notes that are needed. The preset can be found in the Custom folder under Available Presets.
Those with the Apple Prores Codec on their computers can use this as the preview codec if required. By choosing Quicktime as the preview format in a custom editing mode, and lastly Apple Prores as the required codec.
Conclusion
If your computer failed to meet the requirement to run Premiere Pro, you may need to spend some money to buy a powerful computer or choose another professional video editing software similar to Premiere Pro, or choose a video editing software. If your computer isn’t powerful enough to run Premiere Pro, you will get awful experience at editing footage because of the long loading time and stuck playback.

Benjamin Arango
Benjamin Arango is a writer and a lover of all things video.
Follow @Benjamin Arango
Benjamin Arango
Mar 27, 2024• Proven solutions
We all know that Adobe Premiere Pro is one of the best professional video editing software, while to run such a powerful video editing software, you may need a powerful windows PC or Mac as well. Though most modern computer systems can run Adobe Premiere out of the box, there are some steps to take, and potential decisions to make, before installing the software, or if you are building or buying a new computer to make sure you get the best experience possible with the software.
You may also like:Best Adobe Premiere Alternatives >>
Minimum system requirement to run Premiere Pro on Windows and Mac in 2019
Your computer should at least to meet the minimum specification below to run Premiere Pro, and if you need to edit some VR videos, your computer configuration should be higher according to the minimum specifications list on their website .
- Intel 6th or newer CPU
- Windows 10 (64-bit) 1703 or later/ MacOS V10.12 later
- 16GB RAM; 4GB GPU VRAM
- Fast internal SSD
- 1920*1080 Display resolution
- 32-bit video card
- Internet connection
However, it is important to remember this is the minimum specification, and will not necessarily give a satisfactory user experience. The recommended specifications are far more likely to provide the kind of performance expected of the software and those would be the ones to use as a guide for the minimum spec for a new computer or any upgrades being planned prior to installation.
How to check Computer Specifications
Since Premiere Pro CC only works on Windows 10 system after 2018 13.0 release, we will show you how to check if your PC meets the requirements to run Premiere Pro on Windows 10
- Press Windows Key+ E on the keyboard to bring up Windows Explorer.
- Right click the This PC option in the sidebar and then select Properties from the context menu.

- The system specification window will show up which you see the Processor, RAM, system type and other system information.
Checking the specification on your Mac is easy, just click the Apple icon in the top-left corner of your Mac, and then select About This Mac option. In the pop-up window you will see the information including Processor speed, memory and graphic card etc.
How to Set Up Computer for Premiere
1. Processor
Whilst the software will run on a Core2Duo intel or Phenom II AMD processor, it is worth noting that rendering can be highly intensive work for the processor and the fastest possible processor within your budget will pay dividends in speed of editing. In general, even a Core I3, the cheapest of the current Intel range, will be significantly faster than older processors, but because Premiere happily uses multi cored processors to their full, if the budget can reach to a quad core or more processor then do so, Premiere is a piece of software that benefits from the computational power increase more than most.
2. Memory
The next consideration is memory. The minimum specification suggests 4GB of RAM with 8GB recommended, for reliable and smooth running consider 8GB minimum, and go for as much as you can. For a computer that is used for other activities as well, multitasking can see even 24GB of Ram being fully utilized, especially if you are working on HD content. Speaking of content, this is the other aspect of memory to look at. Whilst you can use a storage drive that contains everything else on your computer to keep the media you are working on, for HD content especially, and for trouble free and the fastest possible operation it is advisable to reserve a single drive, preferably a 7200 RPM or faster one, exclusively for your media. Bandwidth and access times means Premiere will be significantly faster in operation with its media on a dedicated drive.
3. Graphic
The final aspect of specification to consider is graphics. Adobe Premiere uses a feature called the Mercury Playback Engine that allows much faster and smoother playback of video without rendering, it has two modes, software only and GPU acceleration mode (Using either CUDA or OpenCL). The GPU acceleration mode offers significant performance increases and is therefore highly desirable. However, not all GPU’s are compatible with the Mercury Playback Engine, the list of those that are is found on the previously linked specification page, so if a new computer is being built or purchased, or upgrades are being considered prior to install, it is highly desirable to utilize a compatible GPU where possible.
5. Settings
Having covered the basic specifications of a computer that will enhance the operation of Premiere, it is now time to look at the computer settings and how this can affect Premiere’s performance and usability.
The first thing to understand is that video editing, especially HD video, is bandwidth intensive, in effect, it fills up the lanes between the CPU, RAM, GPU and Hard Drive during operation. Spreading the use of that bandwidth over several devices can see huge performance gains, so one of the best ways to optimize the computer for Premier is to adjust how the hard drives are used. How effective this can be depends on the computer you are using, so we will try to cover a few different possibilities here.
6. Drive
If your computer contains a single drive, simply install Premiere and start using it, there are no options available here. If there are two drives, keep one for the operating system, programs and cache files. Use the second drive exclusively for video project files, exported projects and previews.
If the computer has three drives then keep one for the operating system and programs, the second one for the video project files, and use the third for previews, cache files and exported projects.
If you have access to even more drives, then split the cache from the previews, and ultimately have one drive each for previews, exports and cache. Spreading the files across as many drives as possible enhances performance by enabling the different read/write operations to occur without interference from each other.
That is the theory, but how do you achieve this? This is done within Premiere itself, there are two parts, accessing where the media cache files are placed is done though the edit menu, following the path edit > preferences > media.

Changing where the project files, previews and exports are stored is just as easy, and is accessed via the project menu by taking the path project > project settings > scratchdisks.

7. Sequence Setting
When working with Premiere it is important to have the correct settings for the type of media you are using and the nature of the final output. This is done within Premiere by a function known as a Sequence.
After creating a new project you are presented with the sequence dialogue box. You can have as many sequences in a single project as you like, but Premiere always assumes you require at least one and so needs the first one to be created to allow work on a project. Any media, both audio and video, placed into a sequence is automatically adapted to the settings of that sequence, so you will want to choose settings that match the original media as closely as possible. Each sequence in a project can have different settings if required, as this lessens the workload on the CPU and makes the process faster and smoother.
The sequence dialogue has three tabs, Sequence Presets, Settings and Tracks
The Preset Tab makes setting up a new sequence much simpler. Choosing a preset enables Premiere to choose the settings that best match the chosen video and audio format. There are a wide range of presets available to suit the most commonly used media types, they are organized based on camera formats. Within each group there are numerous settings and configurations to choose from based around frame sizes and interlacing. Whilst choosing the correct preset can be a little daunting to the uninitiated, ensuring the number of frames per second, the frame size and codec are correct is all that is required.

Once the preset is chosen you can move to the settings tab to adjust the preset manually. Some settings will not be adjustable in this tab due to the specific optimization required for the input media.
Because the presets do such a good job it is not really necessary to adjust anything in the settings tab, and unless you are trying to do something very specific.
While the standard presets are usually suitable, on occasion you may desire a custom setting. To do this, choose a sequence preset that is close to your media, and then make custom selections in the Settings tab. By selecting the Save Preset option on the Settings tab you can then create a custom setting with those parameters. Give the preset a suitable name in the Save Settings dialog and add any notes that are needed. The preset can be found in the Custom folder under Available Presets.
Those with the Apple Prores Codec on their computers can use this as the preview codec if required. By choosing Quicktime as the preview format in a custom editing mode, and lastly Apple Prores as the required codec.
Conclusion
If your computer failed to meet the requirement to run Premiere Pro, you may need to spend some money to buy a powerful computer or choose another professional video editing software similar to Premiere Pro, or choose a video editing software. If your computer isn’t powerful enough to run Premiere Pro, you will get awful experience at editing footage because of the long loading time and stuck playback.

Benjamin Arango
Benjamin Arango is a writer and a lover of all things video.
Follow @Benjamin Arango
Also read:
- Game Recording Made Easy 3 Options for Every Gamer
- New Online Vide
- Best Online Stop Motion Software A Comprehensive Review
- Top 10 Free Online Subtitle Generators
- Updated 2024 Approved Mac Alternatives to Windows Movie Maker Top Picks
- New In 2024, Choosing the Right Green Screen Tool for Your Mac
- Updated TikTok Visuals 101 Understanding Aspect Ratio for Maximum Engagement for 2024
- Updated The Top Free MOD Video Editors You Need to Try for 2024
- New From Zero to Hero The Best Free and Paid Android Video Editors
- New In 2024, Looking for a Lightweight Video Editing Software that Can Get Your Job of Video Editing Done Perfectly? Here Is the List of the Best Light Video Editors for You
- 2024 Approved Looking Beyond FCPX Top 10 Video Editing Software Options
- Updated The Definitive Guide to Choosing an Android Video Editor
- Unlock Facebook Video Success Understanding Aspect Ratios and Dimensions
- New Key Factors to Keep in Mind When Converting Audio to Video for 2024
- New Windows 10 Video Trimmer Showdown Top 10 Free Options for 2024
- New In 2024, Top Apps to Convert Videos to Live Photos on iPhone
- New 2024 Approved Crop Like a Pro A Step-by-Step Guide for Final Cut Pro X Users
- New In 2024, Video Metadata Made Easy 8 Best Mac Editors
- Mobile Masterpieces Top 10 Vlog Editor Apps for Creating Stunning Videos
- How To Remove the Two Factor Authentication From iPhone 11 Pro Max
- Here are Different Ways to Find Pokemon Go Trainer Codes to Add to Your Account On Apple iPhone 12 Pro Max | Dr.fone
- New 2024 Approved Making Slow Motion Videos in Premiere Pro A Review on The Best Methods
- Updated In 2024, Create Lip Sync TikTok Videos Without Installing Any App
- In 2024, 5 Ways to Track Motorola Edge 2023 without App | Dr.fone
- How to Recover Deleted Excel 2016 Files on Mac Complete Guide
- In 2024, How to Track a Lost Nokia C02 for Free? | Dr.fone
- Guide How To Unbrick a Bricked Vivo Y78t Phone | Dr.fone
- In 2024, How Can We Unlock Our Vivo Y100 5G Phone Screen?
- In 2024, How to Change your Samsung Galaxy A14 4G Location on Twitter | Dr.fone
- Title: The Art of Chroma Keying in FCP X Expert Techniques for Stunning Results
- Author: Emma
- Created at : 2024-06-15 21:43:59
- Updated at : 2024-06-16 21:43:59
- Link: https://video-ai-editor.techidaily.com/the-art-of-chroma-keying-in-fcp-x-expert-techniques-for-stunning-results/
- License: This work is licensed under CC BY-NC-SA 4.0.


