
:max_bytes(150000):strip_icc():format(webp)/GettyImages-1168002788-1bccccf67a1f4988bd355c09748383ab.jpg)
The Best of the Best Top Timecode Calculators for iPhone, Android, and Web
The Best of the Best: Top Timecode Calculators for iPhone, Android, and Web
8 Best Timecode Calculator to Use (online/iPhone/Android)

Shanoon Cox
Mar 27, 2024• Proven solutions
For professionals using video editing tools and film makers, timecode calculator is not a new thing. But, novice users trying to start with such a tool needs to know what exactly it stands for and what will it offer to them. Real-time timecode calculator can be bought, but the market also has some brilliant free of cost tools for your rescue.
This software performs depending on the operations over video timings. Adding, subtracting, dividing or multiplying fragments of videos tapes in various formats can be done using the timecode calculating tool. You can even convert calculated values without submitting the values again between formats.
Recommended Timecode Calculator on PC - Filmora
If you want to have a powerful yet intuitive timecode calculator, we recommend using Filmora to calculate timecode. It is a build in effects, so just drag and drop to use. The timecode is precise without loss. The steps are also easy to start. Don’t need to worry about complex operations. Just download it now to have a try!
- Drag video clip to timeline
- Drag timecode effect to video clip. Now, timecode calculator is generated
- You can show millisecond, frames and scale of timecode. You can also change text color and opacity.
 Download Mac Version ](https://tools.techidaily.com/wondershare/filmora/download/ )
Part 1: Best online timecode calculator
Here comes the list of reliable timecode calculators –
1. Michael Cinquin
This online timecode calculator has an integrated keykode (keycode) calculator as well. The timecode calculator allows you to decide the frames per second, whereas keykode calculator helps in finalizing what type of film you are choosing.
Features
- You can convert a timecode to images with this tool.
- Images can be added or subtracted from a keycode.
- Timecode can be added or subtracted to a timecode.
- Computing number of images between 2 keycodes is possible.

2. Zapstudio
Using this free online timecode calculator, you can calculate time out of frames and frames out of time easily. The timecode used here follows SMTPE format denoting HOURS:MINUTES:SECONDS:FRAMES.
Features
- You can set the frame rate for converting frames to time and time to frames.
- You can calculate the time between the ‘IN’ and ‘OUT’ point here.
- You can also set how slow you can make the clip by altering the clip framerate and project framerate.

3. Omni
This timecode calculator has an attractive interface but with plenty of Ads to confuse the user. The plus side is it comes with instructions and examples in the page to use the timecode calculator.
Features
- The site allows you to enter frames and frames per second, and the result is published just below the input values.
- You can share the result by email or on social media sites by tapping the ‘Send this result’ button.
- The values can be reset by pressing the ‘Refresh’ icon.

4. Kodak
This timecode calculator from the film making expert Kodak is awesome. You need to enter your location though, while starting to calculate timecode.
Features
- It allows you to calculate feet, speed, time, and frames.
- The speed here denotes frames per second.
- You can alter the feet, which is otherwise constant while calculating the timecode. It affects the overall values.

Part 2: Best timecode calculator apps
When it comes to calculate timecode using an online timecode calculator app on your Smartphone, you have a list of them too.
5. Daan van de Westelaken
This is an iOS app available directly to be installed on your iPhone from the official website. It is also known as Simple Timecode Calculator.
Features
- It supports iOS 8 and above compatible iPhones.
- It helps you to multiply, add, subtract or divide video files utilizing major frame rates.
- This iOS app comes with an inbuilt ticker tape function that is activated the moment you rotate the iPhone to landscape orientation.
- You can assign the onscreen input value to any of the 2 memory buttons by holding down that button.

6. TcCalc
This Android app is meant for video and film timecode calculations. It is compatible with all frame rates.
Features
- TcCalc’s supported frame rates are 23.98, 24, 25, 29.97, 30, 50, 59.94, and 60.
- It even supports the drop and not drop time codes.
- You can calculate timecodes and switch the values, while the current frame value stays intact.
- Standard timecode strings and frame values are the output formats for timecodes.

7. TimeCode Calculator
This Android app is a paid one available on Google Play Store that you can buy for approximately $2.58. It is essential for timecode calculations that supports IN and OUT timecode for converting to and from frames.
Features
- You can gauge the differences between fps rate supporting drop and non drop –NTSC (SMTPE-12M-1-2008), and PAL.
- It can help you edit films and videos and cut them as well with fps ranging from 10 and beyond.
- Timecode calculation is supported for addition, subtraction, division and multiplication as well as RCL STO.

8. Timecode
It supports iOS versions higher than iOS 8 on iPhone, iPad, and iPod Touch. It enables you to calculate and convert one timecode to the other or any other unit with a single click.
Features
- It has 10 unique preset formats.
- There are 10 preset frame rates and units with this iOS app.
- Timecode calculation and footage is cakewalk with intuitive app.

Conclusion
From the above article, we have a huge list of timecode calculator for 25fps and other fps that you can utilize to make interesting films. While picking the timecode calculator ensure that the software or app meets your purpose to avoid any issues.
Download Mac Version ](https://tools.techidaily.com/wondershare/filmora/download/ )
Shanoon Cox
Shanoon Cox is a writer and a lover of all things video.
Follow @Shanoon Cox
Shanoon Cox
Mar 27, 2024• Proven solutions
For professionals using video editing tools and film makers, timecode calculator is not a new thing. But, novice users trying to start with such a tool needs to know what exactly it stands for and what will it offer to them. Real-time timecode calculator can be bought, but the market also has some brilliant free of cost tools for your rescue.
This software performs depending on the operations over video timings. Adding, subtracting, dividing or multiplying fragments of videos tapes in various formats can be done using the timecode calculating tool. You can even convert calculated values without submitting the values again between formats.
Recommended Timecode Calculator on PC - Filmora
If you want to have a powerful yet intuitive timecode calculator, we recommend using Filmora to calculate timecode. It is a build in effects, so just drag and drop to use. The timecode is precise without loss. The steps are also easy to start. Don’t need to worry about complex operations. Just download it now to have a try!
- Drag video clip to timeline
- Drag timecode effect to video clip. Now, timecode calculator is generated
- You can show millisecond, frames and scale of timecode. You can also change text color and opacity.
Download Mac Version ](https://tools.techidaily.com/wondershare/filmora/download/ )
Part 1: Best online timecode calculator
Here comes the list of reliable timecode calculators –
1. Michael Cinquin
This online timecode calculator has an integrated keykode (keycode) calculator as well. The timecode calculator allows you to decide the frames per second, whereas keykode calculator helps in finalizing what type of film you are choosing.
Features
- You can convert a timecode to images with this tool.
- Images can be added or subtracted from a keycode.
- Timecode can be added or subtracted to a timecode.
- Computing number of images between 2 keycodes is possible.
2. Zapstudio
Using this free online timecode calculator, you can calculate time out of frames and frames out of time easily. The timecode used here follows SMTPE format denoting HOURS:MINUTES:SECONDS:FRAMES.
Features
- You can set the frame rate for converting frames to time and time to frames.
- You can calculate the time between the ‘IN’ and ‘OUT’ point here.
- You can also set how slow you can make the clip by altering the clip framerate and project framerate.
3. Omni
This timecode calculator has an attractive interface but with plenty of Ads to confuse the user. The plus side is it comes with instructions and examples in the page to use the timecode calculator.
Features
- The site allows you to enter frames and frames per second, and the result is published just below the input values.
- You can share the result by email or on social media sites by tapping the ‘Send this result’ button.
- The values can be reset by pressing the ‘Refresh’ icon.
4. Kodak
This timecode calculator from the film making expert Kodak is awesome. You need to enter your location though, while starting to calculate timecode.
Features
- It allows you to calculate feet, speed, time, and frames.
- The speed here denotes frames per second.
- You can alter the feet, which is otherwise constant while calculating the timecode. It affects the overall values.
Part 2: Best timecode calculator apps
When it comes to calculate timecode using an online timecode calculator app on your Smartphone, you have a list of them too.
5. Daan van de Westelaken
This is an iOS app available directly to be installed on your iPhone from the official website. It is also known as Simple Timecode Calculator.
Features
- It supports iOS 8 and above compatible iPhones.
- It helps you to multiply, add, subtract or divide video files utilizing major frame rates.
- This iOS app comes with an inbuilt ticker tape function that is activated the moment you rotate the iPhone to landscape orientation.
- You can assign the onscreen input value to any of the 2 memory buttons by holding down that button.
6. TcCalc
This Android app is meant for video and film timecode calculations. It is compatible with all frame rates.
Features
- TcCalc’s supported frame rates are 23.98, 24, 25, 29.97, 30, 50, 59.94, and 60.
- It even supports the drop and not drop time codes.
- You can calculate timecodes and switch the values, while the current frame value stays intact.
- Standard timecode strings and frame values are the output formats for timecodes.
7. TimeCode Calculator
This Android app is a paid one available on Google Play Store that you can buy for approximately $2.58. It is essential for timecode calculations that supports IN and OUT timecode for converting to and from frames.
Features
- You can gauge the differences between fps rate supporting drop and non drop –NTSC (SMTPE-12M-1-2008), and PAL.
- It can help you edit films and videos and cut them as well with fps ranging from 10 and beyond.
- Timecode calculation is supported for addition, subtraction, division and multiplication as well as RCL STO.
8. Timecode
It supports iOS versions higher than iOS 8 on iPhone, iPad, and iPod Touch. It enables you to calculate and convert one timecode to the other or any other unit with a single click.
Features
- It has 10 unique preset formats.
- There are 10 preset frame rates and units with this iOS app.
- Timecode calculation and footage is cakewalk with intuitive app.
Conclusion
From the above article, we have a huge list of timecode calculator for 25fps and other fps that you can utilize to make interesting films. While picking the timecode calculator ensure that the software or app meets your purpose to avoid any issues.
Download Mac Version ](https://tools.techidaily.com/wondershare/filmora/download/ )
Shanoon Cox
Shanoon Cox is a writer and a lover of all things video.
Follow @Shanoon Cox
Mac Video Editing Software: 10 Alternatives to Vegas Pro You Need to Know
For creating high-grade dynamic videos, simply shooting or recording a clip is not enough. Finding the best Sony Ve gas alternatives for Mac is essential since the software mainly targets Windows users.
Thanks to developers, there are many free and paid options to start your video editing journey on a Mac. Let’s first have a look at alternative software you could consider.
- Lightworks
- Wondershare Filmora
- Adobe Premiere Pro
- HitFilm Express
- Kdenlive
- OpenShot
- Blender
- Jahshaka
- Final Cut Pro
- Cyberlink PowerDirector 365
- What are the limitations when using Sony Vegas (Vegas Pro) on Mac?
- Hot FAQs about Vegas Pro Alternatives
Part 1: Sony Vegas Pro Alternatives & Competitors Overview
Here is a list of the top 10 tools we found after research. For an easier understanding, the following are the essential points of difference between alternative video editing software types for Sony Vegas Pro in a tabular form.
| Software | Supported OS | Price | Editor’s Verdict |
|---|---|---|---|
| Lightworks | Windows, Mac, Linux | Create-$9.99/month, Pro-$23.99/month | Medium-Difficult |
| Wondershare Filmora | Windows, Mac | Annual-$49.99, Perpetual-$79.99 | Easy |
| Adobe Premiere Pro | Windows, Mac | $20.99/month | Easy-Medium |
| HitFilm Express | Windows, Mac | Free | Easy |
| Kdenlive | Windows, Mac, Linux | Free | Medium-Difficult |
| OpenShot | Windows, Mac, Linux, OsX | Free | Medium-Difficult |
| Blender | Windows, Mac, Linux | Free | Easy |
| Jahshaka | Windows, Linux, OsX | Free | Easy-Medium |
| Final Cut Pro | Mac | Lifetime-$299.99 | Easy-Medium |
| Cyberlink PowerDirector 365 | Windows, Mac | Lifetime-$52.50 | Easy-Medium |
Part 2: Top 10 Sony Vegas (Vegas Pro) Alternatives & Competitors
Now that you know the primary differences between the Sony Vegas Pro alternatives. Are you find anything you like? Let’s move on to more details for your further consideration.
1. Lightworks
With Lightworks, using the independent timeline codec, format, and resolution alteration in videos is extremely simple. In addition, you can use the multi-cam editing feature for real-time, high-quality editing work. Moreover, drag and drop elements into videos for optimized video editing work, including pre-existing Storyboard points.
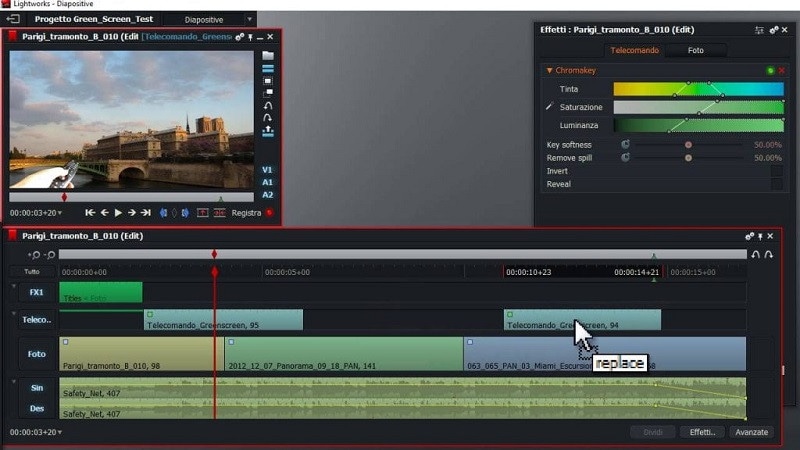
Main Features:
- Industry-grade features like QC, transcoding, and automated transfer are available.
- Edit files at different FPS limits and use three-point editing for recording/source files.
- Insert files and overwrite on a new project, replace, backfill, and fit to fill your video clips.
- Attach Storyboard tiles and match-frame clips/sub-clips easily.
Pros
- Flexible functionality and speedy transfers
- Edit files with professional movie-like quality
- Auto Sync feature for automatic timeline re-syncing is available
Cons
- Direct X is only available on the Windows version
- TotalFX plugin is not available for free- you have to upgrade to use them
OS Compatibility: Windows , Mac , Linux
Best For: Editing experts creating visually animated and professional-looking short videos can work with Lightworks.
What users say:
For professional-level video editing work, Lightworks brings a lot of resources and elements to users. According to reviews , people who have tried it have experienced better video editing functionality with these resources.
2. Wondershare Filmora
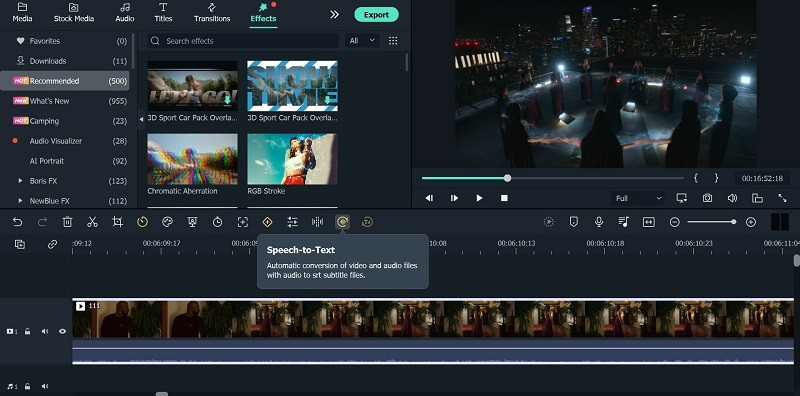
The top Vegas Pro alternative that both Windows and Mac users can opt for is Filmora. The software has advanced AI-incorporated editing functions for automated editing work, including preset effects from FX plugins. Besides that, you can easily add pre-set transitions, audio clips, text, images, and more.
Beginners find it simple to navigate through its interface and can opt for the Instant Mode function for automatic video edits .
Free Download For Win 7 or later(64-bit)
Free Download For macOS 10.14 or later

For a better idea of how this works, you should check out this tutorial video: https://filmora.wondershare.com/get-creative/make-a-video-quickly.html
Main Features:
- Instant Mode is available for automatic video/audio project editing out of 6 shorter clips.
- Support Advanced editing tools like Chroma Key and AI Portrait.
- Record voiceover, apply speech-to-text/text-to-speech functions, and more audio editing features.
- OpenFX plugins like BorisFX and NewBlue FX for a better list of pre-set effects.
Pros
- Simple to use and navigate on the editor timeline, especially with drag-and-drop support
- Output your editing files in different video/audio formats
- Quickly share the file on Vimeo or YouTube, besides downloading it on the local hard drive
Cons
- Free trial users cannot bring their Instant Mode-created videos into the editor timeline
- 4K support only with selected MKV, MOV, M4V (for Mac), and MP4 codecs
OS Compatibility: Windows , Mac
G2 Rating: 4.4 out of 5
Best For: All types of users like educators, students, homeowners, businesses, and video editors for comprehensive video editing tools and uses.
What users say:
Filmora is extremely simple to use, with advanced features available for top-level video editing work. Users mention in reviews how they have benefitted from the simple functionality and dynamic AI-based features available here for video editing.
3. Adobe Premiere Pro
If you are looking for high-quality programs like Sony Vegas, Adobe Premiere Pro is a reliable choice. This editing software allows you to easily create, delete, and move big video projects. Moreover, you can work on multiple files simultaneously and use shortcuts for faster editing work.
Preset filters and editing features are also available here, especially if they choose the Adobe Creative Cloud option.
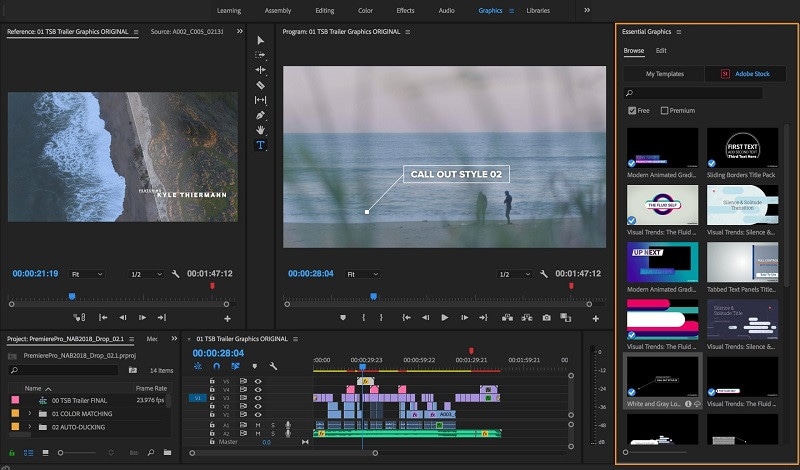
Main Features:
- Multiple pre-set transitions and effects are available for quick thematic changes.
- Add graphics, titles, and captions.
- Color grading and correction tools are available.
- It is possible to add keyframing and animation elements.
Pros
- Opting for group plans for video editing practice and learning using Adobe Premiere Pro is possible
- Aligns audio with videos instantly during editing
- Utilize Quick Export functionality for video files in some taps
Cons
- Windows High Contrast Mode is supported but to a limited extent, like with menus and title bars
- HDR workflows can only be handled on the Windows version with DisplayHDR 400 support
OS Compatibility: Windows , Mac
G2 Rating: 4.5 out of 5
Best For: Professional editors and trainers can use the various plans under Adobe Premiere Pro for video/audio editing.
What users say:
Advertisers and videographers enjoy high-grade video editing features and like the simple effects and interface quality. The motion graphics support in Adobe Premiere Pro is high-grade as well.
4. HitFilm Express
A capable Sony Vegas free alternative that you should check out is HitFilm Express. With this, you can expect many prepared designs for quick video edits. Additionally, you can manually customize the video files you are working on with high-grade personalization features available in the timeline.

Main Features:
- Pre-set customizable designs are available.
- Built-in sound effects and soundtracks are usable for free.
- Cache renders in timelines are optimized.
- The New Grade Clips feature allows users to apply varying effects to many video clips.
Pros
- Stable process of switching between timelines with an active orbit tool
- Easy to switch between 2D/3D timelines while using the text tool
- Simple to use for an unlimited period
Cons
- Does not work on older versions than Windows 10 and macOS 10.14
- Users cannot integrate this with Vegas Pro like before
OS Compatibility: Windows , Mac
TechRadar Rating: 4.5 out of 5
Best For: This software is a high-quality video editor for custom video editing work, fit for beginners and professionals alike.
What users say:
HitFilm Express is easy to use and efficient in the market for professional-level editing. The tutorial is available here for quick learning about the steps, and expandable features are well-admired by users.
5. Kdenlive
A high-quality Sony Vegas open-source variety that you should seriously consider is Kdenlive. The video editor comes with MLT framework support and holds many tools for optimizing video editing.
To simplify, you can arrange and adjust various video/audio tracks and mute or lock specific ones as needed. Add everything from filters, texts, and transitions using this editor for high-grade video projects.
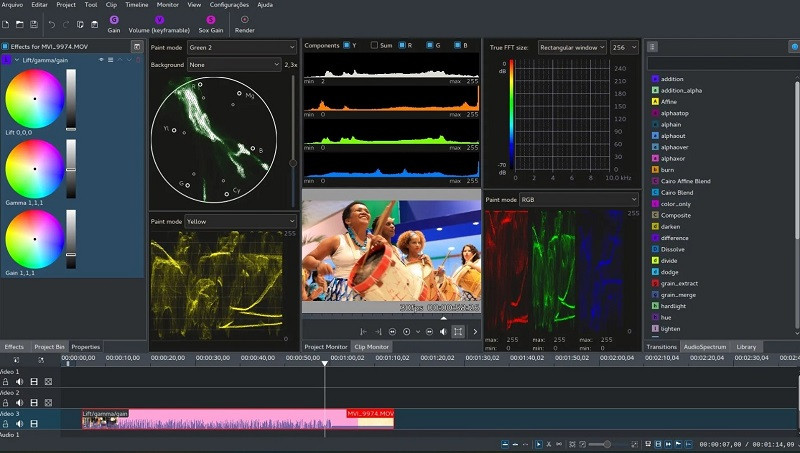
Main Features:
- Get an automatic backup of your video project while you are editing it.
- Use proxy editing to create low-resolution source clip copies and render them later on computers.
- Multiple video/audio scopes are available for monitoring projects like vectorscope, waveform, and RDB Parade.
- Many transition and effect choices to use.
Pros
- Flexibility with themes to add with multiple options
- Pre-render specific timeline parts for preview
- Effects are simple to use with keyframing quality
Cons
- Complex for completely non-technical users to adapt to
- Only supports 64-bit versions in regards to Windows-based compatibility
Trustpilot Rating: 3.7 out of 5
Best For: High-level editing experts who need strong video editing and monitoring features in an open-source platform.
What users say:
Kdenlive, as an open-source video editing software, assures quick and straightforward usability with projects. Per reviews , users like the ability to make simple video edits without bugs in this editor and quickly export finished projects.
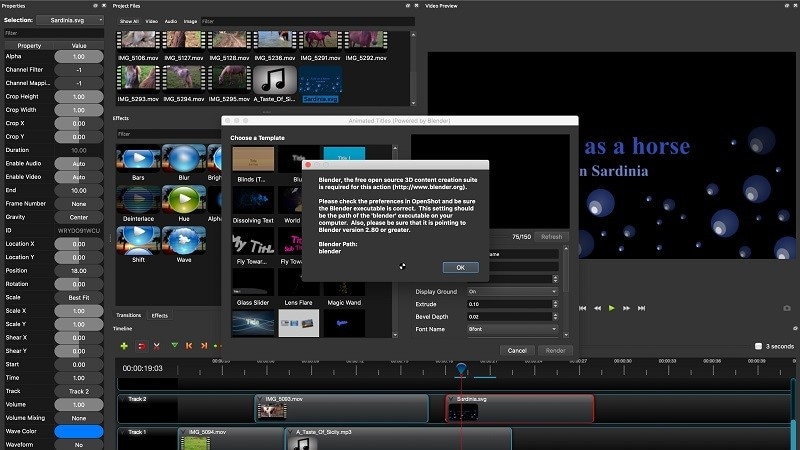
6. OpenShot
OpenShot is a high-quality cross-platform video editor that you can use on different devices for quick but dynamic video project edits. Use keyframing ability here to adjust the animated elements you add to the file.
Moreover, cut the videos with simple steps and add many audio tracks/background videos/watermarks in layers. Also, get several video effects to optimize the video look easily.
Main Features:
- Adjust video speed in reverse motion, fast forward, and slow motion.
- Render effects and 3D animated elements into the video project.
- Get title templates and edit them as needed.
- Visualize the background audio beats with waveform support.
Pros
- Very user-friendly interface with a simple navigation guarantee
- Supports more than 70 languages that you can translate as well using LaunchPad
- Drag-and-drop functionality is supported for adding images, audio, and videos into the OpenShot editor timeline
Cons
- Some bug issues can occur
- Slightly complex learning curve
OS Compatibility: Windows , Linux , OsX
G2 Rating: 4.4 out of 5
Best For: Professional-level video editing experts can opt for this cross-platform free software for high-quality video creations.
What users say:
The OpenShot software is suitable for high-quality video editing across different devices and operating systems. Users like the lack of automated watermarks on all videos, its simple dashboard, and its multi-track editing ability, all available for free.
7. Blender
Blender is free video editing software like Sony Vegas that users can use for video editing, but it is also effective for game development with animations. Indeed, you can create and render dynamic-looking scenes with features like Cycles.
Furthermore, the software has a rich modelling toolset with solutions like curves and sculpting tools.

Main Features:
- Completely customization-friendly UI, shortcuts, and window layout here.
- Customization and scripting are possible to do with this software due to the Python API support.
- Supports access and integration of many pipeline tools for projects.
- Comes with advanced simulation-based features available in MantaFlow and Bullet libraries.
Pros
- Basic and advanced tools for quick video edits
- Strong composition and masking ability with object-based motion tracking benefits
- Easily create short animations with Blender
Cons
- Data under the standalone games created here fall under GPL conditions
- Strict licensing rules are applicable here
OS Compatibility: Windows , Mac , Linux
G2 Rating: 4.5 out of 5
Best For: Game developers and videographers for companies can use this open-source platform for creation and editing.
What users say:
Blender is a capable software for animation-based editing, with high-quality game-based features and interactive elements that make editing simple. As per reviews , users like the simple animation-based tools and fast rendering it offers.
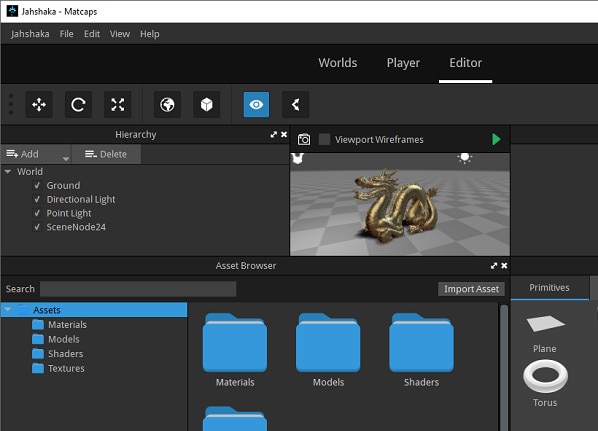
8. Jahshaka
Users of Jahshaka can experience an inclusive, collaborative environment for metaverse-level editing work. This free editing software, like Sony Vegas, focuses mainly on VR-based editing functions and comes with powerful tools for project management and content creation.
Take the help of other team members to collaborate on dynamic virtual world building, editing, and publishing.
Main Features:
- Compatible player for different desktop and mobile devices.
- Create diversified worlds and scenes with one comprehensive platform.
- Immersive software 3D video development.
- Access to pre-built content and libraries of scenes and assets
Pros
- Easily share and distribute your virtual projects
- Deliver final projects offline and online
- An interactive multi-user engine is available
Cons
- Usable for a niche audience and does not include standard video editing tools
- Jahshaka V2 legacy support is no longer active
OS Compatibility: Windows , Linux , OsX
SourceForge Rating: 4.4 out of 5
Best For: Professional video editors who want a collaborative experience in VR-based development and publishing.
What users say:
Jahshaka is a suitable program for optimized VR-based editing with many preset features and themes to choose from. Most users enjoy the new features and worlds and can work with them efficiently.
9. Final Cut Pro
One of the top Sony Vegas alternatives Mac users can safely turn to is Final Cut Pro, which has powerful modern video editing features. With this software, you will access Cinematic Mode, which you can use to create stylish and thematic video scenes.
Similarly, the Object Tracker features utilize ML technology to automatically detect objects and faces in moving videos. It can align effects and titles accurately with the graphical elements in videos.

Main Features:
- Object Tracker feature for using color correction and adding texts into moving videos.
- Accelerated functional for motion tracking with Apple Neural Engine.
- Add high-quality effects and titles into videos with Cinematic Mode support.
- Preset audio tracks and royalty-free sound effects are available for editing.
Pros
- Handle color grading for optimized scene quality
- Adjust the field depth and focus depth in clips
- Share projects across iOS and macOS platforms
Cons
- Not valid for Windows users
- Relatively high cost to avail the paid version with all advanced features
OS Compatibility: Mac
TrustRadius Rating: 4.8 out of 5
Best For: Professional video editors, students, and filmmakers who want to create cinematic-quality video projects.
What users say:
Final Cut Pro is an efficient Mac-based video editing tool with easy sharing and editing capabilities, rich effects/transitions options, and fast rendering ability. Customers enjoy the intuitive non-linear editor, easy accessibility to social media platforms for file exporting, and live scrubbing, as noted in one review .
10. Cyberlink PowerDirector 365
Another Sony Vegas mac alternative for Windows you should give a try is PowerDirector 365 from Cyberlink. This software removes or compiles video clips and uses masking features like image/custom masks.
Preset special effects, blending modes, and sound effects are available here for quick editing. Additionally, the AI-powered Motion Tracking traces objects in clips and adds graphics, animations, and text quickly in line with it.

Main Features:
- You can create and remove videos with masking features.
- Drag and drop the pre-set effects and texts into videos.
- Adjust video clips with tools for border, gradation, and shadowing.
- Multiple animations, callouts, graphics, and stickers to add to videos.
Pros
- Use green screen functionality for quick background removal or editing
- Automatic audio mastering and mixing functionality are available
- Keyframing benefits for customized animations like scaling and positioning
Cons
- Dolby Digital-centric audio codec is not available for users
- Users can try features like Room Echo Removal and NVIDIA A/V Denoise only on Windows 11
OS Compatibility: Windows
TechRadar Rating: 4.5 out of 5
Best For: Professional videographers and regular users who want a Windows-based video editing software for standard video clip editing.
What users say:
Cyberlink PowerDirector is a powerful video editor with standard editing functions many users have tried and benefited from. According to customers , the program has high-quality video and audio editing benefits for presentations, with additional effects/splitting/cropping features.
Part 3: What are the limitations when using Sony Vegas (Vegas Pro) on Mac?
Yes, with the given Sony Vegas alternatives, Mac and Windows users can benefit heavily. But why is it important to try for a replacement when Sony Vegas Pro is relatively efficient software?
To know the answer, you should take the time to understand its limitations, which do exist.
It only works for Windows users
The Sony Vegas Pro software is not available for Mac or other operating systems besides Windows. In addition, it’ll be really complex and time-consuming, even if you opt for virtual machine software or handle dual booting techniques to configure the software on your Mac or Linux.
You need to invest in other hardware
Sony Vegas Pro does do not work within one comprehensive platform like other capable video editing software types, like Wondershare Filmora . You have to acquire a powerful PC and tools to operate it separately. The software works very slowly on older devices.
Not incredibly unique
The functions of Sony Vegas Pro match somewhat with other options in the market. So, users would not expect much value in purchasing this software’s plans that they want to upgrade from their previous system, but on the other hand, the available features are mostly standard-level in functionality as well.
Hot FAQs about Vegas Pro Alternatives
After knowing these details, many users still have specific common queries about opting for a Sony Vegas Pro alternatively. So these are some common FAQs about this- answered.
1. Can Sony Vegas be used on a Mac?
No, it is impossible to directly use Sony Vegas on macOS devices since it does not support it. Instead, you have to separately use a dual boot strategy or virtual machine software to activate the video editor on Mac devices, but the process for that is complex.
2. Is Wondershare Filmora or Vegas Pro better?
Wondershare Filmora and Vegas Pro are top-level options in video and audio editing projects with professional-level editing accuracy. However, Filmora has a cohesive ecosystem with rich AI and standard functions and comes with Mac/Windows support. So, in that sense, Filmora is comparatively a better choice.
Final Words
In place of Sony Vegas Pro, any of these options would also give you a great user experience. Out of them, Filmora is one that we will recommend due to its multi-faceted benefits and features for Mac and Windows users. Ultimately, make your decision based on your particular needs.
Free Download For Win 7 or later(64-bit)
Free Download For macOS 10.14 or later
Part 1: Sony Vegas Pro Alternatives & Competitors Overview
Here is a list of the top 10 tools we found after research. For an easier understanding, the following are the essential points of difference between alternative video editing software types for Sony Vegas Pro in a tabular form.
| Software | Supported OS | Price | Editor’s Verdict |
|---|---|---|---|
| Lightworks | Windows, Mac, Linux | Create-$9.99/month, Pro-$23.99/month | Medium-Difficult |
| Wondershare Filmora | Windows, Mac | Annual-$49.99, Perpetual-$79.99 | Easy |
| Adobe Premiere Pro | Windows, Mac | $20.99/month | Easy-Medium |
| HitFilm Express | Windows, Mac | Free | Easy |
| Kdenlive | Windows, Mac, Linux | Free | Medium-Difficult |
| OpenShot | Windows, Mac, Linux, OsX | Free | Medium-Difficult |
| Blender | Windows, Mac, Linux | Free | Easy |
| Jahshaka | Windows, Linux, OsX | Free | Easy-Medium |
| Final Cut Pro | Mac | Lifetime-$299.99 | Easy-Medium |
| Cyberlink PowerDirector 365 | Windows, Mac | Lifetime-$52.50 | Easy-Medium |
Part 2: Top 10 Sony Vegas (Vegas Pro) Alternatives & Competitors
Now that you know the primary differences between the Sony Vegas Pro alternatives. Are you find anything you like? Let’s move on to more details for your further consideration.
1. Lightworks
With Lightworks, using the independent timeline codec, format, and resolution alteration in videos is extremely simple. In addition, you can use the multi-cam editing feature for real-time, high-quality editing work. Moreover, drag and drop elements into videos for optimized video editing work, including pre-existing Storyboard points.
Main Features:
- Industry-grade features like QC, transcoding, and automated transfer are available.
- Edit files at different FPS limits and use three-point editing for recording/source files.
- Insert files and overwrite on a new project, replace, backfill, and fit to fill your video clips.
- Attach Storyboard tiles and match-frame clips/sub-clips easily.
Pros
- Flexible functionality and speedy transfers
- Edit files with professional movie-like quality
- Auto Sync feature for automatic timeline re-syncing is available
Cons
- Direct X is only available on the Windows version
- TotalFX plugin is not available for free- you have to upgrade to use them
OS Compatibility: Windows , Mac , Linux
Best For: Editing experts creating visually animated and professional-looking short videos can work with Lightworks.
What users say:
For professional-level video editing work, Lightworks brings a lot of resources and elements to users. According to reviews , people who have tried it have experienced better video editing functionality with these resources.
2. Wondershare Filmora
The top Vegas Pro alternative that both Windows and Mac users can opt for is Filmora. The software has advanced AI-incorporated editing functions for automated editing work, including preset effects from FX plugins. Besides that, you can easily add pre-set transitions, audio clips, text, images, and more.
Beginners find it simple to navigate through its interface and can opt for the Instant Mode function for automatic video edits .
Free Download For Win 7 or later(64-bit)
Free Download For macOS 10.14 or later
For a better idea of how this works, you should check out this tutorial video: https://filmora.wondershare.com/get-creative/make-a-video-quickly.html
Main Features:
- Instant Mode is available for automatic video/audio project editing out of 6 shorter clips.
- Support Advanced editing tools like Chroma Key and AI Portrait.
- Record voiceover, apply speech-to-text/text-to-speech functions, and more audio editing features.
- OpenFX plugins like BorisFX and NewBlue FX for a better list of pre-set effects.
Pros
- Simple to use and navigate on the editor timeline, especially with drag-and-drop support
- Output your editing files in different video/audio formats
- Quickly share the file on Vimeo or YouTube, besides downloading it on the local hard drive
Cons
- Free trial users cannot bring their Instant Mode-created videos into the editor timeline
- 4K support only with selected MKV, MOV, M4V (for Mac), and MP4 codecs
OS Compatibility: Windows , Mac
G2 Rating: 4.4 out of 5
Best For: All types of users like educators, students, homeowners, businesses, and video editors for comprehensive video editing tools and uses.
What users say:
Filmora is extremely simple to use, with advanced features available for top-level video editing work. Users mention in reviews how they have benefitted from the simple functionality and dynamic AI-based features available here for video editing.
3. Adobe Premiere Pro
If you are looking for high-quality programs like Sony Vegas, Adobe Premiere Pro is a reliable choice. This editing software allows you to easily create, delete, and move big video projects. Moreover, you can work on multiple files simultaneously and use shortcuts for faster editing work.
Preset filters and editing features are also available here, especially if they choose the Adobe Creative Cloud option.
Main Features:
- Multiple pre-set transitions and effects are available for quick thematic changes.
- Add graphics, titles, and captions.
- Color grading and correction tools are available.
- It is possible to add keyframing and animation elements.
Pros
- Opting for group plans for video editing practice and learning using Adobe Premiere Pro is possible
- Aligns audio with videos instantly during editing
- Utilize Quick Export functionality for video files in some taps
Cons
- Windows High Contrast Mode is supported but to a limited extent, like with menus and title bars
- HDR workflows can only be handled on the Windows version with DisplayHDR 400 support
OS Compatibility: Windows , Mac
G2 Rating: 4.5 out of 5
Best For: Professional editors and trainers can use the various plans under Adobe Premiere Pro for video/audio editing.
What users say:
Advertisers and videographers enjoy high-grade video editing features and like the simple effects and interface quality. The motion graphics support in Adobe Premiere Pro is high-grade as well.
4. HitFilm Express
A capable Sony Vegas free alternative that you should check out is HitFilm Express. With this, you can expect many prepared designs for quick video edits. Additionally, you can manually customize the video files you are working on with high-grade personalization features available in the timeline.
Main Features:
- Pre-set customizable designs are available.
- Built-in sound effects and soundtracks are usable for free.
- Cache renders in timelines are optimized.
- The New Grade Clips feature allows users to apply varying effects to many video clips.
Pros
- Stable process of switching between timelines with an active orbit tool
- Easy to switch between 2D/3D timelines while using the text tool
- Simple to use for an unlimited period
Cons
- Does not work on older versions than Windows 10 and macOS 10.14
- Users cannot integrate this with Vegas Pro like before
OS Compatibility: Windows , Mac
TechRadar Rating: 4.5 out of 5
Best For: This software is a high-quality video editor for custom video editing work, fit for beginners and professionals alike.
What users say:
HitFilm Express is easy to use and efficient in the market for professional-level editing. The tutorial is available here for quick learning about the steps, and expandable features are well-admired by users.
5. Kdenlive
A high-quality Sony Vegas open-source variety that you should seriously consider is Kdenlive. The video editor comes with MLT framework support and holds many tools for optimizing video editing.
To simplify, you can arrange and adjust various video/audio tracks and mute or lock specific ones as needed. Add everything from filters, texts, and transitions using this editor for high-grade video projects.
Main Features:
- Get an automatic backup of your video project while you are editing it.
- Use proxy editing to create low-resolution source clip copies and render them later on computers.
- Multiple video/audio scopes are available for monitoring projects like vectorscope, waveform, and RDB Parade.
- Many transition and effect choices to use.
Pros
- Flexibility with themes to add with multiple options
- Pre-render specific timeline parts for preview
- Effects are simple to use with keyframing quality
Cons
- Complex for completely non-technical users to adapt to
- Only supports 64-bit versions in regards to Windows-based compatibility
Trustpilot Rating: 3.7 out of 5
Best For: High-level editing experts who need strong video editing and monitoring features in an open-source platform.
What users say:
Kdenlive, as an open-source video editing software, assures quick and straightforward usability with projects. Per reviews , users like the ability to make simple video edits without bugs in this editor and quickly export finished projects.
6. OpenShot
OpenShot is a high-quality cross-platform video editor that you can use on different devices for quick but dynamic video project edits. Use keyframing ability here to adjust the animated elements you add to the file.
Moreover, cut the videos with simple steps and add many audio tracks/background videos/watermarks in layers. Also, get several video effects to optimize the video look easily.
Main Features:
- Adjust video speed in reverse motion, fast forward, and slow motion.
- Render effects and 3D animated elements into the video project.
- Get title templates and edit them as needed.
- Visualize the background audio beats with waveform support.
Pros
- Very user-friendly interface with a simple navigation guarantee
- Supports more than 70 languages that you can translate as well using LaunchPad
- Drag-and-drop functionality is supported for adding images, audio, and videos into the OpenShot editor timeline
Cons
- Some bug issues can occur
- Slightly complex learning curve
OS Compatibility: Windows , Linux , OsX
G2 Rating: 4.4 out of 5
Best For: Professional-level video editing experts can opt for this cross-platform free software for high-quality video creations.
What users say:
The OpenShot software is suitable for high-quality video editing across different devices and operating systems. Users like the lack of automated watermarks on all videos, its simple dashboard, and its multi-track editing ability, all available for free.
7. Blender
Blender is free video editing software like Sony Vegas that users can use for video editing, but it is also effective for game development with animations. Indeed, you can create and render dynamic-looking scenes with features like Cycles.
Furthermore, the software has a rich modelling toolset with solutions like curves and sculpting tools.
Main Features:
- Completely customization-friendly UI, shortcuts, and window layout here.
- Customization and scripting are possible to do with this software due to the Python API support.
- Supports access and integration of many pipeline tools for projects.
- Comes with advanced simulation-based features available in MantaFlow and Bullet libraries.
Pros
- Basic and advanced tools for quick video edits
- Strong composition and masking ability with object-based motion tracking benefits
- Easily create short animations with Blender
Cons
- Data under the standalone games created here fall under GPL conditions
- Strict licensing rules are applicable here
OS Compatibility: Windows , Mac , Linux
G2 Rating: 4.5 out of 5
Best For: Game developers and videographers for companies can use this open-source platform for creation and editing.
What users say:
Blender is a capable software for animation-based editing, with high-quality game-based features and interactive elements that make editing simple. As per reviews , users like the simple animation-based tools and fast rendering it offers.
8. Jahshaka
Users of Jahshaka can experience an inclusive, collaborative environment for metaverse-level editing work. This free editing software, like Sony Vegas, focuses mainly on VR-based editing functions and comes with powerful tools for project management and content creation.
Take the help of other team members to collaborate on dynamic virtual world building, editing, and publishing.
Main Features:
- Compatible player for different desktop and mobile devices.
- Create diversified worlds and scenes with one comprehensive platform.
- Immersive software 3D video development.
- Access to pre-built content and libraries of scenes and assets
Pros
- Easily share and distribute your virtual projects
- Deliver final projects offline and online
- An interactive multi-user engine is available
Cons
- Usable for a niche audience and does not include standard video editing tools
- Jahshaka V2 legacy support is no longer active
OS Compatibility: Windows , Linux , OsX
SourceForge Rating: 4.4 out of 5
Best For: Professional video editors who want a collaborative experience in VR-based development and publishing.
What users say:
Jahshaka is a suitable program for optimized VR-based editing with many preset features and themes to choose from. Most users enjoy the new features and worlds and can work with them efficiently.
9. Final Cut Pro
One of the top Sony Vegas alternatives Mac users can safely turn to is Final Cut Pro, which has powerful modern video editing features. With this software, you will access Cinematic Mode, which you can use to create stylish and thematic video scenes.
Similarly, the Object Tracker features utilize ML technology to automatically detect objects and faces in moving videos. It can align effects and titles accurately with the graphical elements in videos.
Main Features:
- Object Tracker feature for using color correction and adding texts into moving videos.
- Accelerated functional for motion tracking with Apple Neural Engine.
- Add high-quality effects and titles into videos with Cinematic Mode support.
- Preset audio tracks and royalty-free sound effects are available for editing.
Pros
- Handle color grading for optimized scene quality
- Adjust the field depth and focus depth in clips
- Share projects across iOS and macOS platforms
Cons
- Not valid for Windows users
- Relatively high cost to avail the paid version with all advanced features
OS Compatibility: Mac
TrustRadius Rating: 4.8 out of 5
Best For: Professional video editors, students, and filmmakers who want to create cinematic-quality video projects.
What users say:
Final Cut Pro is an efficient Mac-based video editing tool with easy sharing and editing capabilities, rich effects/transitions options, and fast rendering ability. Customers enjoy the intuitive non-linear editor, easy accessibility to social media platforms for file exporting, and live scrubbing, as noted in one review .
10. Cyberlink PowerDirector 365
Another Sony Vegas mac alternative for Windows you should give a try is PowerDirector 365 from Cyberlink. This software removes or compiles video clips and uses masking features like image/custom masks.
Preset special effects, blending modes, and sound effects are available here for quick editing. Additionally, the AI-powered Motion Tracking traces objects in clips and adds graphics, animations, and text quickly in line with it.
Main Features:
- You can create and remove videos with masking features.
- Drag and drop the pre-set effects and texts into videos.
- Adjust video clips with tools for border, gradation, and shadowing.
- Multiple animations, callouts, graphics, and stickers to add to videos.
Pros
- Use green screen functionality for quick background removal or editing
- Automatic audio mastering and mixing functionality are available
- Keyframing benefits for customized animations like scaling and positioning
Cons
- Dolby Digital-centric audio codec is not available for users
- Users can try features like Room Echo Removal and NVIDIA A/V Denoise only on Windows 11
OS Compatibility: Windows
TechRadar Rating: 4.5 out of 5
Best For: Professional videographers and regular users who want a Windows-based video editing software for standard video clip editing.
What users say:
Cyberlink PowerDirector is a powerful video editor with standard editing functions many users have tried and benefited from. According to customers , the program has high-quality video and audio editing benefits for presentations, with additional effects/splitting/cropping features.
Part 3: What are the limitations when using Sony Vegas (Vegas Pro) on Mac?
Yes, with the given Sony Vegas alternatives, Mac and Windows users can benefit heavily. But why is it important to try for a replacement when Sony Vegas Pro is relatively efficient software?
To know the answer, you should take the time to understand its limitations, which do exist.
It only works for Windows users
The Sony Vegas Pro software is not available for Mac or other operating systems besides Windows. In addition, it’ll be really complex and time-consuming, even if you opt for virtual machine software or handle dual booting techniques to configure the software on your Mac or Linux.
You need to invest in other hardware
Sony Vegas Pro does do not work within one comprehensive platform like other capable video editing software types, like Wondershare Filmora . You have to acquire a powerful PC and tools to operate it separately. The software works very slowly on older devices.
Not incredibly unique
The functions of Sony Vegas Pro match somewhat with other options in the market. So, users would not expect much value in purchasing this software’s plans that they want to upgrade from their previous system, but on the other hand, the available features are mostly standard-level in functionality as well.
Hot FAQs about Vegas Pro Alternatives
After knowing these details, many users still have specific common queries about opting for a Sony Vegas Pro alternatively. So these are some common FAQs about this- answered.
1. Can Sony Vegas be used on a Mac?
No, it is impossible to directly use Sony Vegas on macOS devices since it does not support it. Instead, you have to separately use a dual boot strategy or virtual machine software to activate the video editor on Mac devices, but the process for that is complex.
2. Is Wondershare Filmora or Vegas Pro better?
Wondershare Filmora and Vegas Pro are top-level options in video and audio editing projects with professional-level editing accuracy. However, Filmora has a cohesive ecosystem with rich AI and standard functions and comes with Mac/Windows support. So, in that sense, Filmora is comparatively a better choice.
Final Words
In place of Sony Vegas Pro, any of these options would also give you a great user experience. Out of them, Filmora is one that we will recommend due to its multi-faceted benefits and features for Mac and Windows users. Ultimately, make your decision based on your particular needs.
Free Download For Win 7 or later(64-bit)
Free Download For macOS 10.14 or later
From Scratch to Pro: Understanding XML Files in FCPX
What is an XML File and How to Export XML in Final Cut Pro X?
Shanoon Cox
Mar 27, 2024• Proven solutions
The XML files have multiple usages and contain the tags and texts as their main components. The purpose of the XML file is to format the data to aid in optimal storage and transfer process. The XML file consists of tags and texts. This tag contains the main elements of the file, and the text carries readable information.
Unlike HTML, the Extensible Markup Language describes the data content in a readable format without any complex codes. It is easy to understand and displays a clear illustration of the purpose. You can find the applications of XML in web publishing, to perform web tasks, and common uses like data storage, transfers.
Most users opt for XML due to its compatible features, readability, and personalization options. In this article, you will learn how to import and export XML files in the Final Cut Pro application. Use the below guidelines to carry out the desired process successfully. It is high time to get ready for an informative takeoff. Fasten your seats for the enlightening journey on the XML file at the Final cut pro X program.
- [Part1: What is the XML file in Final cut pro X? ](#what is XML)
- [Part2: Why exporting XML in final cut pro instead?](#export XML)
- [Part3: How to import and export XML files in Final cut pro X?](#how to do it)
- Part4: What editors can import and export XML files?

Part 1: What is the XML file in Final cut pro X?
XML, or Extensible Markup Language, can be imported and exported in Final Cut Pro. The best way to transfer the Final cut pro X files to any other third-party application is to use the XML format. Many programs do not recognize the file format of Final cut pro X documents. To convert it as a readable file, transfer the output in the form of XML type.
Most users may refine or edit the Final cut pro X files further to achieve their desired outcomes. To overcome the file compatibility issues, you must adopt the XML file pattern.
The sole purpose of the XML file is to avoid the complexity in transferring the data files like libraries, media, projects from the Final cut pro X app to another application. It minimizes the difficulties in handling the export procedure of the edited media files.
Despite ample methodologies in the digital space, XML is the simplest way to overcome unnecessary compatibility issues. You can convert the output files to a flexible format for a better transfer process. All forms of metadata, documents transfers occur using the XML file.
The handling comforts aid the usage of XML in the Final Cut Pro X ambiance. Quick processing is feasible with this file format and you can export them based on your needs. The simple texts with faster transfer persuade the editors to opt for this format. This Markup language is easy to understand, and you need not require any technical skills to understand the XML content.
The tags and texts reveal the standard operation of that file. You can work on the XML fine in your comforts unlike the other file types in the digital space. The Final Cut Pro X editors use the XML file to import and export the media file’s components, libraries, events for further processing. The XML serves as a comfortable file type to edit on the FINAL CUT PRO X platform.
Part 2: Why exporting XML in final cut pro instead?
You must be wondering, why do you need to export the XML file from the Final Cut Pro X environment? What are benefits do you achieve in transferring this XML content from this ambiance? Here comes the solutions for your queries in detail for better understanding.
- For further editing
As you all know that, the foremost purpose of Final Cut Pro X is to edit, store and transfer the media files based on the requirement. In case, if you want to make a unique edit on the processed videos, then you must transfer the edited clips to the desired applications.
In this scenario, you require a reliable file format to carry the meta details of the edited videos. There is a need to export the XML file to the FINAL CUT PRO X platform. To make further edits, you must transfer the entire project to the editing tools without any data loss.
- For teamworking
If you are working in groups, make your edits to be visible to your teammates. It requires a quick share of your projects from Final Cut Pro X to any other platform. To serve this purpose, export the XML files. XML file format assists in faster shares and lossless transfer to any required ambiance.
In addition, Filmora is even easier for team-working, click to see how .


- To transfer projects, clips, and libraries to other APP or devices
The XML file carries the metadata elements of the projects. It contains crucial components like libraries, clips. Moreover, the XML format helps to overcome compatibility issues. You can transfer them to any application or device and disclose them in no time.
It acts as a standard file type to handle many digital spaces flawlessly. If there is a need for the edited XML files in Final Cut Pro X, immediately transfer them to the necessary apps or devices for further processing.
Part 3: How to import and export XML files in Final cut pro X?
The next question that arises quickly after surfing the above content is how to import and export the XML files in the Final Cut Pro X tool for further editing purposes.
In this section, you will discover efficient steps to carry out the transfer process flawlessly. It ensures lossless transfer and the XML files moves at a rapid rate to the desired ambiance from the Final Cut Pro X tool.
To import the XML file in the Final Cut Pro X program, follow the below guidelines.
Step 1: Open the Final cut pro X app on your device, then tap the File Menu at the top bar of the screen. From the dropdown list choose ‘Import -> XML’ option.
Step 2: Surf the folders in your device and select the desired XML file that requires the import action. Hit the ‘Import’ button to load the XML file into the Final Cut Pro X platform.

Another method to import the XML file into the Final Cut Pro X ambiance is that you can drag the XML files directly into the working environment of this program.
Next, you can learn how to export the XML files from the Final Cut Pro X tool for further edit and processing activities.
Step 1: Open the Final Cut Pro X program, choose the libraries or events that require the export process. Then, tap ‘File -> Export XML’. Type in the name for this XML file and choose the desired folder in your system for quick access.
Step 2: Enable the Metadata view pop-up to witness the data in the structured format. Select the XML version and press the ‘Save’ button to complete the export process.

The XML file is available in your system, and you can use it at any application for further processing.
Both the import and export process in Final Cut Pro X is simple, and you can try them without any issues. Few clicks are enough to complete the procedure flawlessly.
Part 4: What editors can import and export XML files?
There are surplus video editors available in the digital market to work with XML files to acquire the enhanced version of the clips. iMovie and Lumafusion programs can imports and exports the XML files to make depth edits as per the needs.
The iMovie application encourages the editors to import the XML files into its working timeline quickly. Simple drag and drop actions are enough to complete the import procedure. Insert the XML file in the timeline and make the necessary edits like trim, crop according to your requirement.
The Lumafusion is a renowned program that edits videos optimally on the iOS platform. You can import the XML files into this environment in no time. Press the ‘File -> Import’ option and navigate the folders to include the XML file into this video editor timeline. Using the built-in features of this app, make the perfect edits to suit your needs without any compromises.

Conclusion
Thus, you had an insightful discussion on the XML files and their associated import and export procedures in the Final Cut Pro X program. Use the above content to work with the XML files effectively.
The stepwise guidelines will aid you to tap the perfect controls for successful insertion and the transfer of the XML data. The glimpses of the video editing tools help you to understand that you can import the XML data for further edits.
This article had given you enlightening facts about XML and its importance during the transfer and storage process. Connect with this article to discover the role of XML in organizing the vital data and its associated imports and exports in the Final cut pro X program.
Shanoon Cox
Shanoon Cox is a writer and a lover of all things video.
Follow @Shanoon Cox
Shanoon Cox
Mar 27, 2024• Proven solutions
The XML files have multiple usages and contain the tags and texts as their main components. The purpose of the XML file is to format the data to aid in optimal storage and transfer process. The XML file consists of tags and texts. This tag contains the main elements of the file, and the text carries readable information.
Unlike HTML, the Extensible Markup Language describes the data content in a readable format without any complex codes. It is easy to understand and displays a clear illustration of the purpose. You can find the applications of XML in web publishing, to perform web tasks, and common uses like data storage, transfers.
Most users opt for XML due to its compatible features, readability, and personalization options. In this article, you will learn how to import and export XML files in the Final Cut Pro application. Use the below guidelines to carry out the desired process successfully. It is high time to get ready for an informative takeoff. Fasten your seats for the enlightening journey on the XML file at the Final cut pro X program.
- [Part1: What is the XML file in Final cut pro X? ](#what is XML)
- [Part2: Why exporting XML in final cut pro instead?](#export XML)
- [Part3: How to import and export XML files in Final cut pro X?](#how to do it)
- Part4: What editors can import and export XML files?
Part 1: What is the XML file in Final cut pro X?
XML, or Extensible Markup Language, can be imported and exported in Final Cut Pro. The best way to transfer the Final cut pro X files to any other third-party application is to use the XML format. Many programs do not recognize the file format of Final cut pro X documents. To convert it as a readable file, transfer the output in the form of XML type.
Most users may refine or edit the Final cut pro X files further to achieve their desired outcomes. To overcome the file compatibility issues, you must adopt the XML file pattern.
The sole purpose of the XML file is to avoid the complexity in transferring the data files like libraries, media, projects from the Final cut pro X app to another application. It minimizes the difficulties in handling the export procedure of the edited media files.
Despite ample methodologies in the digital space, XML is the simplest way to overcome unnecessary compatibility issues. You can convert the output files to a flexible format for a better transfer process. All forms of metadata, documents transfers occur using the XML file.
The handling comforts aid the usage of XML in the Final Cut Pro X ambiance. Quick processing is feasible with this file format and you can export them based on your needs. The simple texts with faster transfer persuade the editors to opt for this format. This Markup language is easy to understand, and you need not require any technical skills to understand the XML content.
The tags and texts reveal the standard operation of that file. You can work on the XML fine in your comforts unlike the other file types in the digital space. The Final Cut Pro X editors use the XML file to import and export the media file’s components, libraries, events for further processing. The XML serves as a comfortable file type to edit on the FINAL CUT PRO X platform.
Part 2: Why exporting XML in final cut pro instead?
You must be wondering, why do you need to export the XML file from the Final Cut Pro X environment? What are benefits do you achieve in transferring this XML content from this ambiance? Here comes the solutions for your queries in detail for better understanding.
- For further editing
As you all know that, the foremost purpose of Final Cut Pro X is to edit, store and transfer the media files based on the requirement. In case, if you want to make a unique edit on the processed videos, then you must transfer the edited clips to the desired applications.
In this scenario, you require a reliable file format to carry the meta details of the edited videos. There is a need to export the XML file to the FINAL CUT PRO X platform. To make further edits, you must transfer the entire project to the editing tools without any data loss.
- For teamworking
If you are working in groups, make your edits to be visible to your teammates. It requires a quick share of your projects from Final Cut Pro X to any other platform. To serve this purpose, export the XML files. XML file format assists in faster shares and lossless transfer to any required ambiance.
In addition, Filmora is even easier for team-working, click to see how .
- To transfer projects, clips, and libraries to other APP or devices
The XML file carries the metadata elements of the projects. It contains crucial components like libraries, clips. Moreover, the XML format helps to overcome compatibility issues. You can transfer them to any application or device and disclose them in no time.
It acts as a standard file type to handle many digital spaces flawlessly. If there is a need for the edited XML files in Final Cut Pro X, immediately transfer them to the necessary apps or devices for further processing.
Part 3: How to import and export XML files in Final cut pro X?
The next question that arises quickly after surfing the above content is how to import and export the XML files in the Final Cut Pro X tool for further editing purposes.
In this section, you will discover efficient steps to carry out the transfer process flawlessly. It ensures lossless transfer and the XML files moves at a rapid rate to the desired ambiance from the Final Cut Pro X tool.
To import the XML file in the Final Cut Pro X program, follow the below guidelines.
Step 1: Open the Final cut pro X app on your device, then tap the File Menu at the top bar of the screen. From the dropdown list choose ‘Import -> XML’ option.
Step 2: Surf the folders in your device and select the desired XML file that requires the import action. Hit the ‘Import’ button to load the XML file into the Final Cut Pro X platform.
Another method to import the XML file into the Final Cut Pro X ambiance is that you can drag the XML files directly into the working environment of this program.
Next, you can learn how to export the XML files from the Final Cut Pro X tool for further edit and processing activities.
Step 1: Open the Final Cut Pro X program, choose the libraries or events that require the export process. Then, tap ‘File -> Export XML’. Type in the name for this XML file and choose the desired folder in your system for quick access.
Step 2: Enable the Metadata view pop-up to witness the data in the structured format. Select the XML version and press the ‘Save’ button to complete the export process.
The XML file is available in your system, and you can use it at any application for further processing.
Both the import and export process in Final Cut Pro X is simple, and you can try them without any issues. Few clicks are enough to complete the procedure flawlessly.
Part 4: What editors can import and export XML files?
There are surplus video editors available in the digital market to work with XML files to acquire the enhanced version of the clips. iMovie and Lumafusion programs can imports and exports the XML files to make depth edits as per the needs.
The iMovie application encourages the editors to import the XML files into its working timeline quickly. Simple drag and drop actions are enough to complete the import procedure. Insert the XML file in the timeline and make the necessary edits like trim, crop according to your requirement.
The Lumafusion is a renowned program that edits videos optimally on the iOS platform. You can import the XML files into this environment in no time. Press the ‘File -> Import’ option and navigate the folders to include the XML file into this video editor timeline. Using the built-in features of this app, make the perfect edits to suit your needs without any compromises.
Conclusion
Thus, you had an insightful discussion on the XML files and their associated import and export procedures in the Final Cut Pro X program. Use the above content to work with the XML files effectively.
The stepwise guidelines will aid you to tap the perfect controls for successful insertion and the transfer of the XML data. The glimpses of the video editing tools help you to understand that you can import the XML data for further edits.
This article had given you enlightening facts about XML and its importance during the transfer and storage process. Connect with this article to discover the role of XML in organizing the vital data and its associated imports and exports in the Final cut pro X program.
Shanoon Cox
Shanoon Cox is a writer and a lover of all things video.
Follow @Shanoon Cox
Best Free Subtitle Editors for Video Creators
When you watch a video online, it’s usually has a title and description. But what if the viewer doesn’t speak the same language as the speaker? Thankfully, there are subtitle maker online that you can use to create subtitles for any video.
Subtitles are excellent for those who want to learn a new language. It is also suitable for those who have trouble hearing. These subtitles can be added to the video by using subtitle maker online. Many subtitle makers are available, but we will discuss the top 10 subtitle creator online.
Best Free Subtitle Makers to Add Subtitles to Video Online
1. Adobe Creative Cloud Express
Creative Cloud Express is re-branded from Adobe Spark, a web and mobile app for creating multimeadia content. With Creative Cloud Express, you can add subtitles or captions to videos online without downloading any software on your computer. It also provides lots of editing tools such as convert video to GIF, reverse videos, merge videos, resize videos for different social , and change video speed.
You can use Creative Cloud Express for free, which includes most core features, but if you want to upgrade to use all features and assets, you may need to pay $9.99/month for the premium plan.
To add subtitles to video with Creative Cloud Express, follow the steps below:
- Visit https://www.adobe.com/express/feature/video/add-subtitle and click Add subtitles to your videos now to get started. Follow the instruction to sign up and sign in your account.
- Adobe will ask you to pick a story template, but you can always start from scratch. Here I will choose a template.
- Now import video or picture material from your computer, and adjust its position in the timeline.
- Pick from a variety of subtitle layout alternatives and change the text size as necessary.
- After adding titles and subtitles to your video, click the Download button to save your video to local computer.

If you prefer to add subtitles to video on Windows or Mac computer, you can try Filmora video editor . Compared with those online tools, Filmora video editor is undoubtedly a great choice for those who need more customized and stylish subtitles.

For Win 7 or later (64-bit)
 Secure Download
For macOS 10.12 or later
Secure Download
Whether you want to edit home movies to send to family and friends or upload to YouTube and Vimeo for sharing, this video editor from Wondershare Filmora can help take your videos to a higher level effortlessly. Here, let’s take a look at the main features of this video editing software.
Filmora is compatible with the Filmstock effects store, an online stock media including video effects, va library for your video projects,video footage, music, sound effects, and stock images as well.
2. Kapwing
As one of the best online video editors , Kapwing allows you to add subtitles to the video easily. It gives three options for adding subtitles: upload an SRT file, manually add them, or have them auto-generated . It opens the video in the online video editor in either situation.
You can place subtitles anywhere on the screen, and you can relocate them at any time. Apart from that, you can customize the text’s appearance with formatting options, text color, and background color. However, you can export videos up to 30 minutes long for free, and to export longer video, you need to pay $16 per month. And in order to download the edited video without a watermark, you must create an account.
To use Kapwing subtitle creator online, follow these steps:
- Go to https://www.kapwing.com/subtitles , and upload your video file.
- On the Add Subtitles screen, choose the method for adding subtitles: add subtitles manually, or use auto-generated, or upload .SRT file. Here I will try add subtitles manually.
- When adding subtitles, make sure the timestamps are correct on the video. (If required) Set the time for precise sync (if desired).
- Click the “Done” button to return to the main editor. Click Export Video and then download it with embedded subtitles.

3. Clideo
Clideo is a video creation app that lets users add subtitles to their own videos. You can add subtitles in any language from an official list of languages available on the website. After adding the subtitle, you can re-position it anywhere on the screen with a few clicks. For free users, Claudio only allows HD exports, and they cannot download the video without a watermark.
To use this subtitle maker online tool, follow these steps:
- Visit https://clideo.com/add-subtitles-to-video and click Add subtitles to your videos now to get started after you register yourself on Clideo with your email id and password.
- Upload the video file from local storage, Google Drive or Dropbox, and then pick an option for adding captions: manually or using a subtitle file. Select the first instance, click “Add subtitle,” type your text, and set the timings.
You can also add a title, leader lines, and subheadings to your presentation. The font, color, background, size, and slide alignment are adjustable.
4. Veed.io
Veed.io is another easy-to-use web video editing tool with several subtitle options for adding subtitles. You can add subtitles quickly and easily, type them manually or upload them in SRT file format.
Veed is an automated subtitling platform that helps people add subtitles online to their YouTube videos without using off-the-shelf subtitle processing software. It is suitable for individuals who have no time or patience to type out long sentence structures one letter at a time. You can start without an account.
You can choose the color of the text, the background of subtitles, and more, to make your film look more attractive. It allows you to share your movies with friends via social media networks like Twitter and Facebook.
To use Veed subtitle creator online, follow these steps:
- Go to https://www.veed.io/tools/auto-subtitle-generator and click on “Get Started.” You can select a blank project or a template.
- Go to the Project Settings section on the left. Choose any one of them depending on your requirements and click Next.
- While using automated transcription, you have to upload.SRT subtitle file or enter the transcript manually.
- You can also personalize the text, color, size, font, alignment, and anything else you want.Make changes to the timeline and then sync the subtitles.
- After that, go to the Export and save the video.
5. Flixier
Flixier is one of the most accessible tools to add subtitles online. Flixier is an efficient auto subtitle generation and syncing platform. You can add any video file type with auto subtitles in Flixier. You can add auto subtitles to MPEG, MP4, MOV, AVI, or any other file on your system. There is no need to convert the video or do extra work. This automatic subtitle maker takes care of everything.
Flixier allows you to make a video subtitle automatically and manually create one or add a subtitle from your computer. You may submit any type of subtitle file (SRT, VTT, ASS, SSA, TXT).
To use Flixier subtitle maker online, follow these steps:
- Go to https://flixier.com/tools/auto-subtitle-generator and click on “Get Started.”
- You must first upload your videos to the Flixier library to create subtitles automatically.
- You may do so by uploading from your computer, importing from cloud storage services, or straight from YouTube, Zoom, or Twitch.
- After importing them, you may drag and drop your movie clips on the Flixier timeline.
- In the pop-up window that appears, click on one, and a button saying “Generate Auto Subtitle” will appear on the right. After you’ve finished your work, click start to have your subtitling generated and added onto the timeline where you can continue making changes.
- Finally, Flixier’s cloud rendering engine lets you export your film in minutes.
- Now, you may save the video to your computer or send it straight to social media.
6. Subtitle Horse
Subtitle Horse is a browser-based subtitler for online video captioning. There are many features, such as real-time validation, an interactive timeline, and shortcuts. Subtitle horse is highly configurable: Subtitles may be made by both amateurs and experts. Users must create an account to upload videos.
With the free version of subtitle horse, you may add subtitles and captions to your video. You may export your subtitles in the necessary formats (SRT, TimedText, WebVTT, etc.). The video can be accessed online, on a platform like YouTube, Dropbox, or others.
To use Subtitle-Horse subtitle creator online, follow these steps:
- Go to https://subtitle-horse.com/ and click on “Create subtitles with the free version.”
- Upload your video or add a URL by clicking the “Add Project” button
- Click “Next” and select “Frame Rate” and “Waveform.”
- Click “Start Subtitling”
- After adding subtitles, you can download them for free or buy HD-quality MP4 videos.
7. Subtitle Bee
SubtitleBee understands and automatically translates more than 120 languages across the world. Before uploading your video, simply choose your language and let SubtitleBee handle the rest by adding subtitles in your desired language.
The algorithm is about 95% accurate in detecting your voice and adding automated captions based on most languages. AI subtitle translation allows you to translate subtitles into other languages. You can use it for free with limited features and watermarked files. There is a time limit on free trial accounts, so you can add videos shorter than 10 minutes in length.
To use Subtitle-Bee subtitle maker online, follow these steps:
- Go to https://subtitlebee.com/ and click on “Add subtitles now”
- Then select the language of the current media voices.
- Now, Upload your video or paste a URL from Youtube, Vimeo, or self-hosted.
- Make any modifications as needed by editing the subtitles to meet your demands.
- Simply add the text you want and customize it to your own needs.
- Choose the social networking site that you wish to publish on.
- Download and encode your video with the subtitles included.
8. Fastreel

Fastreel allows you to create a video with subs and change the text settings: font, size, color, style, and position. A free membership will allow you to produce and share videos in the format of your choice, as well as access stock media. The cost of a paid subscription is $5.95 per video.
Furthermore, there are several colorful templates for various events — explainer videos, wedding films, YouTube intros, customer testimonials, and so forth. To personalize each template, you may use your own photos, films, music, and text. Plus, every template has its own title and transition style. Fastreel is not made for professional users; it’s a tool for novices and those searching for fast answers.
To use Fastreel subtitle creator online, follow these steps:
- Go to https://www.fastreel.com/add-subtitles-to-video.html and click on “Add subtitles now”
- Click the Add Your File button to upload any MOV, MKV, AVI, WMV, or MP4 content less than 500 MB in size. You can add subtitles only to the first hour of a film; therefore, it’s best to pick one with fewer subtitles.
- To add an SRT file to a video, select Upload SRT. You can modify each caption and its timing.
- You can also alter the text’s font, size, color, style, and position. The button labeled “Download SRT” allows you to save the subtitles file for later use.
- Then, scroll down to the bottom of the page and click Continue.
- After finishing, click the Export button. Choose a name and destination for your video, then choose a format. You’ll see the export window where you can select a save option that is appropriate for you. Subtitles will be permanently added to the video.
9. EZGIF

EZGIF is a well-known website for animated GIFs. EZGIF has several tools for GIFs, Photos, and Videos. It offers an online tool to add subtitles to videos that you may use. It’s pretty simple to utilize and provides two methods for adding subtitles. You can upload a maximum of 100 MB on EZGIF. If your video is larger than 100 MB, you may compress it using EZGIF.
To add subtitles to a video on EZGIF, follow these steps:
- Go to https://ezgif.com/video-subtitles .
- Upload a video file or copy and paste the URL of a video available on the internet.
- To add subtitles, click the “Upload” button. To enter them manually, scroll to the bottom of the screen.
- Simply type the subtitle in the box, then set the time duration for when it should appear in the video. To cover the whole video, you may add more subtitles as well.
- After that, click “Add Subtitles” and then save the output.
10. PROMO

Promo is a website that makes promotion easier. This online tool lets users add basic subtitles to videos with ease as a video creation software. This site is free of charge and does not require registration to use the subtitle function, but it does give you an ad at the beginning of your finished video.
Using Promo, you may add video captions or subtitles from your browser anytime, anytime, anyplace. There’s no need to download anything; it’s as simple as clicking a link. The free version comes with a watermark. For the ad-free version, there is a $99/month fee.
To add subtitles with Promo subtitle maker online, follow the steps below:
- Go to https://promo.com/tools/add-subtitles-to-video .
- Upload the video you wish to caption or subtitle.
- You can use one of the platform’s professionally designed video templates or premium clips to construct a new film from the ground up.
- To add a caption to your video, after uploading it in Promo’s video editor, click the circular pink plus sign to the left of the timeline. Choose “Add Caption” from the dropdown menu.
- After you’ve added and positioned, and designed your subtitles with beautiful text and colors, click Save & Preview to view your creation and publish or download it.
Conclusion
If you need subtitles for your videos, it is important to find the best subtitle maker online that will suit all of your needs. Whether you are looking for a free option or want something with more customization, there are plenty of options available online. Check out our list, and make sure to choose one that suits what you need!
Creative Cloud Express is re-branded from Adobe Spark, a web and mobile app for creating multimeadia content. With Creative Cloud Express, you can add subtitles or captions to videos online without downloading any software on your computer. It also provides lots of editing tools such as convert video to GIF, reverse videos, merge videos, resize videos for different social , and change video speed.
You can use Creative Cloud Express for free, which includes most core features, but if you want to upgrade to use all features and assets, you may need to pay $9.99/month for the premium plan.
To add subtitles to video with Creative Cloud Express, follow the steps below:
- Visit https://www.adobe.com/express/feature/video/add-subtitle and click Add subtitles to your videos now to get started. Follow the instruction to sign up and sign in your account.
- Adobe will ask you to pick a story template, but you can always start from scratch. Here I will choose a template.
- Now import video or picture material from your computer, and adjust its position in the timeline.
- Pick from a variety of subtitle layout alternatives and change the text size as necessary.
- After adding titles and subtitles to your video, click the Download button to save your video to local computer.
If you prefer to add subtitles to video on Windows or Mac computer, you can try Filmora video editor . Compared with those online tools, Filmora video editor is undoubtedly a great choice for those who need more customized and stylish subtitles.
For Win 7 or later (64-bit)
Secure Download
For macOS 10.12 or later
Secure Download
Whether you want to edit home movies to send to family and friends or upload to YouTube and Vimeo for sharing, this video editor from Wondershare Filmora can help take your videos to a higher level effortlessly. Here, let’s take a look at the main features of this video editing software.
Filmora is compatible with the Filmstock effects store, an online stock media including video effects, va library for your video projects,video footage, music, sound effects, and stock images as well.
2. Kapwing
As one of the best online video editors , Kapwing allows you to add subtitles to the video easily. It gives three options for adding subtitles: upload an SRT file, manually add them, or have them auto-generated . It opens the video in the online video editor in either situation.
You can place subtitles anywhere on the screen, and you can relocate them at any time. Apart from that, you can customize the text’s appearance with formatting options, text color, and background color. However, you can export videos up to 30 minutes long for free, and to export longer video, you need to pay $16 per month. And in order to download the edited video without a watermark, you must create an account.
To use Kapwing subtitle creator online, follow these steps:
- Go to https://www.kapwing.com/subtitles , and upload your video file.
- On the Add Subtitles screen, choose the method for adding subtitles: add subtitles manually, or use auto-generated, or upload .SRT file. Here I will try add subtitles manually.
- When adding subtitles, make sure the timestamps are correct on the video. (If required) Set the time for precise sync (if desired).
- Click the “Done” button to return to the main editor. Click Export Video and then download it with embedded subtitles.
3. Clideo
Clideo is a video creation app that lets users add subtitles to their own videos. You can add subtitles in any language from an official list of languages available on the website. After adding the subtitle, you can re-position it anywhere on the screen with a few clicks. For free users, Claudio only allows HD exports, and they cannot download the video without a watermark.
To use this subtitle maker online tool, follow these steps:
- Visit https://clideo.com/add-subtitles-to-video and click Add subtitles to your videos now to get started after you register yourself on Clideo with your email id and password.
- Upload the video file from local storage, Google Drive or Dropbox, and then pick an option for adding captions: manually or using a subtitle file. Select the first instance, click “Add subtitle,” type your text, and set the timings.
You can also add a title, leader lines, and subheadings to your presentation. The font, color, background, size, and slide alignment are adjustable.
4. Veed.io
Veed.io is another easy-to-use web video editing tool with several subtitle options for adding subtitles. You can add subtitles quickly and easily, type them manually or upload them in SRT file format.
Veed is an automated subtitling platform that helps people add subtitles online to their YouTube videos without using off-the-shelf subtitle processing software. It is suitable for individuals who have no time or patience to type out long sentence structures one letter at a time. You can start without an account.
You can choose the color of the text, the background of subtitles, and more, to make your film look more attractive. It allows you to share your movies with friends via social media networks like Twitter and Facebook.
To use Veed subtitle creator online, follow these steps:
- Go to https://www.veed.io/tools/auto-subtitle-generator and click on “Get Started.” You can select a blank project or a template.
- Go to the Project Settings section on the left. Choose any one of them depending on your requirements and click Next.
- While using automated transcription, you have to upload.SRT subtitle file or enter the transcript manually.
- You can also personalize the text, color, size, font, alignment, and anything else you want.Make changes to the timeline and then sync the subtitles.
- After that, go to the Export and save the video.
5. Flixier
Flixier is one of the most accessible tools to add subtitles online. Flixier is an efficient auto subtitle generation and syncing platform. You can add any video file type with auto subtitles in Flixier. You can add auto subtitles to MPEG, MP4, MOV, AVI, or any other file on your system. There is no need to convert the video or do extra work. This automatic subtitle maker takes care of everything.
Flixier allows you to make a video subtitle automatically and manually create one or add a subtitle from your computer. You may submit any type of subtitle file (SRT, VTT, ASS, SSA, TXT).
To use Flixier subtitle maker online, follow these steps:
- Go to https://flixier.com/tools/auto-subtitle-generator and click on “Get Started.”
- You must first upload your videos to the Flixier library to create subtitles automatically.
- You may do so by uploading from your computer, importing from cloud storage services, or straight from YouTube, Zoom, or Twitch.
- After importing them, you may drag and drop your movie clips on the Flixier timeline.
- In the pop-up window that appears, click on one, and a button saying “Generate Auto Subtitle” will appear on the right. After you’ve finished your work, click start to have your subtitling generated and added onto the timeline where you can continue making changes.
- Finally, Flixier’s cloud rendering engine lets you export your film in minutes.
- Now, you may save the video to your computer or send it straight to social media.
6. Subtitle Horse
Subtitle Horse is a browser-based subtitler for online video captioning. There are many features, such as real-time validation, an interactive timeline, and shortcuts. Subtitle horse is highly configurable: Subtitles may be made by both amateurs and experts. Users must create an account to upload videos.
With the free version of subtitle horse, you may add subtitles and captions to your video. You may export your subtitles in the necessary formats (SRT, TimedText, WebVTT, etc.). The video can be accessed online, on a platform like YouTube, Dropbox, or others.
To use Subtitle-Horse subtitle creator online, follow these steps:
- Go to https://subtitle-horse.com/ and click on “Create subtitles with the free version.”
- Upload your video or add a URL by clicking the “Add Project” button
- Click “Next” and select “Frame Rate” and “Waveform.”
- Click “Start Subtitling”
- After adding subtitles, you can download them for free or buy HD-quality MP4 videos.
7. Subtitle Bee
SubtitleBee understands and automatically translates more than 120 languages across the world. Before uploading your video, simply choose your language and let SubtitleBee handle the rest by adding subtitles in your desired language.
The algorithm is about 95% accurate in detecting your voice and adding automated captions based on most languages. AI subtitle translation allows you to translate subtitles into other languages. You can use it for free with limited features and watermarked files. There is a time limit on free trial accounts, so you can add videos shorter than 10 minutes in length.
To use Subtitle-Bee subtitle maker online, follow these steps:
- Go to https://subtitlebee.com/ and click on “Add subtitles now”
- Then select the language of the current media voices.
- Now, Upload your video or paste a URL from Youtube, Vimeo, or self-hosted.
- Make any modifications as needed by editing the subtitles to meet your demands.
- Simply add the text you want and customize it to your own needs.
- Choose the social networking site that you wish to publish on.
- Download and encode your video with the subtitles included.
8. Fastreel
Fastreel allows you to create a video with subs and change the text settings: font, size, color, style, and position. A free membership will allow you to produce and share videos in the format of your choice, as well as access stock media. The cost of a paid subscription is $5.95 per video.
Furthermore, there are several colorful templates for various events — explainer videos, wedding films, YouTube intros, customer testimonials, and so forth. To personalize each template, you may use your own photos, films, music, and text. Plus, every template has its own title and transition style. Fastreel is not made for professional users; it’s a tool for novices and those searching for fast answers.
To use Fastreel subtitle creator online, follow these steps:
- Go to https://www.fastreel.com/add-subtitles-to-video.html and click on “Add subtitles now”
- Click the Add Your File button to upload any MOV, MKV, AVI, WMV, or MP4 content less than 500 MB in size. You can add subtitles only to the first hour of a film; therefore, it’s best to pick one with fewer subtitles.
- To add an SRT file to a video, select Upload SRT. You can modify each caption and its timing.
- You can also alter the text’s font, size, color, style, and position. The button labeled “Download SRT” allows you to save the subtitles file for later use.
- Then, scroll down to the bottom of the page and click Continue.
- After finishing, click the Export button. Choose a name and destination for your video, then choose a format. You’ll see the export window where you can select a save option that is appropriate for you. Subtitles will be permanently added to the video.
9. EZGIF
EZGIF is a well-known website for animated GIFs. EZGIF has several tools for GIFs, Photos, and Videos. It offers an online tool to add subtitles to videos that you may use. It’s pretty simple to utilize and provides two methods for adding subtitles. You can upload a maximum of 100 MB on EZGIF. If your video is larger than 100 MB, you may compress it using EZGIF.
To add subtitles to a video on EZGIF, follow these steps:
- Go to https://ezgif.com/video-subtitles .
- Upload a video file or copy and paste the URL of a video available on the internet.
- To add subtitles, click the “Upload” button. To enter them manually, scroll to the bottom of the screen.
- Simply type the subtitle in the box, then set the time duration for when it should appear in the video. To cover the whole video, you may add more subtitles as well.
- After that, click “Add Subtitles” and then save the output.
10. PROMO
Promo is a website that makes promotion easier. This online tool lets users add basic subtitles to videos with ease as a video creation software. This site is free of charge and does not require registration to use the subtitle function, but it does give you an ad at the beginning of your finished video.
Using Promo, you may add video captions or subtitles from your browser anytime, anytime, anyplace. There’s no need to download anything; it’s as simple as clicking a link. The free version comes with a watermark. For the ad-free version, there is a $99/month fee.
To add subtitles with Promo subtitle maker online, follow the steps below:
- Go to https://promo.com/tools/add-subtitles-to-video .
- Upload the video you wish to caption or subtitle.
- You can use one of the platform’s professionally designed video templates or premium clips to construct a new film from the ground up.
- To add a caption to your video, after uploading it in Promo’s video editor, click the circular pink plus sign to the left of the timeline. Choose “Add Caption” from the dropdown menu.
- After you’ve added and positioned, and designed your subtitles with beautiful text and colors, click Save & Preview to view your creation and publish or download it.
Conclusion
If you need subtitles for your videos, it is important to find the best subtitle maker online that will suit all of your needs. Whether you are looking for a free option or want something with more customization, there are plenty of options available online. Check out our list, and make sure to choose one that suits what you need!
Also read:
- New S Most Popular Free and Open-Source Video Editing Tools
- New 2024 Approved The 6 Best Audio Converter Software to Pick
- New Video to Audio Conversion Made Easy My Selection Criteria for 2024
- New In 2024, Shrink Your MPEG2 Videos Download and Use VirtualDub Today
- Updated Waveform Video Generation Made Easy Top Online Tools for 2024
- Slow Down Time 10 Exceptional Video Editing Software for 2024
- In 2024, Best of the Best Top 10 Free WebM Video Editors This Year
- Updated In 2024, Preserve Audio Perfection How to Convert Video to MP3 with Zero Loss
- New Top 10 Best Free Android Video Editors Free&Paid
- Updated 2024 Approved What Sets Final Cut Pro Apart From Final Cut Express?
- New 2024 Approved Effortless AVI Video Editing Top Cutters and Trimmers for Any Device
- Updated Free MOV Video Editor Roundup Top 10 Options for 2024
- Free Animated Logo Design Software Top Picks and Expert Advice for 2024
- Updated 2024 Approved The Ultimate List of Free Video Rotation Tools (No Watermarks!)
- New Make Every Moment Epic Add Slow Motion Effects to Your Videos for Free for 2024
- Updated 2024 Approved The Top iPhone Video Editing Software A Beginners Guide
- New In 2024, From Scratch to Stardom Making Reaction Videos Easy with Filmora
- New Track Your Every Move Best Motion Tracking Apps Reviewed
- In 2024, Seamless Video Editing on Chromebook Top Android Apps
- 10 Free Video Surveillance Software Solutions to Keep You Safe for 2024
- New 6 Top-Notch Free MOV Video Editing Software
- Updated Free Windows Movie Maker Download Your One-Stop Installation Resource for 2024
- New Combine Videos Effortlessly Best Easy Video Joiner Alternatives
- New In 2024, Unlock Efficient Writing Top Mac Speech-to-Text Tools That Are Free, Easy, and Instantly Accessible
- New Editing Videos in Mavericks Tips, Tricks, and Techniques
- 2024 Approved Discover the Best 3D Video Production Tools for Stunning Visuals
- In 2024, Facebook Video Aspect Ratios 101 A Beginners Guide to Perfection
- New In 2024, Full Guide How to Free Up Space for FCPX?
- 2024 Approved Bring Your Vision to Life 7 Best Movie Intro Design Software
- New Online Photo Editing Top Free Background Blur Software
- In 2024, Get Instant Access to Twitter Video Dimensions
- Mac Video Editing Made Easy VN Editor and Its Alternatives
- New In 2024, No-Cost Video Upgrades Top 9 Online Enhancement Options
- In 2024, Tips That Show Anyone on Youtube to Mp3 Converter Review
- New In 2024, Discover the Best Top 10 Public Domain Image Libraries
- Motion Tracking for Text The Top Software Choices for 2024
- New 2024 Approved Edit Like a Pro Without Spending a Dime Top 10 Free Open-Source Video Editors
- New 2024 Approved VLC Slow Motion Tutorial Enhance Your Video Viewing Experience
- New Unlock Stunning Transitions Top 10 Premiere Pro Plugins
- Updated From Capture to Creation Easy Video Editing with GoPro Quik on MacBook
- Updated In 2024, Filmora Coupon Hunters Guide 7 Essential Tips
- New Free Online Subtitle Software Top 10 Recommendations for 2024
- New 2024 Approved Discover the Best Green Screen Software for Your Mac Workflow
- Updated 2024 Approved Best iMovie Equivalent Apps for Android Top Picks
- Updated QuickTime Player Tutorial Speed Up Videos on Windows and Mac Computers for 2024
- 2024 Approved Speech-to-Text Technology How It Works and How to Use It
- Updated VN Video Editor App Review Editing Made Easy on Android
- In 2024, The Facebook Video Size Handbook Aspect Ratios Explained
- Here are Some Pro Tips for Pokemon Go PvP Battles On Apple iPhone 12 mini | Dr.fone
- In 2024, How to use iSpoofer on Poco X6? | Dr.fone
- 2 Ways to Fade in Text in Premiere Pro for 2024
- Full Guide How To Fix Connection Is Not Private on Asus ROG Phone 8 | Dr.fone
- 2024 Approved The Ever-Changing Era of AI Video Translation A Reality to Be Fulfilled
- How to Track a Lost Nokia C22 for Free? | Dr.fone
- In 2024, How to Transfer from Apple iPhone SE (2020) to iPhone 8/11/11 Pro | Dr.fone
- Does Airplane Mode Turn off GPS Location On Motorola G24 Power? | Dr.fone
- 8 Best Apps for Screen Mirroring Vivo Y200e 5G PC | Dr.fone
- New Resize Like a Pro The Top Technique for Vertical Video Success for 2024
- How to Soft Reset Honor X7b phone? | Dr.fone
- Updated 2024 Approved Users Guide How To Create Photo Talking Videos With the Best Tools?
- In 2024, How and Where to Find a Shiny Stone Pokémon For Vivo Y100 5G? | Dr.fone
- Best 5 Tips to Freeze-Frame in After Effects for 2024
- How to Soft Reset Xiaomi Redmi Note 12 Pro 5G phone? | Dr.fone
- Unova Stone Pokémon Go Evolution List and How Catch Them For Lava Blaze Pro 5G | Dr.fone
- In 2024, Fixing Foneazy MockGo Not Working On Sony Xperia 10 V | Dr.fone
- 10 Best Fake GPS Location Spoofers for Vivo V29 Pro | Dr.fone
- In 2024, Top 10 Best Spy Watches For your Samsung Galaxy A54 5G | Dr.fone
- In 2024, How to Detect and Stop mSpy from Spying on Your Lava Yuva 2 | Dr.fone
- In 2024, Generating the Roll Safe-Think About It Meme
- Title: The Best of the Best Top Timecode Calculators for iPhone, Android, and Web
- Author: Emma
- Created at : 2024-05-19 05:47:16
- Updated at : 2024-05-20 05:47:16
- Link: https://video-ai-editor.techidaily.com/the-best-of-the-best-top-timecode-calculators-for-iphone-android-and-web/
- License: This work is licensed under CC BY-NC-SA 4.0.
